Sometimes you may notice windows 11 PC acting up after Installing system upgrades, and driver updates Or wrong settings might cause the system to malfunction and crash. And to deal with such issues, Microsoft includes the windows System Restore feature that lets you revert your computer’s state to the last working state. By default, the System Restore feature is disabled on your computer and you need to manually enable this function in order to use it. Here this post guide how to Enable and configure the system restore feature on windows 11. In addition, we check how to Recover Windows 11 with a Restore Point.
It is advsed to configure and create restore point before making changes to your system, so that you can undo the changes you made if something goes wrong.
What is system restore in windows 11?
The system Restore feature is designed to protect and repair windows computers.
With the system restore feature enabled windows 11 allows users to create restore points or take a snapshot of the current working state of their PC. And which can be further restored at any time if the computer not working well after installation failure or data corruption occurs. It’s like undoing the last major changes to windows 11 and revert your systems back to the way when the restore point was created.
In short, The windows system restore feature creates snapshots of the current working states of your computer and saves them as restore points. And allows revert your system to its last working state.
Well, performing system restore doesn’t affect personal files on a PC but it only removes app drivers and updates installed after the restore point was created.
To use a restore point in the future, you must first create one now.
How to create System Restore Point in Windows 11
By default the system restore feature is disabled on your computer and you need to manually enable this function in order to use it. Here is how to how to enable and configure system restore in Windows 11.
To enable system restore on Windows 11
- Press Windows key + I to open the settings app on windows 11 PC
- Click System, next scroll down to the bottom of the page and select About.
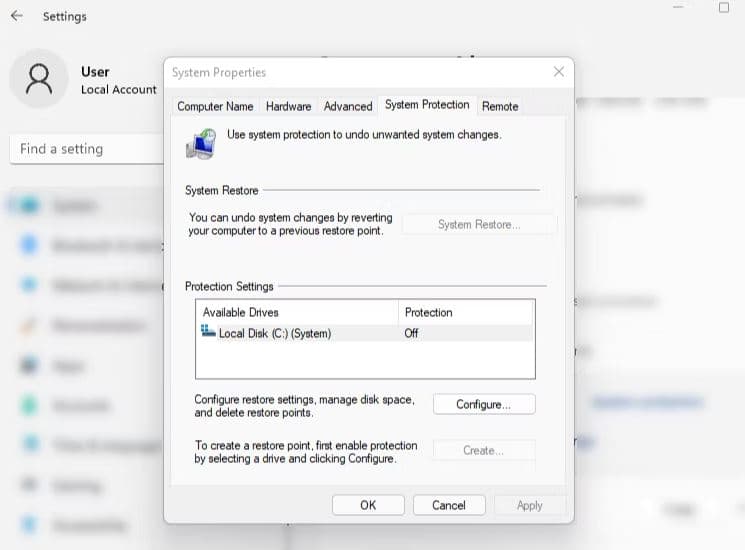
- Here look and click System Protection found in the Related links section to open the System Properties window.
- Here check the Protection Settings section, if it says On, it means your System Restore is enabled and it creates restore points automatically.
- If you see off beside your system drive means the system restore is disabled
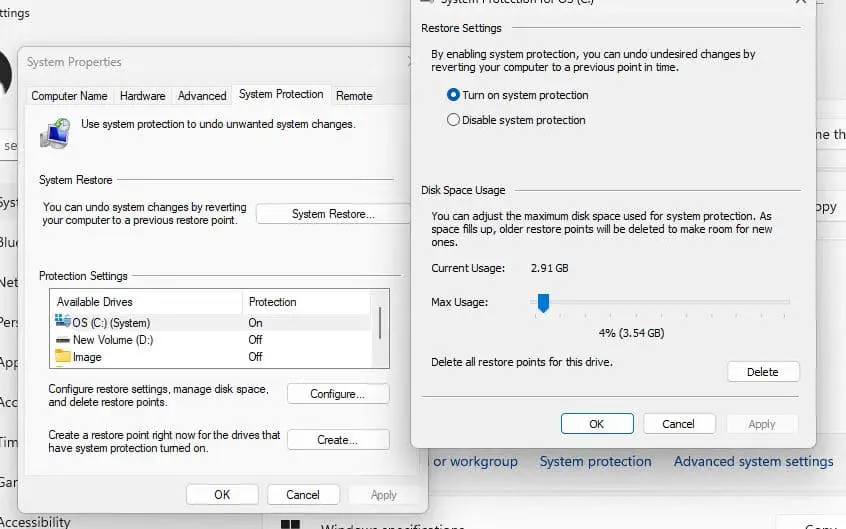
- Select the system drive C and click on configure button
- Under the Restore Settings section, select the Turn on system protection option.
- Here also you can drag the Max Usage slider to decide how much space your Windows 11 system should reserve for restore points
- Once done with the configurations, click Apply and then OK.
After doing so, Windows 11 automatically create a restore point before making any important changes to your system such as installing or uninstalling a Windows update.
To create System Restore Point Manually
Windows creates a new restore point on a weekly basis and replaces it with the oldest one to manage storage space. But if you want to create a system restore point Manually
- Again open system properties and move to the system protection tab,
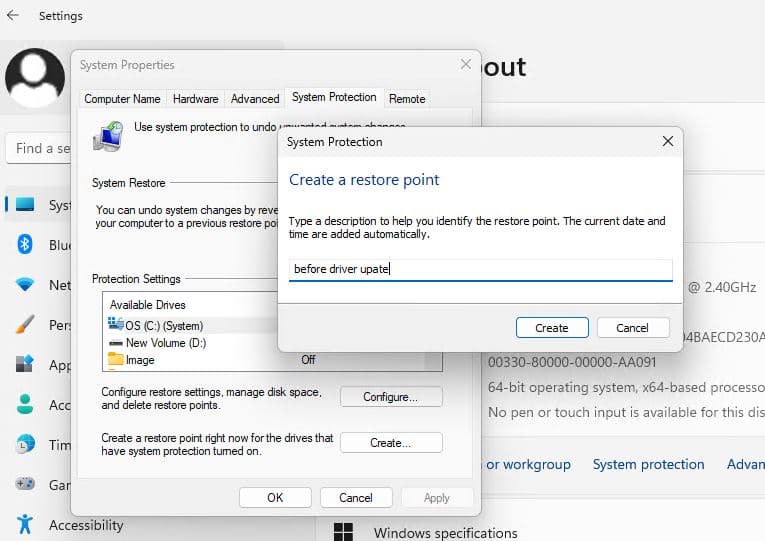
- Next click on Create to make a restore point manually, Give a description of the restore point for identification.
- Finally, click on the “Create” button to automatically start the restore point creation.
How to use System Restore Point in Windows 11
Well if you experience problems after a system upgrade or new driver install and looking to undo the changes, Here is how to restore the system to a previous working point.
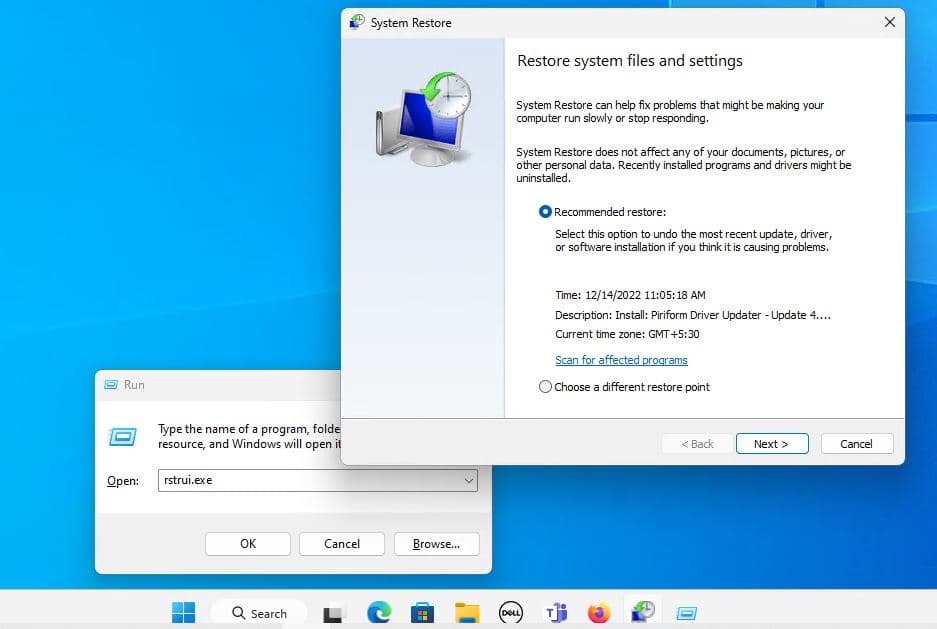
- Press Windows key + R, type rstrui.exe and click ok to open system restore window,
- By default recommended restore option is selected, Click the “Next” button to proceed
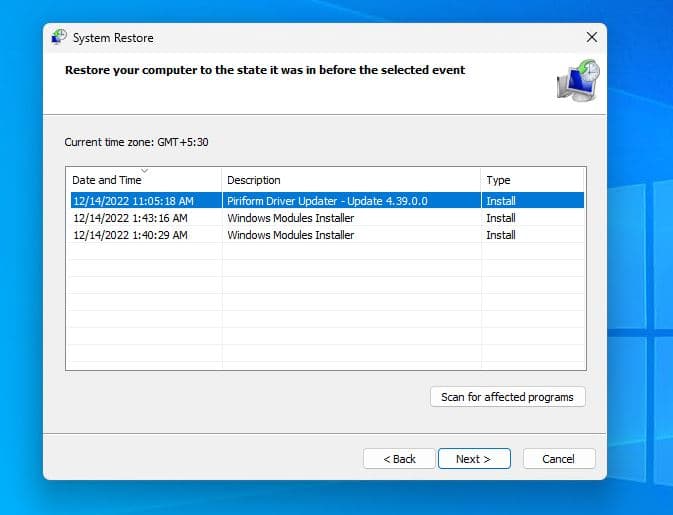
- Or you can select choose a different restore point option to select the recent restore point manually.
- Look at the recent system restore point created, or you have created it manually with the date and time. Choose it and tap on “Next”.
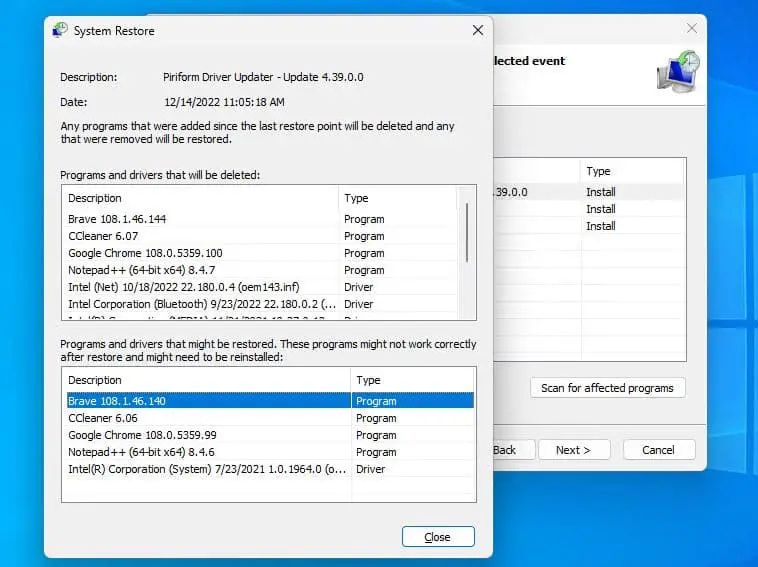
In addition, you can click on the scan for affected programs button to know what apps will be removed or added to your system because they were added or removed after creating the restore point.
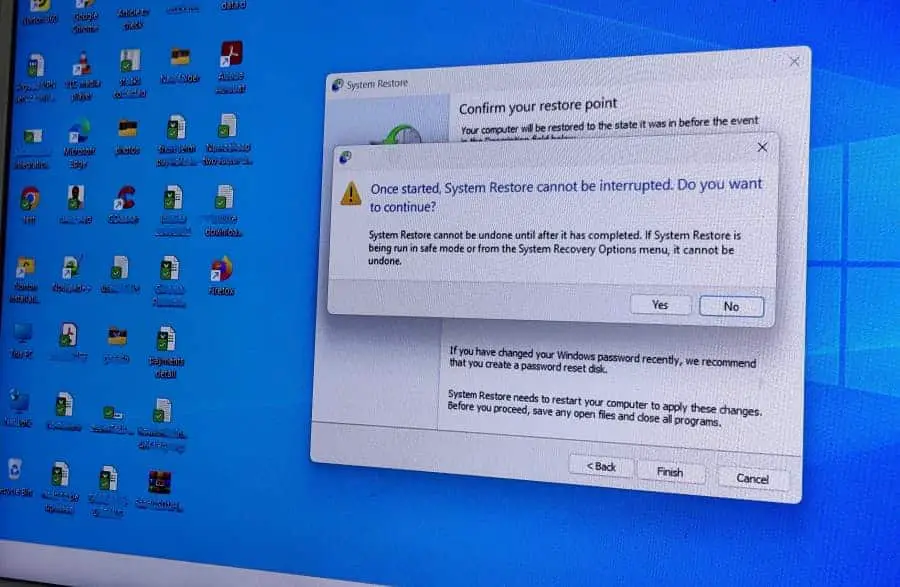
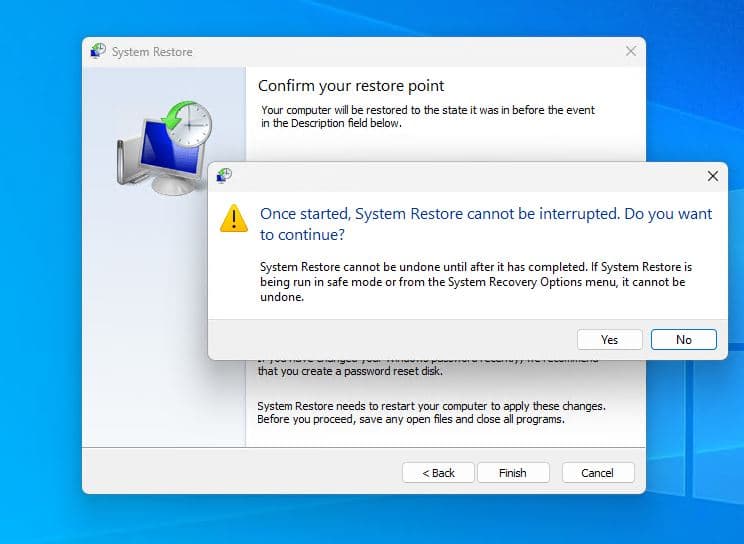
- And finally, click next and Tap on the “Finish” button, this will restart your Windows 11 for the System Restore process.
System restore if windows 11 won’t boot
If due to some reason your PC fails to start normally or won’t boot, you can perform a system restore from advanced startup options. For this, you need to access the advanced startup on your PC.
There are different ways you can access advanced options on your PC
- If you can access your desktop click the power option, hold the shift key and click on the restart.
- If you have bootable media for Windows, then boot into the computer using that and click on the repair your computer option.
- power off your PC. Press the power button to turn it on, and as soon as the Windows logo appears, turn it off. This will interrupt the normal boot process. Repeat this 4-5 times to access advanced startup.
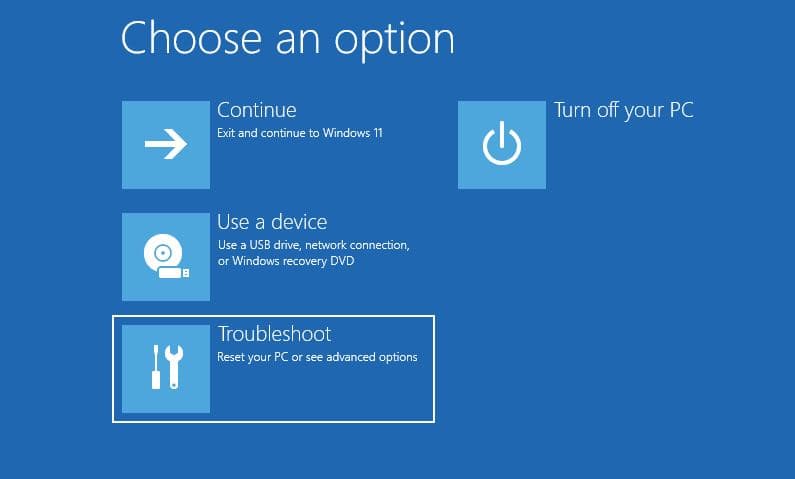
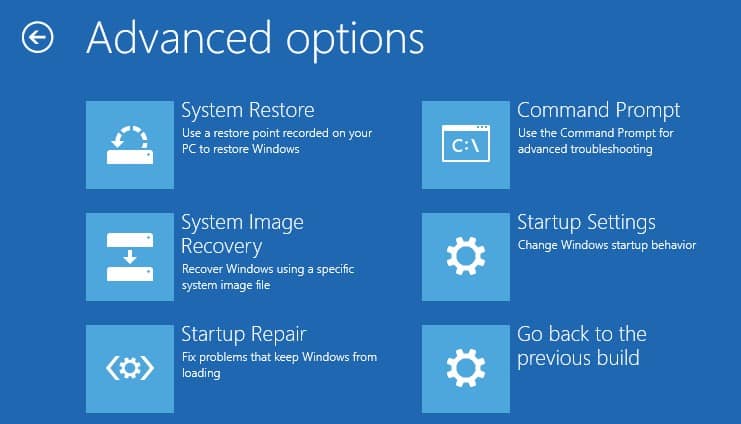
Click on Troubleshoot, then Select Advanced options.
And finally, on the advanced options screen, Click on System Restore.
The computer may ask you to enter the Administrator password. After that, click on the Continue button
Choose the restore point you want to revert to in the System Restore window click next, Confirm the restore point you want to use and click finish to start the system restoration process.
Restore Windows 11 to the Previous Date Using System Restore.
- If your windows 11 PC is bootable and the computer start normally then run rstrui.exe to open the system window select the restore point you created earlier and follow on-screen instructions.
- Well if your PC won’t start normally, Access advanced options using installation media and select System Restore from the list.
Does a System Restore Affect My Personal Files and Programs?
No Performing system restore does not affect your personal files, only the apps, hardware drivers, and system updates installed after the restore point date will be uninstalled.
System restore back up my windows 11 computer?
A restore point comprises Windows system files, installed programs, registry settings, and system drivers. It does not back up your personal files and folders.
Also read:
