Remote Desktop is a built-in feature in Windows 11 pro and enterprise editions, that allows users to remotely connect or control other devices in a Local area network (LAN) or over the internet. The remote desktop tool is not available on Windows 11 Home, and you can use the Chrome Remote Desktop as an alternative. With Remote Desktop, you can access files, programs, and other resources on the remote computer just as you would on your own computer. By default, this feature is disabled on your computer and you need to enable remote desktop manually before using or Access a remote computer. In addition, you need to configure port forwarding on the router, if you are planning to connect a remote computer over the internet. In this article, we’ll explore, How to Enable and Use Remote Desktop on Windows 11.
Note: Remote Desktop uses the Remote Desktop Protocol (RDP) to encrypt the data and establish a remote connection between two computers
How to Enable Remote Desktop
You can enable Remote Desktop on Windows 11 from the Settings app or from Control Panel.
Enable the Remote Desktop from Windows 11 settings:
- Press Windows key + I to open the settings app
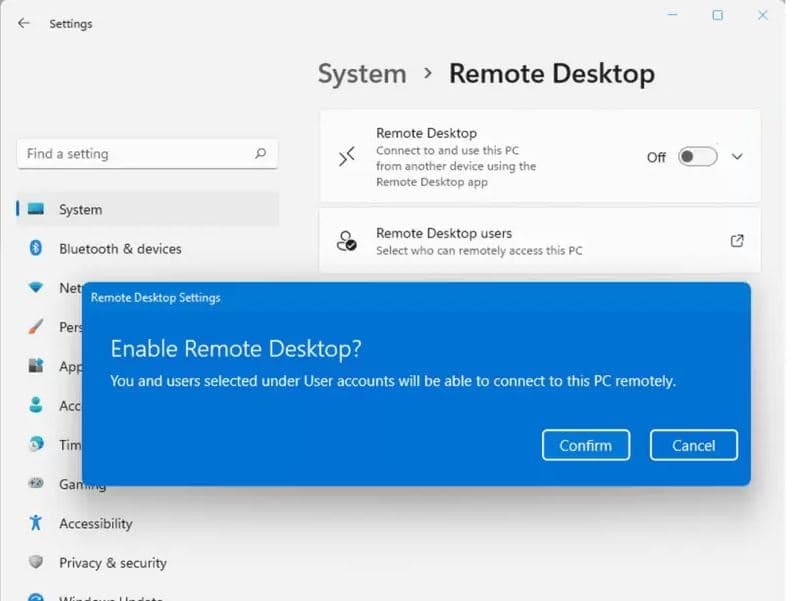
- Go to System then select “Remote Desktop” from the right-hand side.
- And Finally, Toggle on the switch next to “Remote Desktop.”
- Click “Yes” when User Account Control (UAC) prompts for confirmation
In addition, expand the Remote desktop option and check mark on Require devices to use Network Level Authentication Connect (Recommended) to make the connection more secure
Enable Remote Desktop on the Control panel:
Also, you can enable Windows 11 remote desktop from the Control panel.
- Press Windows key + R, type control and select ok
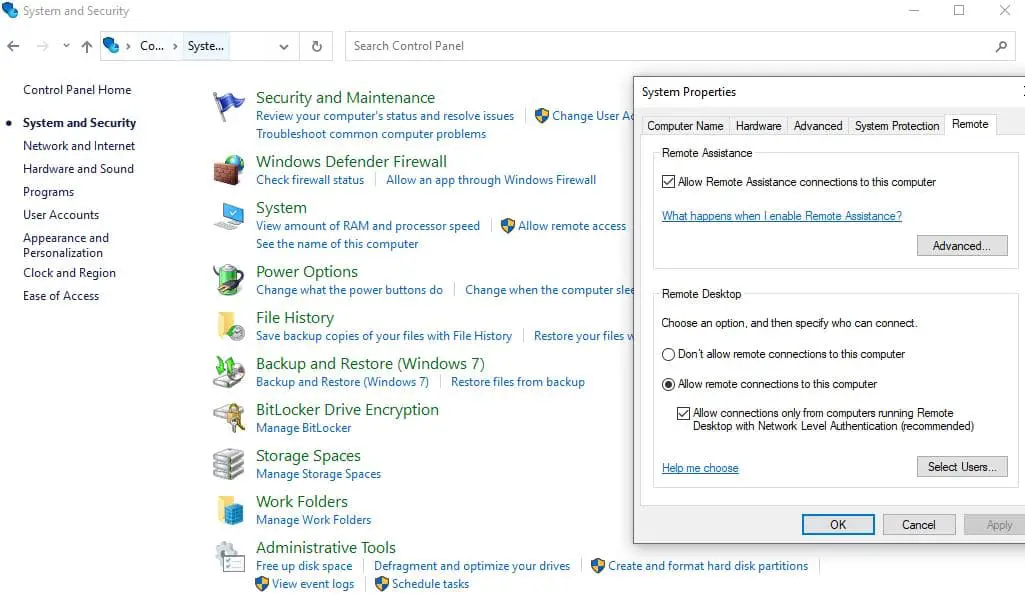
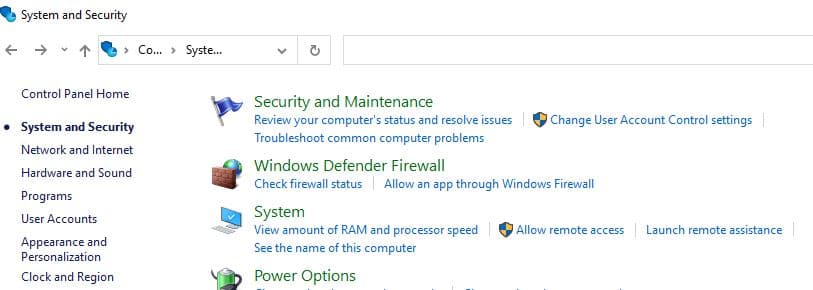
- Click on system and security then Under the “System” section, click the “Allow remote access” option.
- Under the “Remote Desktop” section, select the “Allow remote connections to this computer” option
Allow Remote desktop through Firewall
Sometimes Windows firewalls as well as third-party firewalls, can prevent Remote Desktop connections from being established. because Remote Desktop uses a specific port (3389 by default) to establish connections, and firewalls can be configured to block traffic on that port.
- Open the control panel, Navigate the system and security
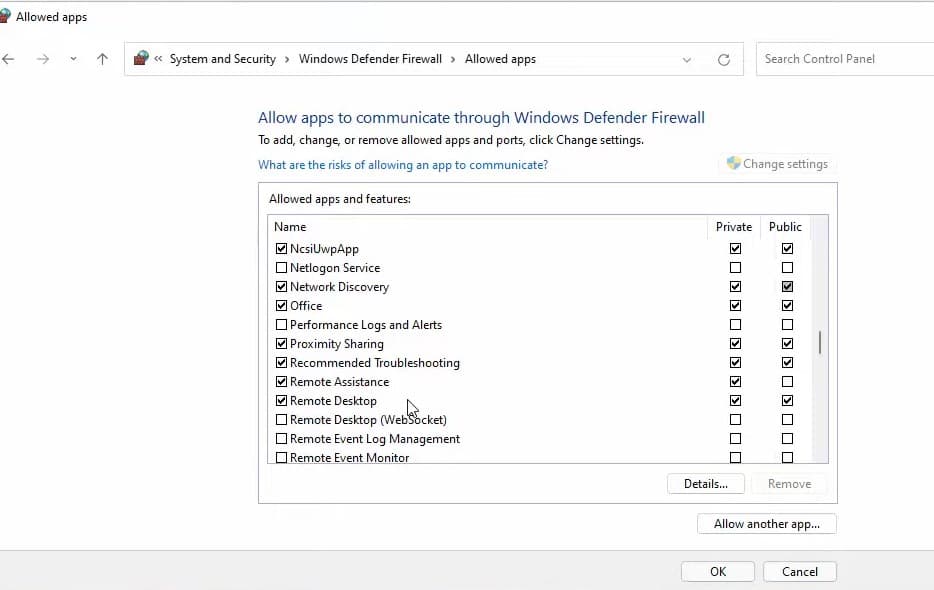
- Under windows defender firewall, Click allow an app through windows firewall
- Click on Changes settings, Scroll down and look for “Remote Desktop” in the list of apps and features.
- Make sure the checkbox next to it is selected, and if not, select it. Click on “OK” to save the changes.
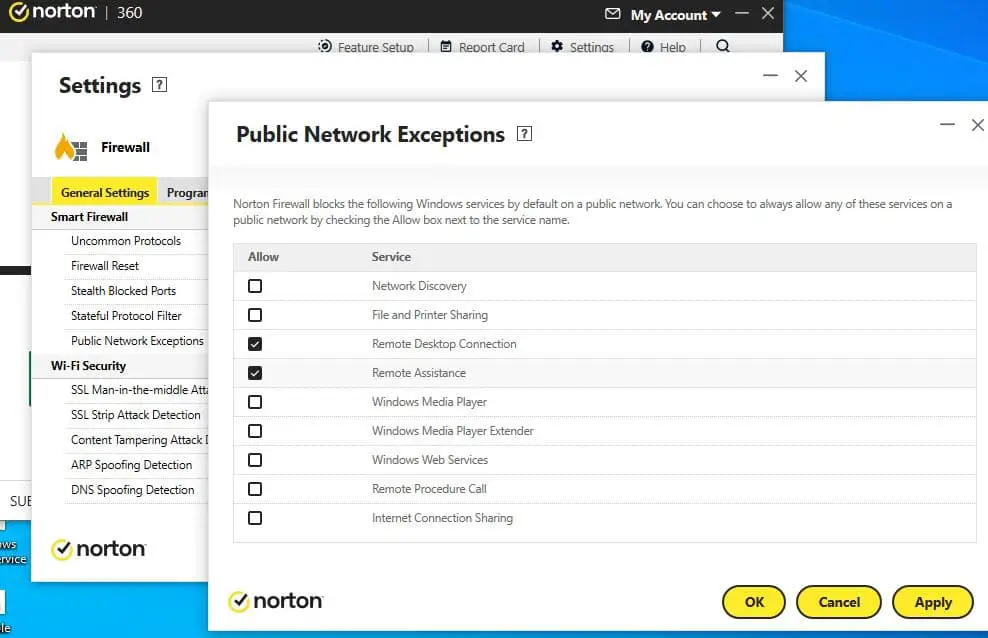
- If you are using third-party antivirus with a built-in firewall, either disable the firewall or allow remote access there.
Connect to Remote desktop PC
Once you enable the Remoted desktop on Windows 11 PC, you need to note down the computer name or IP address to access the computer remotely on LAN. If you are looking for remote access over the internet, you need to configure port forwarding on your router. Microsoft recommends using a VPN to make things easier and secure remote desktop connection.
- To check the computer Name on Windows 11 PC: Press Windows key + I to open settings then select System to check the computer name
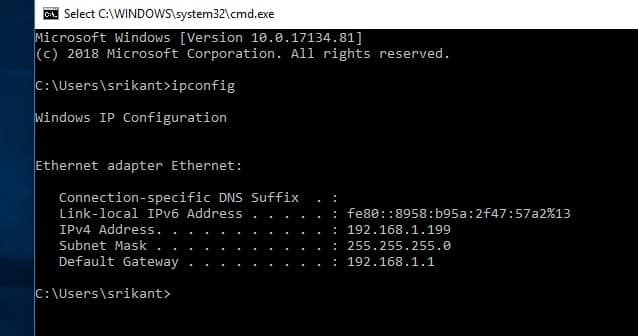
- To check IP address of your computer: Open the command prompt then run ipconfig to check the IP address on your PC.
Now to Access the computer remotely:
On a different computer, ensure the remote desktop is enabled,
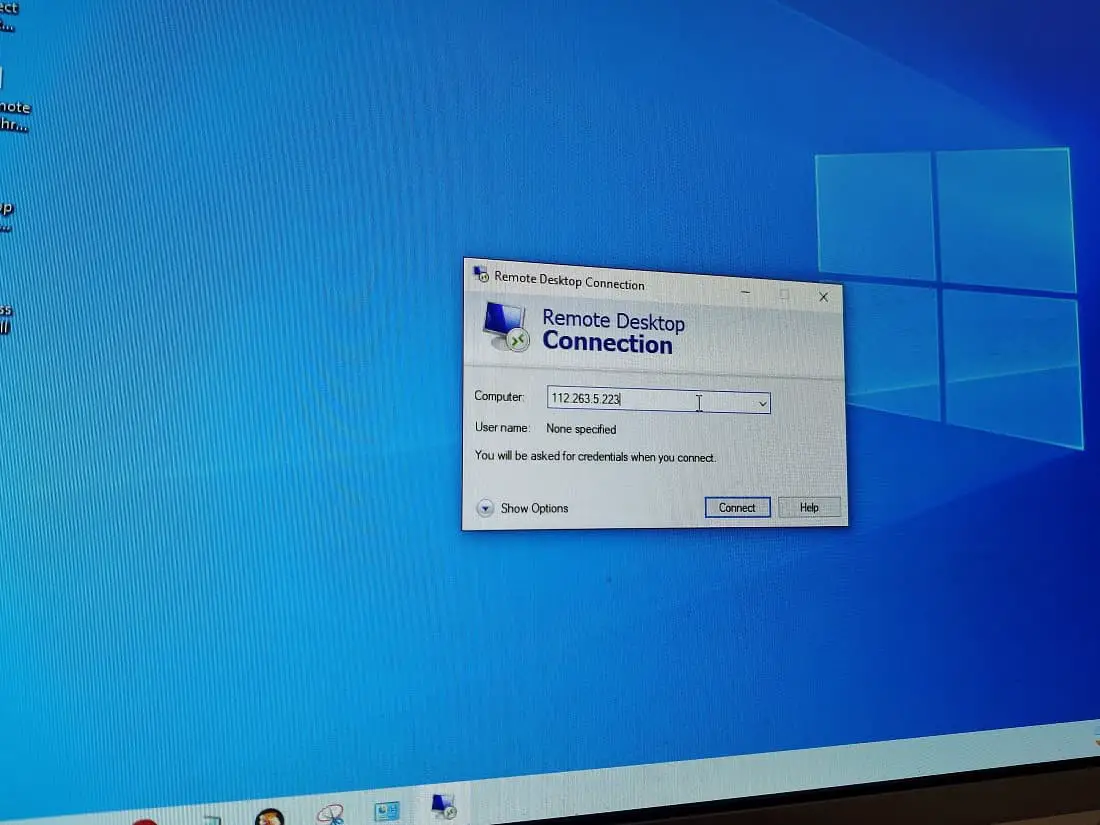
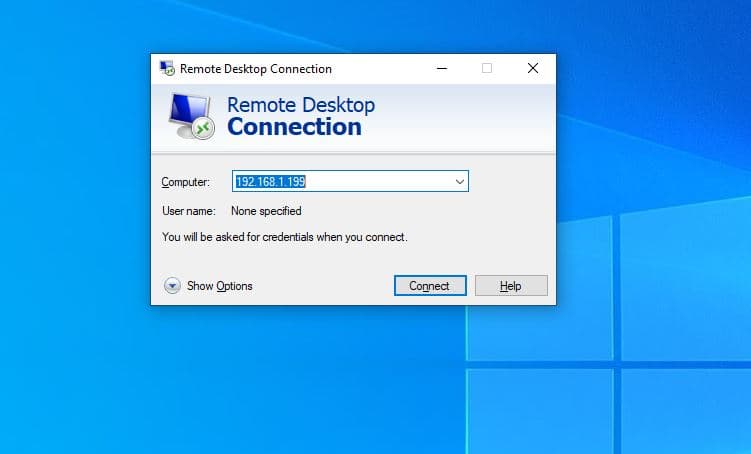
- Press Windows key + R, type mstsc and click ok
- Here enter the IP address of your Windows 11 PC (you enable remote desktop previously) then click ok
- Now Type the password for the account (enter the username and password of Windows 11 PC) and click yes.
And You should then be connected to the remote Windows 11 computer. After connecting you can access files, programs, and other resources on the remote computer just as you would on your own computer.
To end the Remote Desktop session, simply click on the “X” button in the top right corner of the window or press “Ctrl+Alt+End” on your keyboard.
Troubleshoot remote desktop Windows 11
If you are having trouble establishing a remote desktop session, First you need to check and ensure the Remote Desktop Service is running.
Restart remote desktop service:
- Press Windows key + R, type services.msc and click ok
- locate the remote desktop service, right-click on it select restart.
Allow remote desktop on Windows firewall
Ensure that your firewall is not blocking Remote Desktop connections.
- Open windows defender firewall, click Allow an app or feature through Windows Defender Firewall
- Click Change settings, then Select Remote Desktop, and Private and Public.
- Click OK.
Next, check and ensure the Remote Desktop is enabled on the remote computer and that the computer is set to allow remote connections. And make sure both computers are connected to the same local area network (LAN).
Here Microsoft recommends several solutions to fix General Remote Desktop connection problems on Windows 11.
Also read:
- The Difference Between a Remote Desktop and Remote Access
- Remote desktop not working after Windows 11 update [Solved]
- 5 Ways to Keep Your Windows Remote Desktop Secure
- 8 Tips to Safe and secure your Windows 11 PC or laptop For Free
- Troubleshooting Tips: How to Fix PowerPoint Not Opening on Windows 11
