
Updating your operating system is crucial for security and performance enhancements. However, encountering errors like 0xc1900101 can be frustrating. If you are getting Error 0xc1900101 while Update or install Windows 11 2023 update version 21H2. Here we have some solutions you may try to fix this Error 0xc1900101.
For a quick information Windows update Error 0xc1900101 are specific for driver issues. Means whenever you face error 0xC1900101 – 0x2000c, 0xC1900101 – 0x20004, 0xC1900101 – 0x20017, 0xC1900101 – 0x40017, 0xC1900101 – 0x30018, 0xC1900101 – 0x3000D, 0xC1900101 – 0x4000D etc Means a specific driver causing the problem.
Again some other reasons such as Security software, corrupted system files or update database, Any third-party applications also cause Windows 11 version 23H2 to fail with Error 0xc1900101.
Cannot install Windows 11 – Error 0xc1900101
The Reasons Behind Error 0xc1900101 When Updating Windows 11 could be different, Incompatible Hardware or Drivers, Corrupted System Files or Third-Party Software Interference are common.
- Windows 11 has specific hardware requirements. If your system doesn’t meet them or if there are incompatible drivers, it can lead to this error.
- Corrupted or missing system files can hinder the update process, triggering the 0xc1900101 error.
- Certain third-party applications can interfere with the update process. This may include security software, drivers, or utilities.
Remove External Devices
As discussed An error that begins with 0xC1900101 is usually a driver error. Let’s try resolving this by removing all external devices from your computer. This includes USB drives, external hard disks, printers, and any other peripherals.
- Ensure that your computer is powered off completely.
- Unplug all external devices from your computer, including USB drives, external hard disks, printers, and any other peripherals.
- Power on your computer and let it start up without the external devices connected.
- After your computer has restarted, attempt the Windows update again.
Sometimes, conflicts with external devices can cause update errors. By removing them temporarily, you eliminate this potential source of conflict.
Update incompatible device drivers
Ensure all your drivers are up-to-date, especially graphics, chipset, and network drivers. Visit the manufacturer’s website to download and install the latest versions. Also, you can check the Device Manager for errors.
- Press Windows key + X and select Device Manager
- In the window that pops up, look for any device with a yellow exclamation mark beside it (you may have to select each category to switch to the list of devices).
- Press and hold (or right-click) the device name and select either Update Driver Software or Uninstall to correct the errors.
- Now restart Windows and check for updates.
Or you can Visit the device manufacturer’s website to download and install the latest driver. Especially update or reinstall the Display driver, and Network adapter driver to the latest version.
Remove Security Software
Another critical step in resolving error code 0xc1900101 is to temporarily disable or remove any third-party security software installed on your computer. This includes antivirus programs, firewalls, and other security applications.
- Locate the icon for your security software in the system tray (usually in the bottom-right corner of your screen).
- Right-click on the icon and look for an option like “Disable”, “Turn off”, or “Pause protection”. Select this option and choose a time frame (e.g., 1 hour, until restart).

After disabling or uninstalling the security software, restart your computer and try running the Windows update again.
Security software, while crucial for protecting your system, can sometimes interfere with the update process. By temporarily disabling or uninstalling it, you can rule out any potential conflicts.
Remove additional languages
If you have multiple languages installed on your system, it’s possible that conflicts between language packs can lead to update errors like 0xc1900101. Here’s how you can remove additional languages:
Press Win + I to open Settings, Go to Time & language > Language.
- Open Settings go to Time & Language.
- Select the Region & language tab, and select the language you want to remove.
- Click the Remove button under it.
- Repeat for all additional languages you have installed.
Removing additional languages can help streamline the update process, reducing the likelihood of conflicts related to language packs.
Update windows on Clean Boot
This is another effective solution, to find out and fix if any installed software is conflicting with others when you update, install or run it. To Clean boot Windows 11,
- Press Win + R, type msconfig, and press Enter.
- In the System Configuration window, go to the “Services” tab. Check the box that says “Hide all Microsoft services”.
- Click on “Disable all”. This will disable all non-Microsoft services, You will find it at the bottom of that window.
Now Go to the “Startup” tab, Click on “Open Task Manager”. In Task Manager, for each startup item, right-click and select “Disable”. After disabling all non-Microsoft services and startup items, click “OK” in the System Configuration window and restart your computer.
Once your computer has restarted, try running the Windows update again.
This process starts Windows with a minimal set of drivers and startup programs, which can help identify if a third-party application or service is causing the issue.
Windows update troubleshooter
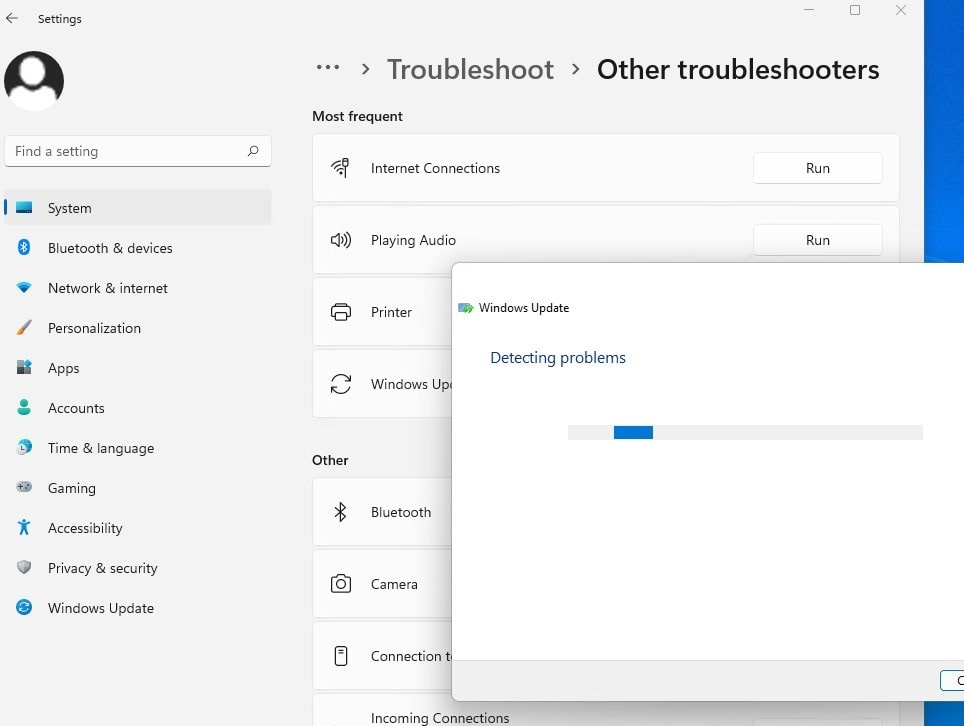
The Windows Update troubleshooter is a built-in tool designed to diagnose and resolve common issues related to Windows updates. Run Windows update troubleshooter and let it to detect and fix the problems prevent Windows update installation.
- Open the settings app followed by Troubleshoot then other troubleshooters
- Then select Windows update and Run The Troubleshooter.
- This will attempt to identify if any problems exist which prevent your computer from downloading and installing Windows Updates.
- After completing, the process Restart Windows and again manually Check for Updates.
The Windows Update troubleshooter can automatically identify and fix a range of common update-related problems. It’s a great first step in resolving update errors like 0xc1900101.
Reset your Windows Update Components
This is the ultimate solution (Reset Windows update components) to fix almost every Windows update problem. However, make sure you have tried all of the solutions and steps above before trying this one as the ones above are much quicker.
Resetting the Windows Update components essentially clears out any cached data and resets the service. This can often resolve issues related to the update process.
Open the command prompt as administrator. Then stop the Windows update services (MSI Installer, Windows Update Services, BITS, and Cryptographic) by performing the command below.
- net stop msiserver
- net stop wuauserv
- net stop bits
- net stop cryptSvc
Rename the Catroot2 and Software Distribution folders. You can do this more easily by copying the following commands in the Command Prompt:
- ren C:\Windows\SoftwareDistribution SoftwareDistribution.old
- ren C:\Windows\System32\catroot2 Catroot2.old
Or you can manually open C:\Windows\ Here rename the SoftwareDistribution as SoftwareDistribution.old and Catroot2 as Catroot2.old.
After that restart the services (MSI Installer, Windows Update Services, BITS, and Cryptographic ) Which you previously stopped, by perform the command below.
- net start wuauserv
- net start cryptSvc
- net start bits
- net start msiserver
That’s all close the command prompt, restart Windows and check for the latest updates from Settings -> update & security -> Windows update.
Repair Corrupt System Files
Corrupt or missing system files can often be the cause of update errors like 0xc1900101. Windows has a built-in tool called System File Checker (SFC) that can scan and repair these files.
Press Windows key + S, type cmd and select run as administrator to Open the Command Prompt as Administrator
Run the command sfc /scannow and press enter key, The System File Checker will begin scanning for and repairing any corrupt system files. This process may take some time.
If the System File Checker is unable to repair all the files, you might need to consider more advanced troubleshooting steps or a repair installation of Windows using DISM command DISM /Online /Cleanup-Image /RestoreHealth.
If none of the above solutions work, consider reaching out to Microsoft Support for personalized assistance.
Also read: