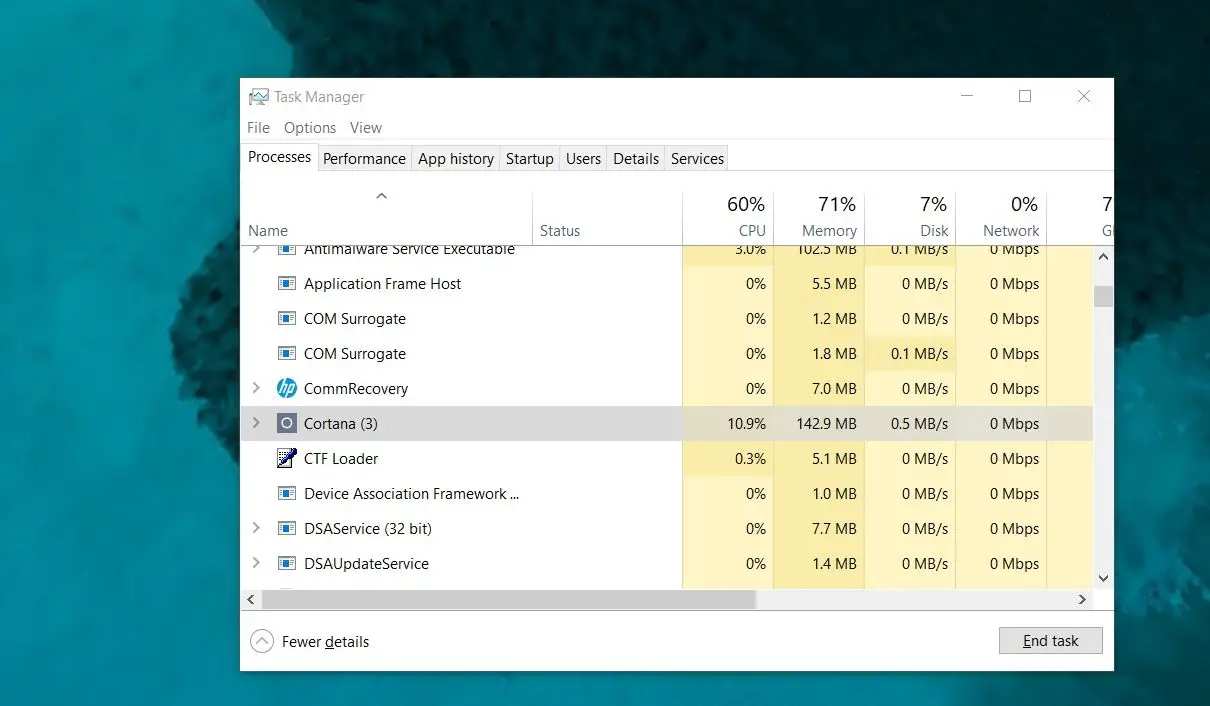
Windows updates are intended to enhance system functionality and security but occasionally introduce unforeseen issues, such as Windows 10 100 Disk Usage. Several users report Windows Updates Cause 100% Disk Usage, seeing High disk utilization in task manager even though nothing is running on the machine. Several factors such as malware infections, disk drive errors, or bad sectors, Corrupted system files and resource-intensive applications can play a significant role in Windows 10 high disk usage issues. whatever the reason Here are several tips and potential fixes to reduce Disk usage on your computer.
Fix High Disk Usage Windows 10
If you notice the problem started after recent Windows update there may be a bug causing high disk usage. Corruption in system files can cause disk-intensive operations, impacting system performance and leading to high disk usage.
The indexing process, which helps in quick file searches, can sometimes lead to high disk usage, especially when indexing large amounts of data or after major changes to the file system.
Disk errors or bad sectors on the hard drive can result in repetitive read/write operations, leading to high disk usage and potentially system instability.
Malicious software can perform tasks in the background, consuming disk resources and leading to high disk usage.
Various background processes and services, such as antivirus scans, maintenance tasks, and indexing services, can contribute to high disk usage.
Check For Virus Malware Infection
Sometimes virus malware infection is the common reason behind high disk usage on your computer. Malicious software can perform background tasks that heavily utilize disk resources. Scanning and removing malware reduces disk activity associated with malicious processes, restoring normal disk usage and safeguarding system integrity.
You can Run a full system scan using Windows Defender or a reputable antivirus program.
- Open Windows Security (Windows Security app > Virus & threat protection).
- Click on “Scan options” and select “Full scan.”
- Click “Scan now” and follow the prompts to complete the scan.
Disable Superfetch and Windows Search
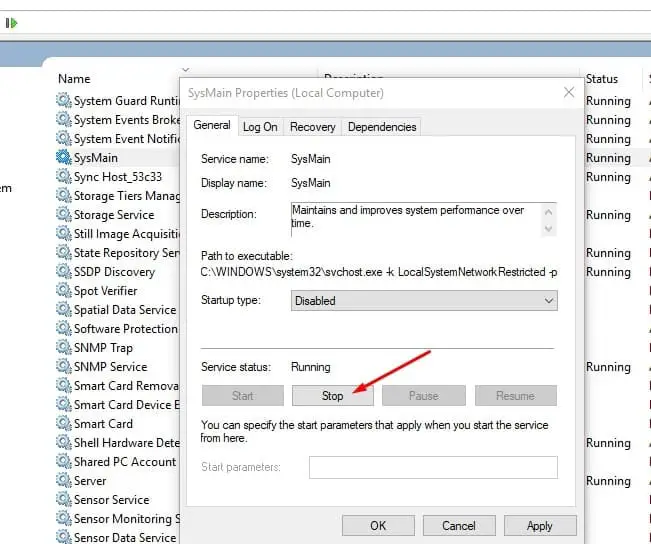
Several Windows users Report After Disable Some Windows Services, (especially The SuperFetch known as SysMain ) High disk Usage Problem was Solved. To Disable These Services,
- Press Windows + R, type Services.msc and ok to open the Windows service console,
- Now Scroll down and look for Service named SysMain.
- Double-click on it, Here change the Startup type Disable.
- Also, Stop the service next to Service Status.
- Click apply and OK to make Save changes.
And Do the Same process for Background Intelligent Transfer Service (BITS), Windows Update, and Windows Search Service. After restarting Windows and check if this helps.
Reset the Paging file (Virtual memory option)
On Windows computers, Virtual memory usage Disk Drive space, most of the time, Incorrect Virtual memory configuration Can Cause High Disk usage issues on Windows computers. If you have Adjust Virtual memory for better performance and System optimization purposes, we recommend disabling this and set Automatically. You Can Do this by the following below.
- Right-click on this PC then Select properties.
- Choose Advanced System Settings on the left panel.
- Go to the Advanced tab, click Settings, Underperformance.
- On performance options, move to Advanced options,
- Click on Change under the Virtual Memory option.
- Here checkmark on Automatically manages the paging file size for all drives.
- Click Apply, OK and Restart Windows To take effect the changes now next login check High Disk usage problem solved.
Check System File Corruption
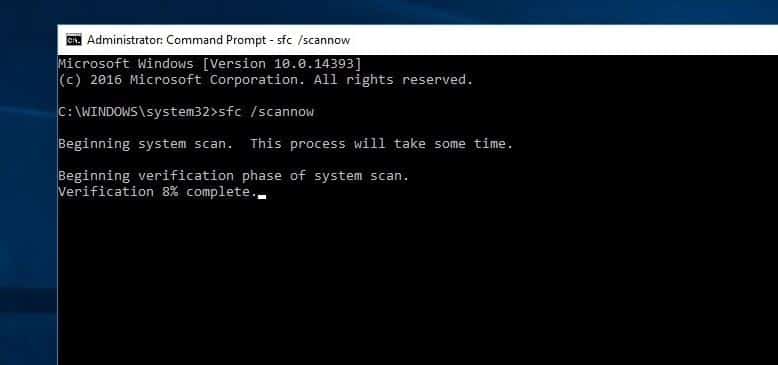
Corrupted System files cause Different Problems on a Windows computer. While Windows 10 upgrade If any system file gets damaged, missing this will Also cause High System Resource Usage, 100% Disk, and CPU usage. You Can Run the SFC utility to scan And restore the missing files.
- First, open the Command prompt as administrator.
- Then type sfc /scannow and hit the enter key to execute the command.
- This will scan for missing damaged System files.
- If found, any system file checker will Automatically Restore them from a special folder located on %WinDir%\System32\dllcache.
- Wait until 100% complete the scanning process.
Repair Disk Drive Errors
Sometimes Disk Drive Errors and bad Sectors can also cause High System Resource usage, High Disk Usage etc on Windows 10 computers. We recommend checking and fix Disk Errors using the CHKDSK command and adding some extra parameters to force CHKDSK to repair the disk, Errors.
Again, to perform Disk Check open the command prompt as administrator,
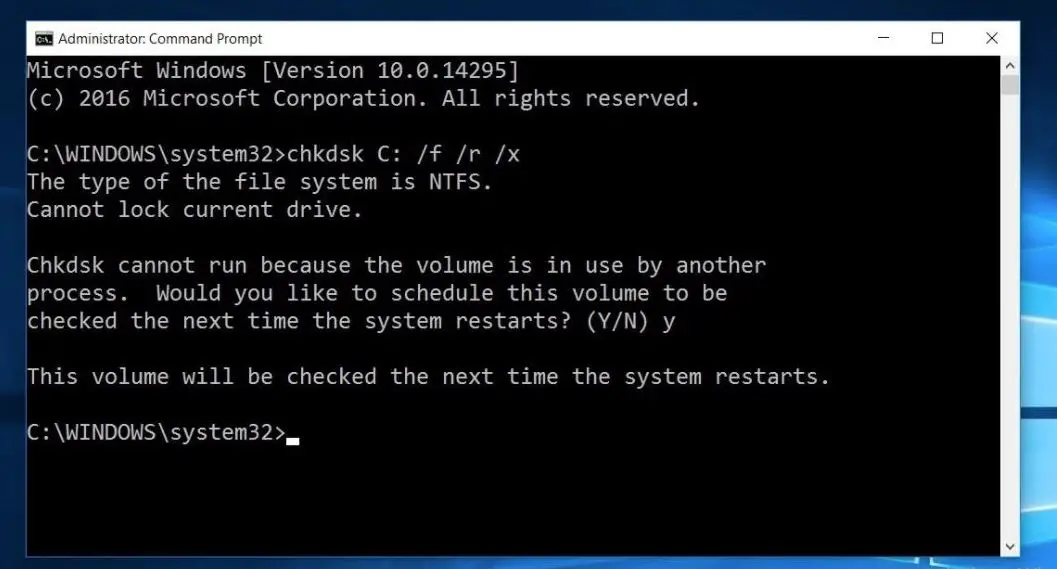
Type chkdsk C: /f /r and hit the enter key.
Here Command CHKDSK is for Check disk Drive, C: is the Drive Letter, which checks for errors. The extra parameter /r Locates bad sectors and recovers readable information and /f Fixes errors on the disk.
This will ask you to confirm whether you’d like to run CheckDisk on the next system reboot. Acknowledge with a Y, and restart your computer. This will scan the disk drive for Errors, Bad sectors if found, this will fix them itself for you. CheckDisk might take some time to finish, but it can be handy not just for High CPU usage, 100% Disk Usage errors but also for some other issues.
Disable Message Signaled Interrupt (MSI) Mode in the Registry
Still, if you can’t resolve the issue Tweak Windows Registry To Disable the Message signaled interrupt (MSI) mode. Several Windows users Report High Disk usage is caused by some Advanced Host Controller Interface PCI-Express (AHCI PCIe) models running with the inbox StorAHCI.sys driver a firmware bug. You Can Fix this bug by disabling MSI mode by tweaking the Windows registry.
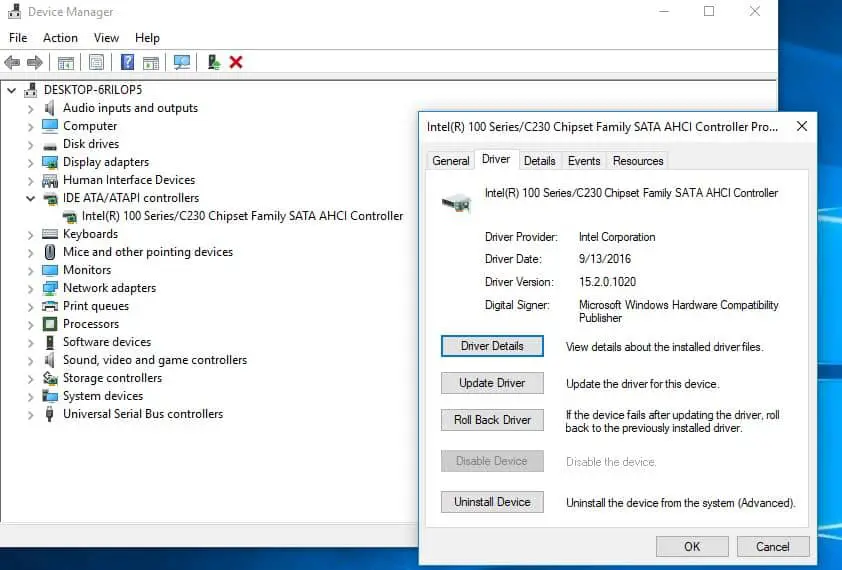
- Press Windows + R, type devmgmt.msc and ok to open the device manager,
- Here expand IDE ATA/ATAPI controllers.
- Double-click on the Standard SATA AHCI controller.
- Here click on Driver Tab and Click Driver Details.
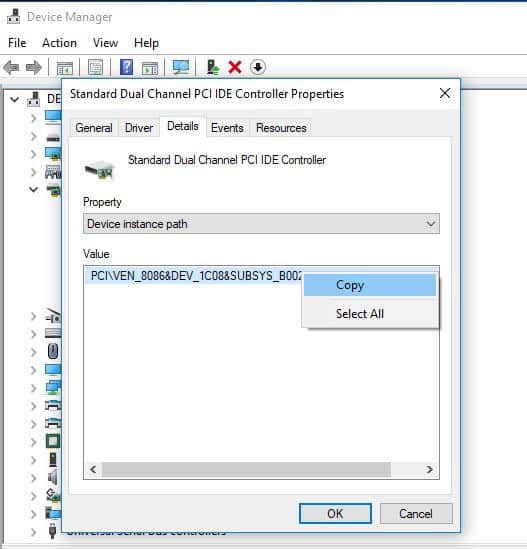
- Go to the Details tab and select Device Instance Path from the drop-down menu of the Property.
- Check the value and copy it with the right-click or note down.
For example, we have the value: PCI\VEN_8086&DEV_1C08&SUBSYS_B0021458&REV_05\3&11583659&0&FD
Tweak Windows Registry
Note: To avoid some serious system issues, don’t forget to back up the Registry before the modification.
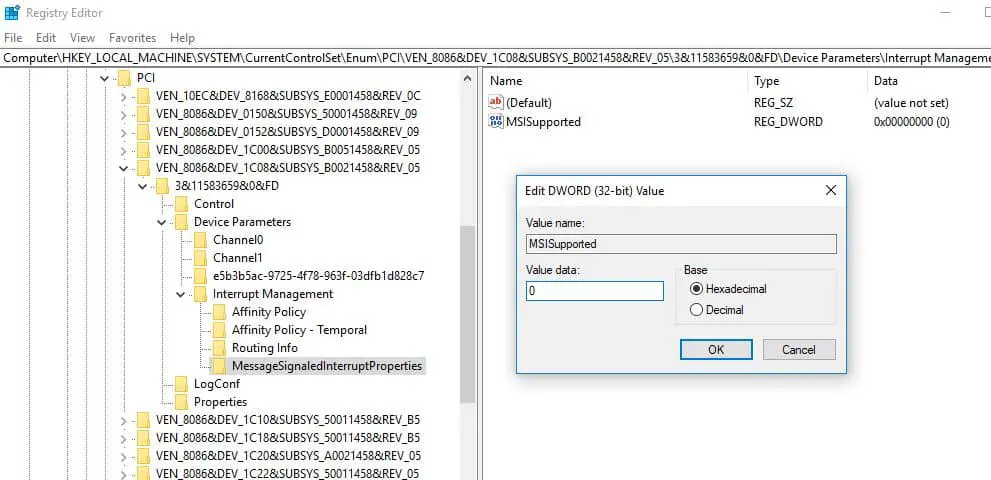
Now Open Windows Registry By pressing Win + R, Type regedit and hit the enter key.
In the Registry Editor, follow the path: HKEY_LOCAL_MACHINE\System\CurrentControlSet\Enum\PCI\“Value”\Device Parameters\Interrupt Management\MessageSignaledInterruptProperties
(Note: Value refers to the Device Instance Path you copied Before.)
- Double-click the MSISupported on the right side, and Change the Value data to 0.
- Click OK And Restart the computer to make the change take effect. 
- After that, the Windows 10 100% disk usage or the high memory/CPU usage problem will never get on your nerves anymore.
Insufficient hardware, such as slow hard drives or inadequate RAM, can lead to high disk usage under heavy workloads. Upgrading hardware improves system performance and responsiveness, reducing reliance on disk resources and mitigating high disk usage issues.
Also, Read
