


Having internet connection problems after Windows 10 1809 upgrade? And a lot of the time the Windows Networks Diagnostics says “DHCP is not enabled for wireless network“? This is because your PC is not set to automatically obtain an IP address from the DHCP server. A number of users report this problem lose connection several times a day and each time running Networks Diagnostics results DHCP is not enabled for wifi or local area network. If you are also struggling with this problem, here how to Enable DHCP for Wireless network and obtain an IP address automatically from the DHCP server.
What is DHCP on the Computer network?
Dynamic Host Configuration Protocol or DHCP is a standardized network protocol that enables users to dynamically and transparently assign reusable IP addresses. If you have a DHCP server installed and configured on your network, all DHCP-enabled clients obtain IP addresses and related framework parameters every time they start and join the network. Means DHCP enables devices such as routers or servers to assign IP addresses to computer systems connecting to the network. And In most home and small businesses, the router acts as the DHCP server.
But if due to incorrect network configuration or any other reason, DHCP fails to Assign IP address Automatically to the Client computer, you are unable to connect to network or internet and get error DHCP is not enabled for wireless network connection message while running the Network adapter
DHCP not enabled for wireless network
First of all restart the router and your PC, fix the problem if a temporary glitch causing the issue.
Disable Antivirus software and VPN (if configured)
Perform a clean boot to determine if any third-party service conflict causing the problem.
Set DHCP To obtain IP Address Automatically
- Press Windows Key + R then type ncpa.cpl and hit Enter.
- Right-click on your WiFi Connection and select Properties.
- From the Wi-Fi properties window, select Internet Protocol Version 4 and click Properties.
- Now make sure to select the radio button “Obtain an IP address automatically” and “Obtain DNS server address automatically”.
- click ok to apply save changes.
- Now Windows 10 will retrieve the IP address from the DHCP server.


Restart the DHCP client service
- Press Windows + R, type services.msc and ok
- Scroll down and look for DHCP client service
- Right-click on DHCP client service, and select restart.
- If the service not started, then double-click on it to open its properties.
- Make sure the Startup type is set to Automatic and click Start if the service is not already running.
- Click Apply followed by OK.
- Restart your PC to save changes and see if you’re able to Fix DHCP is not enabled for WiFi in Windows 10.


Uncheck Proxy
- Press Windows Key + R then type “inetcpl.cpl” and hit enter to open Internet Properties.
- Go to the Connections tab and select LAN settings.
- Here Uncheck Use a Proxy Server for your LAN and make sure “Automatically detect settings” is checked.
- Click Ok then Apply and reboot your PC.
- Now check There is no problem with Network & internet connection.
Reset Winsock and TCP/IP
If none above solutions work for you, then reset TCP/IP configuration to default settings, release/renew IP address, clear DNS cache and perform Winsock reset command fix almost every network and internet connection problem.
Open the command prompt as administrator, and perform commands below one by one.
- netsh winsock reset
- netsh int ipv4 reset
- ipconfig /release
- ipconfig /renew
- ipconfig /flushDNS
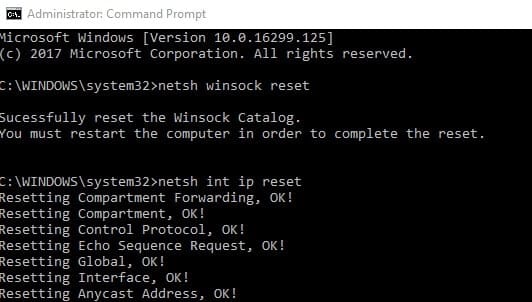

Restart Windows to take effect the changes, and check There is no more problem with Windows 10 Internet or network connection.
Reinstall Network Adapter Driver
Sometimes due to outdated, incompatible driver software for network adapter cause different problems include NIC fails to get an IP address from the DHCP server. Update or reinstall the driver software for the network adapter help to get rid of this issue.
- Press Windows + x select device manager,
- expand network adapter,
- Right click installed driver for wireless adapter select uninstall
- Click yes when ask for confirmation and restart windows.
- On next start windows automatically install the network adapter on your PC
- Otherwise, visit the device manufacturer to download and install the latest driver for the network adapter
- Restart Windows after completing the process and check if the problem fixed.
Did these solutions help to fix DHCP is not enabled for wifi in windows 10? Let us know on the comments below, also read:


