
Microsoft released KB5034441: Windows Recovery Environment update for Windows 10, version 21H2 and 22H2. Usually, this update Aims to address a security vulnerability that could allow attackers to bypass BitLocker encryption by using Windows Recovery Environment (WinRE). For more information, see CVE-2024-20666. However, for some users, Windows 10 KB5034441 security update fails with 0x80070643 errors or receives the error code 0x80070643 – ERROR_INSTALL_FAILURE. Microsoft acknowledged this Windows 10 Update error in a support article and suggested resizing the recovery partition as a workaround.
Windows 10 Update error 0x80070643
You may also encounter this error on your Windows 10 device, error message stating, “There were some problems installing updates, but we’ll try again later. If you keep seeing this and want to search the web or contact support for information, this may help: (0x80070643).”

As per Microsoft’s support article, Windows 10 KB5034441 brings a security vulnerability fix related to Bitlocker encryption. The update requires sufficient space in the recovery partition, and if it’s not large enough, the installation fails. The error message may also include “Windows Recovery Environment servicing failed (CBS_E_INSUFFICIENT_DISK_SPACE).”
To resolve Windows Update error 0x80070643 Microsoft suggests manually resizing the recovery partition to install the WinRE update.
Remember to create a system backup before making any changes. This workaround involves resizing partitions, so caution is advised.
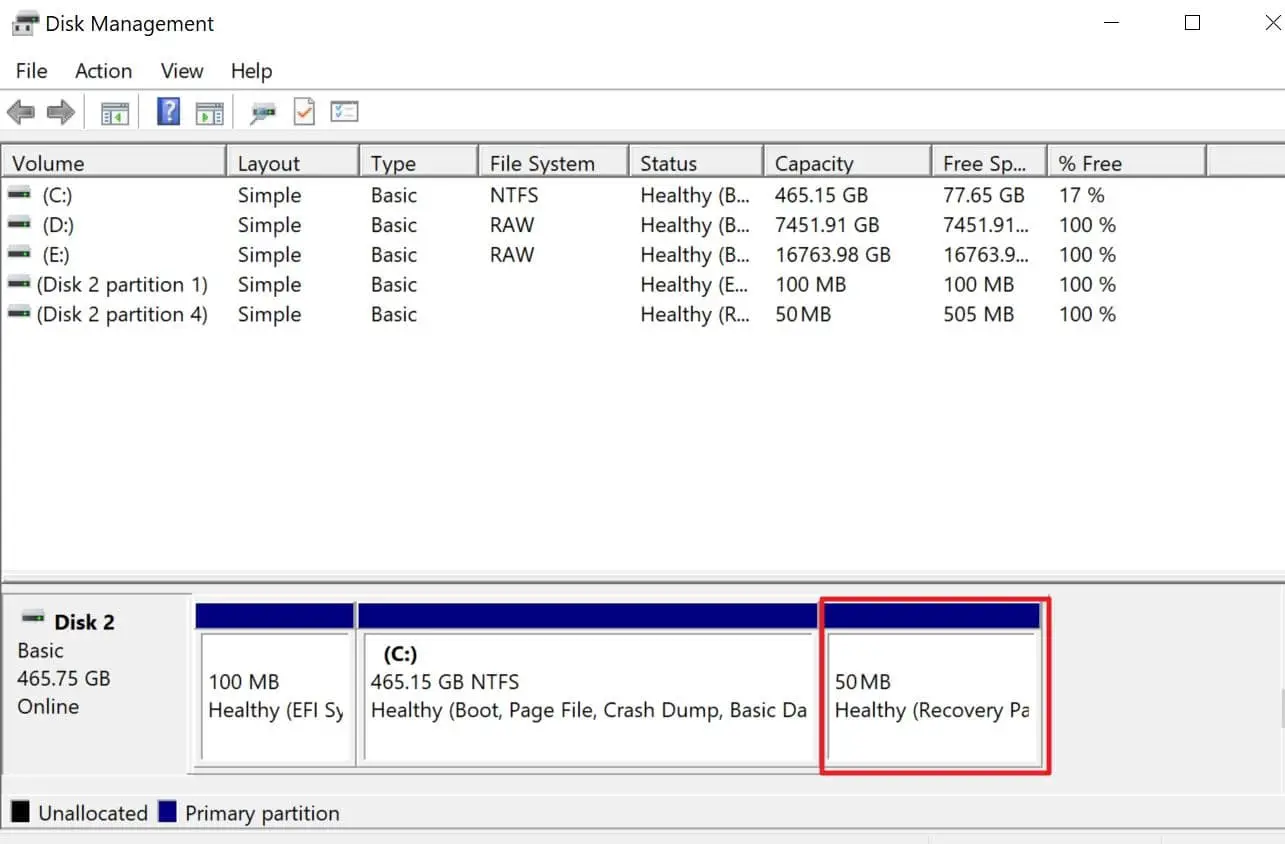
- Open Start, type “Disk Management,” and select “Create and format hard disk partitions.”
- Locate the main Windows drive and check for the Recovery Partition.
- If found, open an elevated command prompt by typing CMD in Start, right-clicking, and selecting “run as administrator.”
- Run
reagentc /infoto confirm WinRE (Windows Recovery Environment) is enabled. Note the harddisk and partition numbers. - Run
reagentc /disableto temporarily disable WinRE.
Shrink the OS partition and prepare the disk for a new recovery partition.
- To shrink the OS, run diskpart
- Run list disk command to see all connected hard disks.
- To select the OS disk, run sel disk <OS disk index> This should be the same disk index as WinRE.
- To check the partition under the OS disk and find the OS partition, run list part
- To select the OS partition, run sel part<OS partition index>

- Shrink the OS partition by running shrink desired=250 minimum=250
- To select the WinRE partition, run sel part<WinRE partition index>
- To delete the WinRE partition, run delete partition override
Create a New Recovery Partition:
First, you need to check if the disk partition style is a GUID Partition Table (GPT) or a Master Boot Record (MBR). To do that, run list disk. Check if there is an asterisk character (*) in the “Gpt” column. If there is an asterisk character (*), then the drive is GPT. Otherwise, the drive is MBR.
- If your disk is GPT, run create partition primary id=de94bba4-06d1-4d40-a16a-bfd50179d6ac followed by the command gpt attributes =0x8000000000000001
- If your disk is MBR, run create partition primary id=27
To format the partition, run format quick fs=ntfs label=”Windows RE tools”
To Verify the Recovery Partition run command list vol.
To exit from diskpart, run exit and run reagentc /enable to re-enable WinRE, You can Confirm the changes by running reagentc /info.
After completing these steps, reboot Windows and check for updates in Windows Update to try and install the KB5034441 security update again.
Note: if you are uncomfortable performing these steps, we recommend Pause Windows 10 updates and wait for Microsoft to offer automated solution in upcoming weeks.

In addition to this, you can apply the following solutions to fix common Windows 10 update problems or Errors on your computer.
Use Windows Update Troubleshooter
Your PC has a built-in troubleshooter to solve common problems. Before trying any additional ways to resolve your issue, You can run the troubleshooter and see if it repairs the errors.
- Press the Windows key search for troubleshooter and select Troubleshoot settings,
- Click on Additional troubleshooters, locate and select Windows update then run the troubleshooter.
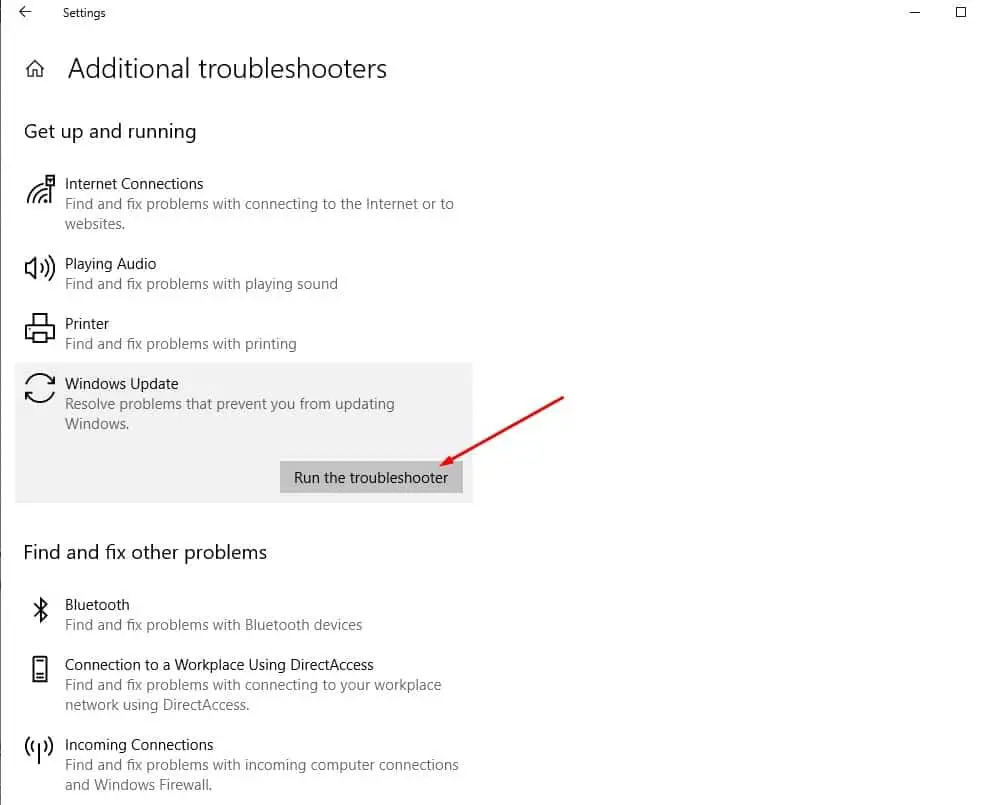
The troubleshooter can scan your device for any issues that may prevent Windows Update from working properly and try to fix them automatically.
Restart Windows Update Service
The Windows Update Service may encounter glitches that hinder its normal operation. Restarting the service refreshes its functionality, potentially resolving any issues causing the update to fail.
- Open the Run dialog (Win + R), and type “services.msc,”
- Scroll down to locate “Windows Update” in the list, right-click, and select “Restart.”
- Now check for updates, check if there is no more problem installing Windows updates.
Check and Repair System Files
Sometimes, the update may fail or get stuck because of corrupted or missing system files. To fix this, you can use the System File Checker (SFC) and the Deployment Image Servicing and Management (DISM) tools. These are command-line tools that can scan and repair your system files.
Press the Windows key, type cmd and Open the command prompt as administrator. Now run the following commands.
- sfc /scannow
- dism /online /cleanup-image /restorehealth
Free Up Disk Space
Another common cause of Windows 10 update failure or stuck download is insufficient disk space. Updates often require significant disk space. If your system is running low on storage, the update may not have enough space to unpack and install, leading to failure. You need to Delete unnecessary files, including temporary files, old downloads, and unused applications to free up disk space.
- To check how much space you have left, go to Settings > System > Storage and click on your system drive.
- Also, you can use the built-in Disk Cleanup tool to automate this process.
In addition, you should check your internet connection and make sure it is stable and fast enough to download the update files. You can use a speed test tool or visit a website like fast.com to measure your bandwidth. If your connection is slow or unstable, you may want to switch to a wired connection or use a different network.
Incorrect date and time settings can create discrepancies in the update process. Some updates rely on accurate timestamps, and ensuring the correct date and time helps avoid conflicts during installation. Verify that your system’s date and time settings are accurate. Adjust them if necessary.
Also read: