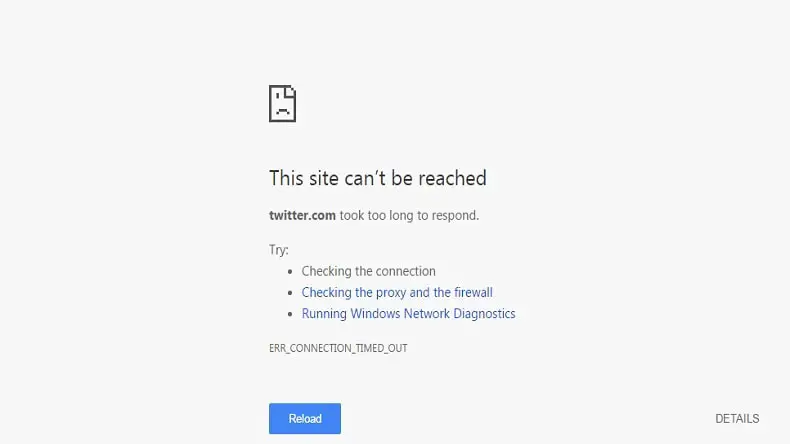
Does Google Chrome fail to load the websites with error This site can’t be reached. Even if you have connected to the internet but are unable to browse web pages. “This Site Can’t be Reached” is a common error cause if you have an internet connection problem on your device or DNS lookup failed so the webpage is not available. Whatever the reason here are some effective solutions to solve This site can’t be reached, The connection was reset on Google Chrome.
This site can’t be reached error chrome
If you have any enabled antivirus programs, we recommend disabling them temporarily to check if the issue will be resolved by disabling them.
Open the Command prompt as administrator, type netsh Winsock reset, then press Enter. Restart your computer, and visit the web page to check this works.
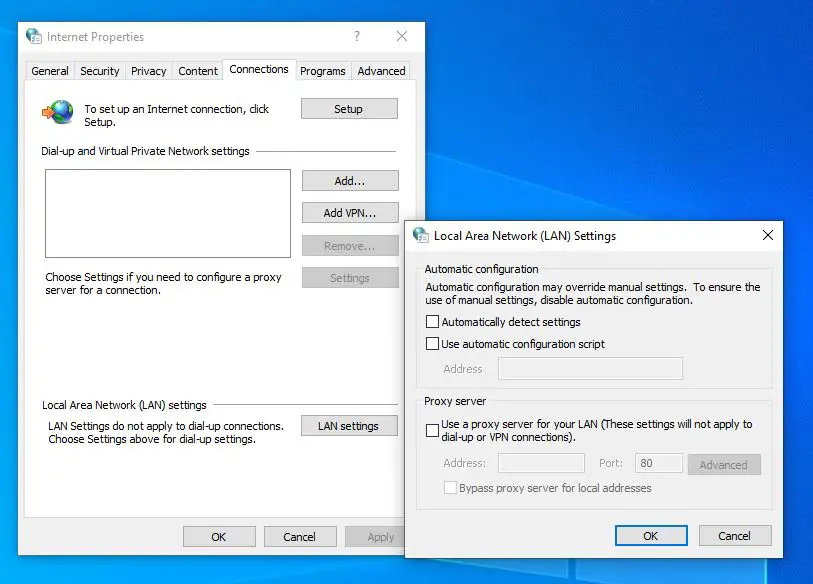
Check the Internet Proxy Settings
- Search for and select Internet Options in the search bar,
- Go to the Connections tab, and select LAN settings,
- Uncheck the Use a proxy server for your LAN option there if it is ticked,
- Checkmark on automatically detect settings and Click OK,
- Now close everything, Restart windows and check the problem is resolved.
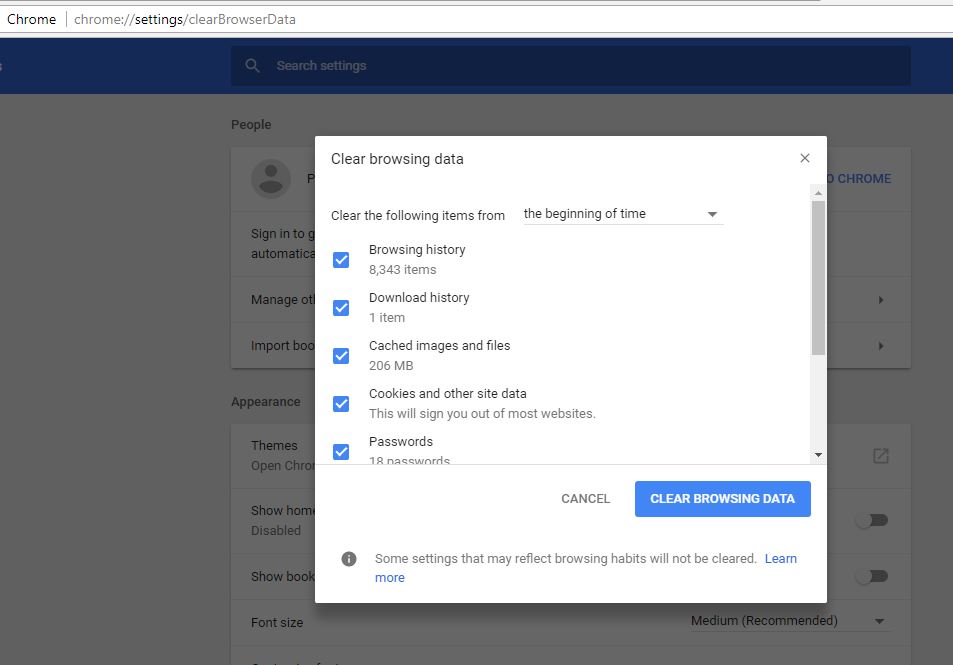
Clear Cookies On Chrome Browser
To clear all Cookies Open Google Chrome Browser and use the shortcut key Ctrl-Shift-Del.
Here make sure “Cookies and other site and plugin data” and “the beginning of time” under Obliterate the following items are selected, it is overkill as you will delete all cookies And click clear browsing Data to clear all cookies. Now Close And Reopen Chrome Browser. Then open the web page worked for you it’s great, if still getting the same error follow the next solution.
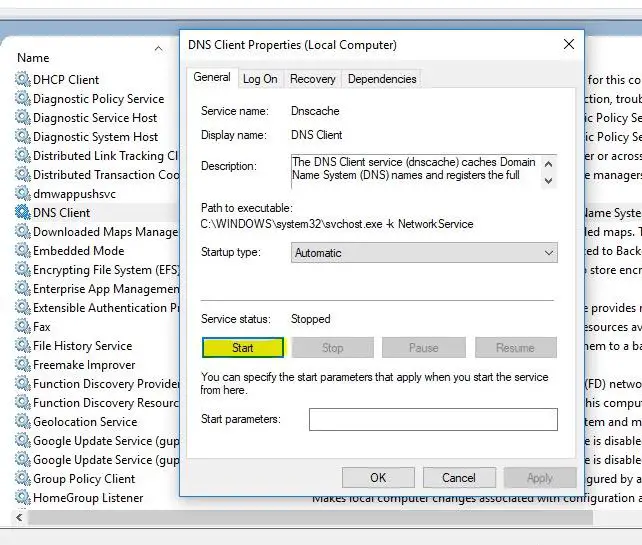
Restart DNS client
- Press Windows + R, type services.msc, and ok
- look for service named DNS client, Right click and select restart,
- If the service is not started, Right click and select properties,
- Here change the startup type automatic and start the service next to the service status.
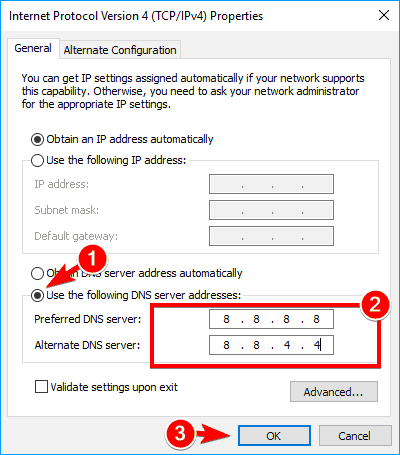
Switch to Google DNS
- Press Windows + R, type ncpa.cpl and ok
- This will open the network connections window,
- Right, click on active network and select properties.
- Select “Internet Protocol Version 4 (TCP/IP)” and click Properties.
- Here select the Radio button “Use the following DNS server addresses.”
- And Type the following address
- Preferred DNS server 8.8.8.8
- and Alternate DNS server 8.8.4.4
- Checkmark on “Validate settings upon exit” then click OK and click Close.
- Now Restart windows and check This must have Fix This site can’t be reached error in Google Chrome.
Try resetting TCP/IP Setting
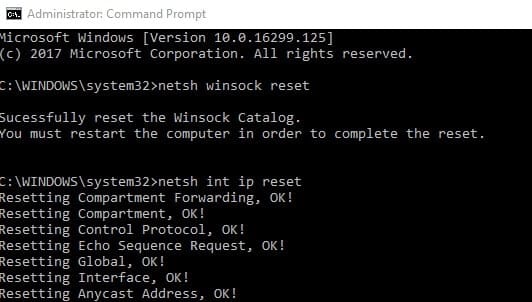
If none above solutions work for you, open the command prompt as administrator and perform the command below
- netsh winsock reset
- netsh int ip reset
- ipconfig /release
- ipconfig /all
- ipconfig /flushdns
- ipconfig /renew
Restart Windows and check the problem is resolved, There is no more problem visit web pages.
Reinstall Google Chrome Browser
If after apply the above all solutions still getting This site can’t be reached error. Then the last solution is Reinstall the Google Chrome Web Browser.
- Go to Control Panel and click “Uninstall a program” and uninstall Google Chrome from your PC.
- Next clear Chrome Cache Data from C:\Users\%your_name%\AppD
ata\Local\Google\ and delete everything inside this folder. - Restart windows,
- After that Download the latest version of Google Chrome Browser and install it.
- That’s all Now again open the Chrome web browser and try to open the web page again.
- Hope This time you will get success and a smile on your face :).
Reinstall the network adapter
uninstall/reinstall the network adapter driver and check. Follow the below steps:
- Press Windows key + X and click on Device manager.
- Locate for Network adaptor and click on it to expand it.
- Right-click on the device and click on uninstall.
- Once you are done uninstalling the driver, restart the computer. It will automatically install the generic network adapter driver.
Or visit the device manufacturer’s website, download and install the latest network adapter driver for your PC. Restart windows and open any web page to check there is no more error.
Also read:
