HDMI or High-Definition Multimedia Interface standard for simultaneously transmitting digital video and audio from a source such as computer to monitor. PC and laptops come with HDMI port that allows connect second monitor or to enjoy TV and movies on a bigger screen. But after upgrading to Windows 11 few users report, HDMI port is not working on their laptop or PC, preventing connect PC or laptop to an external monitor via HDMI port. Sometimes you may experience, the computer monitor is connected through HDMI port but the sound is not playing. or HDMI Display Not working after the current Windows 11 Update.
Why HDMI port not working on Windows 11?
Several things might cause HDMI not working on Windows 11, faulty HDMI cables, dust and debris inside the HDMI port, outdated display (Graphics) driver, Outdated windows 11 version or Windows update bug are common. Here is what to do if Windows 11 not detecting HDMI TV/Monitor or a sound problem on your PC.
- Ensure the HDMI cable is connected properly between your PC/Laptop and Monitor or TV.
- Installing the latest Windows 11 update sometimes brings fix for the problem.
- If HDMI sound is not working run the sound troubleshooter and make sure the latest audio drivers are installed on your PC.
- An outdated display driver is another common reason why Windows 11 Not Detecting HDMI TV/Monitor, update or reinstall the display driver most probably work for you.
Basic things to check
- The first thing you need to ensure the HDMI cable is connected properly, blow out any dust from the HDMI port manually.
- Try to unplug the HDMI cable from the Windows 11 device as well as the output device and then plug it back in properly.
- Next, visually inspect the cable to check for damage, or try changing the HDMI cable and use a different HDMI port to dock the cable as well.
- If you have a graphics card, ensure you’ve plugged the cable into the HDMI port on the graphics card and not the HDMI port on the motherboard.
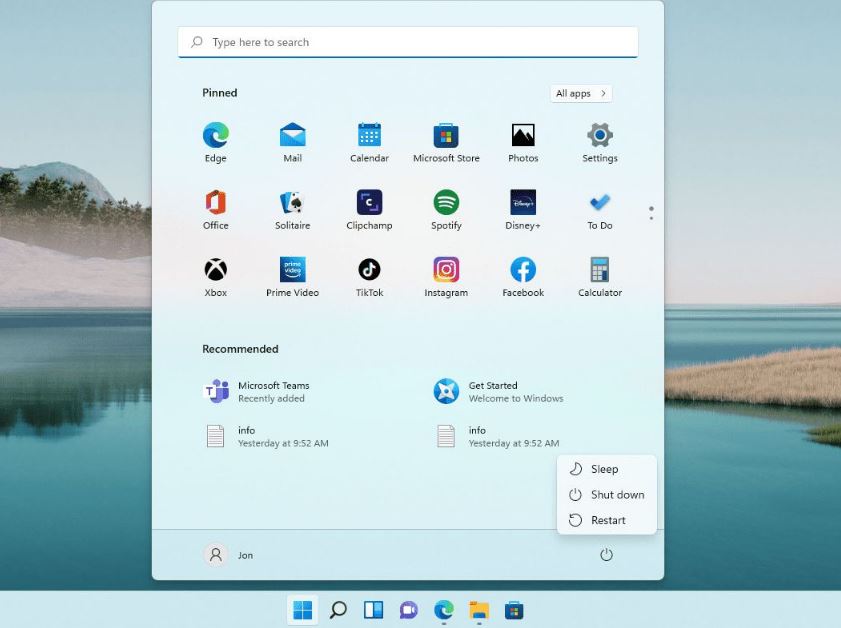
Restart windows 11
Sometimes due to temporary glitches Windows might fail to recognize the port is active and result HDMI Connection Not Working on Windows 11. Let’s reboot your computer, not only refresh the operating system and restart running process, but also clear temporary glitches and Windows should recognize the port and (if necessary) install the correct driver.
Update windows 11
Microsoft regularly updates Windows with the latest bug fixes and security improvements. And it’s essential to keep your system up to date as the latest Windows updates may contain a fix for HDMI not working on your Windows 11 PC.
- Press Windows key + X and select settings,
- Click on windows update then hit the Check for Updates button,
- If Windows updates are pending there, allow them to download and install,
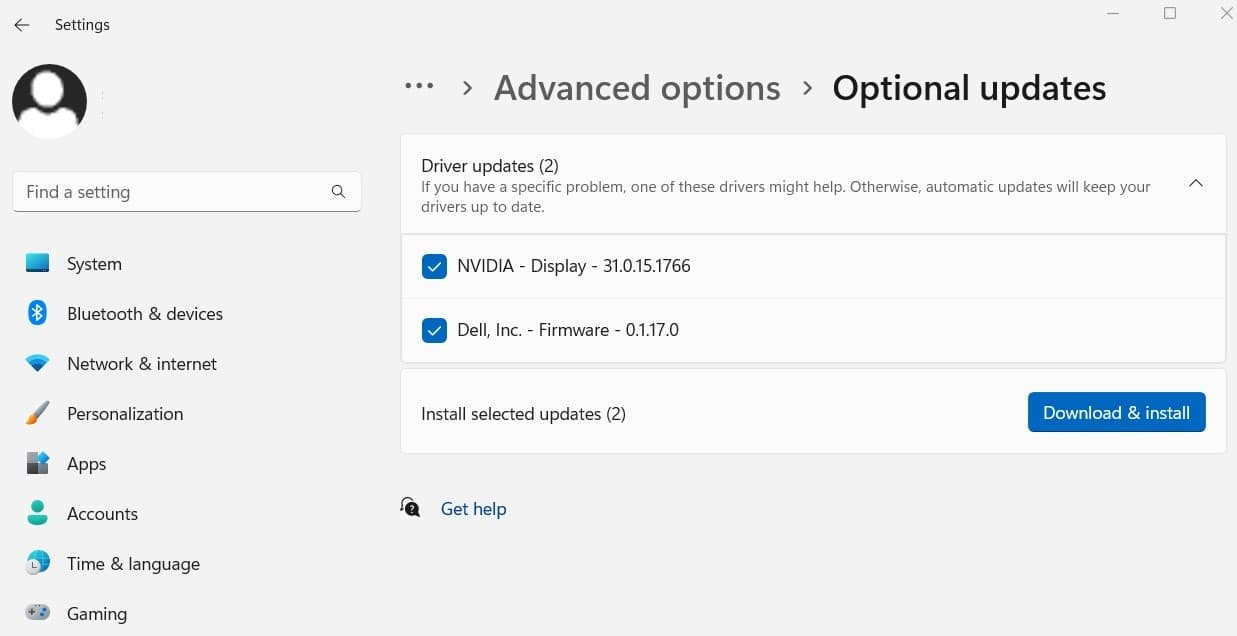
- In addition, click on advanced options then optional updates,
- If optional updates or driver updates are available, check and allow them to download and install as well.
Once done reboot your PC to apply the change and check if the second display is detected or if HDMI sound working.
Check Resolution and Refresh Rate
Ensure the correct resolution and refresh rate are selected when you plug in the HDMI cable to your PC and external display.
- Right-click an empty area on the desktop and click Display settings from the context menu.
- Next, select the display you want to modify. If you don’t see it, click the Identify button.
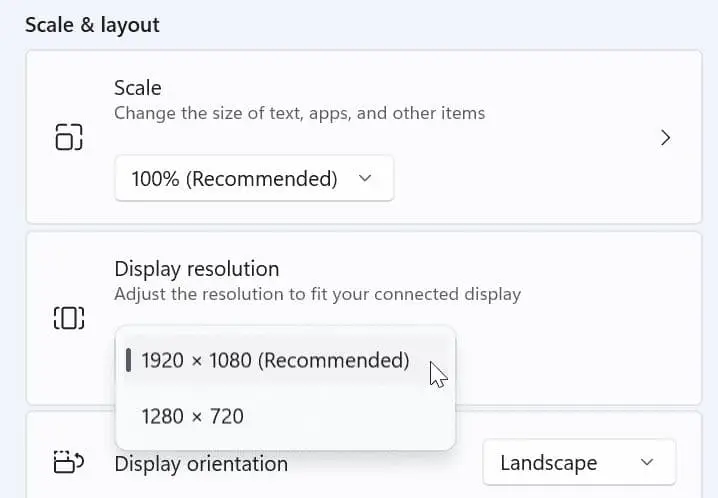
- Scroll down to the Scale and Layout section and use the dropdown menu to adjust the Display resolution for the external monitor.
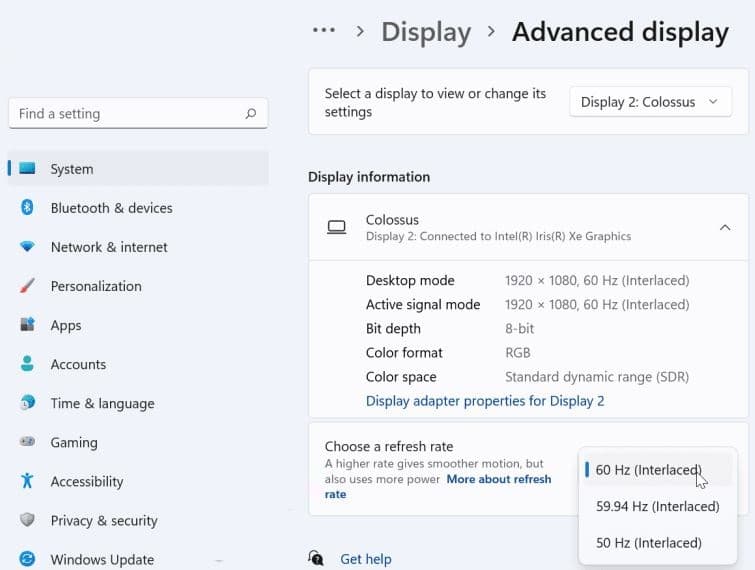
Now click Advanced Display under the Related settings section.
- Adjust the refresh rate for the display in the Choose a refresh rate section.
Note – You can refer to your monitor or TV’s user guide for the maximum rate to use here.
Check Multi-Monitor Mode
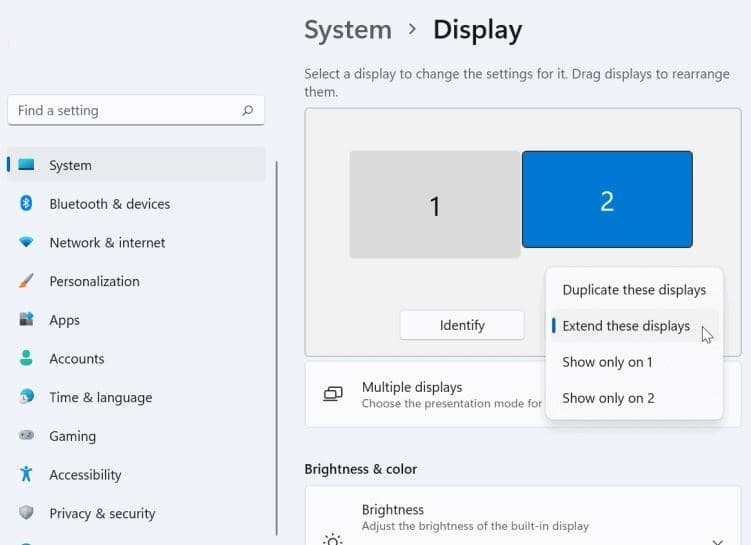
If you’re using HDMI for a second display, it’s worth checking the multi-monitor setup, because due to incorrect configuration, your PC might ignore your HDMI TV or monitor entirely.
- Right-click an empty area on the desktop and click Display settings.
- You can choose between Duplicate these displays, extend these displays, show only on 1, or show only on 2.
Note – If you have more than two monitors, you’ll see additional options.
Update Display Drivers
Outdated Graphics driver is another common reason why HDMI Displays Not working on Windows 11. Ensure your graphics card drivers are updated.
To update your display drivers:
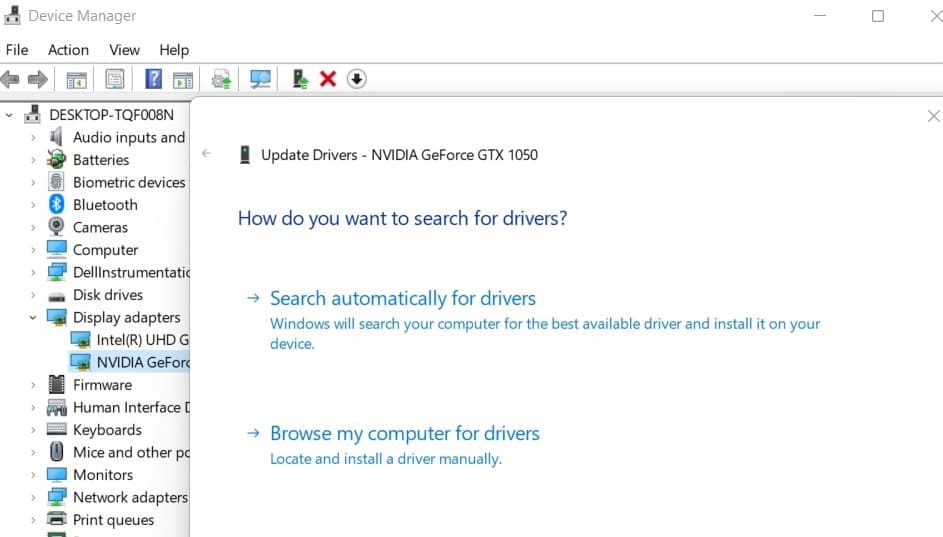
- Right-click on the start menu and select Device Manager
- This will display all devices and peripherals connected to your computer,
- locate and expand display adapters, right-click your graphics card and select Update driver.
- Select Search automatically for drivers and Windows will search for an updated driver.
- Or you can download the updated driver from the manufacturer’s website, and manually install it.
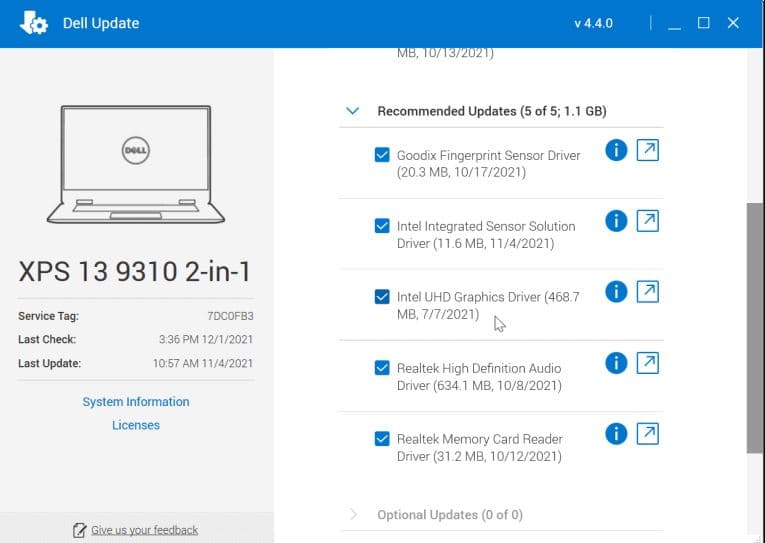
- Also, you can download the OEM update tool from the manufacturer and run the OEM’s update utility. Usually, it consists of OEM software updates and, more important, driver updates.
Run SFC or DISM Scan
Sometimes system file corruption could be the reason why Windows 11 HDMI not detecting the second monitor. If the above solutions haven’t yet fixed the problem, you can use the SFC and DISM tools to check your local drive for corrupted system files and replace them.
- Open command prompt as administrator,
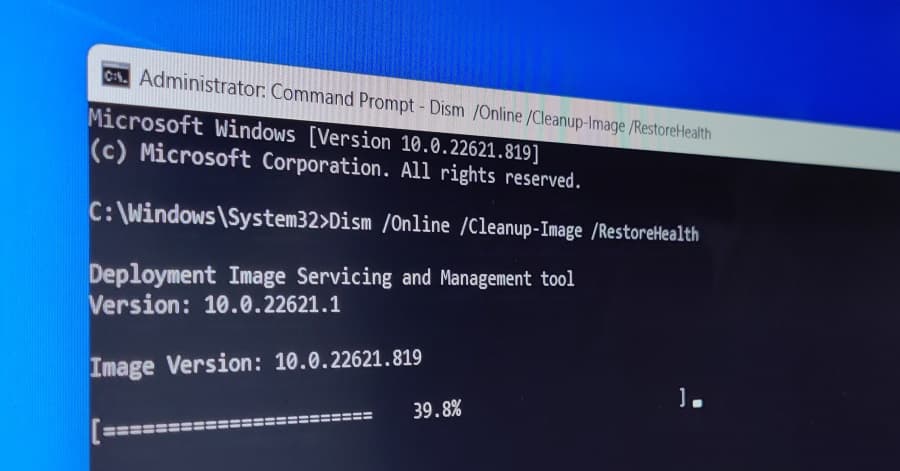
- First, run DISM command DISM /Online /Cleanup-Image /RestoreHealth
- Next, run the system file checker command sfc /scannow
- Let the scanning complete, once done Restart your PC and see if HDMI is working once the SFC tool finishes its scan.
Well, if you are only experiencing HDMI Audio Not Working in Windows 11.
- Ensure the correct HDMI output is selected from the list. You can check the same on the System Tray volume controls section.
- Run the built-in Windows sound troubleshooter to automatically scan and fix HDMI audio not working problem.
- Again, old versions of audio/sound drivers might cause the HDMI audio not to connect properly, update sound drivers in Windows 11 that probably restore the audio on your PC.
- Sometimes restarting the Audio service restart Windows audio from the Services menu fix the problem as well.
Also read
 Now click Advanced Display under the Related settings section.