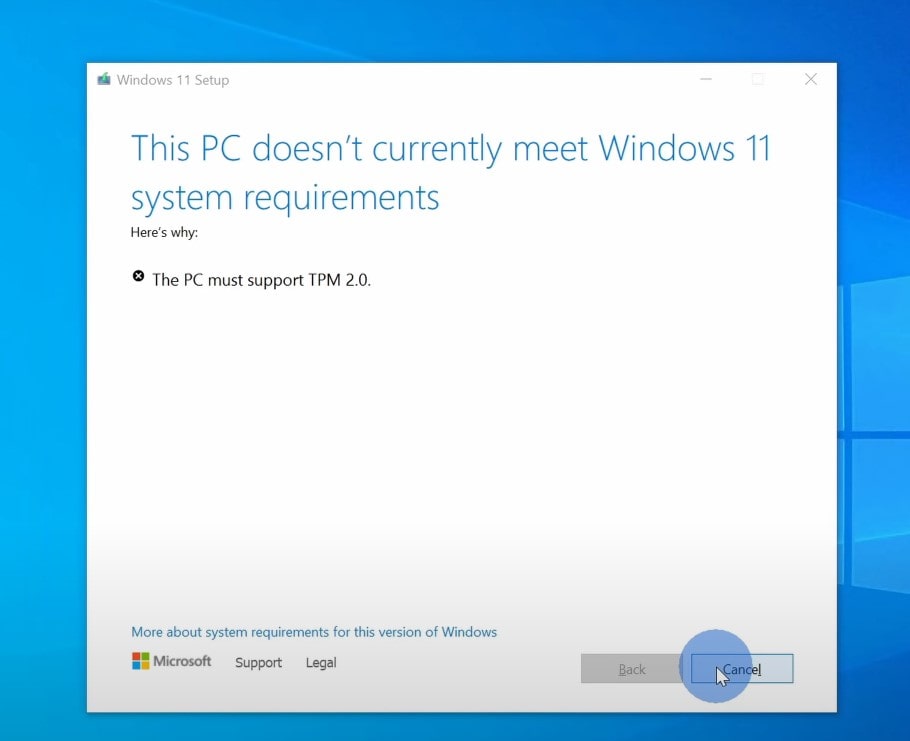
Microsoft has released Windows 11 23H2 with a number of new features & improvements and a completely fresh UI. It’s a free upgrade for all compatible devices running the latest Windows 10. This time Microsoft is very strict on Windows 11 system requirements and doesn’t allow you to install Windows 11 on Unsupported PC. The latest Windows 11 requires an eighth-generation or newer Intel processor, you also need TPM 2.0. But what if you don’t have those, well if you try to upgrade you will see an error message “This PC doesn’t currently meet Windows 11 system requirements“.
Windows 11 System Requirements
As per Microsoft officials to install Windows 11, your device must meet the following system requirements:
- 1 GHz processor or faster with two or more cores compatible with a 64-bit processor.
- 4GB RAM or more is required.
- At Least 64GB of free space is needed to install Windows 11.
- Your PC should be UEFI and Secure Boot Capable.
- TPM (Trusted Platform Module) 2.0 is required.
- Graphics card compatible with DirectX 12 or later with WDDM 2.0 driver
- 720p display greater than 9 inches diagonally with 8 bits per color channel required.
- Internet connection with a Microsoft Account.
Windows 11 Requires TPM 2.0 and Secure Boot
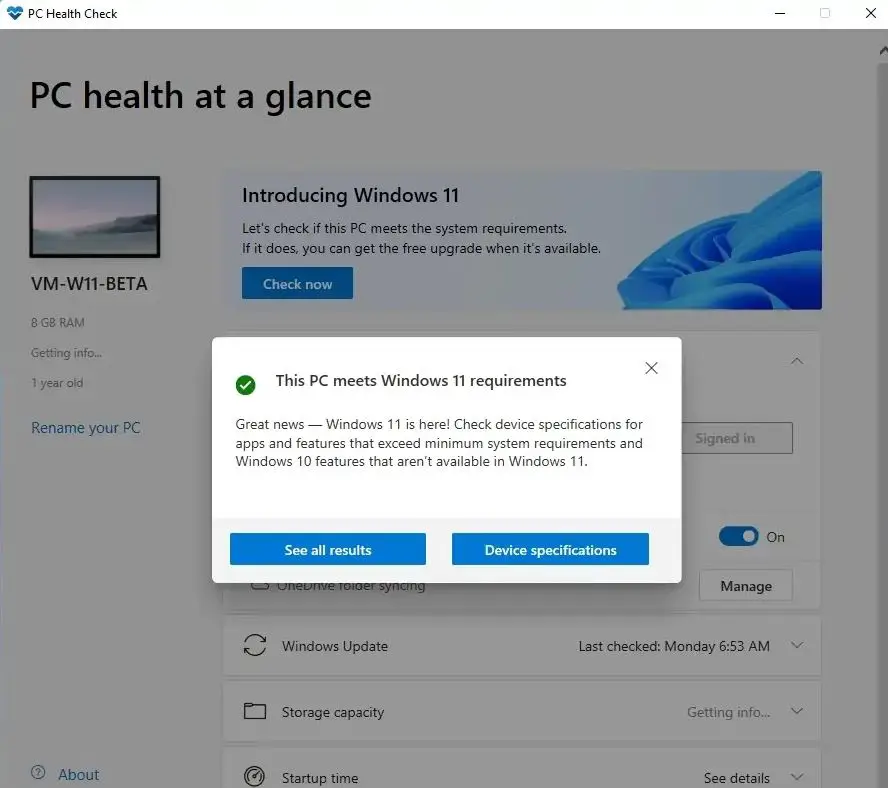
To check whether your device meets the above system requirements or not run the official PC Health check utility.
Enable TPM and secure boot
If the PC health check utility reports that your computer doesn’t have TPM, there’s a chance your PC does have TPM—but it may be disabled by default.
- Restart your PC and Access BIOS setup using the F2 key or Del key (It depends on your motherboard manufacturer)
- Move to the Security tab using the right arrow key, then here look for TPM option and enable the same.
Install Windows 11 23H2 on an Unsupported PC
If your device meets minimum system requirements you can check for Windows updates to get the latest Windows 11 installed on your device. But what if your system doesn’t meet the following system requirements, don’t worry you can tweak the system to bypass CPU requirements or TPM or UEFI requirements and allow you to proceed with the installation.
What Happens If You Install Windows 11 on Unsupported PC?
- As per my personal experience, installing Windows 11 on an unsupported processor didn’t harm our device.
- You can still get windows updates: Yes its surprising, if you install windows 11 on Unsupported PC Its still Get windows updates.
- Performance wont change much: If you install windows 11 on unsuported PC your system performance will generally be the same, you didnt notice any substantial change in performance.
- Well, Microsoft doesn’t recommend installing Windows 11 on unsupported devices, and there is no guarantee such devices will receive all future updates.
To install Windows 11 on unsupported devices first we download the Windows 11 ISO image, then tweak the Windows registry to bypass the Windows 11 system requirement check, and then install Windows 11. Let’s start
Download Windows 11 ISO
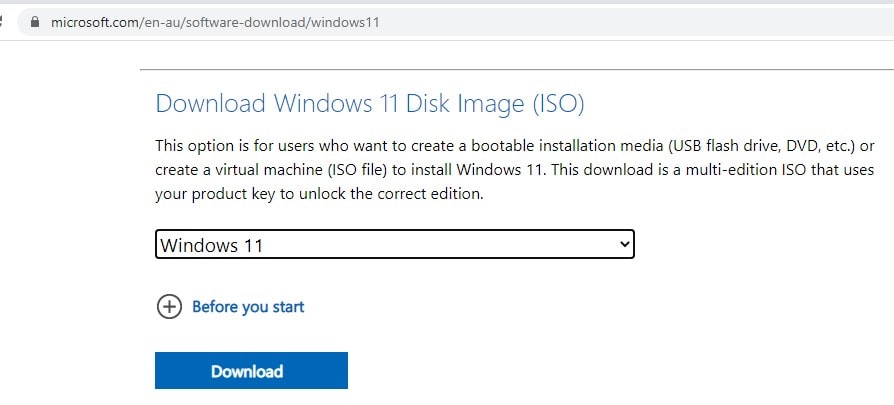
First, download the Windows ISO image file from Microsoft’s official page. To do so follow the steps given below-
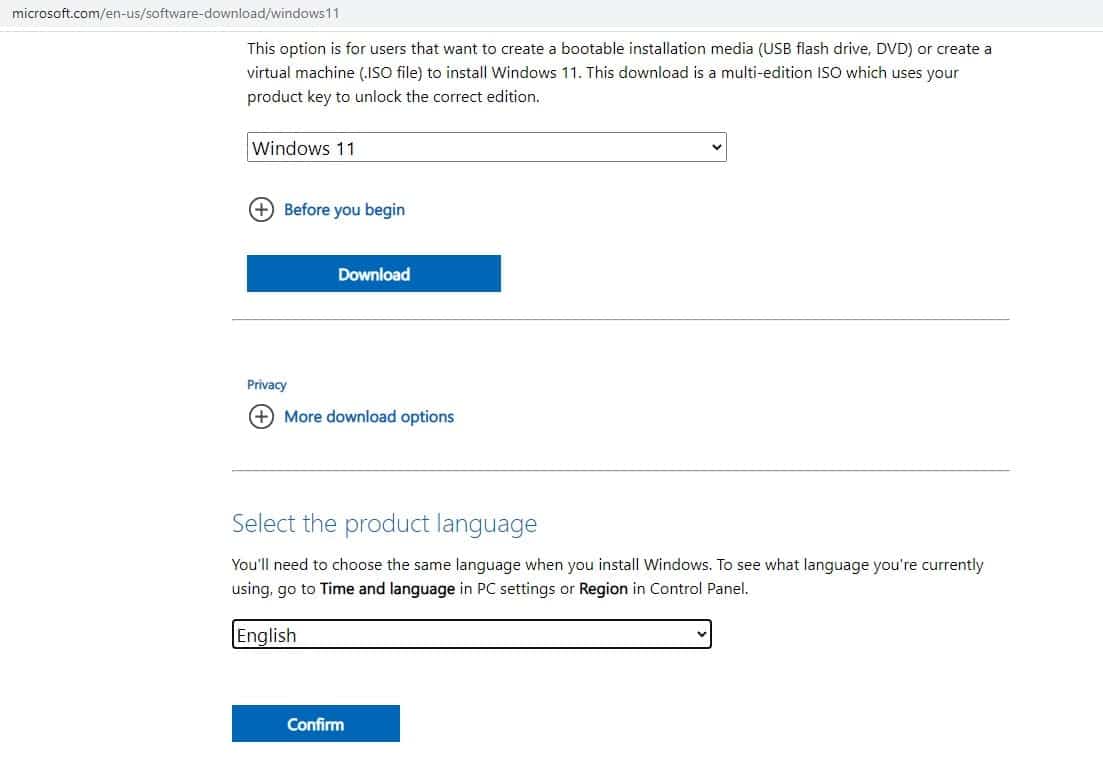
- Head over to the Windows 11 download page here,
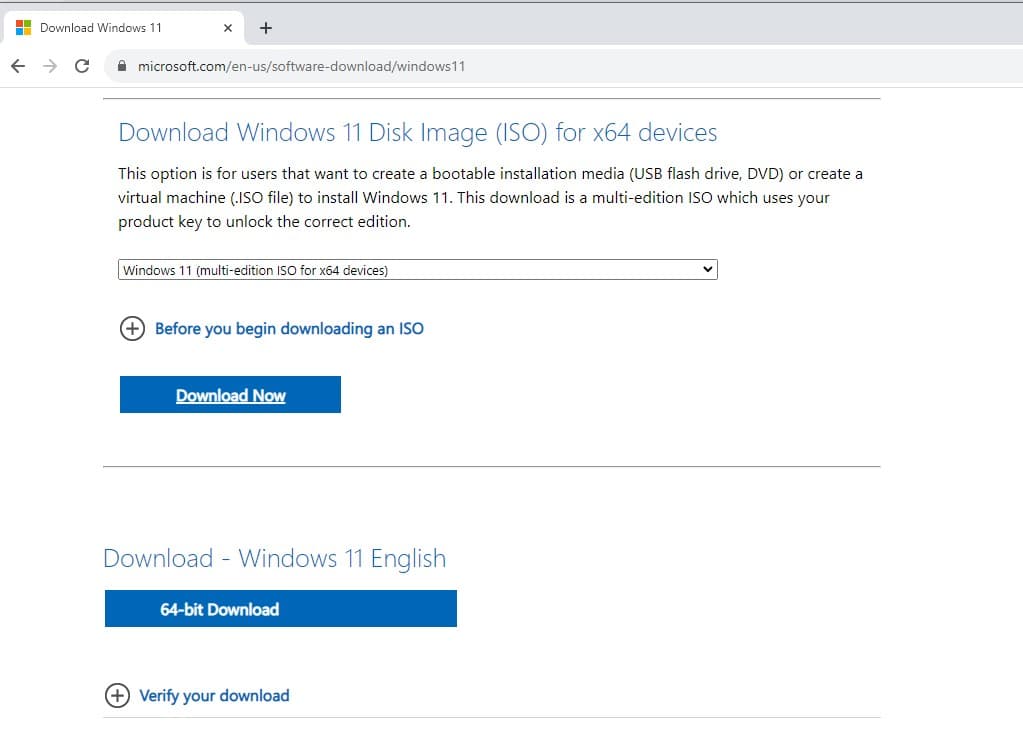
- Scroll down to the bottom option where you can download an ISO for Windows 11,
- Here select Windows 11 from the drop-down menu, then click on Download,
- Next, you have to choose one language, (select English) then click on confirm,
- This will start to download the latest Windows 11 ISO image direct from the Microsoft server, It will be about 6.2 GB file
Tweak Windows registry to bypass system requirements
Now we tweak the Windows registry to bypass the system requirement or CPU check for Windows 11.
- Press the Windows key + R, type regedit, and click ok to open the Windows registry editor,
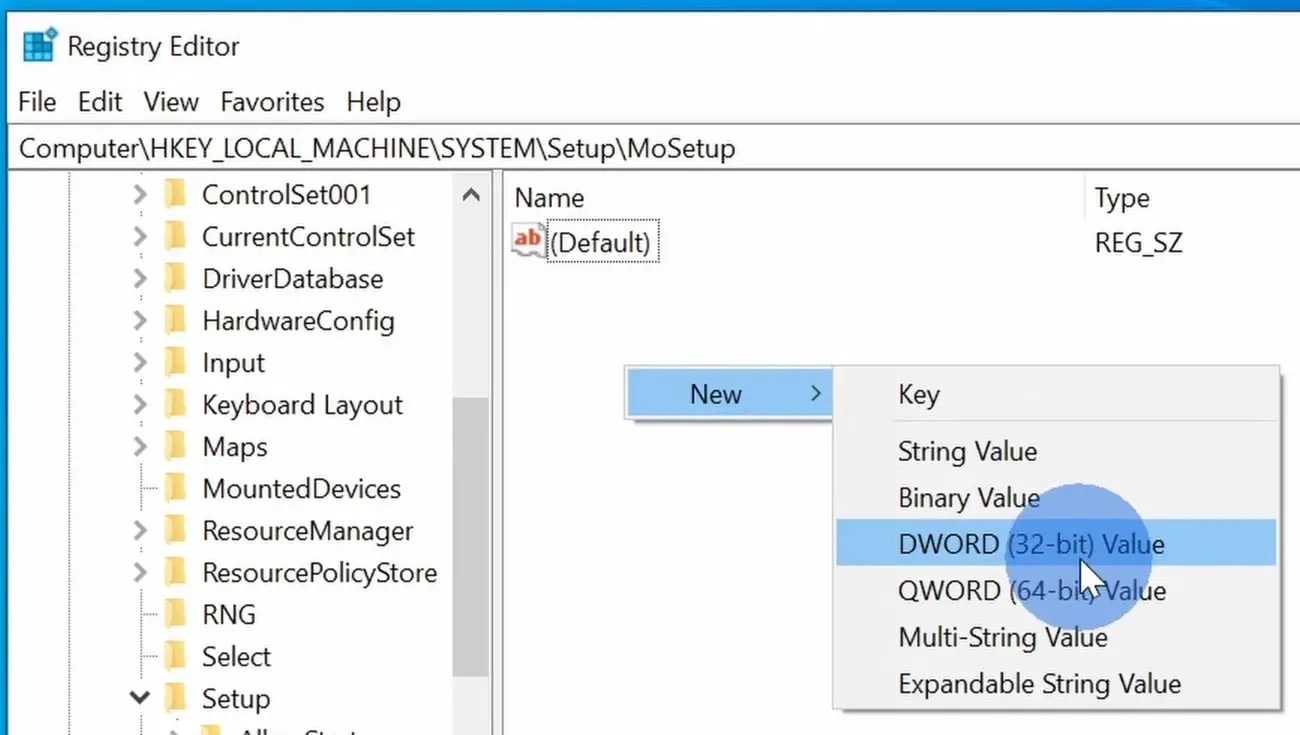
- Next, navigate to HKEY_LOCAL_MACHINE\SYSTEM\Setup\MoSetup,
- Right-click on the right pane, click on New, and then on DWORD(32-BIT) Value.
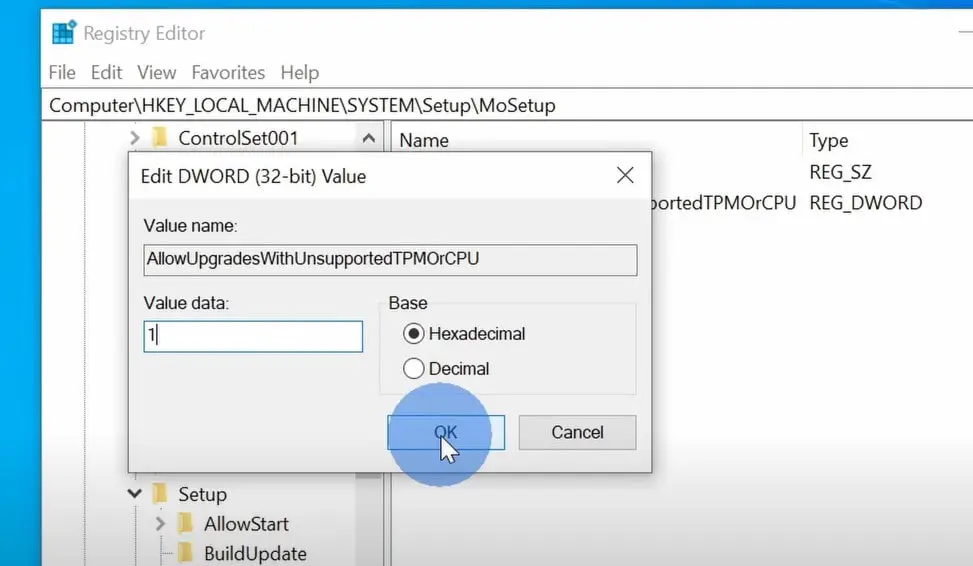
- And name the value AllowUpgradesWithUnsupportedTPMOrCPU
- Double click on the new key (AllowUpgradesWithUnsupportedTPMOrCPU) and change the Value Data to 1 and click on ok button.
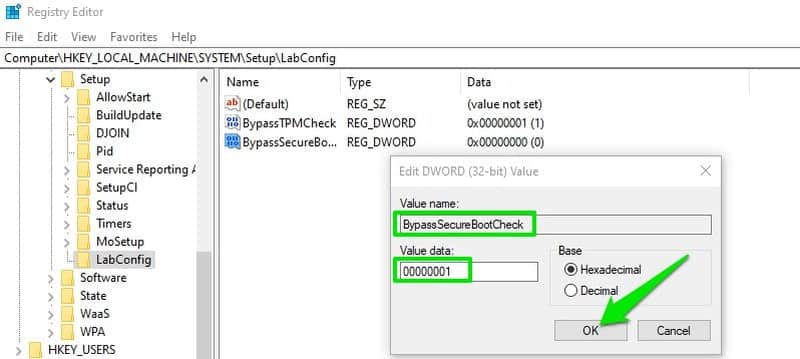
In addition, If your PC doesn’t support TPM and Secure Boot
- Again open the Windows registry and navigate to HKEY_LOCAL_MACHINE > SYSTEM > Setup.
- Right-click on Setup and select New > Key and name that new entry LabConfig
- While LabConfig is selected, right-click on an empty space in the right panel and create a new DWORD (32-bit) Value, name it BypassTPMCheck and change its value 00000001.
- Similarly, create another DWORD (32-bit) Value under LabConfig, Name it BypassSecureBootCheck and set its value to 00000001 too
- Once done close the registry editor and restart your PC
Upgrade from Windows 10 to Windows 11
To upgrade your device to the latest Windows 11 23H2:
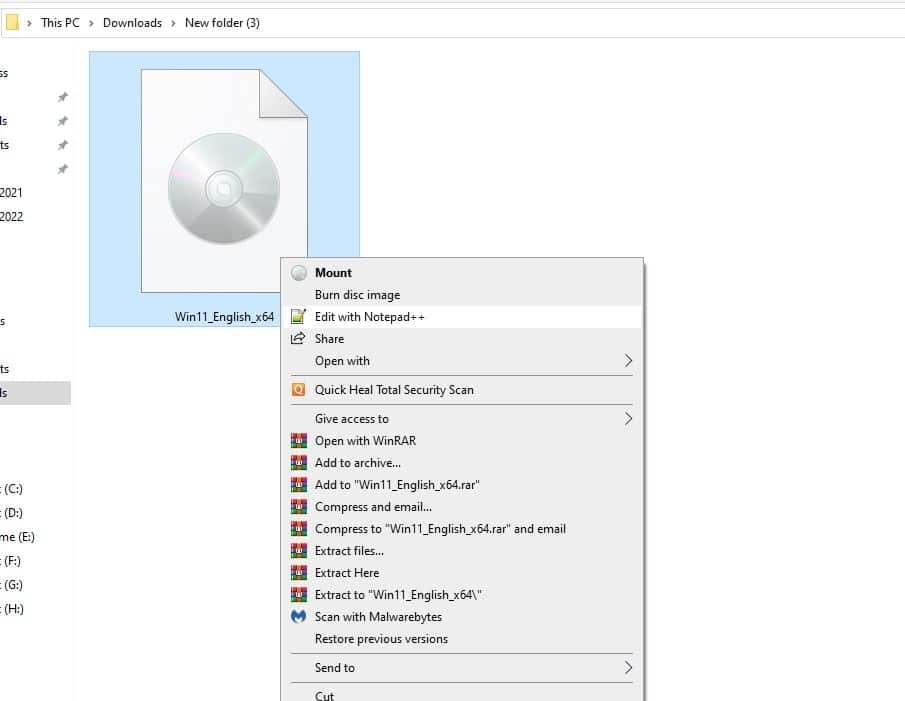
- Press Windows key + E to open File Explorer, and locate the Windows 11 ISO image (that you downloaded previously), right-click on it select mount.
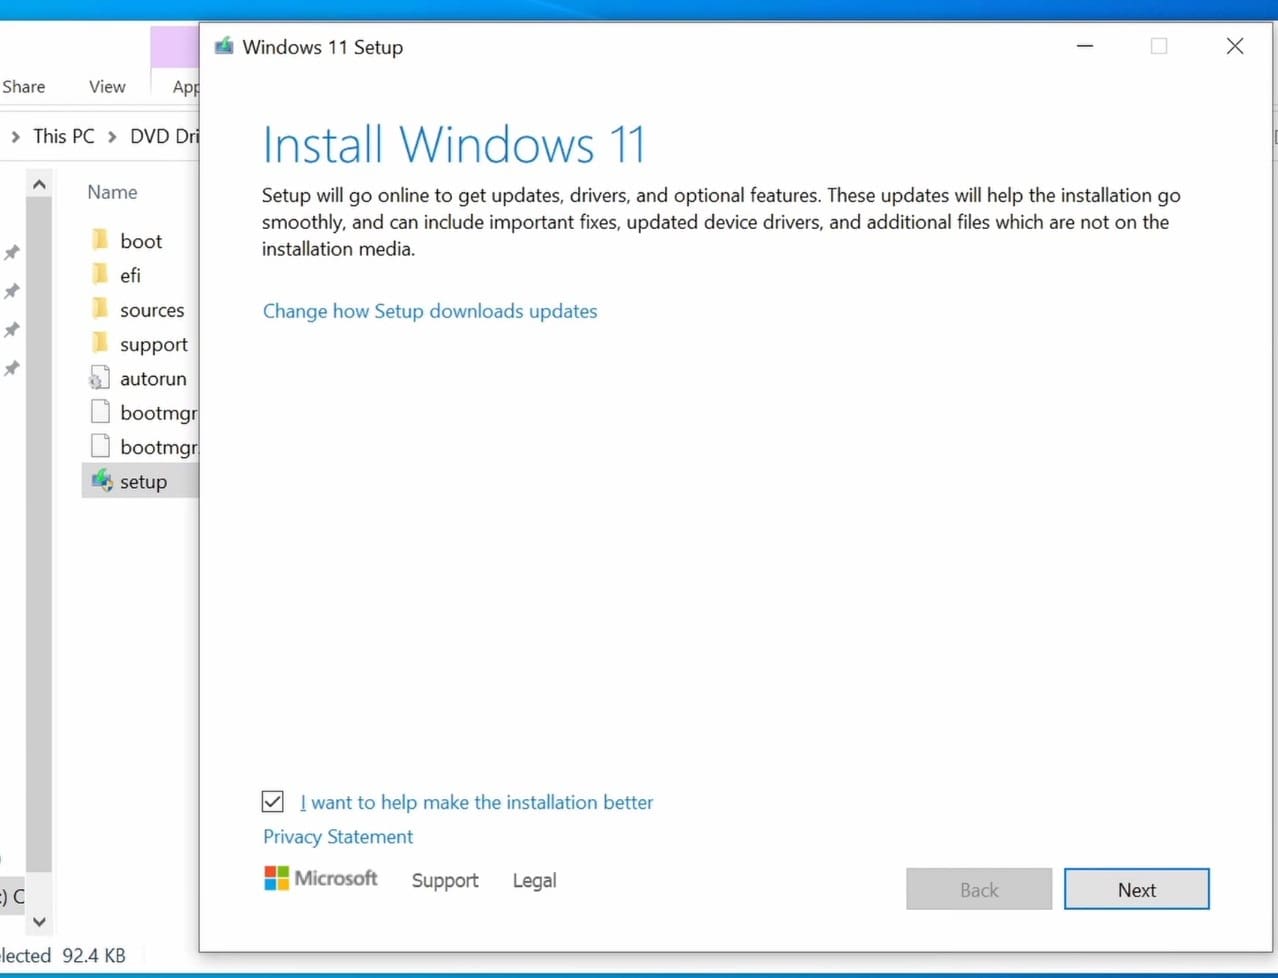
- Now, look for the setup.exe, Double-click on it, to start the Windows 11 installation process.
- click yes if UAC prompts for permission, and Follow the on-screen instructions to install Windows 11 on your PC.
- This time you should now find that you are able to successfully install Windows 11
Install Windows 11 from USB Drive
Also, you can install Windows 11 from a bootable USB drive. To do so we need to create a Windows 11 installation media following the steps below.
- First Download the Windows 11 Media Creation Tool from this link.
- Plug your USB drive (at least 8 GB or more) to your PC,
- Now locate the media creation tool, right-click on it select run as administrator,
- On the Select Language and Edition window, click on Next.
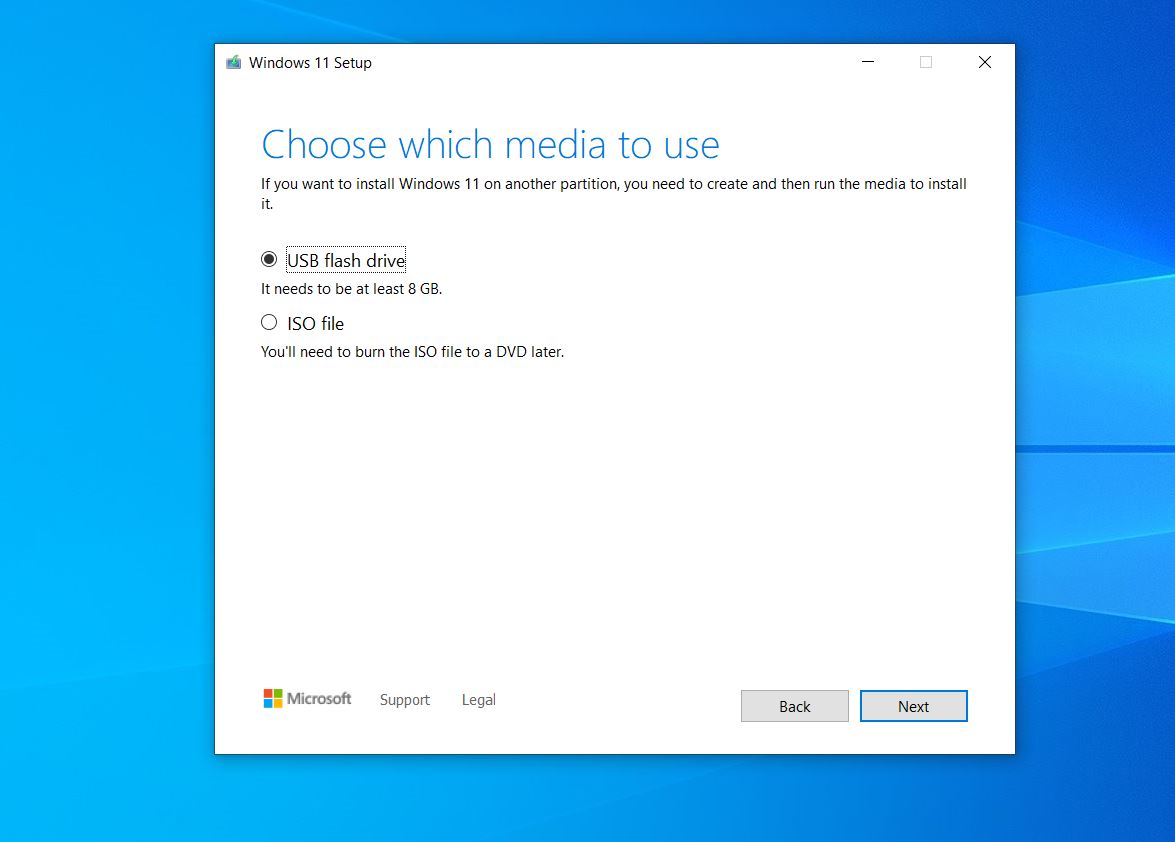
- Click the option for USB Flash Drive, and then select the USB flash drive,
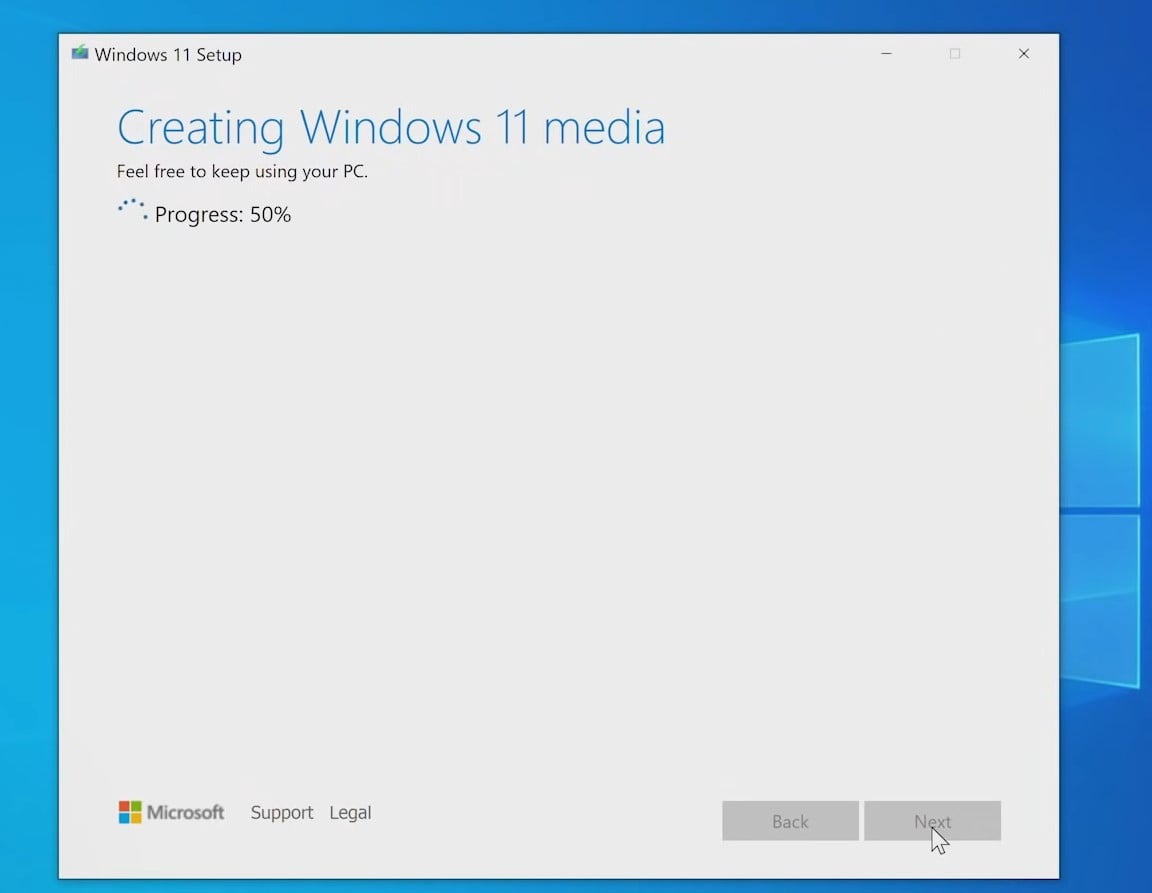
The Media Creation tool will download Windows 11 image files and make bootable media for Windows 11. Make sure you have a stable internet connection to download Windows 11 files from the Microsoft server.
Once done, reboot your PC, Boot your PC to BIOS and install Windows 11 from the USB drive.
Also read:
- Speed Up Windows 11 and Improve Performance (7 effective tips)
- Microsoft Store Missing In Windows 11? Here is how to Get it back
- Solved: Print Spooler keeps stopping Not Running on Windows 10
- Why is my computer running so slow? Reasons with Easy Solutions
- Bluetooth not working after Windows 11 update? 6 solutions to apply
- Solved: Slow Internet connection problem on Windows 11
