
The latest Windows 11 is quick to start but sometimes you may notice Scanning and repairing drive C and it’s stuck while the PC is attempting to boot. Usually, windows automatically attempt to scan and repair the disk drive if it detects a problem with your hard drive. And once the scanning completes PC restart normally, but a few users report, the Scanning and Repairing Drive C stuck on 100% after the windows 11 update. The common reason for this is problems with the Disk drive and its because of the computer being incorrectly shut down or bad sectors on the hard drive or many other reasons. Here is How to Repair Disk Errors on Windows 11 when it is stuck scanning and repairing drive C.
If the storage disk on your PC has bad sectors, it may also trigger Windows 11 to try to repair the bad sections.
Why does my computer do a disk check every time I start it up?
When your computer detects some internal problems, it automatically runs the disk check process to eliminate the issue. Forced shutdown of the Windows PC is One of the most common reasons behind disk errors that may results scanning and repairing drive C at startup. Again corrupted sectors in your hard drive can be responsible for this error. Some other reasons include virus malware infection or system file corruption also prevents CHKDSK tool from repairing the drive and results in stuck scanning and repairing the drive.

Running CHKDSK tool in safe mode, repairing corrupted system files using the system file checker utility, and removing virus malware using antivirus software probably fix such problems for you.
How to Repair Disk Errors on Windows 11
The scanning and repairing process can take a long time, but if you notice it stuck there longer than you expect press the power button to forcefully shut down your PC.
In addition check there are no loose connection issues between the disk and the computer. If possible recheck the cable and port to ensure the disks have been connected to the PC correctly.
Now start windows 11 in safe mode and apply the solutions listed below. Safe Mode starts the computer with minimal required services and drivers and thus is a diagnostic mode in which you can perform fixes.

Cancel Disk Checking on Startup
If windows scanning and repairing drive c on every boot, you can tweak the windows registry to skip Disk Checking on Startup on windows 11.
- Press Windows key + R, type regedit and click ok to open the registry editor,
- Navigate HKEY_LOCAL_MACHINE\SYSTEM\CurrentControlSet\Control\Session Manager and click on Session Manager to bring up its contents.
- Here Look for the string named BootExecute, Double-click it to open and edit its contents.
- Type autocheck autochk /k:C * into the value data field to skip disk checking on C drive.

Note – To skip disk checking on multiple drives add those drive names for example autocheck autochk /k:C /k:D *
And to revert to scanning and checking for disk errors at startup, you’ll need to reset BootExecute to its default value autocheck autochk *
Use the Windows Error checking tool
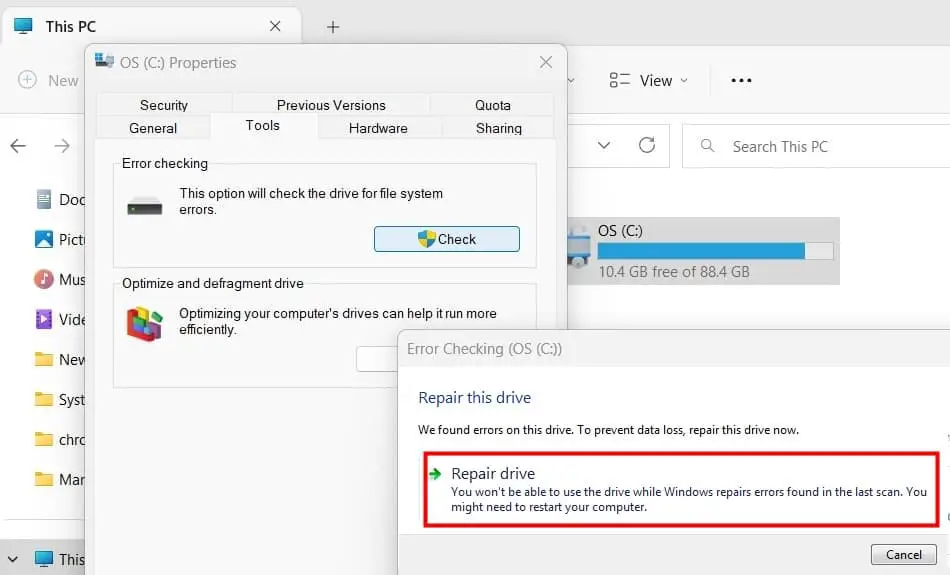
Let’s try to scan for and repair any potential issues with the drive using Windows Error checking tool in drive Properties.
- Press Windows key + E, and navigate to This PC
- locate the drive you looking for repair for example C and right-click it, select properties,
- Move to the Tools tab, and click the Check button on the Error checking section.
If Windows determines that everything is running smoothly, it will suggest that you don’t need to scan the drive.
- Click on repair drive, it may take anything from a few minutes to half an hour, depending on the size and state of your drive
Repair system files using SFC tool
Windows system file corruption also causes different problems on the computer and that may prevent chkdsk tool complete its task and repairing the drive errors.
- Press Windows key + R and type cmd, right-click on the command prompt select run as administrator,
- Type sfc /scannow and press enter key to execute the command
- The command line tool, scan all protected system files and replace corrupted files with a cached copy that is located in a compressed folder at %WinDir%\System32\dllcache.
- Let SFC scan, find and repair any system files that have been corrupted, and reboot your PC once the scanning is complete 100%

Run DISM command
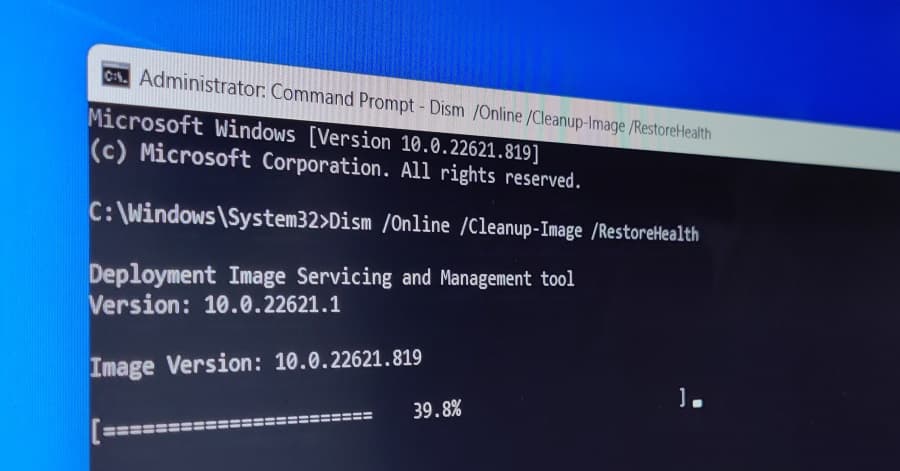
If the system file checker scan results found corrupt files but was unable to fix some of them run the DISM restore health command. DISM (Deployment Image Servicing and Management) tool is used to scan and solve issues of corrupted system files, which could cause the repair drive errors you face.
- Open command prompt as administrator
- Type DISM /online /cleanup-image /restorehealth and press enter key to execute the command,
- This will scan and patch faulty files in the component store of the Windows system image, allowing SFC to function correctly.
- This can take around 10-15 minutes up to a few hours to finish depending on the level of corruption.
Run CHKDSK command in Safe Mode
After running the sfc and DISM commands again run the CHKDSK command to scan the drive and repair potential errors.
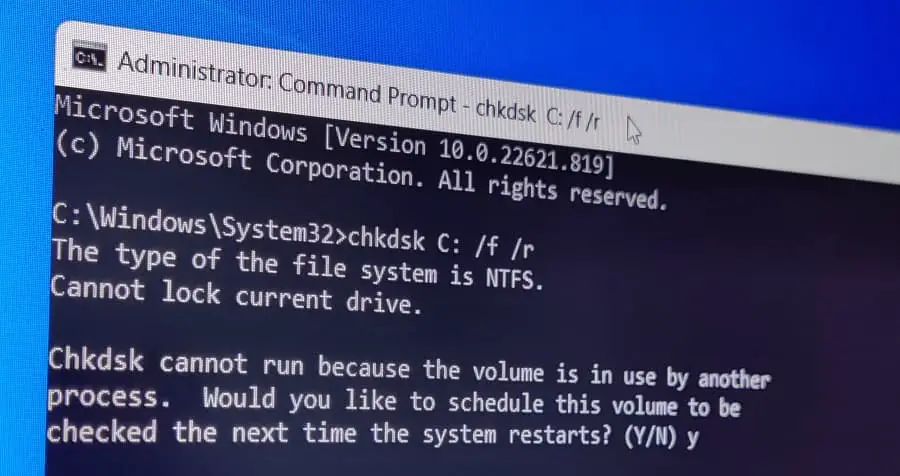
- Press windows key + R and type cmd, right click on command prompt select run as administrator,
- Type command chkdsk C: /f /r and press enter key
CHKDSK scans the disk for file system errors, C: is the drive to scan for errors and /F switch Fixes errors on the disk where /r switch Locates bad sectors and recovers readable information.
- Type Y and press enter key when it prompts to schedule scan disk drive on the next start.
- Close all programs on your computer and reboot PC, this will start scanning for disk drive errors and try to repair them.
- After the process completes, restart your PC and check to see if disk error problem is resolved.
Run Repair-Volume -DriveLetter command in Safe Mode
Also, you can use PowerShell to run the command Repair-Volume -DriveLetter to scan and fix the hard disk errors.
- Open Powershell as administrator,
- Type the command Repair-Volume -DriveLetter C -OfflineScanAndFix and press enter key,
- Wait for 100% complete the scanning process.
- After that restart windows, This helps them to fix windows 10 scanning and repair drive c stuck at 100.
Did the above solutions help repair disk drive errors on windows 11? Let us know on the comments below.
FAQ:
- How Long Does It Take A PC To Repair Drive Errors?
A PC may take between 10 to 15 minutes to repair driver errors. However, this is affected by the state of the disk or its size.
- What Is The Difference Between CHKDSK And SFC?
The difference between CHKDSK and SFC is in what they do. You use CHKDSK to fix disk issues in Windows.
- How Do I Fix Disk Errors In Windows 11?
The quickest way to fix disk errors in Windows 11 is to run CHKDSK with the /F switch.
Also read:
- Use of CHKDSK, SFC, and DISM diagnostic tools in windows 11
- Windows 10 Photos app not working File system error -2147219196
- Solved: Kernel Security Check Failure error In Windows 11
- Solved: Print Spooler Keeps Stopping on Windows 11
- Computer Won’t Wake Up From Sleep on Windows 11
- 4 Ways to Update Device Drivers in Windows11 or windows 10