Sometimes you may experience serious issues with Windows 11 and it didn’t allow troubleshoot the problems. Such as after a power failure, installing new software or games windows 11 restarts automatically, PC won’t boot or display a blue screen error at startup. System file corruption, driver incompatibility or software conflict are common reasons behind this problem. And you can start your PC in safe mode, then try to repair system files, update device drivers or remove the conflict programs to fix such problems. Here this article explores, how to fix Windows 11 problems in safe mode.
What is Safe mode on Windows?
Safe mode is a diagnostic mode on Windows 11, that allows you to boot up your computer with a minimal set of drivers and services, which can help to isolate the cause of problems. This can be very helpful to fix a variety of problems with your Windows computer. Such as having trouble starting your device, Windows 11 won’t boot or frequently restart due to startup issues, virus malware infection, or driver and software conflicts. Also, you can start your PC in safe mode and then run the system file checker and DISM command to repair system files or uninstall problematic software or Windows updates to fix different problems on your computer.
Safe mode designed to help diagnose and fix problems that may be preventing your system from starting normally.
How do I get into Safe mode on Windows 11?
There are different ways you can start Windows 11 in safe mode. If your PC starts normally you can boot into safe mode with a few clicks, if Windows not start normally, you need access to advanced options to start your computer in safe mode.
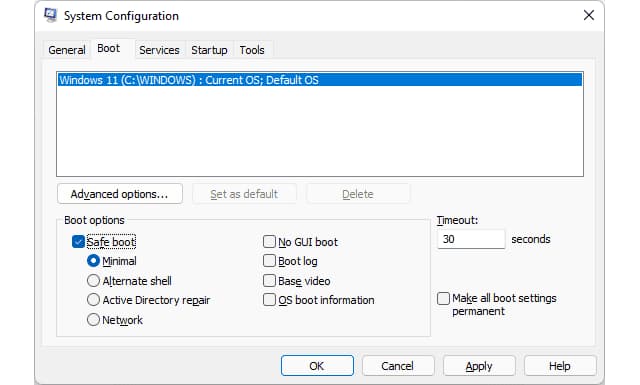
Starting Windows in Safe Mode Using MSConfig
- Press Windows key + R, type msconfig and click ok,
- Move to the boot tab then select safe mode, and ensure the minimal option is selected.
- Also, you can select the network option to enable internet access in safe mode.
- Click apply then ok and restart your PC to get into safe mode windows 11
Use the Start menu to boot Windows into Safe Mode
- Click on the start menu then the power option,
- Hold the shift key on the keyboard then select the restart option,
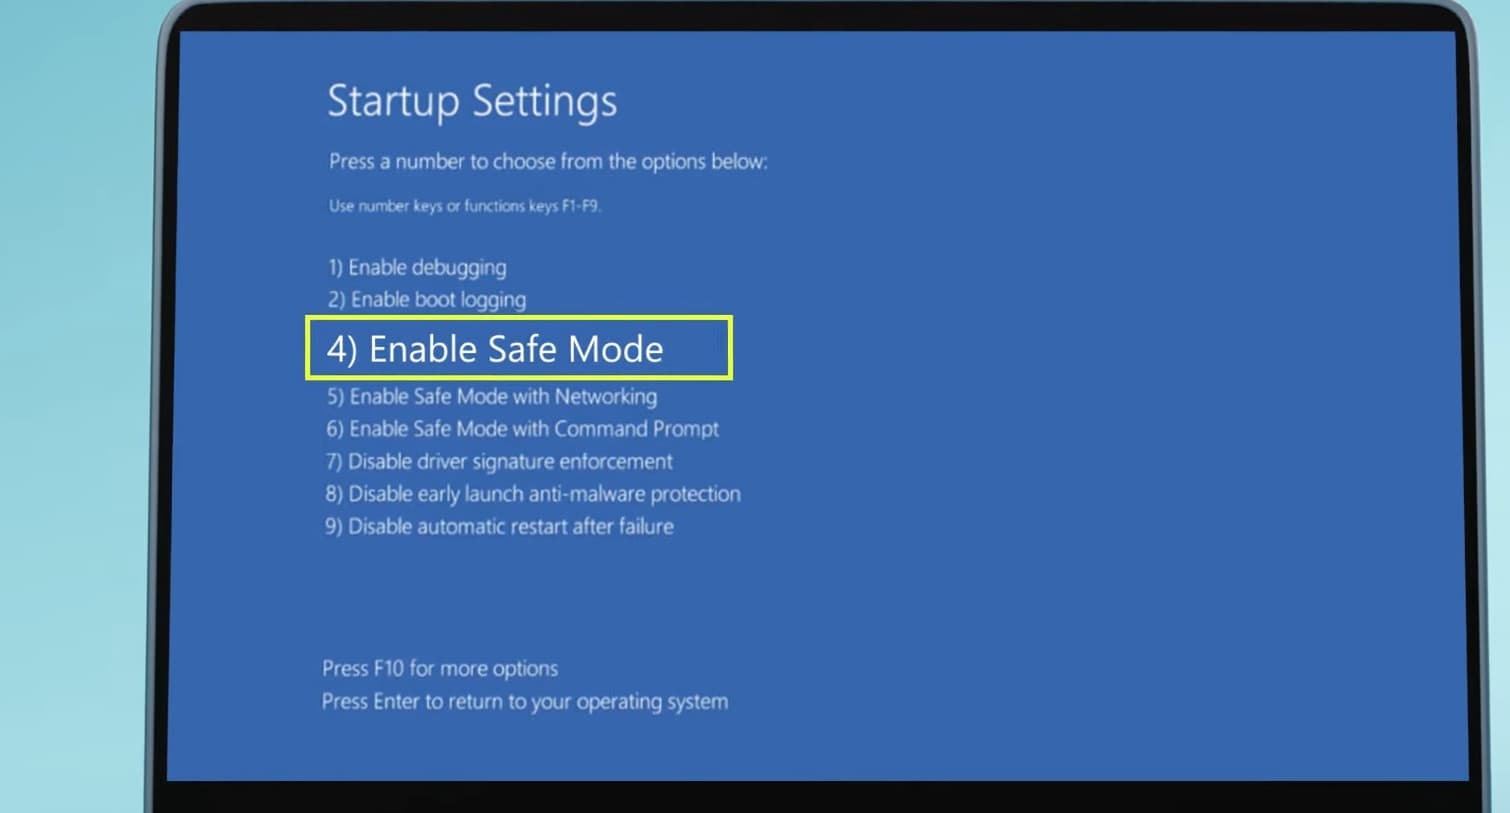
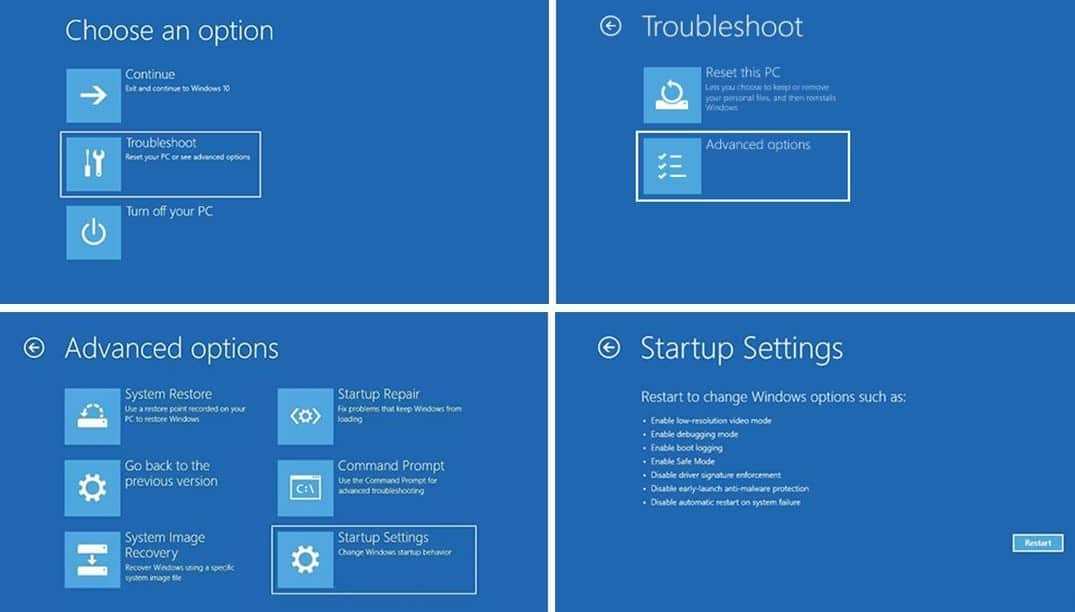
- Go to Troubleshoot then Advanced Options, click Startup Settings and click on Restart
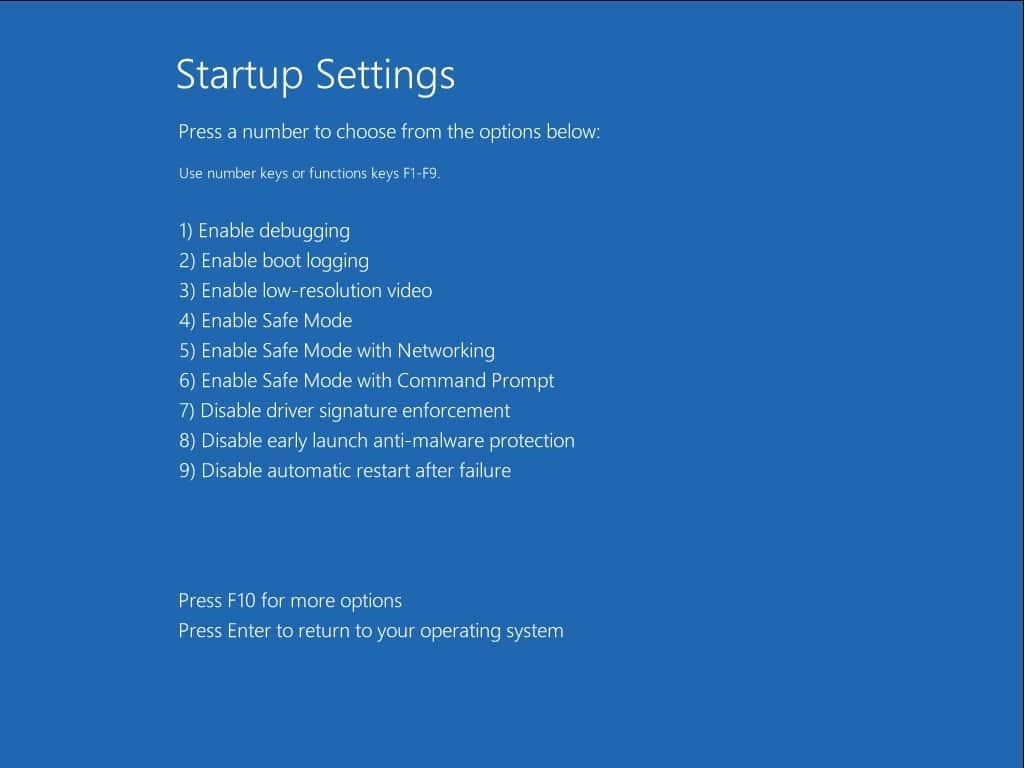
- When you see the Startup Settings screen, press the “F4” key.
Enter Safe Mode using Advanced Startup on Windows 11
If Windows 11 PC won’t start normally, frequently reboots or crashes, then access advanced options using USB media.
- Click on startup settings then restart and finally click on F4 to start Windows 11 in safe mode.
How to Fix Your PC in Safe Mode
Once you are in Safe Mode, you can now begin to repair Windows 11. There are several ways to do this, and we will cover some of the most common methods below.
Uninstall conflicting software
If you notice the problem started after a recent Windows update or driver update or install new application or game on your computer. You can safely remove it on safe mode which probably fixes the problem and allow to start Windows 11 normally.
To uninstall an update on Windows 11
- Open settings using Windows key + I, go to Windows update then update history. Under the “Related settings” section, click Uninstall updates then Click the Uninstall option to remove the update from Windows 11.
To Uninstall driver update on Windows 11
- Press Windows key + X and select device manager, Right click on recently updated driver and select properties. Here click on the Rollback option to revert to the previously installed version of a device driver.
- Or you can locate the driver right-click on it select uninstall to remove the driver.
To uninstall apps and games on Windows 11
- Press Windows key + X and select installed apps, locate the app or game then click the menu (three-dotted) button on the right side, and select the Uninstall option to remove it from Windows 11.
Repair system files on Windows 11
Corrupted system files on Windows 11 are another common reason may cause different problems or the computer fails to start. Run the System File Checker (SFC) and Deployment Image Servicing and Management (DISM) utilities to scan and repair any corrupted system files.
- Press Windows key + S, type cmd and click on run as administrator,
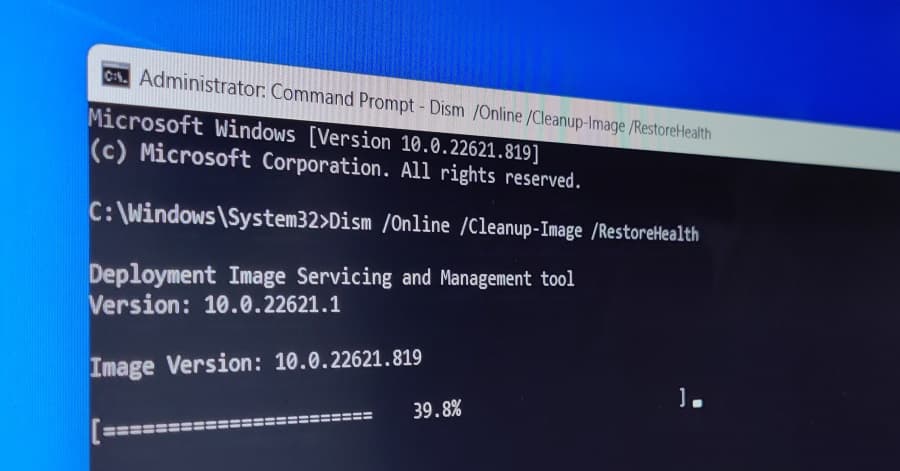
- Once the command prompt opens, run DISM command DISM /Online /Cleanup-Image /RestoreHealth
- The DISM command download and replace any corrupted files from Windows Update or from a specified location, such as a Windows installation media
- Next run sfc /scannow command to scan all protected system files and replace any corrupted files with a cached copy that is located in a compressed folder at %WinDir%\System32\dllcache.
- After the repair process is complete, restart your computer to ensure that the changes take effect.
Disable fast startup
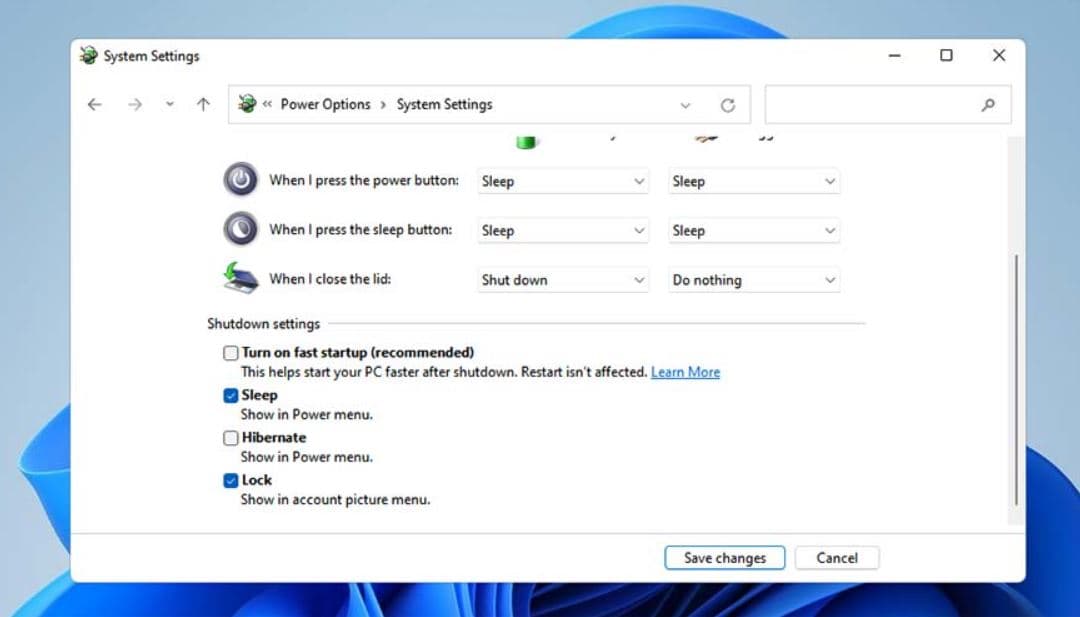
Fast Startup is a feature enables Windows 11 systems to boot up quickly by using hybrid shutdown and hibernation methods. But sometimes this feature cause issue with certain hardware or software and prevent Windows start normally.
- Press Windows key + R, type powercfg.cpl and press enter key
- click on “Choose what the power buttons do” from the left pane then Change settings that are currently unavailable
- And finally uncheck the “Turn on fast startup (recommended)” option. Click on “Save changes.
Reinstall display driver
If your PC crashes frequently but is stable in safe mode, this is frequently a sign of a driver issue. Try to download and install fresh versions from your manufacturer’s website in Safe Mode. Or uninstall the current driver from the device manager and let Windows install the default driver.
- Press Windows key + X and select Device Manager,
- Expand the display adapter, right-click on the graphics driver select uninstall option.
- Click uninstall again, when it prompts for confirmation.
- Once done, reboot Windows 11, this will automatically install the default driver and start your PC normally.
- Or you can visit the Devie manufacturer site to download and install the latest version of the graphics driver.
Perform system restore
If your computer has recently been functioning properly but is now unresponsive, then you and perform a system restore to revert settings to previously known-good condition. This can be helpful if you recently installed a new program or driver that is causing problems.
- Press Windows key + R, type rstrui.exe and click ok
- Select a restore point from the list of available restore points.
- Click on Next and then click on Finish. Your computer will now restart and begin the System Restore process
In addition, if you suspect that your system is infected with malware, you can run a full scan in safe mode to detect and remove any malware present on your system.
Well if Windows 11 fails to start in safe mode, and crashes frequently Use Startup Repair to Repair Windows 11.
Also read:
- How to fix Windows 10 startup problems on your PC or Laptop
- Windows 10 stuck on repairing disk errors? Here is how to fix it
- Solved: Network adapter not working Windows 11 (Error 39)
- Internet not working after Windows 10 update (8 solutions)
- 10 ways to Speed up Firefox Browser and Make it faster than ever
