Experiencing audio-related issues after the Windows 11 update? If you are not getting desired sound quality, low volume after the Windows 11 update, or Your Laptop Has No Sound at all, resetting audio settings on Windows 11 can solve most of these issues. In this article, we will guide you on how to reset audio settings on Windows 11. We will also provide additional tips to troubleshoot audio problems in Windows 11, in case resetting the audio settings does not solve the problem.
How to reset audio settings on Windows 11
There are different options for resetting or restore the default audio settings on Windows 11, depending on the issue you are currently facing. For example, you can Reset Sound Devices and Volumes for All Apps to Their Defaults, Reset Windows Audio Services or Reset Audio device Drivers and system sounds on Windows 11.
Reset all your volume levels
Let’s first reset the sound and volume settings for apps.
- Press Windows key + X and select settings,
- Go to the system then the sound option on the right,
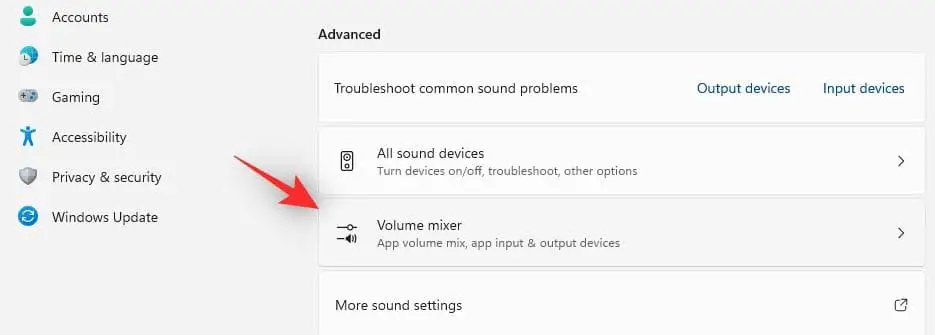
- Here under the Advanced section select Volume Mixer,
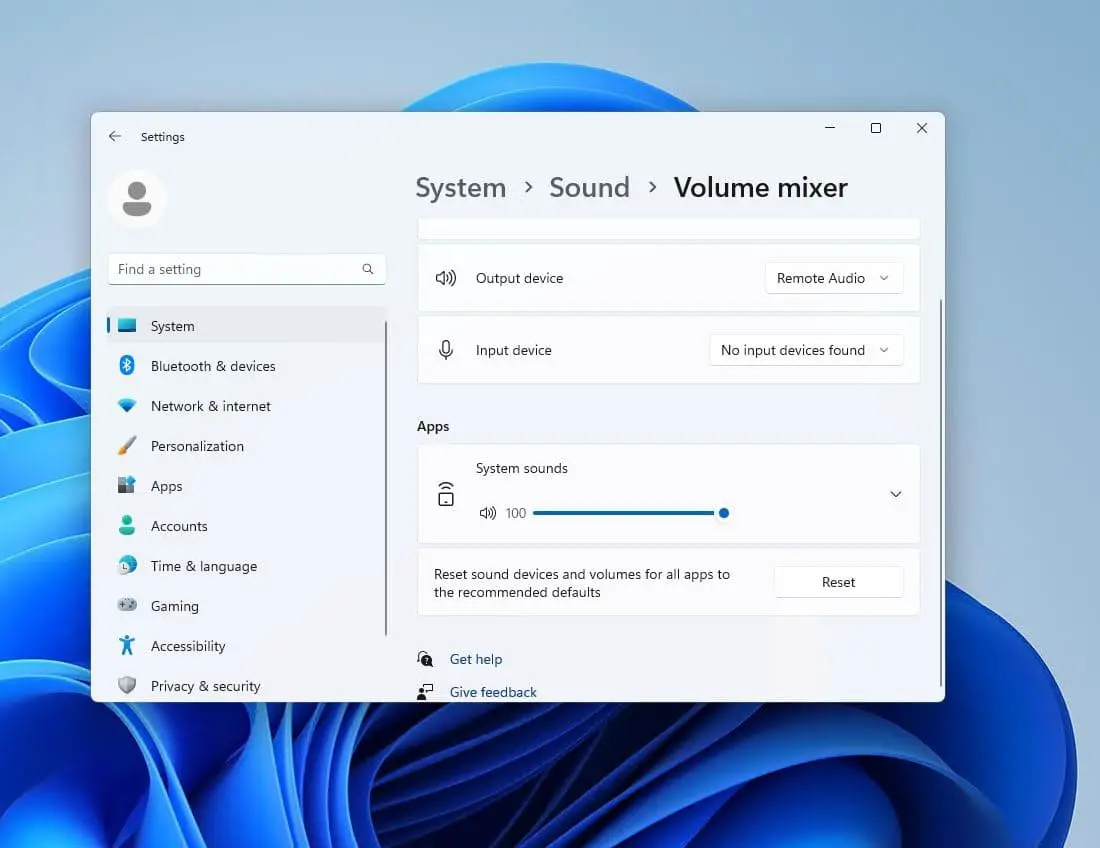
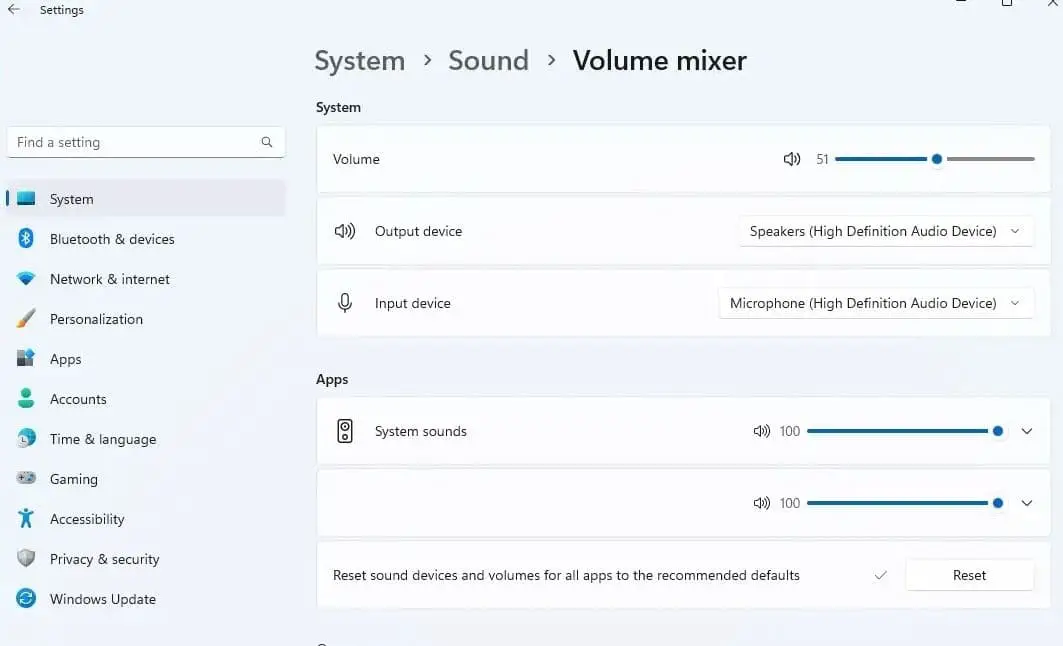
- Scroll down to the bottom of this page and click the Reset button next to the Reset sound devices and volumes for all apps to the recommended defaults option.
- This will instantly reset all audio settings on Windows 11.
Reset Individual Sound Device Settings
You can also reset individual sound device settings to their default by following the steps below.
- Press Windows key + X and select settings
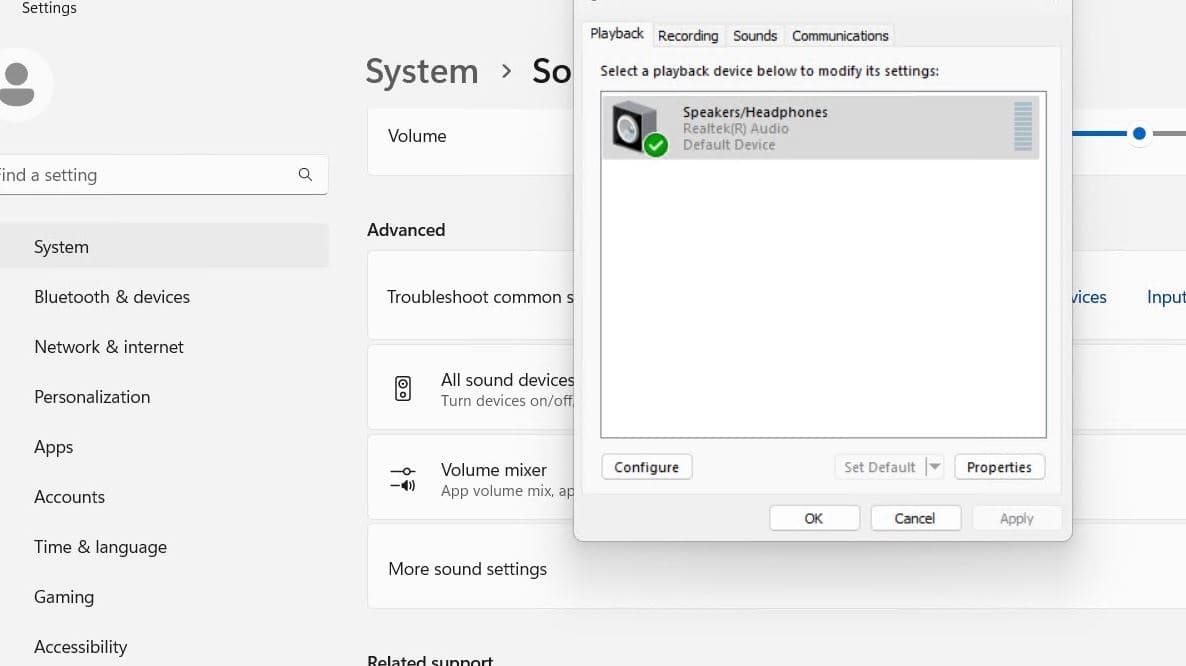
- Navigate to the system then Sound, Under the Advanced section select the more sound settings option
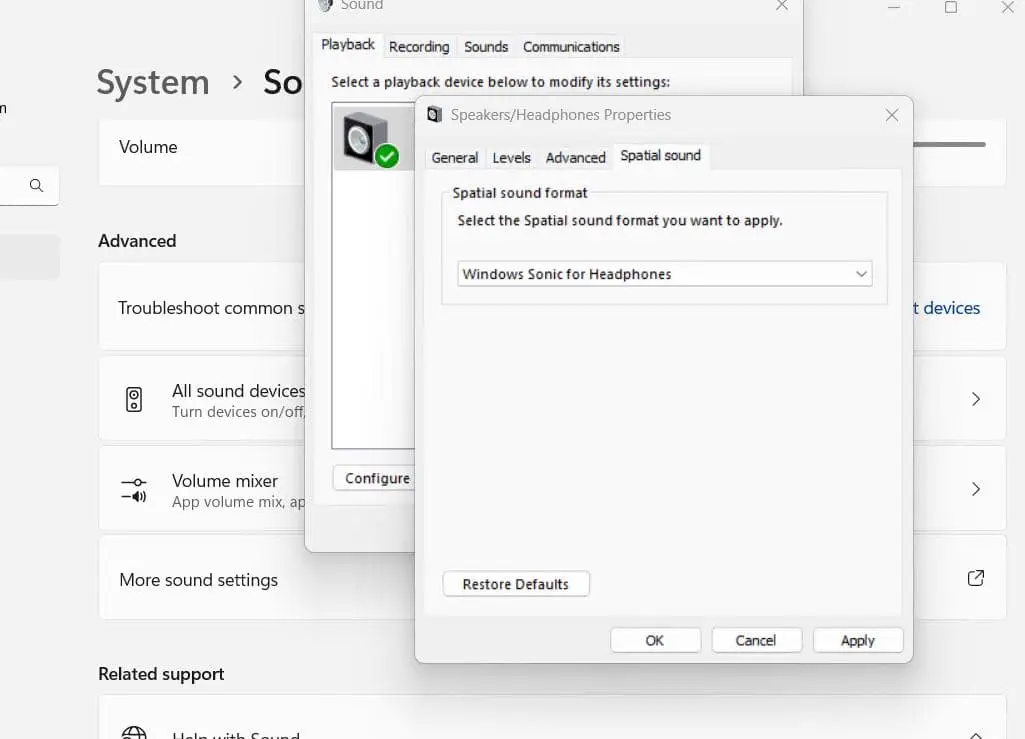
- Ensure the Playback tab is selected, Select the speaker from the list and click the Properties button
- Move to the Advanced tab from the device’s Properties window and click the Restore Defaults button.
- Next, select the Enhancements tab, then click the Restore Defaults button.
- Click the Spatial sound tab, then Click the Restore Defaults button.
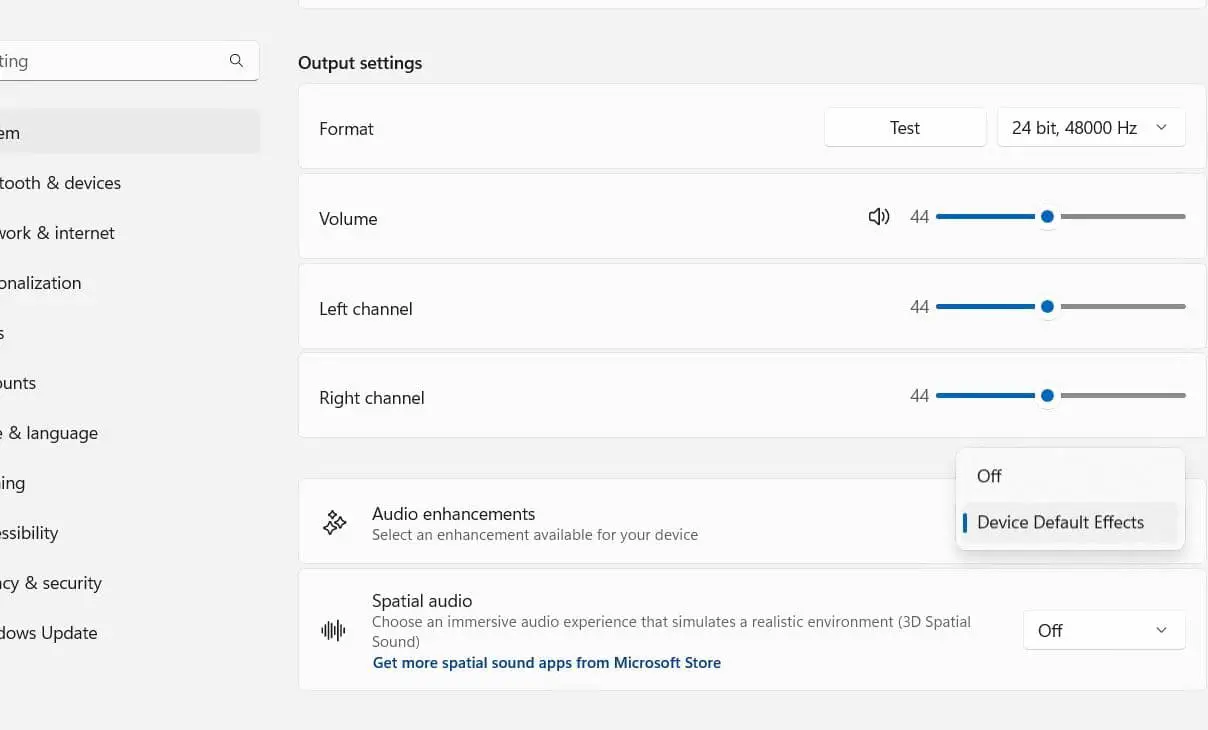
In addition, Open Windows 11 settings Go to System > Sound > Output and click the Speakers option for the appropriate device. In the Sound section, set all the volume levels to the same level and ensure the Audio enhancements option is set to Device Default Effects.
Reset System Sounds on Windows 11
- Open Settings, using the Windows key + I,
- Head to System > Sound > Advanced and select More sound settings from the list.
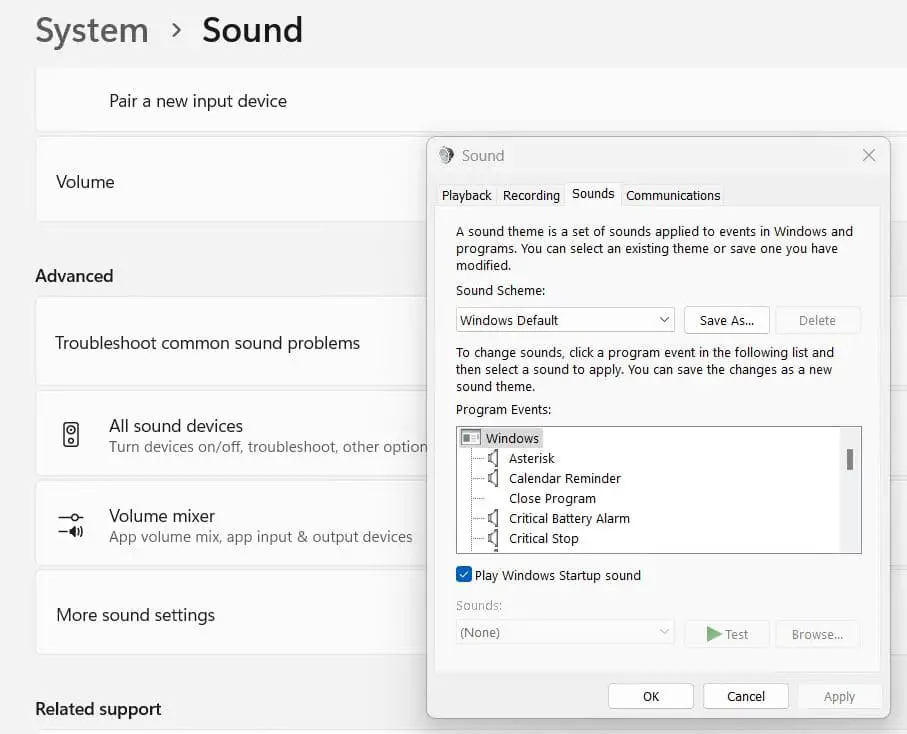
- When the Sound window appears, select the Sounds tab at the top.
- Select Windows Default from the dropdown menu under the Sound Scheme option.
- Click Apply and OK to verify the Windows Default system sound scheme.
Restart the Audio driver in Windows 11
Again audio drivers are another common reason that probably causes Audio issues on your computer. You could try restarting the audio driver, there is a high probability that your issue will be resolved.
- Press Windows key + X and select the device manager
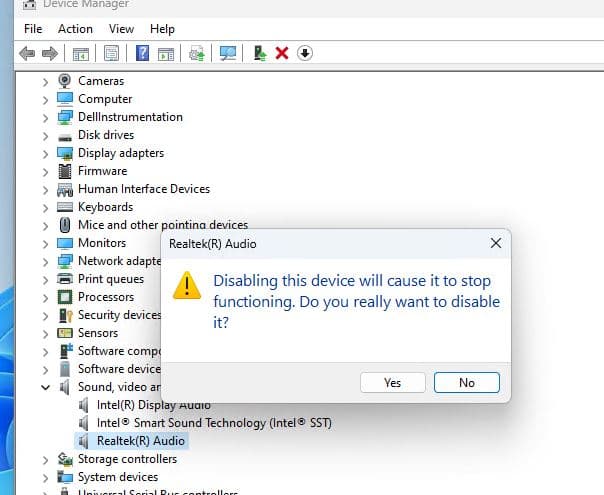
- Locate and expand Sound, video and game controllers, right-click on the audio driver select disable
- Click yes when it prompts for confirmation and reboot your computer
- Again open the device manager, and right-click on audio driver this time select the enable driver option
- Now check if the audio issue is resolved on Windows 11 PC.
Restart the Audio service
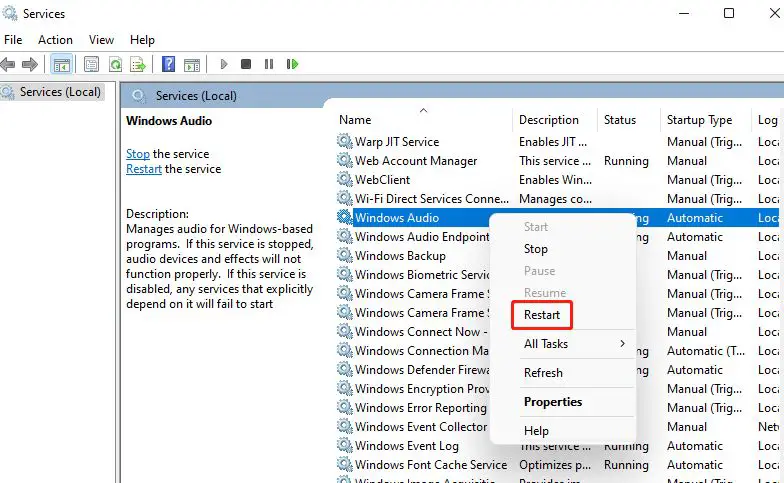
- Press the Windows key + R, type services.msc and click ok to open the services console,
- Locate the audio service, right-click on it select the restart option
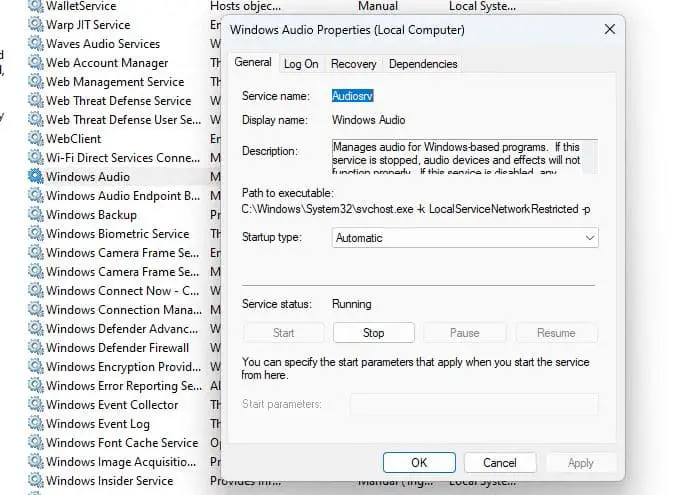
- In addition, if the service is not started, right-click on audio service select properties,
- Here change the startup type automatic and click start next to the service status.
Run the audio troubleshooter
If resetting audio settings didn’t fix the problem on your computer, still no audio on your Windows 11 Laptop. you should run the built-in audio troubleshooter that automatically diagnoses and automatically fix related problems on your PC.
- Press the Windows key + I to open the settings
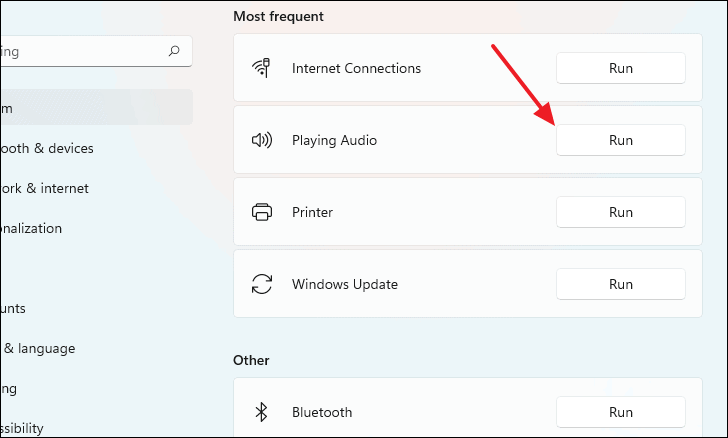
- Go to the system then troubleshoot and click on other troubleshooters,
- This will display a list of available troubleshooters, click Run next to the Audio option
- This will start diagnosing audio problems, check related drivers, and services running and try to fix them automatically.
- Once the troubleshooting completes reboot your PC and check if the audio problem is solved.
Reinstall the Audio driver on Windows 11
An outdated or incompatible audio driver on Windows 11 is another common reason behind low volume or no sound problems on your computer. And update or reinstalling the audio driver with the latest version most probably fix the problem for you.
- Press Windows key X and select Device Manager
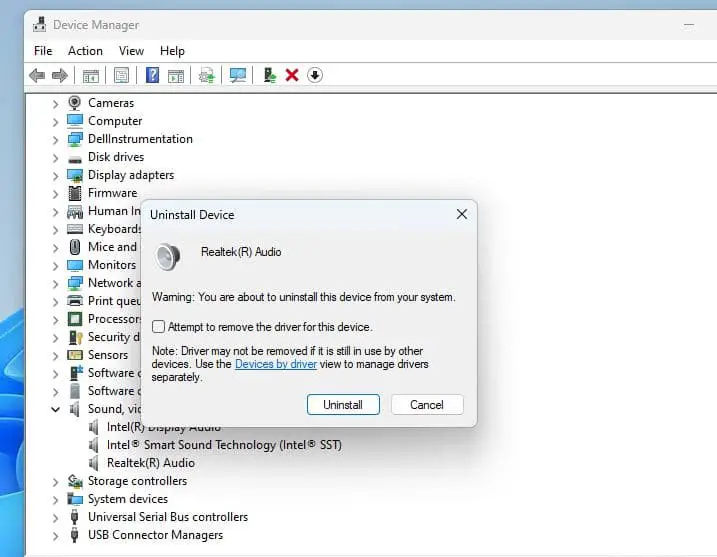
- Expand Sound, video and game controllers, right-click on the audio driver select uninstall
- Click uninstall again, when it prompts for confirmation, and reboot your PC.
This will automatically install the default audio driver on your computer. Or you can visit the device manufacturer’s site to download the latest audio driver for Windows 11 and install it.
Also read:
- Sound not working “Audio device is disabled” on Windows 11/10
- The Importance of Creating Strong Passwords (explained)
- 5 Reasons Why Windows 11 Update not Showing on Your PC (with Solutions)
- Windows 11 settings you should change now for a better user experience
- Laptop Battery Draining Faster Than Usual? Here are Battery saving tips for Windows 11
- Solved: Minecraft won’t launch or stuck on the loading screen | 2024 Guide
