The System file checker or SFC /scannow command line utility scan your windows system files for errors and try to repair them. This is a very useful utility we recommend run whenever you experience problems with windows 11. If due to any reason, system files are corrupted or missing you may experience windows 11 freezes, very slow to respond or take longer than expected time to shut down or restart. And in such situations running sfc /scannow command is very helpful that scans all protected system files, and replaces corrupted files with a cached copy that is located in a compressed folder at %WinDir%\System32\dllcache. But sometimes you may notice sfc /scannow stuck repair or sfc scannow not working with error Windows Resource Protection could not perform the requested operation. Here we have a few workaround appy to fix the problem on windows 11.
Why is SFC Scannow Not Working?
Overall system file checker is a great tool to solve a large spectrum of problems. But sometimes you may notice the SFC scannow stuck for a long time or it freezes the entire system. You may get receive an error message Windows resource protection could not perform the requested operation. Or the SFC scan fail to repair corrupted system files “windows protection found corrupt files but was unable to fix some of them”.
Usually, the System file checker utility checks the integrity of Windows system files and repairs them if required. But there are multiple factors including a virus or malware infection, a hardware failure, lack of permission or a problem with windows images prevents SFC to complete its job. As a result, sfc /scannow stuck repair or sfc scannow unable to repair some files.
How to Fix SFC Scannow Not Working
If sfc scannow not working, Make sure to open the command prompt as administrator and run sfc /scannow command. The next thing you need to check or Start the Windows Modules Installer Service. You can start windows 11 in safe mode and perform SFC/scannow to get better results. Also running DISM restore health command repair the system image and enable SFC to complete its job.
Run SFC scannow as administrator
- Press Windows key + S and type cmd, Right click on the command prompt select run as administrator,
- Click yes when UAC (user access control) ask for permission,
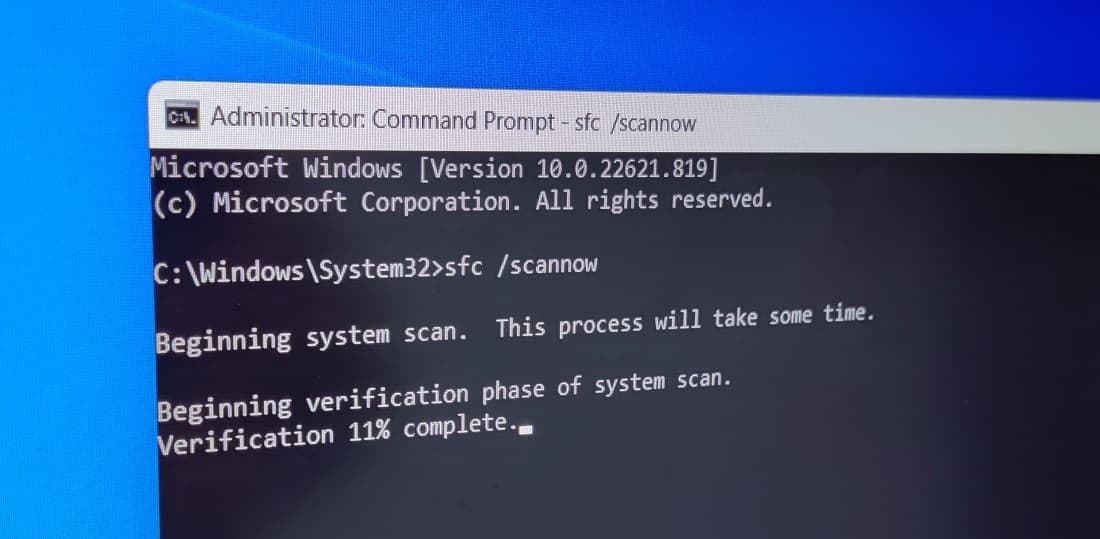
- Now type sfc /scannow and press enter key to execute the command
- Let the scanning complete 100%
If the scanning get stuck or the SFC scan result found corrupt files but was unable to fix run the command in safe mode.
Perform sfc scannow on safe mode
Windows Safe Mode is probably the best method to check for a possible system errors.
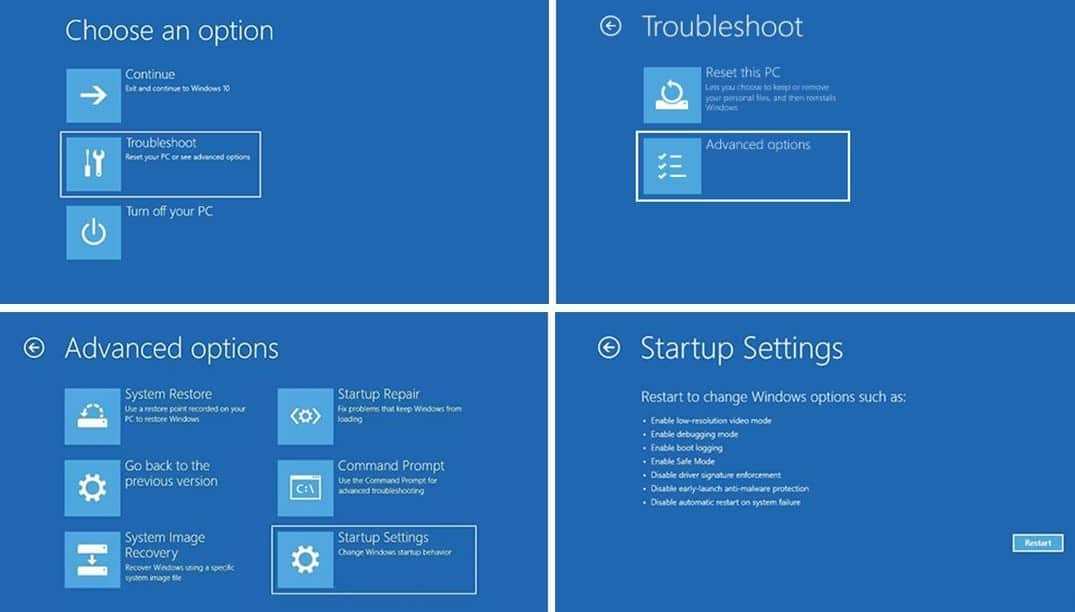
- Hold down the Shift key, click the Power icon and then Restart.
- Next Select Troubleshoot, and then Advanced options.
- Click Startup Settings, and then Restart. Your computer will turn off and on again.
- And finally, Press F4 to start your computer in Safe Mode, or F5 to start Safe Mode with internet access.
- Now when your computer starts in safe mode Open the command prompt as administrator,
- Type sfc /scannow and press enter key to execute the command
- Let the scanning complete and repair corrupt system files on your computer
- Once it completes 100% restart your PC
Start Windows Modules Installer
If due to any reason, the Windows Module Installer service is disabled or not running on your computer, running sfc scannow result Windows Resource Protection could not perform the requested operation. And you may need to enable the Windows Modules Installer service in order for the SFC scan to function properly.
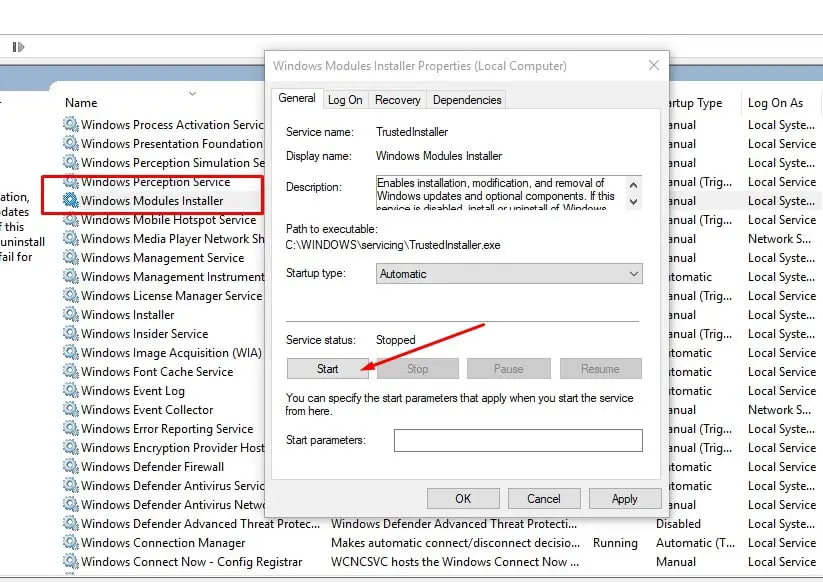
- Press Windows key + R, type services.msc and click ok
- Scroll down to locate Windows Modules Installer service Right click on it select restart,
- If the service not running right click on it select properties, change its startup type automatic and start the service next to service status,
- Click apply and ok to save changes.
Also, you can run the command net start trustedinstaller to start the service on your computer.
Now again open the command prompt as administrator and run sfc /scannow command,
Checker if there is no more error “Windows Resource Protection Could Not Perform the Requested Operation”.
Run DISM restore health command
If the system file checker failed to fix corrupt files or results Windows Resource Protection found corrupt files but was unable to fix some of them. In such situations first, you need to Repair Your System Health Using DISM Command that enables SFC to complete its job.
- Open command prompt as administrator,
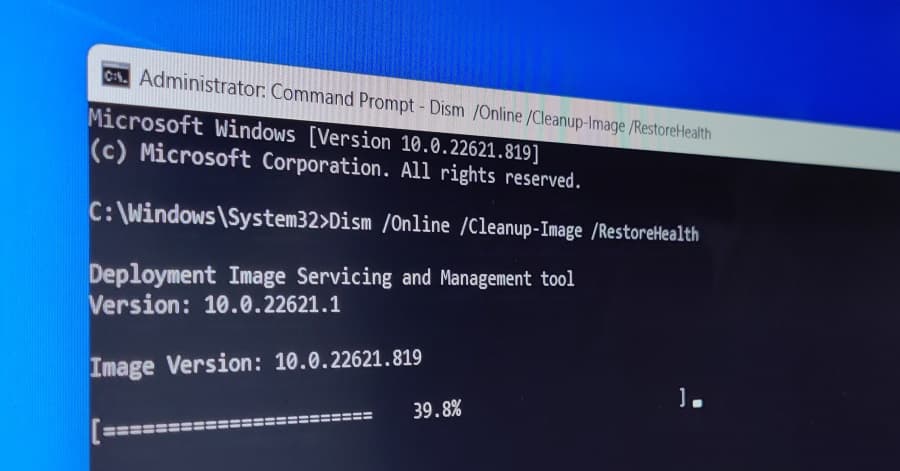
- Run command dism /online /cleanup-image /restorehealth
- Running DISM command services Windows images and repairs your Windows installation by downloading actual replacement files from Windows’ online servers.
- You need to wait for several minutes until it checks and repairs the corrupt files.
DISM scans and patches faulty files in the component store of the Windows system image, allowing SFC to function correctly.
- Once the scanning completes 100% run the sfc /scannow command and check if this repairs all corrupt system files successfully.
Check the hard drive for errors
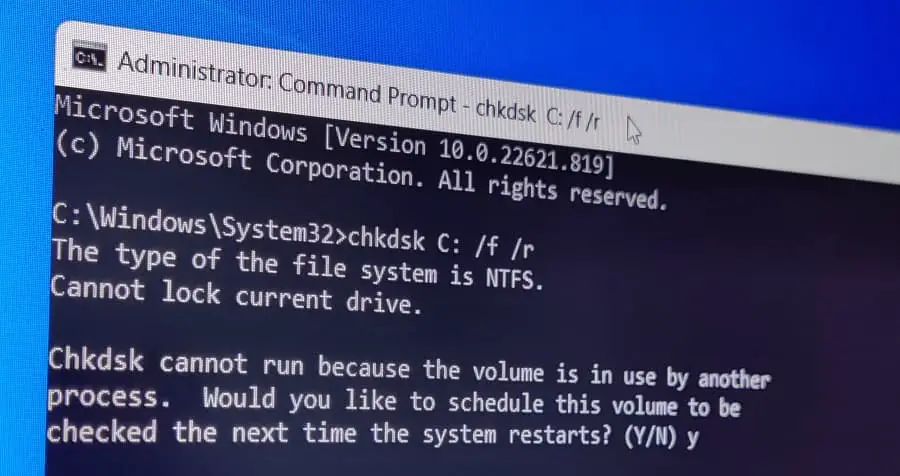
A problem with the disk drive or bad sector on the hard drive is another reason behind system file corruption. And in such cases, you need to repair disk errors using chkdsk command before fix system files using the SFC command.
- Open command prompt as administrator,
- To scan and repair the disk drive errors run the command chkdsk C: /f /r
- Type Y and press enter key when it will prompt the drive in use and schedule the check drive on the next restart,
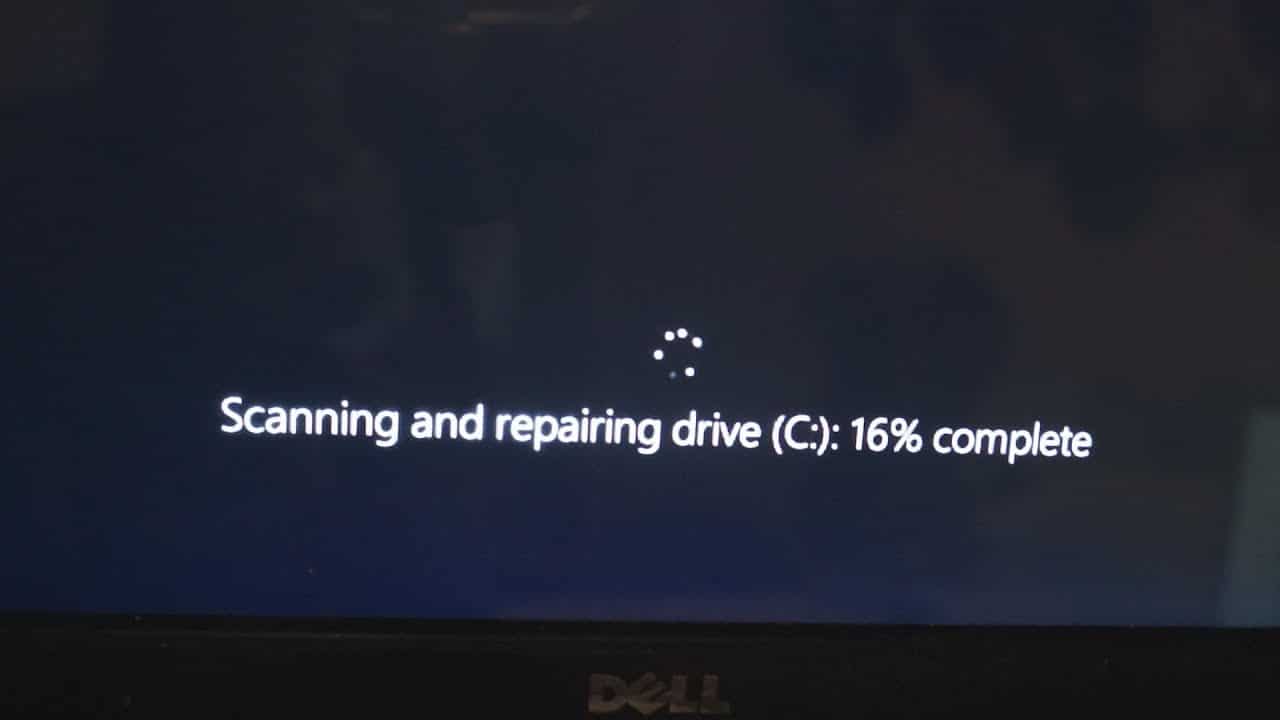
- Close everything and reboot your PC to scan and repair the drive errors.
You will have to wait for several minutes until the bad sectors of the disk are recovered
Once it’s complete, start windows normally. Now again open the command prompt as administrator and run sfc /scannow command.
Perform a System Restore
- Start your computer in Safe Mode
- Press Windows key + R, type rstrui and click ok
- The System Restore window will open. Click Next to proceed.
- Select the Restore point you wish to return to and click Next.
- Follow the on-screen instructions to complete the process.
Perform startup repair
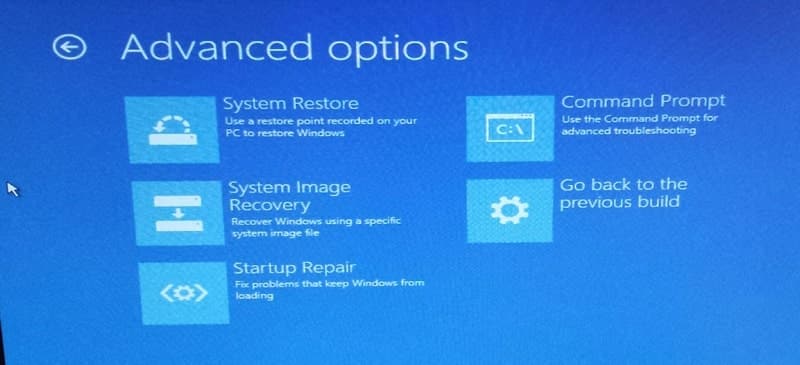
Startup Repair is a Microsoft Windows feature that can fix problems with files that are required to boot the operating system. If sfc scannow stuck repair or not working access advanced options and perform startup repair.
- Hold down the Shift key, click the Power icon and then Restart.
- Next Select Troubleshoot, and then Advanced options.
- And finally, click on the startup repair option, it scans your computer or device for system issues (corrupt system files, invalid boot files) and then tries to fix the problem.
If none of the above solutions work, still sfc scannow stuck hours, the last option is to reinstall Windows 11. This way, all your system files will be replaced, and the SFC scannow command will definitely work.
Also read:
- Use of CHKDSK, SFC, and DISM diagnostic tools in windows 11
- 5 ways to fix PFN LIST CORRUPT Error On Windows 11
- How to fix windows 11 common problems (Step by Step Guide)
- Windows 11 Update won’t download or failed to install [solved]
- 8 Ways to fix Windows Explorer High CPU Usage on windows 11
- Windows 11 Start Menu Not Working? 9 solutions to fix it
