Have you noticed Skype for Windows 10 frequently and randomly stops responding and the only way to close & re-open it again? You are not alone a number of users report Skype not working After upgrade to Windows 10, The app suddenly stops responding to Windows while chatting or making a video call, sometimes cutting off video calls and things, which is rather annoying! If you are also struggling with similar problems here some solutions you may apply to get back Skype working normally.
Skype not working in windows 10
Apply Solutions below If you are using windows 10 building Skype app
- First of all check and make sure both the microphone and camera are working,
- You have a stable Internet connection to make call or video call via skype app,
- Disconnect from VPN if configured on your PC/Laptop
Check Microphone & camera permissions
Let’s check the skype app has permission to use the microphone & Camera for making video calls.
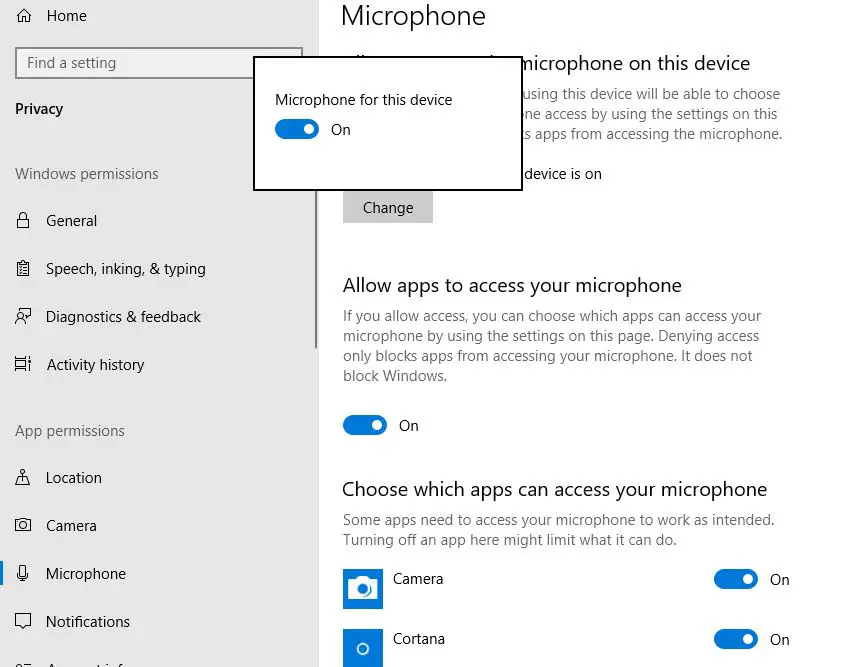
- Open the Start Menu, select Settings then click Privacy.
- Go to Microphone and enable “Allow apps to access the microphone,”
- Then go to Camera and enable “Allow apps to access camera hardware.”
Reset skype app
Let’s follow the steps below to reset the skype app to its default setup that make the fresh new install and probably fix if there any glitch causing skype not responding.
- Open settings using keyboard shortcut Windows + I,
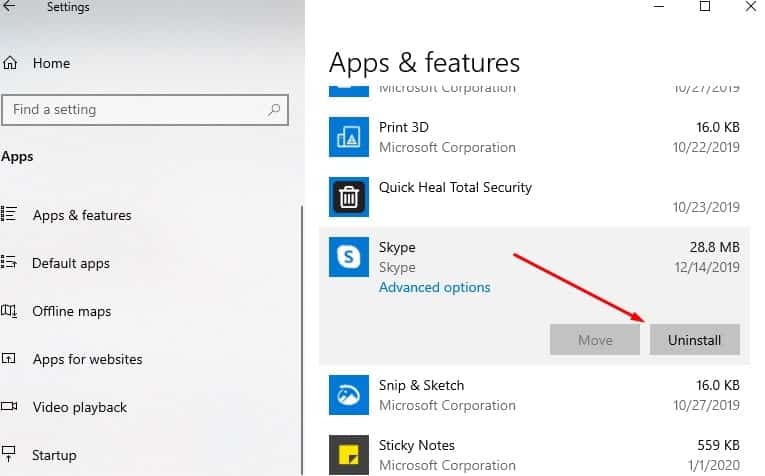
- Click on Apps then Apps & Features
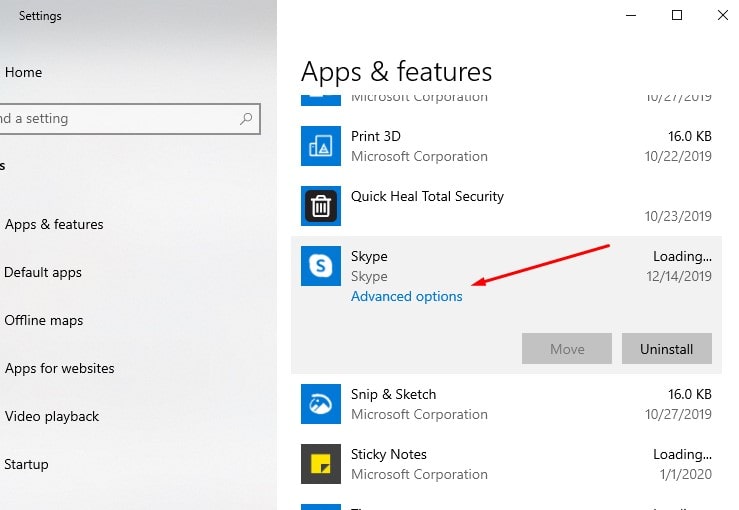
- scroll down locate the skype app, click on it,
- Now click on the Advanced options link (Refer to the image below)
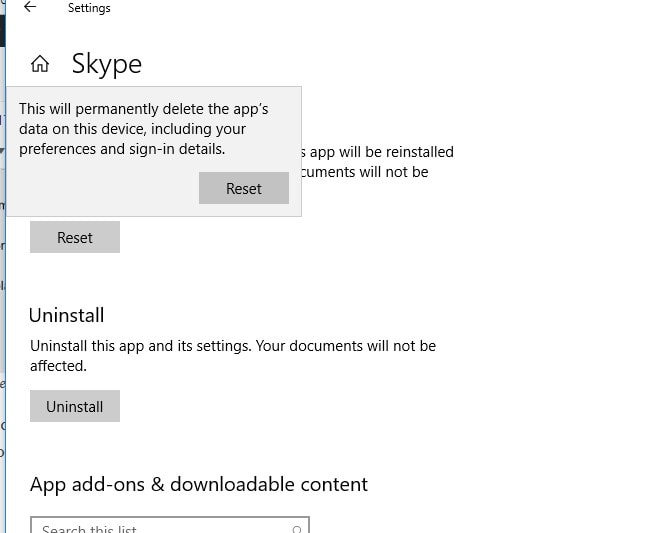
- This will open a new window, scroll down and locate the Reset option then click it.
- When you click on it warns “this will delete apps data include singing details ” again click Reset.
Reinstall Skype App
If reset Skype didn’t fix the problem the only way left it to uninstall and reinstall the skype App.
- Again open settings -> Apps -> Apps & Features
- Locate select skype app and click on it,
- Here you will get the option to uninstall the app, click it and follow on-screen instructions.
- Once done restart your PC
- Now open the Microsoft store search for skype and install the app.
- Log in with your credentials and check the skype app working properly without any problem or error.
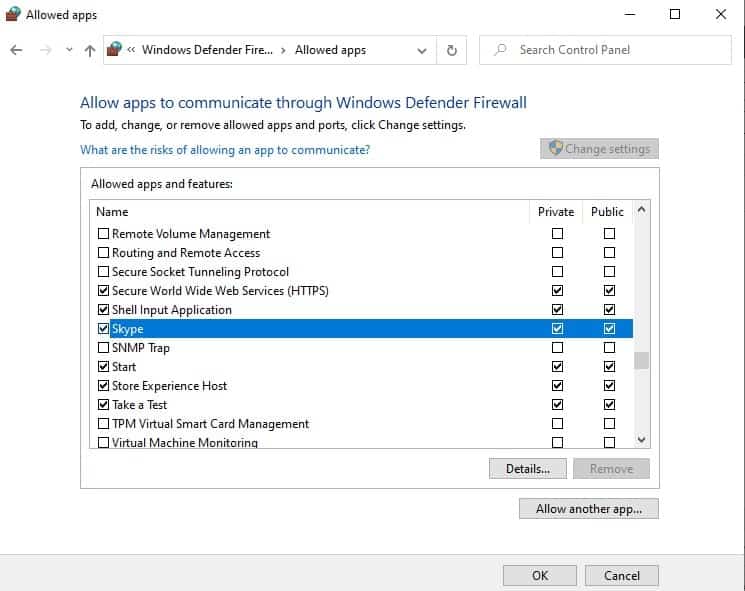
Additionally, you can open the Windows defender firewall -> Allow app or feature through windows defender firewall. And check Skype allowed for both private and public networks.
Apply Solutions if you are using the Skype app desktop version, Or you are using Skype on Windows 7 or 8.1
First of all Upgrade Skype to the latest version, To do this
- Open Skype.
- Click Help and then Check for updates.
Try reinstall the app
- Press Windows + R, type appwiz.cpl and click ok.
- This will open programs & features,
- Here right-click on the skype app and select uninstall.
- Restart windows and on the next login visit skype official page and download and install the latest Skype version.
Reset network configuration
Also, Open the command prompt as administrator and perform the command below to reset network configuration to make sure the network & internet connection not causing Skype to working properly
- ipconfig /release
- ipconfig /renew
- netsh winsock reset
- netsh int ip reset
- ipconfig /flushdns
- ipconfig /registerdns
After that close the command prompt and restart the windows. On the next login open skype and check there is no problem with the skype app.
Also, Read
- 10 Tips to Free Up RAM on Your Windows 10 Computer
- Screen goes black when playing games on Windows 10? Try these solutions
- This site can’t be reached “err_connection_reset” Chrome windows 10
- Solved: Can’t download Apps or Games from Microsoft store windows 10
- How to Share Files and Printers Between Two Windows 10 Computers
