With the latest Windows 11 23H2 Microsoft introduced several refinements to the Start menu. Make it easier to find and launch apps, include two new layouts for the Start menu, bring the ability to create folders to organize your apps in groups and more. But bugs are still present there and you may notice the Windows 11 start menu not working. Few users report start menu freezes up and is unresponsive, and other times it won’t open at all when click the Start Menu button. This issue can be related to random and temporary bugs, Or Windows system files corrupted that make the process unresponsive or freeze. Here in this article, we have mentioned the best possible solutions to troubleshoot the Windows 11 start menu not working problem.
Windows 11 Start Menu Not Working
Corrupted system files to bouched Windows updates or problems with user account profiles or third-party app conflicts are some common reasons why Windows 11 start menu not working. Relaunching Windows Explorer or reboot your computer is very effective to fix the problem. Also, you can run the start menu troubleshooter, use SFC and DISM restore health commands to repair the system files and fix the start menu problem on Windows 11.
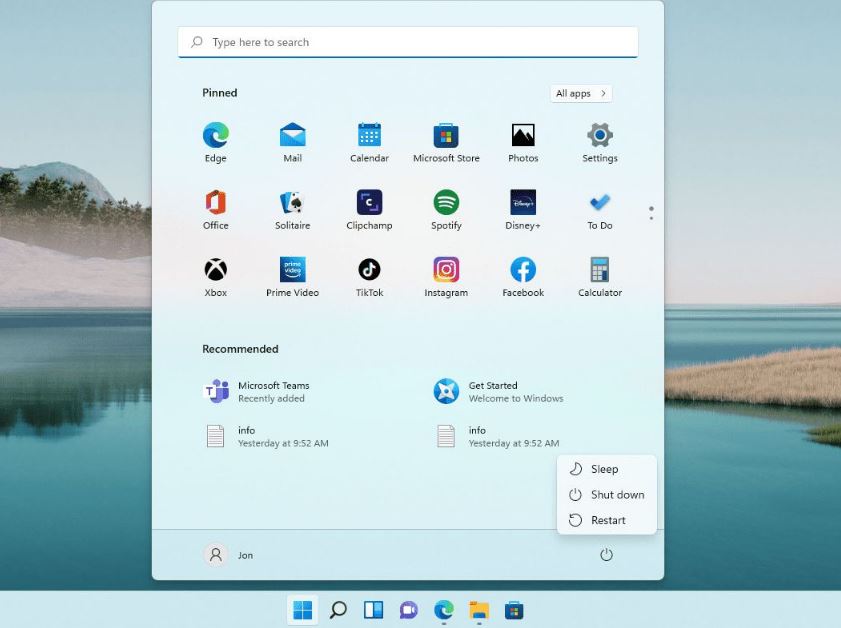
Let’s first restart your computer to see if the problem is fixed. When you restart your computer it refreshes the operating system, and all related services, and clears minor problems that may cause the Windows 11 start menu stuck or not respond.
- Press Alt + Ctrl + Del and select the Power icon at the bottom right corner then Click on Restart.
Restart StartMenuExperienceHost
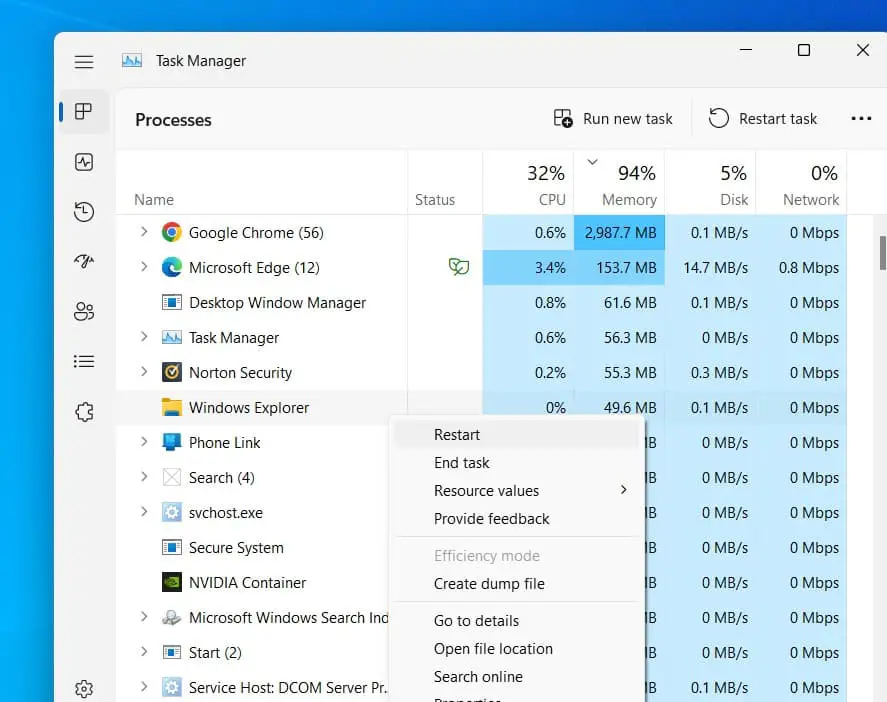
Relaunching Windows Explorer is one of the most popular options that help fix the start menu or taskbar not responding problem on Windows 11. It’s a temporary solution but allows us to apply the next solutions and fix the Windows 11 start menu problem permanently.
- Right-click on the taskbar and select Task Manager or you can Press the CTRL + Shift + Escape keys together to open the Task Manager.
- Here under the process tab scroll down and look for Windows Explorer, right-click on it select restart and check if the start menu is stable now.
Note – If Windows Explorer does not start automatically then click on Run new task, type Explorer, and click ok to start the process.
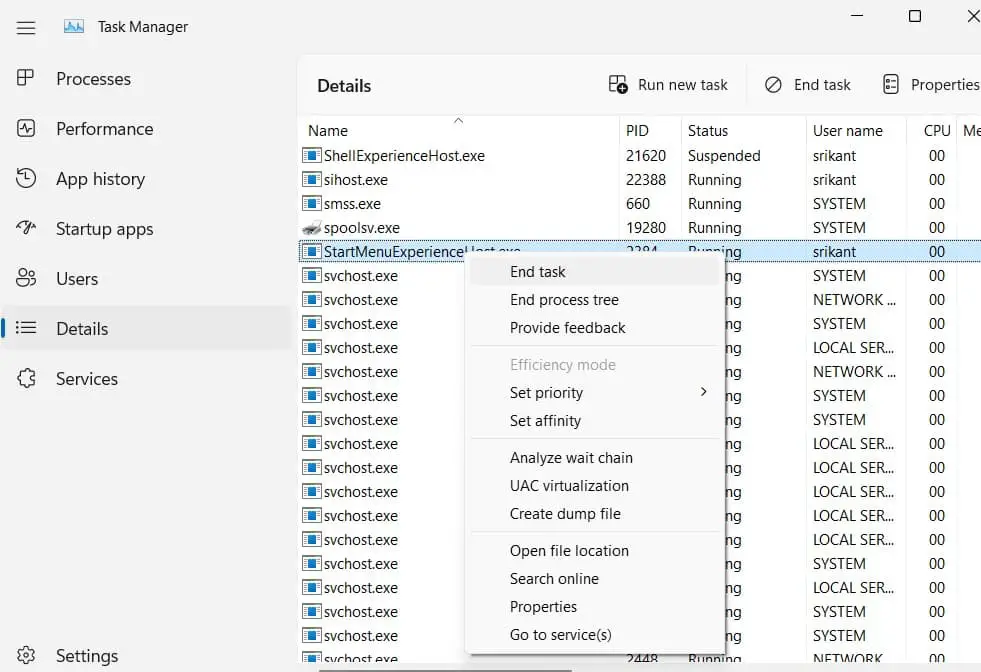
- Next Switch to the Details tab, and scroll down the respective service, starting with StartMenuExperienceHost.exe.
- Right-click it, and select End task, A warning message will pop up, Click End process to confirm.
The process restarts automatically, if not then again click on Run new task and type StartMenuExperienceHost.exe then click ok.
Update windows 11
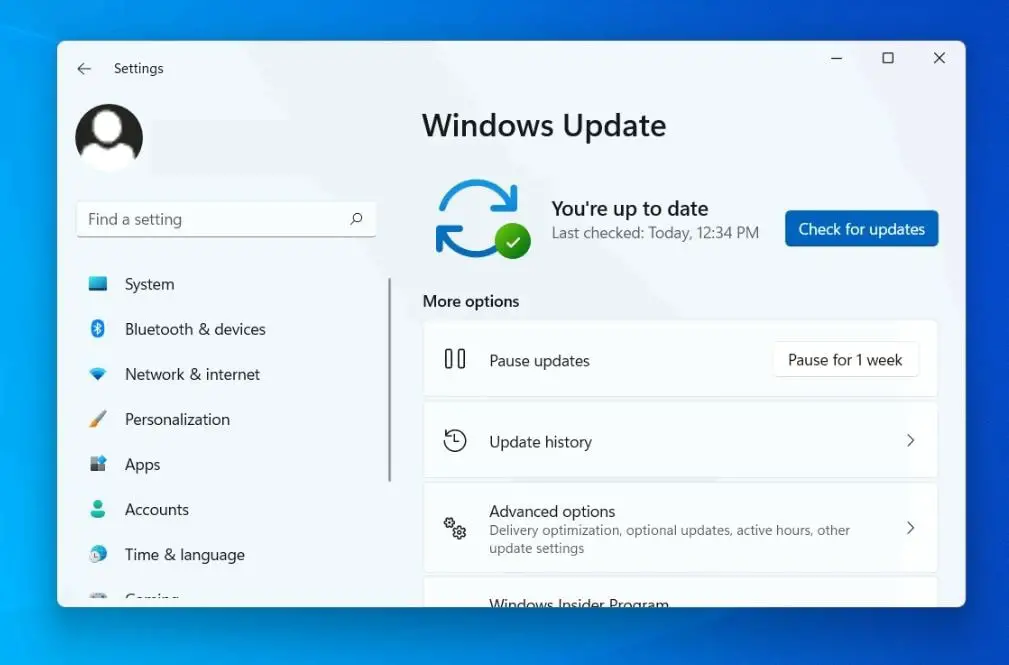
Random bugs on your computer or outdated windows cause different problems on your computer including the start menu not won’t open. Install the latest Windows 11 updates on your computer is one of the most effective ways to make your device error-free, and fix glitches in the Windows Start menu,.
checking for the latest updates and installing them can help if your Windows 11 Start Menu is not working
- Press the Windows key + I to open the settings app,
- Go to Windows Update and click on Check for Updates button,
- If pending updates are there, allow them to download and install on your computer,
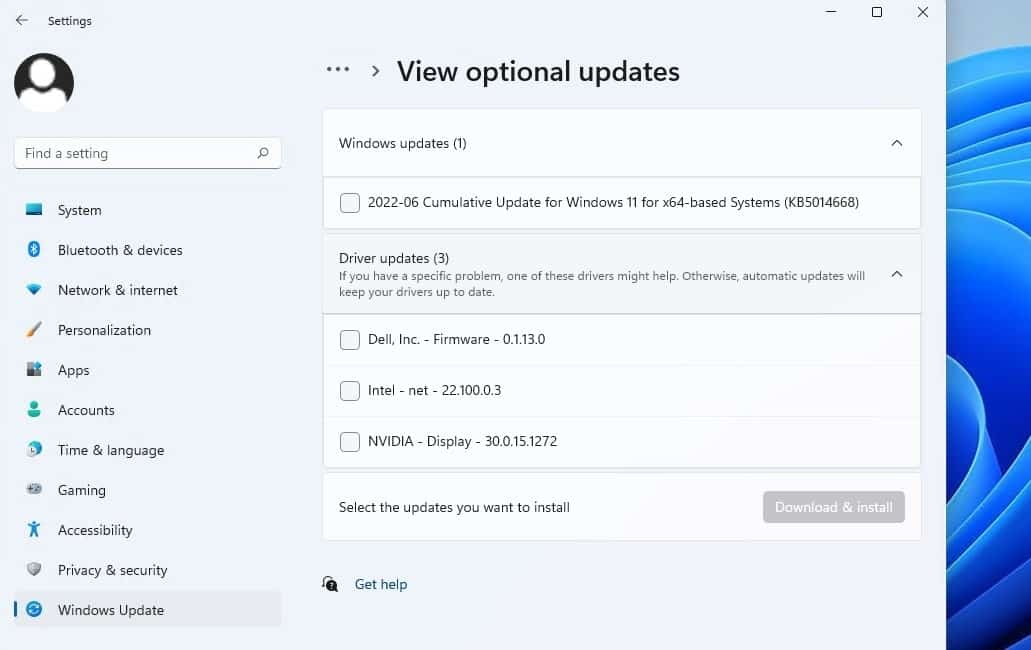
- Once done click on advanced options, and check if driver updates are available there,
- if available any check mark on them and click download and install
And finally, you need to reboot your computer to apply the changes, after that check if the Windows 11 start menu is stable and working normally.
Repair Windows System files
corrupted Windows system files another reason why the Windows 11 start menu not responding or won’t open. Run the system file checker and DISM restore health command that repair and replace corrupted system files with the correct one, optimize Windows 11 performance, and fix the start menu problem
- Press the Windows key + R, type cmd and press Ctrl+Shift+Enter to open the command prompt as an administrator.
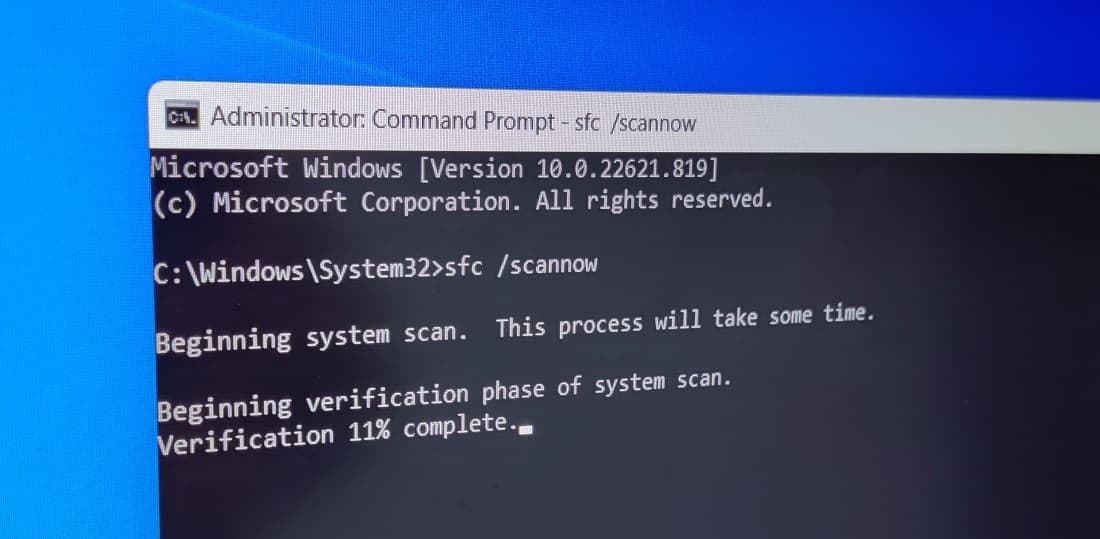
- First type sfc /scannow and press enter key to execute the command
This will scan all protected system files on your computer and replace corrupted files with a cached copy that is located in a compressed folder at %WinDir%\System32\dllcache.
Let the scanning complete 100% and reboot your PC
If the SFC scan results found corrupt files but was unable to fix some of them, you need to run the DISM restore health command: DISM /online /cleanup-image /restorehealth
Run start menu troubleshooter
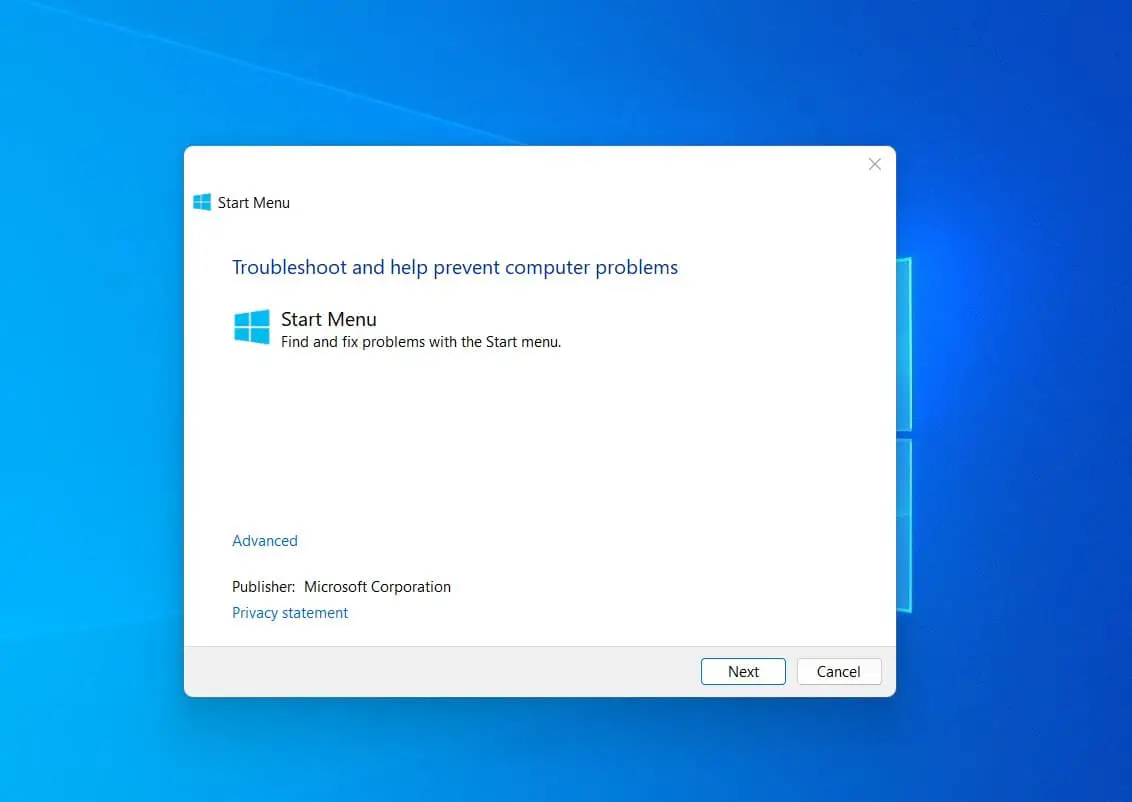
Also, you can run the start menu troubleshooter that automatically detects the problems and fix them for you.
- First, download the start menu troubleshooter here,
- Locate the troubleshooter, right-click on it select run as administrator,
- Click next and follow the on-screen instructions, once done reboot your PC.
In addition, perform a full system scan with the latest updated antivirus or anti-malware application and remove any virus malware infection there.
Remove any third-party application or malicious app if the start menu won’t open or not responding after install it.
Rebuild Search Index
If the start menu is stuck or not responding when you try to search for something, Rebuild the search index is probably helpful.
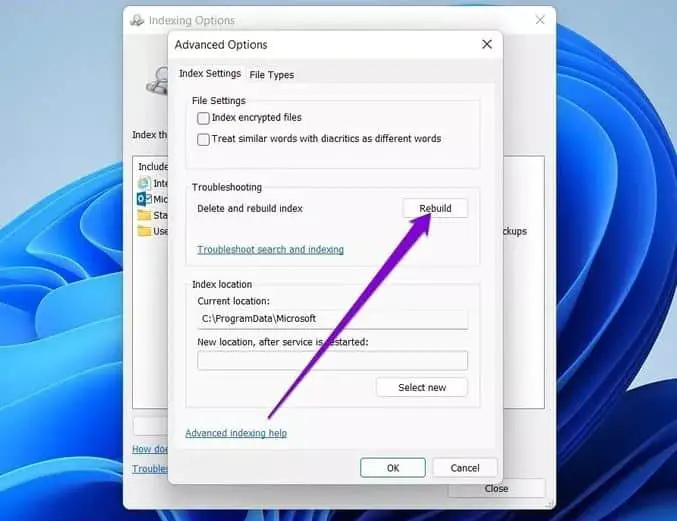
- Press the Windows key + R, and type control /name Microsoft.IndexingOptions and click ok to open indexing options
- Here click on Advanced then click on “Rebuild” in the Troubleshooting section
- A message pops up stating that this may take some time. Click “OK” to continue.
- Once the rebuild is complete, reboot your system and check the start menu function.
Update Graphics driver
Sometimes older or outdated Graphics drivers might interfere with Windows UI elements such as the Windows 11 start menu. If the above solutions didn’t help, they try update or reinstall the graphics driver on your computer.
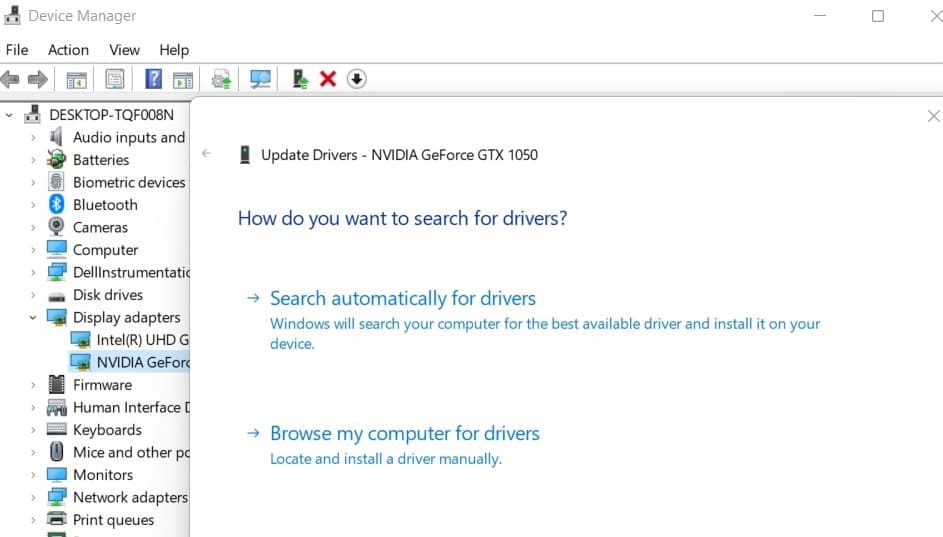
- Press the Windows key + R, type devmgmt.msc and click ok,
- Expand the display driver integrated or external graphics card from the list and right-click on it select Update driver
Also, you can visit the device manufacturer’s site to get download the latest driver update and install it on your PC.
Re-register the Start menu
This is another effective way to fix the Windows 11 start menu not working or won’t open problem.
- Press Ctrl + Shift + Esc key to open task manager and click on Run new task,
- Type PowerShell, check to Create this task with administrative privileges and click OK
- Now run the following command and reboot your computer
Get-AppXPackage -AllUsers | Foreach {Add-AppxPackage -DisableDevelopmentMode -Register “$($_.InstallLocation)\AppXManifest.xml”}
Create a User Account
- From task manager open the command prompt as administrator,
- Type net user USERNAME PASSWORD /add and press the enter key, Here replace USERNAME as the name of the new user and PASSWORD is its password.
For example – net user win11 Pa$$word /add
- Run command net localgroup administrators USERNAME /add to grant the new account administrative rights
- Log off or reboot your computer and log in with a new user account and check if there is no problem with the start menu.
Reset your PC
If the above solutions fail to fix the Windows 11 start menu problem, the only solution left is to reset Windows 11 to its default settings.
- Press Windows key + I to open settings then click on recovery,
- Next, Click on the Reset PC button next to Reset this PC.
- Click on Keep My Files and Follow the on-screen instructions and choose the appropriate response to complete the process.
Also read:
