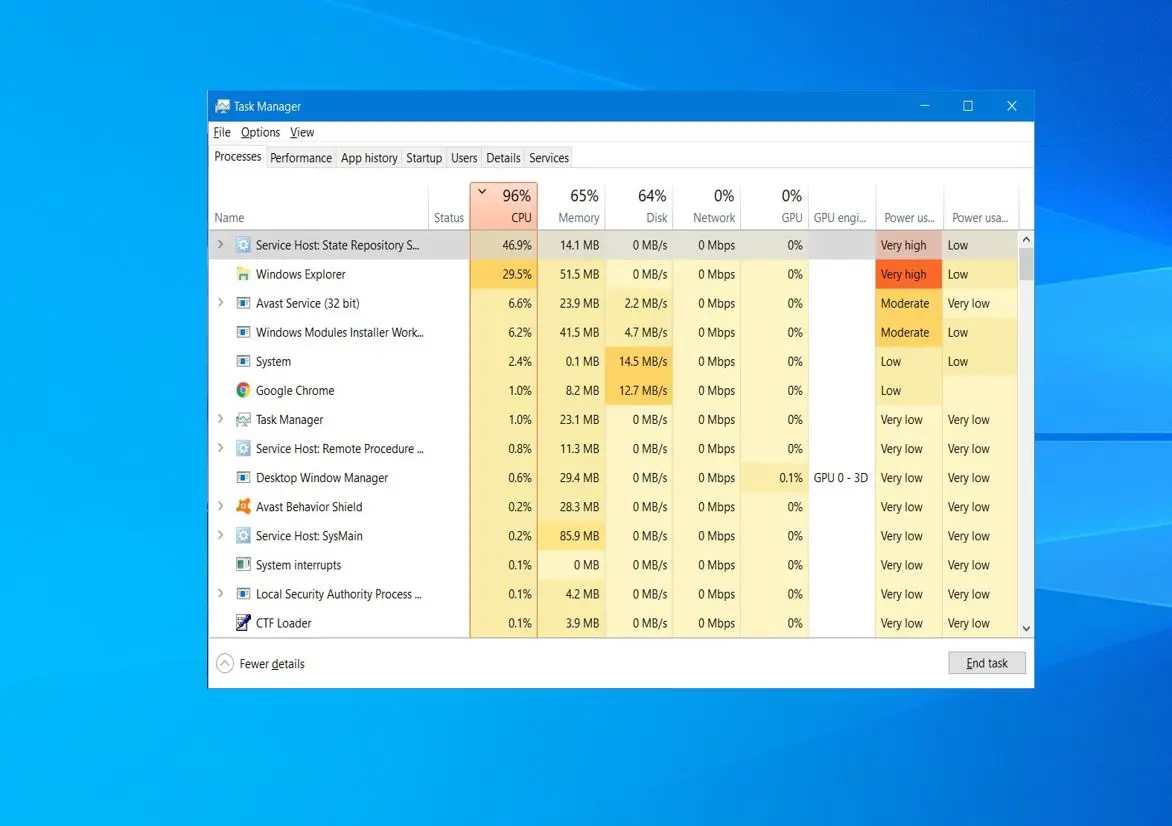
Sometimes, you may experience Windows 10 PC not working as expected, running very slow, and checking on the task manager you may notice High CPU Usage by State Repository Service. Several users report similar problems after the Windows update, “high CPU usage by the State Repository Service, causing system slowdowns and performance issues”. So you may have a question: what is State Repository Service, and why is it causing high CPU or slow system performance? Let’s find out the answer and solutions to fix Windows 10 high CPU usage problem.
What is state repository service?
The Service Host: State Repository Service (StateRepository) is an essential system process that stores and retrieves state information for system components and applications. It ensures the smooth operation of different processes and applications by providing real-time access to stored state information. Undoubtedly, this is an amazing service, but sometimes due to a bug or other reasons State Repository Service starts consuming 100% CPU.
Several factors can trigger high CPU usage by the State Repository Service:
- If system files related to State Repository Service are corrupted or damaged, it can lead to abnormal CPU usage.
- If system files related to State Repository Service are corrupted or damaged, it can lead to abnormal CPU usage.
- Outdated or faulty device drivers can also trigger high CPU usage by State Repository Service.
- In some cases, problems with Windows Update or incomplete installations can result in State Repository Service malfunctioning and using excessive CPU resources.
Restart State Repository Service
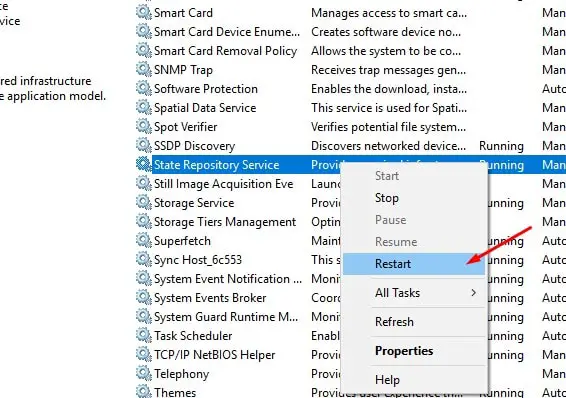
Whenever you notice any specific service causing high CPU or memory usage, it may be because its stuck for some reason. Restarting the State Repository Service can resolve temporary glitches or issues that are causing it to consume high CPU resources. It essentially resets the service, allowing it to start fresh and potentially resolve any underlying problems. This is the quick and easy solution help most users fix the State Repository Service High CPU problem on their computer.
- Press the Windows key + R, and type services.msc and click ok
- Scroll down to locate “StateRepository” or “State Repository Service.”
- Right-click on it and select Restart from the context menu.
In case, if the Restart option is grayed out then double-click on the State Repository Service to open its Properties dialog box and press the Stop button first. Once the Service status is stopped, now press the Start button to start the State Repository Service again.
Run System File Checker (SFC) and DISM Scan
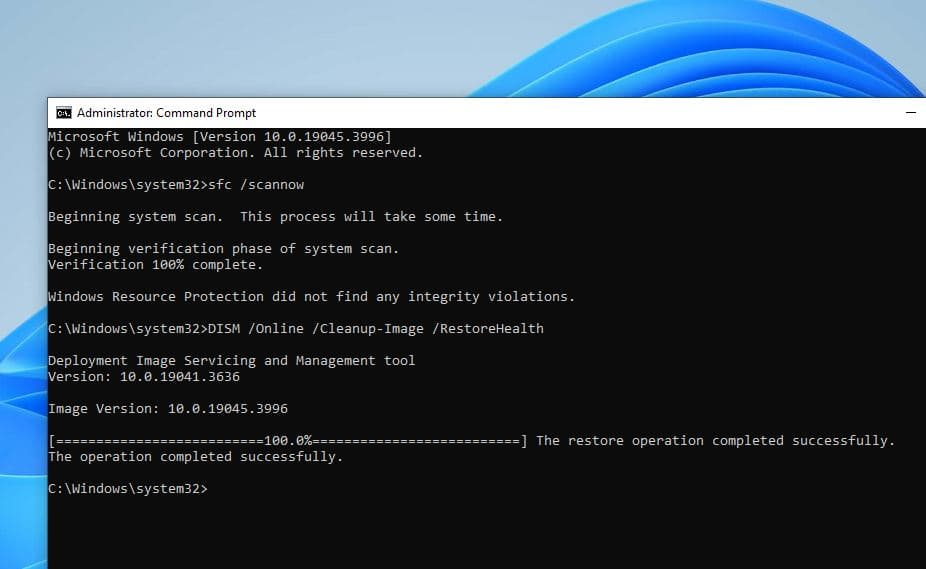
Corrupted or missing system files are another common reason behind Windows 10 slow performance or high CPU usage problems. If system files related to State Repository Service are corrupted or missing it may lead to High CPU or 100 disk usage problem. Run built-in System File Checker (SFC) and Deployment Image Servicing and Management (DISM) to scan and repair corrupted or missing system files.
- Press the Windows key, type cmd right click on the command prompt and select run as administrator.
- In the command prompt window, type: sfc /scannow and press Enter. Let the scan complete. If any issues are found, they will be repaired automatically.
- After the SFC scan completes, type the command: DISM /Online /Cleanup-Image /RestoreHealth and press Enter. This will scan and repair the Windows image for corruption.
- Once the DISM scan finishes, restart your computer and check if the CPU usage comes to normal.
Check for Windows Updates
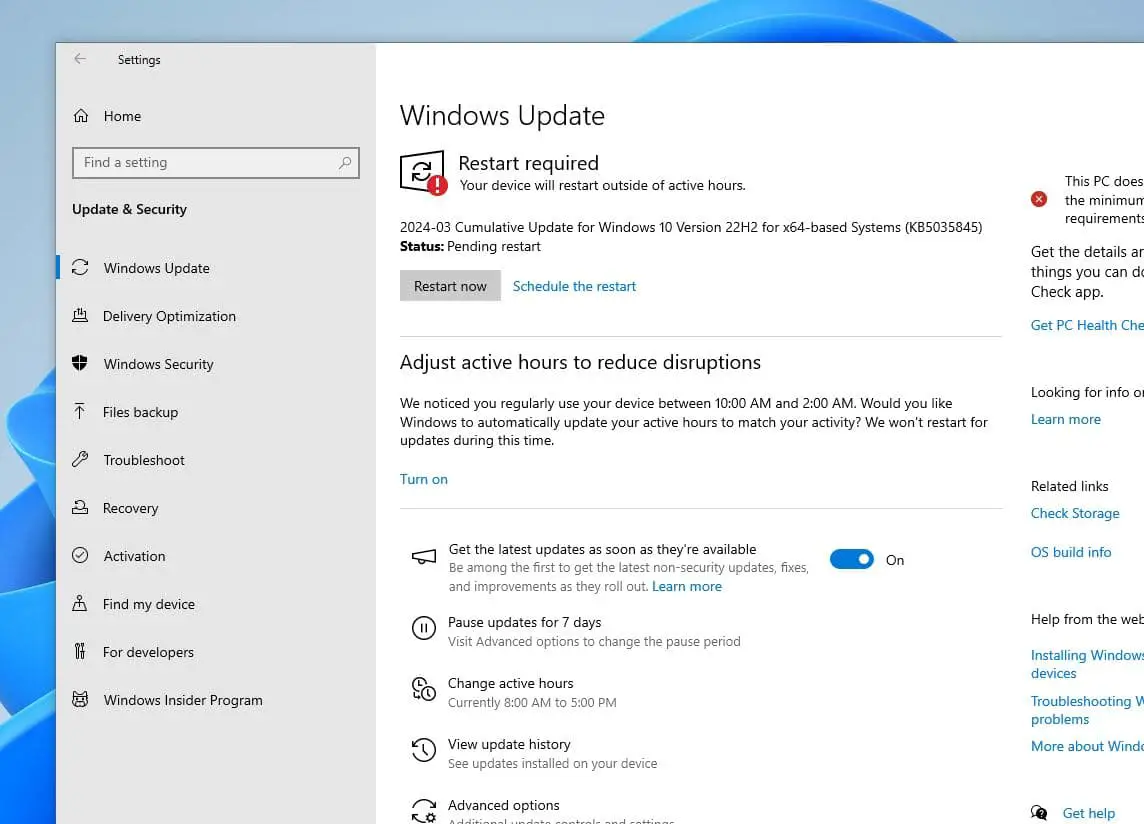
Microsoft regularly releases Windows updates with bug fixes, security patches, and performance improvements. If State Repository Service high CPU usage is caused by a known issue that has been addressed in a Windows update, installing the latest updates can help resolve the problem.
- Press the Windows key + S, type Windows update, and press enter key,
- Click on Check for updates and allow Windows to search for available updates.
- If updates are found, download and install them. Once done, restart your computer to apply and complete the update process.
- Now check if the Windows 10 High CPU usage problem is resolved.
Update Device Drivers
Again Outdated or faulty device drivers can sometimes cause compatibility issues with system processes like State Repository Service, leading to high CPU usage. Updating device drivers to their latest versions ensures compatibility with the operating system and can resolve any driver-related issues contributing to the problem.
- Press the Windows key + X and select Device Manager from the menu.
- Expand the categories to find the devices whose drivers you want to update. For example to update graphics driver expand display adapter.
- Right-click on the Graphics device and select Update driver.
- Choose Search automatically for updated driver software and follow the on-screen instructions.
- Repeat this process for each device that requires an update.
Identify and Uninstall Problematic Applications
Certain third-party applications may conflict with State Repository Service or other system processes, causing them to consume excessive CPU resources. If the problem started after a recent app installation identifying and uninstalling problematic applications, eliminates the source of the conflict and reduces the strain on the CPU.
- Press Win + X and select Apps and Features.
- Scroll through the list of installed applications and identify any third-party applications that might be causing the issue.
- Click on the problematic application and select Uninstall.
- Follow the on-screen prompts to complete the uninstallation process.
Perform Clean Boot
If nothing works, Performing a clean boot starts Windows with only essential services and startup programs, help eliminate potential software conflicts that could be causing high CPU usage.
- Press Windows key + R, type “msconfig”, and press Enter.
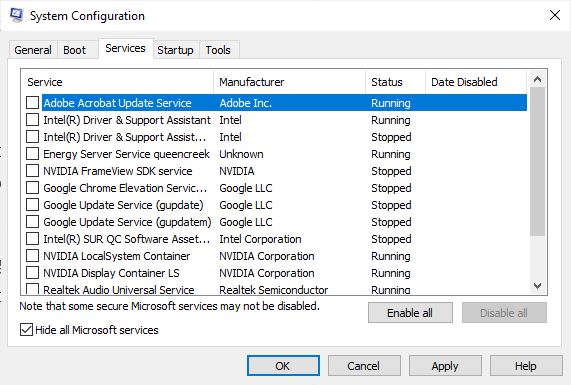
- In the System Configuration window, go to the Services tab.
- Check the box next to Hide all Microsoft services. Click on Disable All.
- Next, Go to the Startup tab and click on Open Task Manager.
- Disable each startup item by right-clicking on it and selecting Disable.
- Close Task Manager click OK in the System Configuration window and restart your PC.
Check if the CPU usage comes to normal, if yes Gradually enabling services and startup programs, you can identify the specific software causing the problem and take appropriate action, such as updating or uninstalling it.
Re-register built-in apps in Windows 10
A few users report that Re-registering built-in apps help them fix the problem of high CPU usage by State Repository Service. If the above solutions didn’t fix your problem, you can try re-registering built-in apps following the steps below.
Before doing this it’s recommended to create a system restore point, So that if anything goes wrong after reinstalling built-in apps you can use the system restore feature to revert back to recent changes without any data loss.
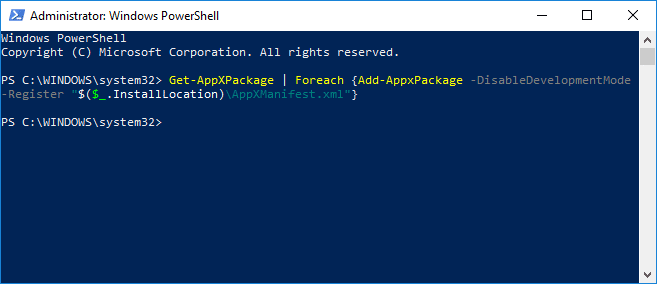
Open Powershell as an administrator, you can do this by right-clicking on the Windows 10 start menu and select PowerShell (admin) Then perform the command below.
Get-AppXPackage -AllUsers | Foreach {Add-AppxPackage -DisableDevelopmentMode -Register “$($_.InstallLocation)\AppXManifest.xml”}
This command will install all the standard applications on your system, After that close the PowerShell window and restart your PC. On the next login, check There is no more high CPU usage by State Repository Service.
Reset Windows Update Components
If State Repository Service high CPU usage is related to issues with Windows Update, resetting the Windows Update components can help resolve the problem. This process clears the corrupt update cache and can correct any underlying issues with the update process that may be causing high CPU usage.
Open Command Prompt as an administrator and Run the following commands one by one:
- net stop wuauserv
- net stop cryptSvc
- net stop bits
- net stop msiserver
- ren C:\Windows\SoftwareDistribution SoftwareDistribution.old
- ren C:\Windows\System32\catroot2 catroot2.old
- net start wuauserv
- net start cryptSvc
- net start bits
- net start msiserver
The above commands stop the Windows Update and related services, Rename the folder where Windows stores update files, so next time when you check for updates it will create a new folder and download fresh update files and restart the services.
Also, Read
