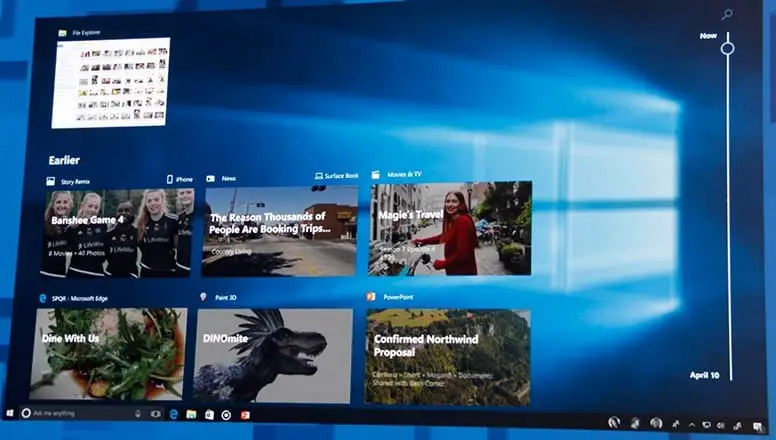
With Windows 10 1803 aka April 2018 update Microsoft Introduced Timeline feature that allows users to review their activity history and quickly return to their previous tasks. In a previous article, we discussed how to enable and Use Windows Timeline Feature on Windows 10. If you find no use for this feature, or you simply don’t want Windows 10 collecting your activities, it’s possible to disable the feature with just a few clicks using the Settings app. let’s see how to disable Timeline in Windows 10 April 2018 Update
Disable Timeline In Windows 10
To disable Timeline, there are two different methods that you can use, Using windows settings and tweaking the windows registry editor. Let’s see how to do
Disable Timeline From Settings
- Press Windows + I to open windows settings
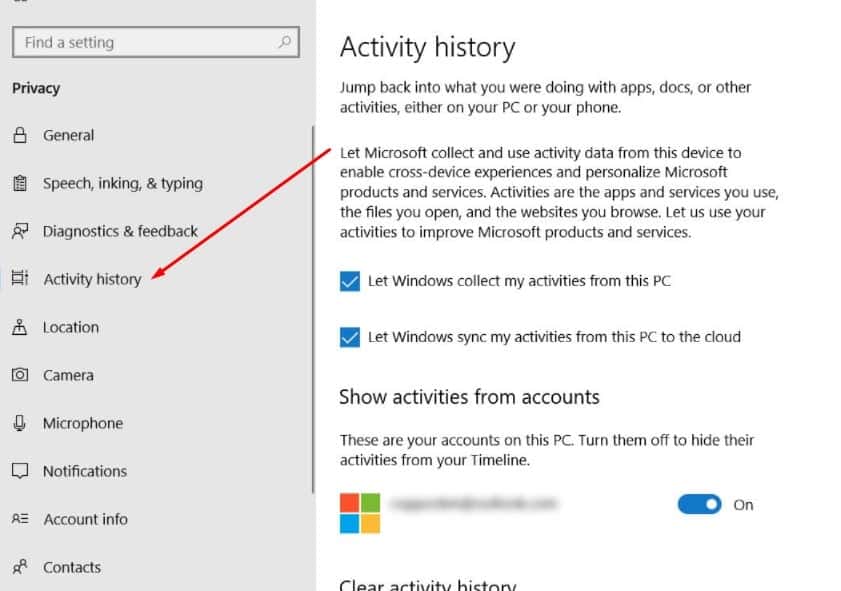
- Then click on privacy followed by Activity history
- Here Clear the Store my activity history on this device option.
- Clear the Send my activity history to Microsoft option.
- Now Under “Show activities from accounts,” turn off the toggle switch for all your accounts.
Jump to another settings page, and then come back to the Activity history page to refresh the page and make the option to delete your history available. Also Under “Clear activity history,” click the Clear button.
Once you’ve completed the steps, Windows 10 will no longer be able to collect activities on your device nor you’ll be able to resume tasks on other devices using Timeline.
Registry Tweak to Disable Timeline
Also, you can Tweak Windows registry tweak to control over ( Enable /Disable )windows timeline feature. Let’s see how to do:
- Press Windows + R, type regedit and click ok to open the windows registry editor.
- Frist backup registry database and navigate to the following path.
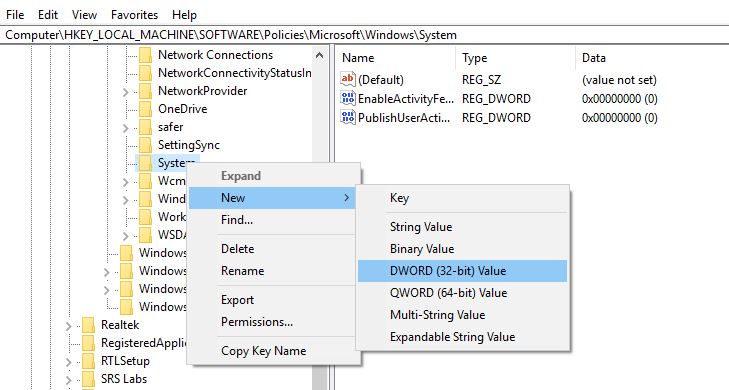
HKEY_LOCAL_MACHINE\SOFTWARE\Policies\Microsoft\Windows\System
Here right click on System -> New – > DWORD (32bit) Value and name it EnableActivityFeed. Double click on the new created key and set its value 0.
Create two more DWORD (32 ) Value and name them PublishUserActivities and UploadUserActivities And set the value 0
That’s all close registry editor and Restart windows.
Now Timeline should no longer be available in the Task view section in the taskbar. If you want to re-enable Timeline at a later time, it’s enough to simply change the value of the registry key mentioned above to 1 or just delete it completely. Or Go to settings -> Privacy – Activity history and checkmark on Let Windows collect my activities from this PC and Let Windows sync my activities from this PC to the cloud option. Also, Read


