A Graphics driver enables the operating system to communicate with the video Graphics card. If you are a PC gamer or gaming user you must know the importance of a Graphics card and the importance of Graphics driver updates. Installing the latest driver update, not only improves your device performance but also fixes reported issues and adds new features that improve gaming quality. So if you are a gaming user, and looking to maximize your gaming experience or play games at the best possible settings, or watch movies at higher resolutions make sure the installed Graphics driver is updated. Because the firmware needs to be optimized in order for it to run properly. Here this post explains how to update NVIDIA Graphics driver in Windows 10.
How to update Nvidia drivers
You can update the Nvidia Graphics driver using Nvidia GeForce Experience software, through Windows Update or Device Manager. If you experience problem installing a new driver, your best option is to use Nvidia’s website directly.
NVIDIA’s GeForce Experience software
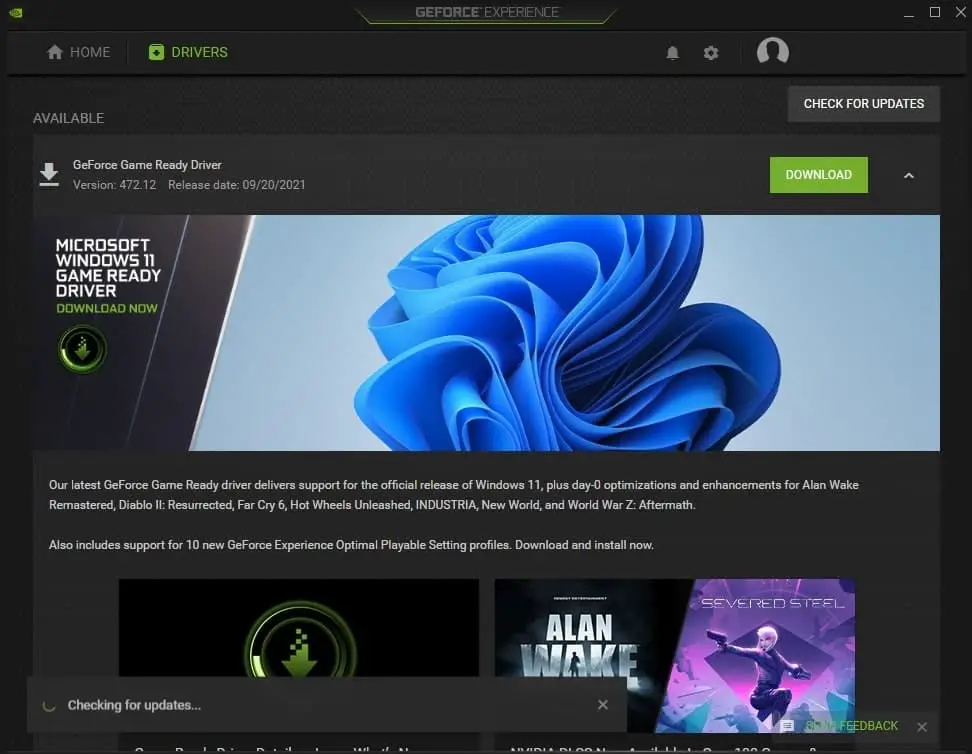
NVIDIA’s GeForce® Experience™ suite is an official tool that manages your Nvidia drivers and game settings. when a new driver is available it provides automatic updates for program and game files. Here’s how to install an updated Graphics driver from this software:
- First Download and install GeForce Experience,
- The installer will scan your system for supported hardware, and you might encounter errors during installation if you don’t have Nvidia Graphics card or using an older product,
- Once the installation is completed, Launch the program and Log in or create your account to continue,
- Once logged in, click the Drivers tab on the GeForce Experience main page, which also shows your latest installation,
- Click the “Check for updates” option near the top right corner to search for updates,
- Choose between Express or a Custom update when prompted. Express installs immediately, while a Custom update requires you to input your preferences.
- The latest Graphics driver will download and the programs will let you know once the installation is complete.
- Reboot your computer to apply the changes.
Windows Device Manager
Also, you can easily update your drivers, including the NVIDIA Graphics driver through the Windows Device Manager.
- Press the Windows key + X at once to load the Windows Quick Link menu and Click Device Manager or press the m key
- This will display all installed device driver list, here locate and expand Display adapters from the list of hardware
- Right-click on your NVIDIA Graphics card and click Update driver
- Choose to search automatically for drivers and wait a few moments while it tries to find and install the latest Graphics Driver for your PC
- Once done reboot your PC to apply changes.
Check for Windows Update
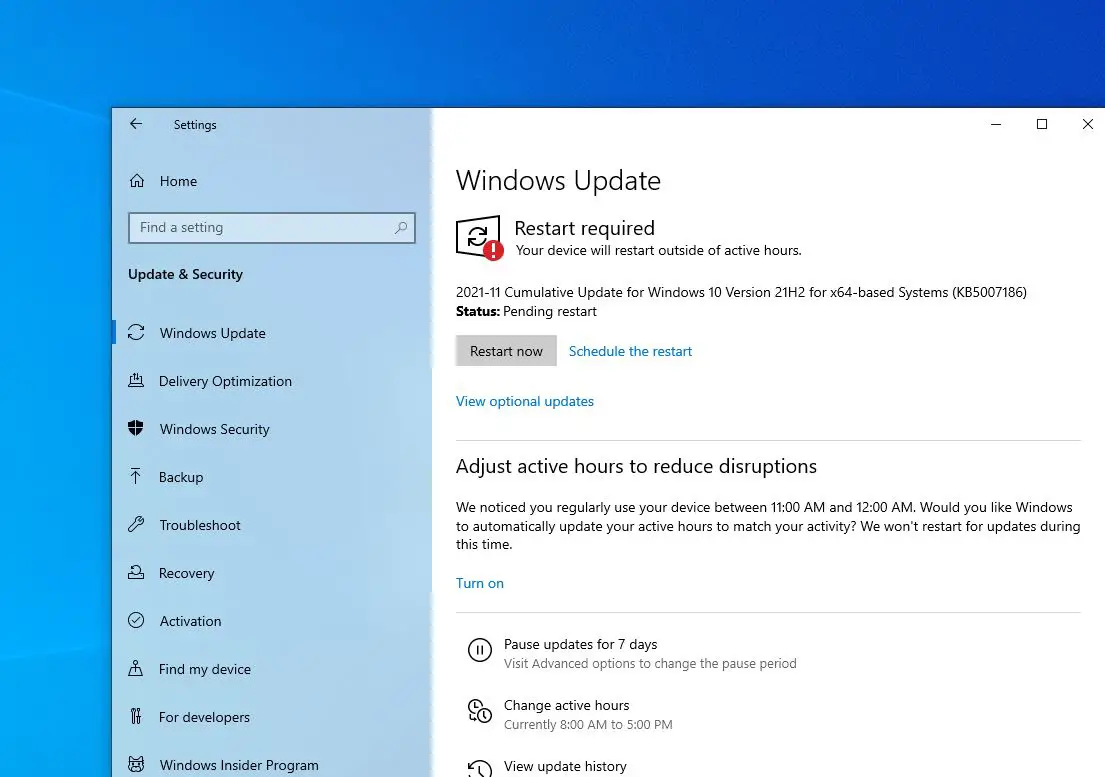
Installing the latest Windows updates also bundles driver updates as well. But compared to Device Manager, Windows Update won’t always provide the most recent updates. Here is how to check for Windows updates on Windows 10.
- Press Windows key then click on settings (the gear icon)
- Go to update and security and hit check for updates button,
- This will check for the latest windows updates if available any the tool try to download and install them,
- From the same tab, you can also view optional updates or confirm the most recent changes to your driver by clicking View update history.
- Once done restart your computer to apply the windows update and make changes to effect.
Download and install drivers manually
This method is a bit more advanced since it requires you to know what type of graphic card you’re using, the manufacturer’s website, and the correct driver version.
Find out which Graphics card you have
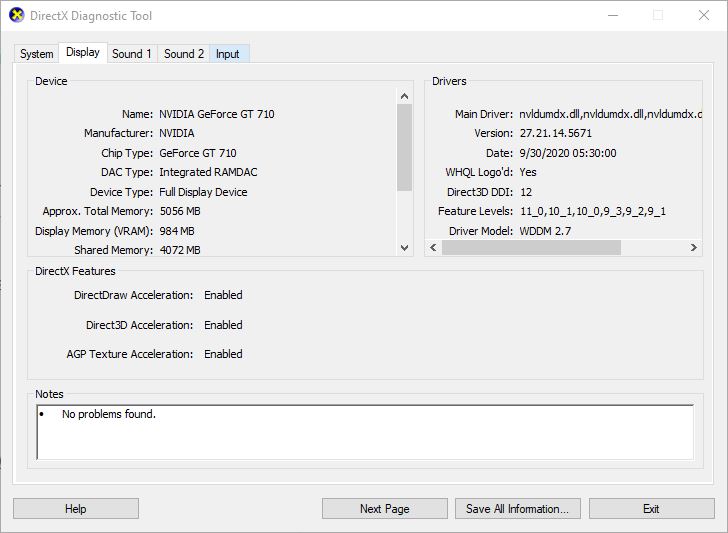
- First Open the DirectX Diagnostic tool using the command dxdiag
- Move to the display tab, and look at the chip type entry this is your Graphics card model note it down.
- Click the System tab and look at the operating system entry to see if you are running 64 bit or 32-bit version of windows.
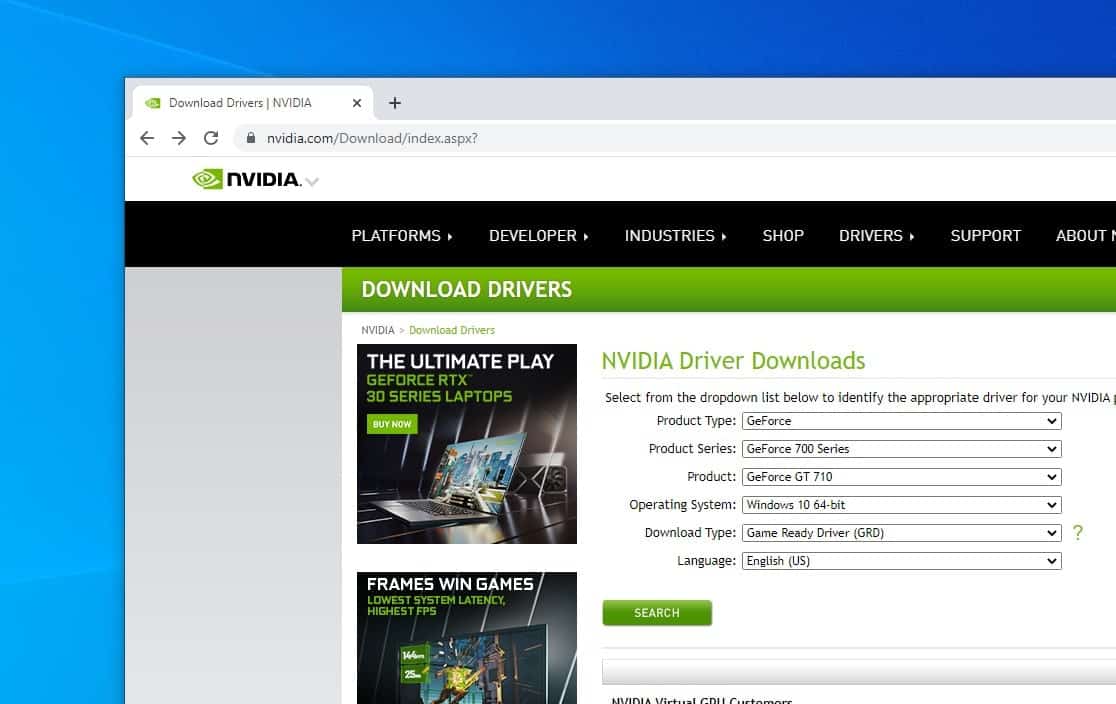
NVIDIA driver download at the company’s official website
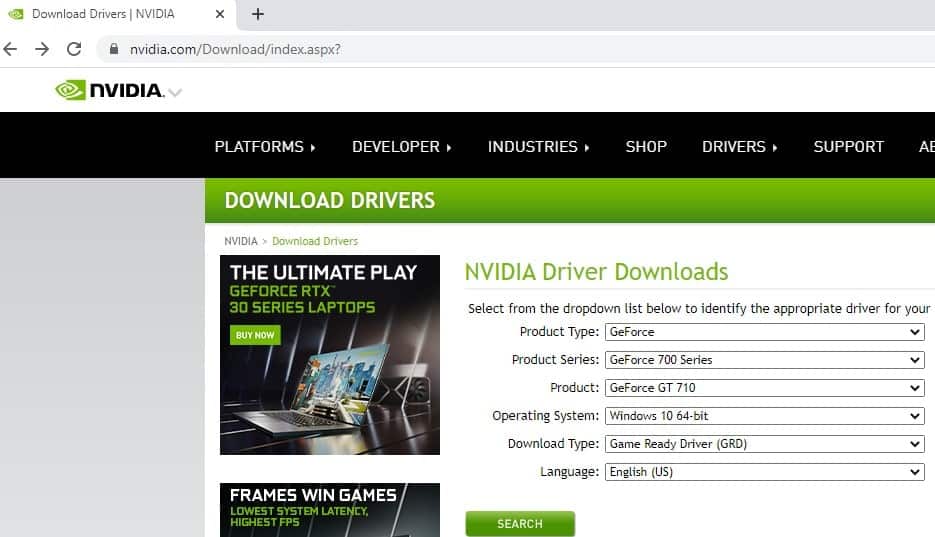
- After finding the model of your graphic card, visit the manufacturer’s website here.
- From there you need to navigate to the Download or Drivers section.
- Now you need to choose Product Type, Product Series and Product.
- After selecting your graphic card model, you need to select the version of the operating system that you’re using. This implies the 32-bit version or the 64-bit one.
- Keep in mind that you need to select 64-bit version of the driver if you’re using 64-bit operating system in order to get the maximum performance.
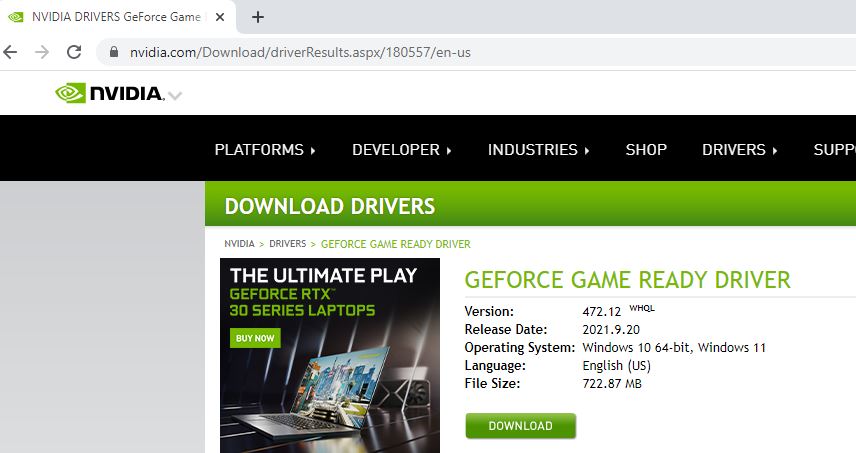
- Now click on search, then download the latest NVIDIA driver to your local storage.
- Locate the download folder, right-click on NVIDIA driver select run as administrator and follow on-screen instructions to install the latest NVIDIA driver on your computer.
- After the new Graphics driver is installed, restart your computer to complete the installation. Now you can enjoy the latest firmware features and tools.
How to roll back an NVIDIA driver update
If you encounter any problem with the latest NVIDIA driver update, such as black screen at startup or Blue screen error. In such situations, you can roll back the driver update, to uninstall the latest drivers, and reinstall the previous version.
- Press Windows key + X and select device manager,
- This will display all installed device driver list, Scroll down until you find Display Adapters expand it,
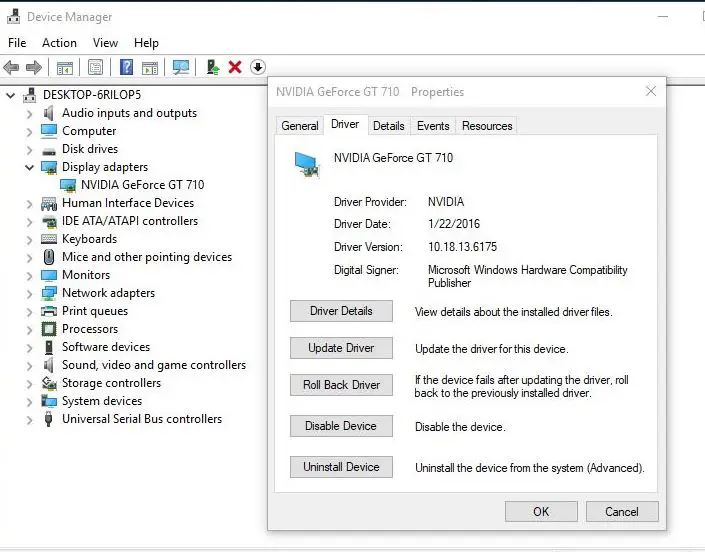
- Select the Nvidia device, right-click on it select Properties
- In the Properties Window, move to Driver Tab. You will then see a list of options
Select Roll Back Driver to revert to the previous driver,
- You will need to choose a reason for why you want to roll back to the previously installed drivers. Choose whatever is most appropriate
- Click Yes to revert back to previous drivers
- If the rollback option is unavailable, there is a way to uninstall your Graphics driver and install an earlier version.
Note: If the roll back option is unavailable, there is a way to uninstall your Graphics driver, and install an earlier version.
Uninstall NVIDIA Graphics driver
Also, you can uninstall and reinstall the NVIDIA Graphics driver following steps below.
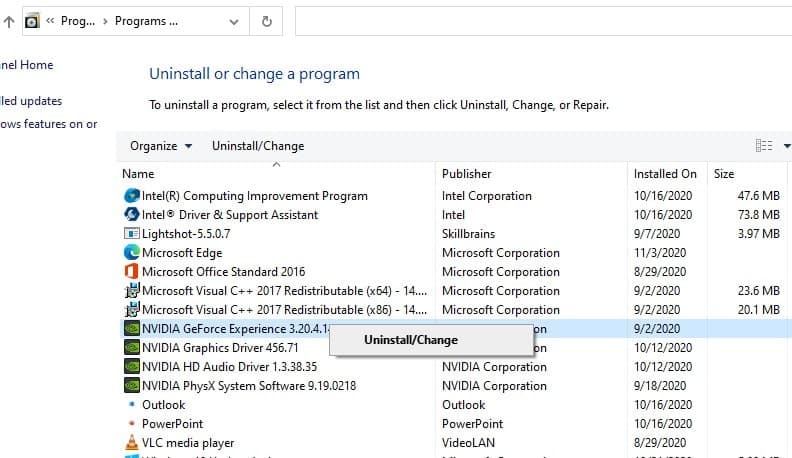
- Press Windows key + R, type appwiz.cpl and then click on ok,
- This will open the Programs and Features window
- Locate the NVIDIA Graphics Driver click on it and select Uninstall/Change
- Confirm that you wish to uninstall it and follow on-screen instructions,
Restart your PC after the uninstall process has finished
Once you’ve uninstalled your driver and rebooted your computer, go to the NVIDIA website and use the Manual Search function to find the drivers you want to install. Download the driver, then double click on the downloaded file to install it.
If you encounter any issues with your driver updates, particularly when using NVIDIA’s GeForce Experience and the Control Panel utility, contact their customer support team.
Also read:
- How To Update, Re-install, Roll Back Device Drivers in Windows 10
- How to fix GeForce Experience error code 0x0003 in Windows 10
- Solved: NVIDIA Control Panel not Opening after Windows 10 update
- Windows 10 Graphics device driver error code 43 (Intel, AMD, NVIDIA)
- Screen goes black when playing games on Windows 10? Try these solutions
