
A stable and reliable internet connection is essential for various activities, from work to entertainment. However, sometimes you may notice the Laptop is connected to WiFi network but there is no internet access. Several users reported this issue, “WiFi connected but no internet access” prevents loading webpages, downloading apps or games. Several factors can contribute to this issue, incorrect Network Configuration, IP address conflict, Problems with WiFi routers, outdated WiFi drivers, or DNS server problems are common. Here is how to troubleshoot and resolve this problem to restore WiFi internet access on Windows 11.
WiFi connected but no Internet
The common reasons why WiFi is connected but no Internet is misconfigured network settings and problems with Wireless routers. But there are also several other possible causes:
- Network Configuration Problems: Incorrect TCP/IP settings, misconfigured network adapters, or IP address conflicts can disrupt internet connectivity.
- Router or Modem Issues: Problems with your router or modem, such as outdated firmware, incorrect settings, or hardware malfunctions, can affect internet access.
- DNS Server Problems: Issues with DNS servers or DNS cache corruption can prevent your device from resolving domain names, leading to internet connection failures.
- Software or Driver Issues: Outdated or faulty network drivers, conflicting software, or malware infections may interfere with internet connectivity.
- ISP Problems: Service provider issues, such as maintenance, outages, or account problems, can result in a temporary loss of internet access.
Restart your PC and Wi-Fi Router
This is the first thing you need to do whenever you experience a problem with network and internet connectivity. Just restart your computer, and the Wi-Fi router (powering it down, and then turning it back).
- Let’s first Unplug the power cord from your router or modem, wait for a few seconds, and plug it back in.
- At the same time Restart your Windows 11 device and then reconnect to the WiFi network.
- When you reboot Windows 11 it will refresh the operating system, restart all services and programs and clear temporary glitches that might be causing the internet problem.
- It also clears temporary glitches and initiates a fresh attempt to obtain a valid IP address and resolve connectivity issues that may have occurred during the initial connection.

Restart DHCP client service
DHCP (Dynamic Host Configuration Protocol) is responsible for assigning IP addresses to devices on the network. If for some reason the DHCP client service is stuck running or not started, your PC might fail to get a Valid IP address from the WiFi router. Restarting the DHCP client service can help refresh the IP configuration and resolve connectivity issues.
- Press the Windows key + R, type services.msc and click ok.
- This will open the Windows service console, locate the DHCP client service, right-click on it select “Restart” from the context menu.
- If the service is not started, Right-click on DHCP client service select properties.
- Change the startup type automatic and start the service next to service status.
- Now disconnect and reconnect to the Wi-Fi network and that is probably enough to fix the limited access issue.

Reset TCP/IP configuration
Incorrect network configuration is sometimes the common reason why wifi connected but no Internet. Resetting the network configuration restores all network-related settings to their default values. This can be effective in resolving complex networking issues that may have arisen due to misconfigurations.
Press the Windows key + S and type cmd, right-click on the command prompt select run as administrator. Now perform the following commands one by one.
- netsh winsock reset
- netsh int ipv4 reset
- ipconfig /flushdns
- ipconfig /release
- ipconfig /renew

After the command executes, restart your computer to apply the changes.
Run the Network Troubleshooter
Microsoft includes plenty of troubleshooting tools with Windows 11 that you can use to fix minor problems and keep your computer running smoothly. There is a network troubleshooter that checks problems with the network adapter and its related driver, and the Internet troubleshooter automatically detects incorrect internet configurations and tries to fix them for you. Let’s run the troubleshooter and let Windows fix the internet problem for you.
Network troubleshooter to help fix some common network and internet connection issues.
- Press the Windows key + X and select settings,
- Go to system then Troubleshoot and click on other troubleshooters,
- Locate the Network adapter troubleshooter and click Run next to it,
- Select the Wi-Fi option and go through the following instructions.

- Next, locate the Internet troubleshooter and click Run next to it

Once the diagnosis is complete, reboot your PC and connect to the Wi-Fi network to check if the internet connection is restored.
Restart the Wi-Fi Adapter
For some users Restarting the Wi-Fi network adapter solve wireless issues, including internet limited access. If this does not work, you should try to update or reinstall the Wi-Fi driver on your computer.
- Right-click the Start button and select Device Manager.
- Locate and extend the “Network adapters” category.
- Right-click on your Wi-Fi adapter and select “Disable device”.
- After a few seconds, right-click on the adapter again and select “Enable device”.
Update Wi-Fi Driver
Outdated network adapter drivers may also cause limited Internet access problems, update the wifi adapter driver fixes the issue.
- Again, open Device Manager and expand the Network adapter
- Right-click on the Wi-Fi adapter, and select Update driver.
- In the next window, select Install drivers automatically, so Windows will search for and install the latest version available.

Switch to Google DNS
DNS (Domain Name System) translates domain names into IP addresses, allowing devices to locate resources on the internet. Using Google’s DNS servers (8.8.8.8 and 8.8.4.4) can provide faster and more reliable DNS resolution, potentially resolving connectivity problems caused by DNS issues with the ISP’s servers.
It’s another effective way to restore internet access on your Windows 11 PC.
- Press Windows key + R, type ncpa.cpl and click ok to open network connections
- Right-click on your Wi-Fi network and select “Properties”.
- Select “Internet Protocol Version 4 (TCP/IPv4)” and click “Properties”.
- Check the box next to “Use the following DNS server addresses” and enter
8.8.8.8for the preferred DNS server and8.8.4.4for the alternate DNS server. - Click “OK” to save the changes., now check if the internet access is restored on your PC.

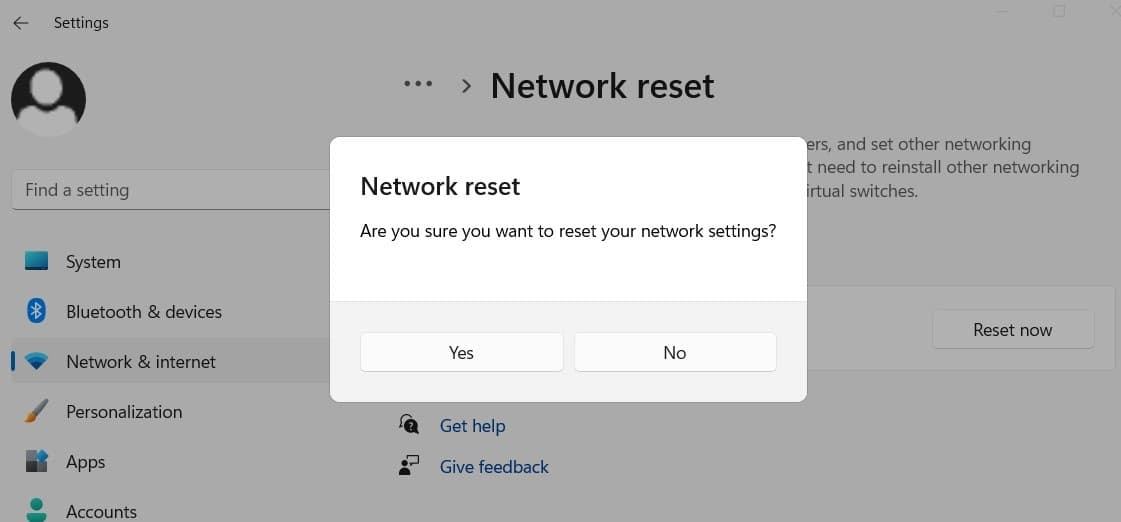
Reset Your Network
If you’ve gone through the above instructions but the internet access is not yet restored, you should reset the network. This will remove and reinstall all network adapters and set other networking components back to their original settings. This comprehensive reset can resolve various network-related issues.
- Press Win + I to bring up Windows Settings.
- Go to Network & Internet> Advanced network settings.
- Head to the More settings section and click Network reset.
- Click “Reset now” and confirm the action.
- Once done reboot your PC and check if the problem is resolved.
Change WiFi power management setting
Some Wi-Fi adapters have power-saving features that may interfere with network connectivity. Disabling power management for the Wi-Fi adapter ensures it stays active and maintains a stable connection.
- Press Windows key + X and select Device Manager
- Locate and expand the Network adapter, Right-click on your Wi-Fi network and select “Properties”.
- Go to the “Power Management” tab, Uncheck the option that says “Allow the computer to turn off this device to save power”.
- Click “OK” to save the changes.

Check the Wi-Fi signal
The next thing you need to ensure the Wi-Fi signal on your laptop. If possible, take your laptop closer to the router or Access point.
If you are connected to VPN server, disconnect it and check if the internet connection is restored. If yes you need to check with VPN service provider to identify and fix the problem.
Sometimes you may experience WiFi Connected but no Internet access, If you have a data cap, and you exceed it, your Wi-Fi network might show limited access once you connect to it. If you have Unlimited Internet plan and there is no data cap then, Turn Off the Metered Connection Feature that probably restores the Internet access.
Still, the problem is not solved and the internet is not working on Windows 11, it’s time to contact the internet service provider for help.
Also read:
- No Wi-Fi after Windows 11 update (5 steps to restore it)
- 6 solutions to fix No Wi-Fi network found on Windows 10
- Laptop Wi-Fi Not working after Windows 11 update (7 solutions)
- Can’t install apps from Microsoft Store Windows 11 (9 ways to fix it)
- 7 ways to fix Microsoft Edge Black Screen Issue on Windows 11