Microsoft Windows 11 version 23H2 was released with several new features and enhancements that can improve your productivity and overall user experience. If you have recently upgrade to Windows 11 it’s essential to make a few changes in settings to improve your experience and tailor the operating system to your needs. From adjusting privacy settings to disabling unnecessary background apps, or taskbar customization, there are several settings you can adjust to make Windows 11 work best for you. This article explores some of the Windows 11 settings you should change now to get the most out of your device.
The Settings You Should Change in Windows 11
You should tweak privacy settings to Prevent advertisers from tracking you or configure Windows security to block fishy apps and websites Automatically. Also, Disable unrequired Startup apps to boot Windows 11 start time, or change the power option, Best Power Efficiency to increase battery life. Configure storage sense to clean up unrequired data on a fixed interval or update Windows 11 and install the latest driver updates to get the best performance.
Prevent advertisers from tracking you
Microsoft usually collects Device and usage data and telemetry data to diagnose and fix problems and enhance user experience. But can also use this data to display personalized ads and suggest products or services that are related to their interests. However, by disabling certain data collection options, you can significantly reduce the amount of personal data that is shared with Microsoft and improve your overall privacy.
- Press the Windows key + X and select settings
- Go to privacy & security then click on General
- Here under the Windows permission section toggle off all options that include show personalized ads, relevant content, and suggested content in the Settings app
- This will disable all the advertisements and suggested content on your computer. You can re-enable it anytime in the future.
block fishy apps and websites
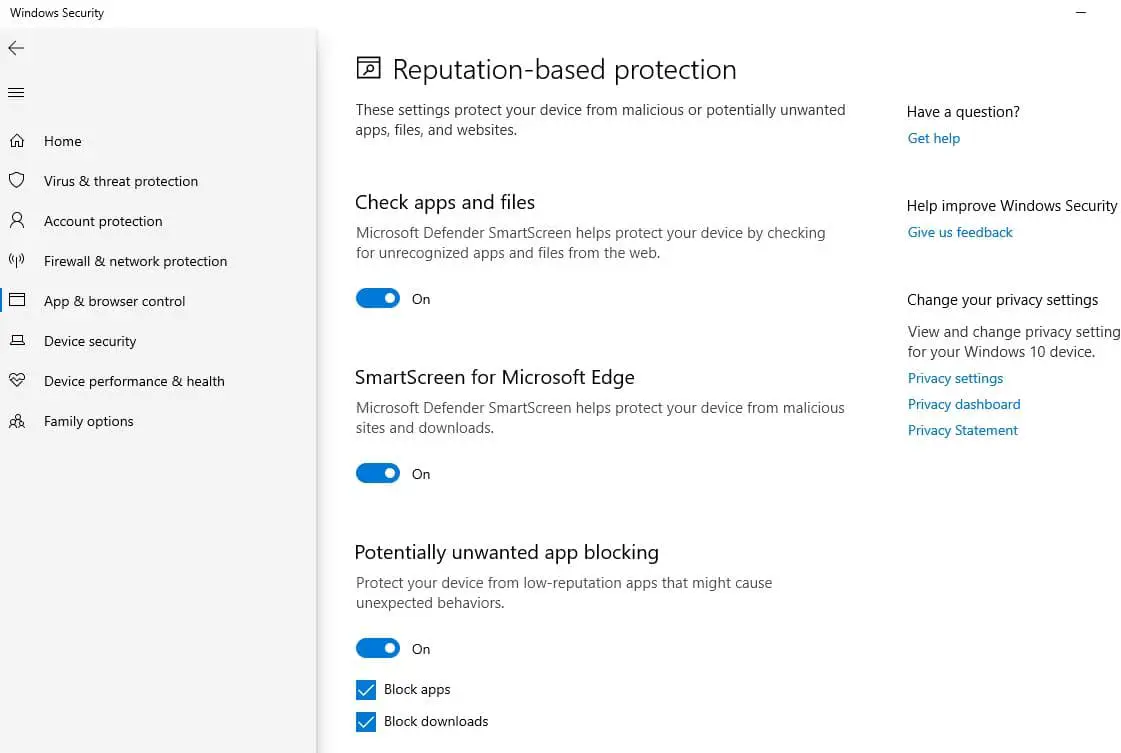
Malicious websites and apps look like ordinary but once you begin to browse or install them, they can cripple your PC. Enable reputation-based protection on Windows security display warning every time you come across such apps or websites and protect your device.
Reputation-based protection is a type of cybersecurity approach that relies on analyzing the reputation of software or files to determine whether they pose a threat to a system or network.
- Press Windows key + S, type Windows security then select it from the top,
- Click on App & Browser control then click the “Turn on” button under the “Reputation-based protection” section heading.
- Now click on Reputation-based protection settings, enable the toggle for check apps and files, potentially unwanted app blocking, and SmartScreen for Microsoft Edge and Microsoft Store.
In addition on Windows security, go to Device security > Core isolation details and switch on the “Memory integrity” toggle.
Turn Off Unwanted Notifications
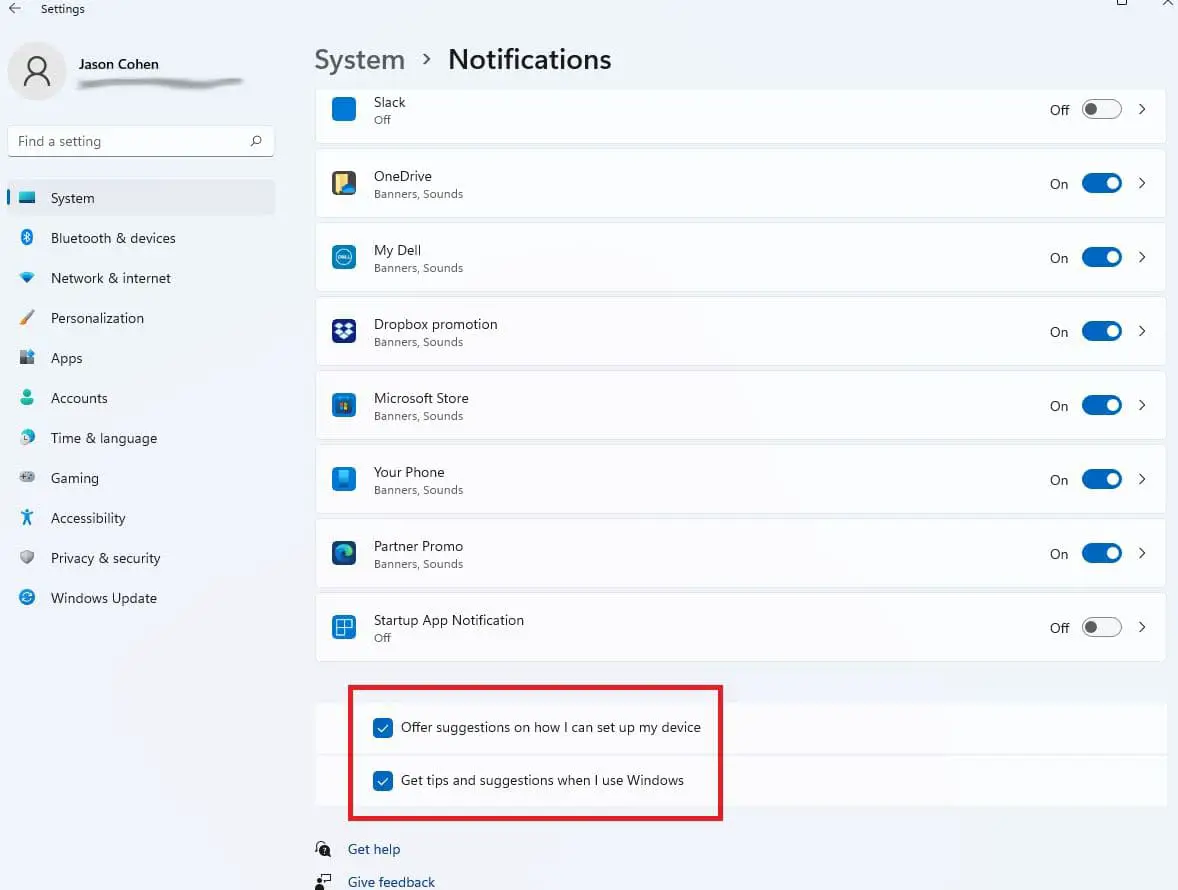
Windows 11 offers tips and suggestions to use the PC better. These notifications are helpful, but they can get annoying if you do something meaningful. And disable unwanted notifications in Windows 11 can help improve your productivity and reduce distractions.
- Open the settings app using the Windows key + I
- Go to System then Notifications and scroll down to the end of the Notifications settings.
- Now, uncheck the checkbox next to “Offer suggestions on how I can set up my device” and “Get tips and suggestions when I use Windows.”
- You will no longer receive notifications related to suggestions and tips.
Review app permissions
When you set up a new app, you typically grant it a few permissions to, say, use your device’s webcam for video calls or track your location for sending you weather alerts. However, many apps continue to misuse their access in the background to covertly collect your data and track your activities. Changing app permissions on Windows 11 is an important step in managing your device and protecting your privacy and security.
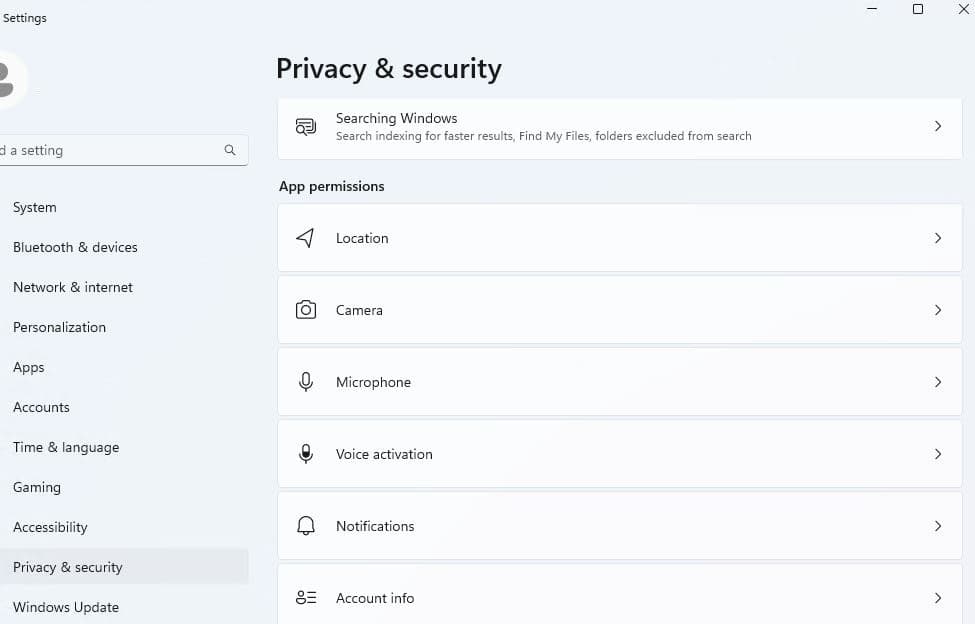
- Press Windows key + I to Open Settings and then pick Privacy & Security
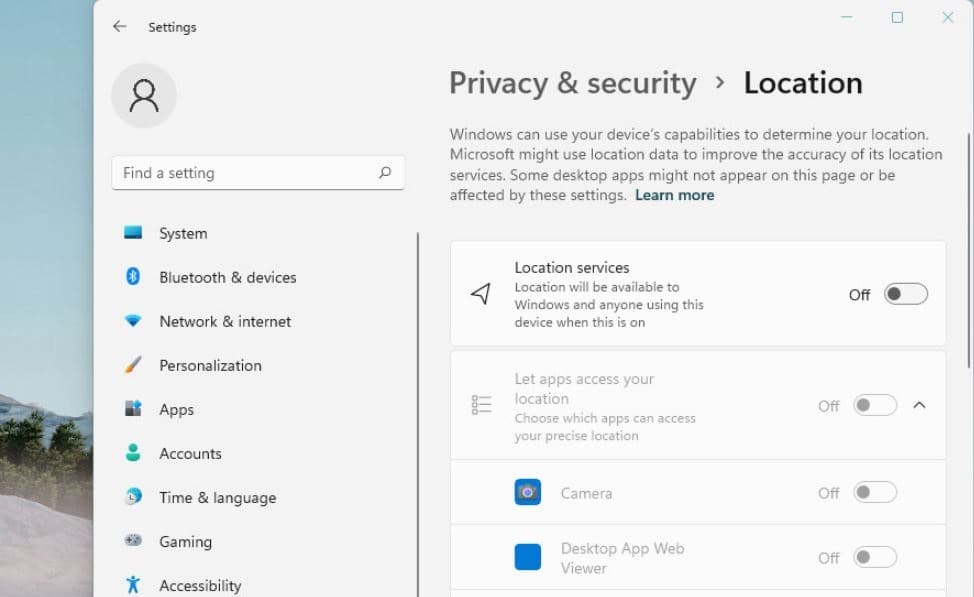
- Here under App permissions, you can see which apps are able to do what in categories such as Location and Microphone.
- Pick permission for example location and inside, turn off the toggle next to an app to prevent them from accessing it.
Doing this also ensures no unnecessary app uses your extensive hardware. Therefore, it will further improve your PC’s performance.
Sign-In With Local Account
Signing in with a local account gives you more control over your device settings and preferences, as you are not required to use Microsoft’s account management tools. Using a local account on Windows 11, disable all the background telemetry and tracking services and protect your privacy by keeping your data out of the cloud.
Creating a local account can save you from a lot of unnecessary updates and other elements.
To create a local account to work on your Windows 11:
- Press the Windows key + X and select settings
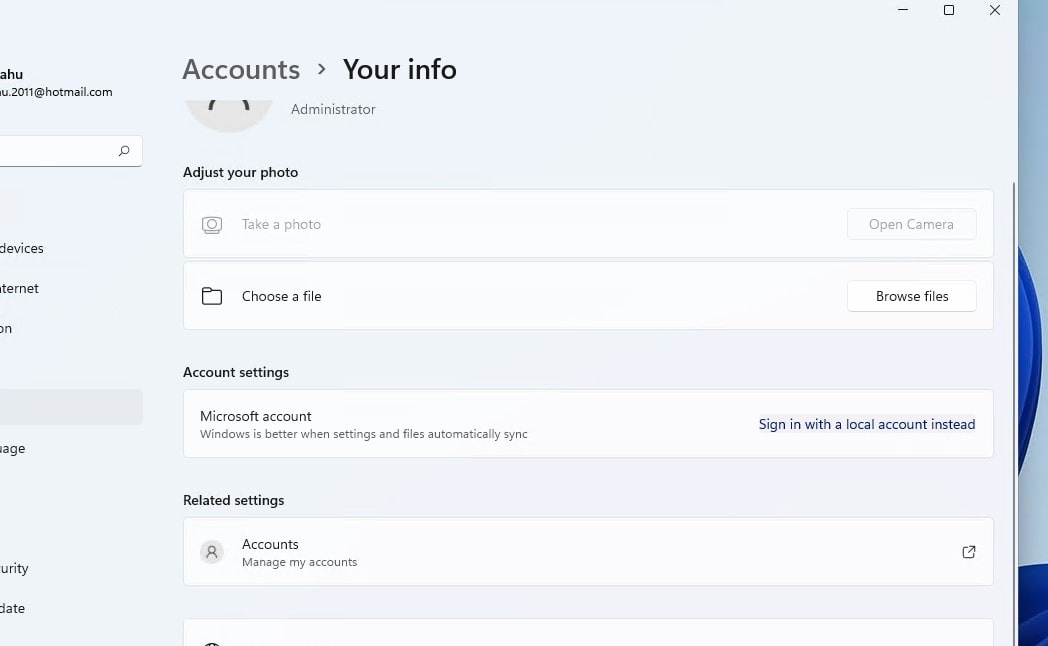
- Go to Account then your info and Click on “Sign in with a local account instead” under Account settings.
- Follow the instructions on your screen to complete the process.
If you don’t have a local account on your computer, you may need to create one From settings -> Accounts -> “Family & other users.”
Click on “Add account”, Then instead of entering an email or phone number, use the “I don’t have this person’s sign-in information” open underneath it. Click on Add a user without a Microsoft account then Add username and password, then a security question
Remove pre-installed bloatware
Bloatware is unnecessary software that comes pre-installed from the device manufacturer and its partnered companies. This preinstalled software can indeed slow down Windows 11, as these programs often take up system resources and can run in the background even when they’re not being used
- Right-click on the start menu select installed apps,
- Click on the three dots (…) next to an unwanted or unrecognized app and Uninstall it.
Disable Unwanted Startup Apps
In addition, many apps launch as soon as you start your PC. Unfortunately, some of these apps are unwanted and can be removed from the startup apps list.
- Press the Windows key + I to open the Settings app,
- Go to Apps then Startup, Now, toggle the switch next to the apps you don’t want to launch at Startup such that they are turned off.
Turn on the Windows 11 night light
Windows 11 also gives you a night light setting, reducing the amount of blue light emitted by your screen so as not to strain your eyes late into the evening. And enable Enable Night Light is an effective way to make your computer use more comfortable and minimize the potential negative impact of blue light on your sleep quality.
- Press the Windows key + X and select settings
- Go to the system then Display, Under the “Brightness & color” section, turn on the Night light toggle.
- Also, you can configure it to run on a timed schedule.
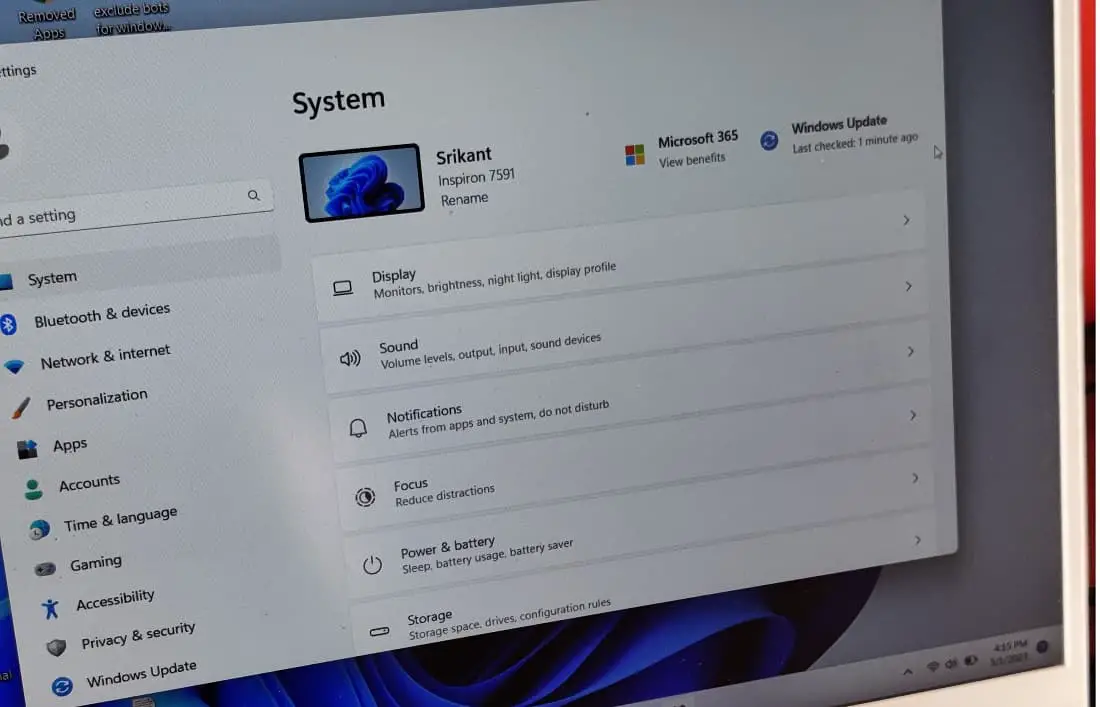
Change computer name on Windows 11
To change the computer name on Windows 11
- Press the Windows key + X then select settings
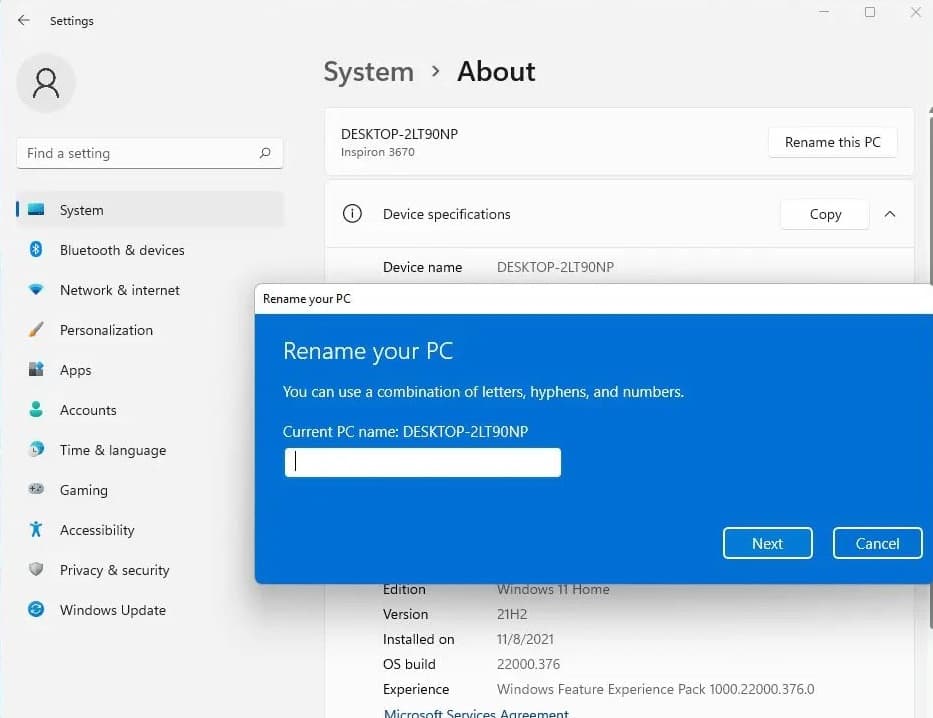
- Go to the system then click on About on the right-hand side.
- Here Under the “Device specifications” section, click the “Rename this PC” button.
- And finally, Enter a new name for the computer, click next then restart your PC to apply the new name on Windows 11.
Check For New Update
Again security patches and driver updates are important for your computer. And, you should check for Windows 11 updates and install them to avoid issues with the PC.
- Press the Windows key + I to open the settings app,
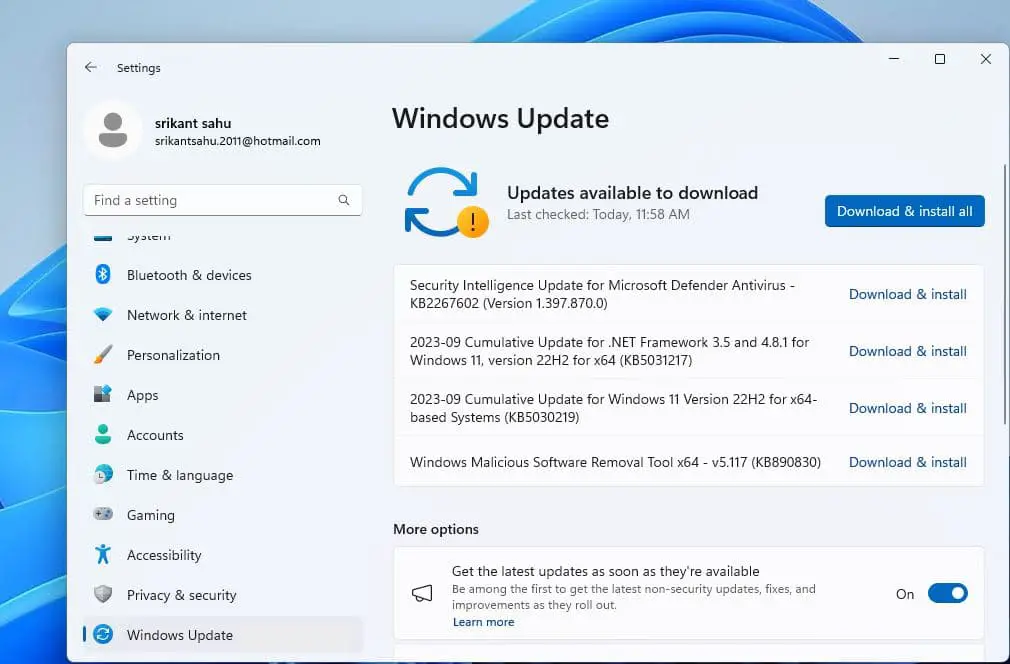
- Go to Windows Update then hit the check for Updates button,
- If there are any updates available, allow them to download from the Microsoft server.
- Once done reboot your computer to apply the Windows updates.
Or you can visit the device manufacturer’s site to download the latest driver update for Windows 11 and install it.
In addition, if you are interested, you can Realign the start menu and icons to the left side of the Taskbar from settings -> Personalization -> Taskbar. Expand the Taskbar behaviors option and next to Taskbar alignment select the Left option
Well if you are looking for Remove the Widgets icon from Taskbar again settings -> Personalization -> Taskbar. Here under the “Taskbar items” section, turn off the Widgets toggle switch
Also read:
- Fix Windows 11 problems in Safe Mode: A Beginner’s Guide
- Windows 10 Start menu not working after update (7 Solutions)
- What is a software update and why you should keep software updated
- Solved: Network adapter not working Windows 11 (Error 39)
- Windows 11: check computer health to ensure it running smoothly
