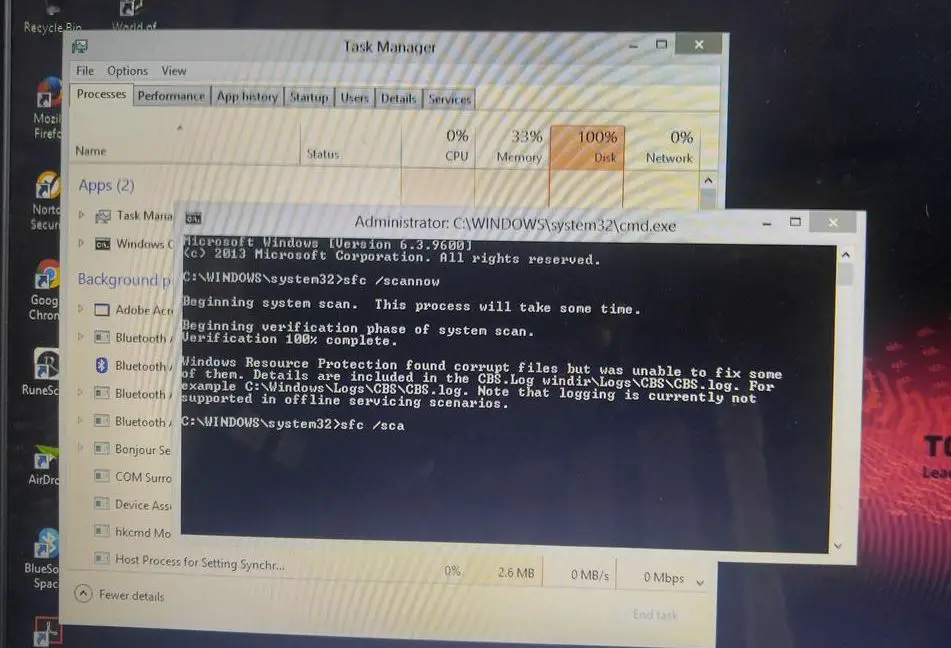
The system file checker utility is also known as SFC utility or sfc.exe or sfc scannow allows windows users to scan for and restore corrupt missing windows system files. Whenever you experience some Windows functions aren’t working or Windows crashes, we recommend run System File Checker to scan Windows and restore your files. But there are some situations that it cannot deal with and the SFC scan results, “windows resource protection found corrupt files but was unable to fix some of them”
Windows Resource Protection found corrupt files but was unable to fix some of them. Details are included in the CBS.Log windir\Logs\CBS\CBS.log.
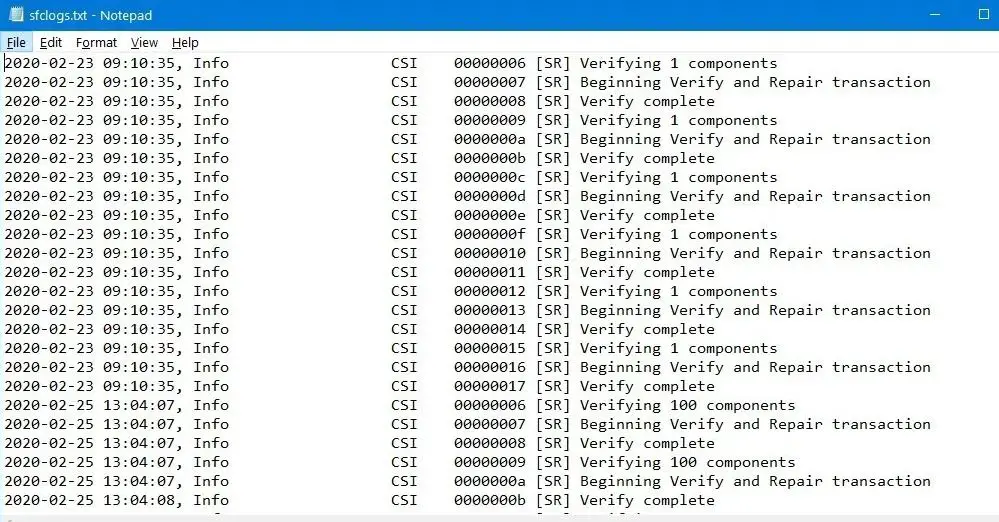
How to view the SFC log file
When you run SFC command the details of System File Checker stored in the CBS.Log file. To view the SFC log file you’ll need to make a readable copy on your desktop following the steps below.
- Open the command prompt as administrator,
- Type command findstr /c:”[SR]” %windir%\Logs\CBS\CBS.log >”%userprofile%\Desktop\sfclogs.txt” and press enter key
- Look at your desktop screen, a new notepad file stored there with the name “sfclogs”
- Open the sfclogs.txt located on the desktop with Notepad to view all the details of the scanned system files and information for files that couldn’t be repaired.
How to repair the corrupted files found by sfc /scannow
When you run the sfc /scannow command the SFC utility scan all protected system files, if found any problem, it will attempt to replace the problematic files with a cached copy that is located in a compressed folder at %WinDir%\System32\dllcache. Most of the time sfc utility restores the corrupted system files with the correct ones, but due to some reason your system files heavily damaged or missing time might result unable to fix them. Here some applicable solutions that help repair the corrupted files found by sfc /scannow.
- Make sure your computer has the latest windows updates installed
- Temporarily disable third-party antivirus software (If installed) and perform sfc scan.
Run SFC command in safe mode
Start Windows in safe mode, and run the sfc /scannow command this will help if any third party addon prevents sfc utility to restore or repair corrupted system files with the correct one.
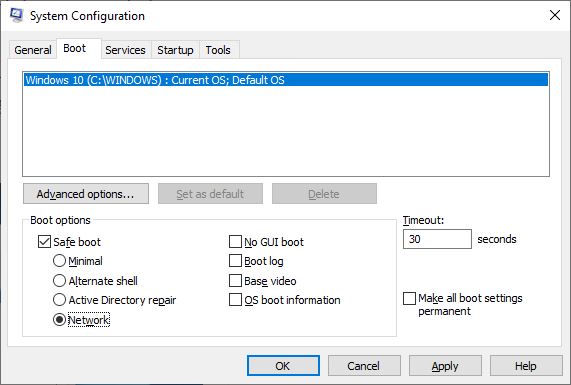
- Press Windows key + R, type msconfig.msc and click ok,
- Move to Boot Tab, Checkmark on safe Boot option (refer image below) click apply and ok
- And restart your PC to boot windows into safe mode.
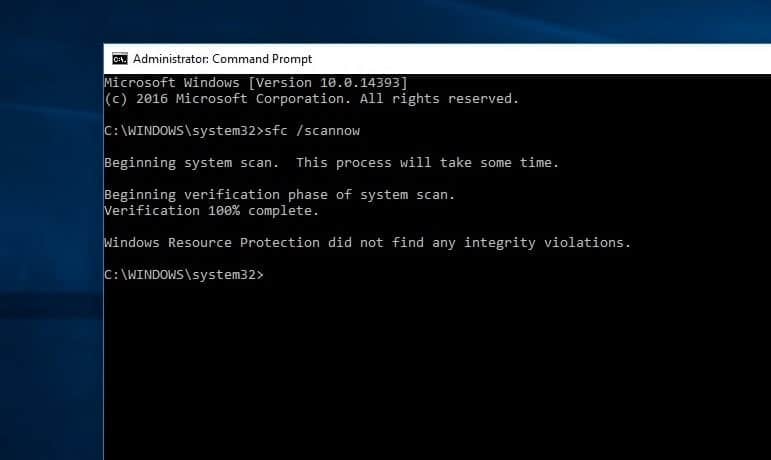
- Now open the command prompt as administrator,
- Type sfc command sfc /scannow and press enter key,
Lets the scanning process complete 100% and check if this time sfc utility repair the corrupted system files. or there is no more “windows resource protection found corrupt files but was unable to fix some of them”
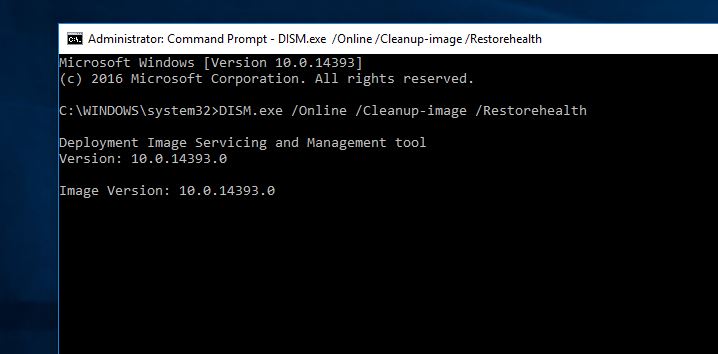
Run DISM restore health command
Next, run the DISM (Deployment Image Servicing and Management) utility that helps repair the Windows image. Well, the sfc utility uses locally stored copies (which may be already corrupted) to replace corrupted files, But DISM uses the windows update component to get their job done. only you need to make sure you have a working internet connection before run the DISM command.
- Search cmd on start menu, right-click on command prompt select run as administrator,
- Type command DISM /Online /Cleanup-Image /RestoreHealth and press the enter key,
- Let the scanning process complete 100%, depending on your PC configuration it might take more than 15-30 min.
Note: If you notice DISM scan stuck around 30% don’t worry and please do not close the window it’s normal behavior and the progression with resume after a few minutes.
Once the scanning process 100% completes run the sfc /scannow command and check if there is no more corrupt files found by sfc utility. If still encountering the “Windows Resource Protection found corrupt files but was unable to fix some of them” error apply the next solution.
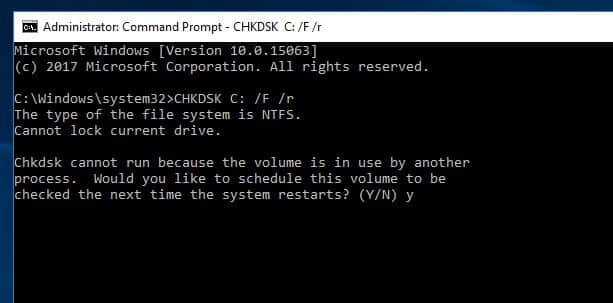
Run check disk command
Several windows users report, running the check disk command before sfc utility helps them get rid of this problem.
- Open the command prompt as administrator,
- Type command, chkdsk c: /f /r and press enter key,
- Type Y and press enter when ask for confirmation to run the check disk command on the next start,
- Close everything and restart your PC to check and repair possible errors on your hard drive.
- Once done reboot your PC and again run the sfc /scannow command
Run SFCFix Tool
Also you can download and run third-party SFCFix Tool which scans your windows for corrupted system files and will restore/repair these files which System File Checker failed to do so.
- Download SFCFix Tool from here.
- Then open the command prompt as administrator
- And type SFC /SCANNOW to run the system file checker utility.
- while running the process launch the SFCFix.exe.
The SFCFix will complete and report on whether it found any corruption, the log file saved to your Desktop, called SFCFix.txt. Open the log file that gives technical details on any problems which were found
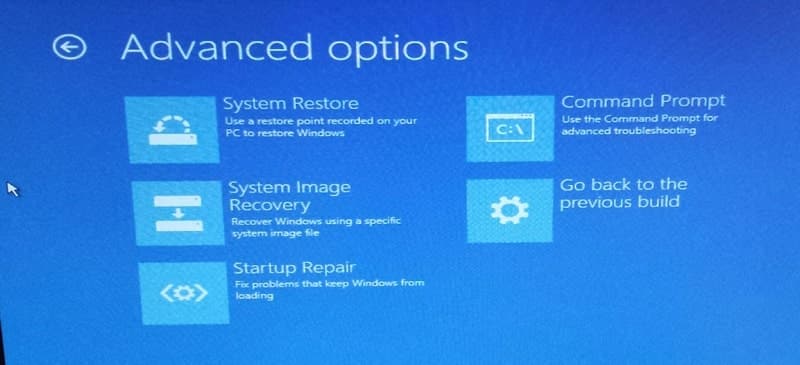
Run startup repair
In addition, you can access advanced options and run the startup repair that helps repair the following.
- Missing/corrupt/incompatible drivers
- Missing/corrupt system files
- Missing/corrupt boot configuration settings
- Corrupt registry settings
- Corrupt disk metadata (master boot record, partition table, or boot sector)
- Problematic update installation
Did the above solutions help repair the corrupted files found by sfc /scannow? Let us know on the comments below.
Also read:
- Windows resource protection could not start the repair service windows 10
- How to fix Different windows update problems in windows 10
- How to Move steam games to another drive without re-downloading
- Solved: Laptop Slow Shutdown after Windows 10 Update
- Understand the Difference Between Windows 10 Home and Windows 10 Pro OS
