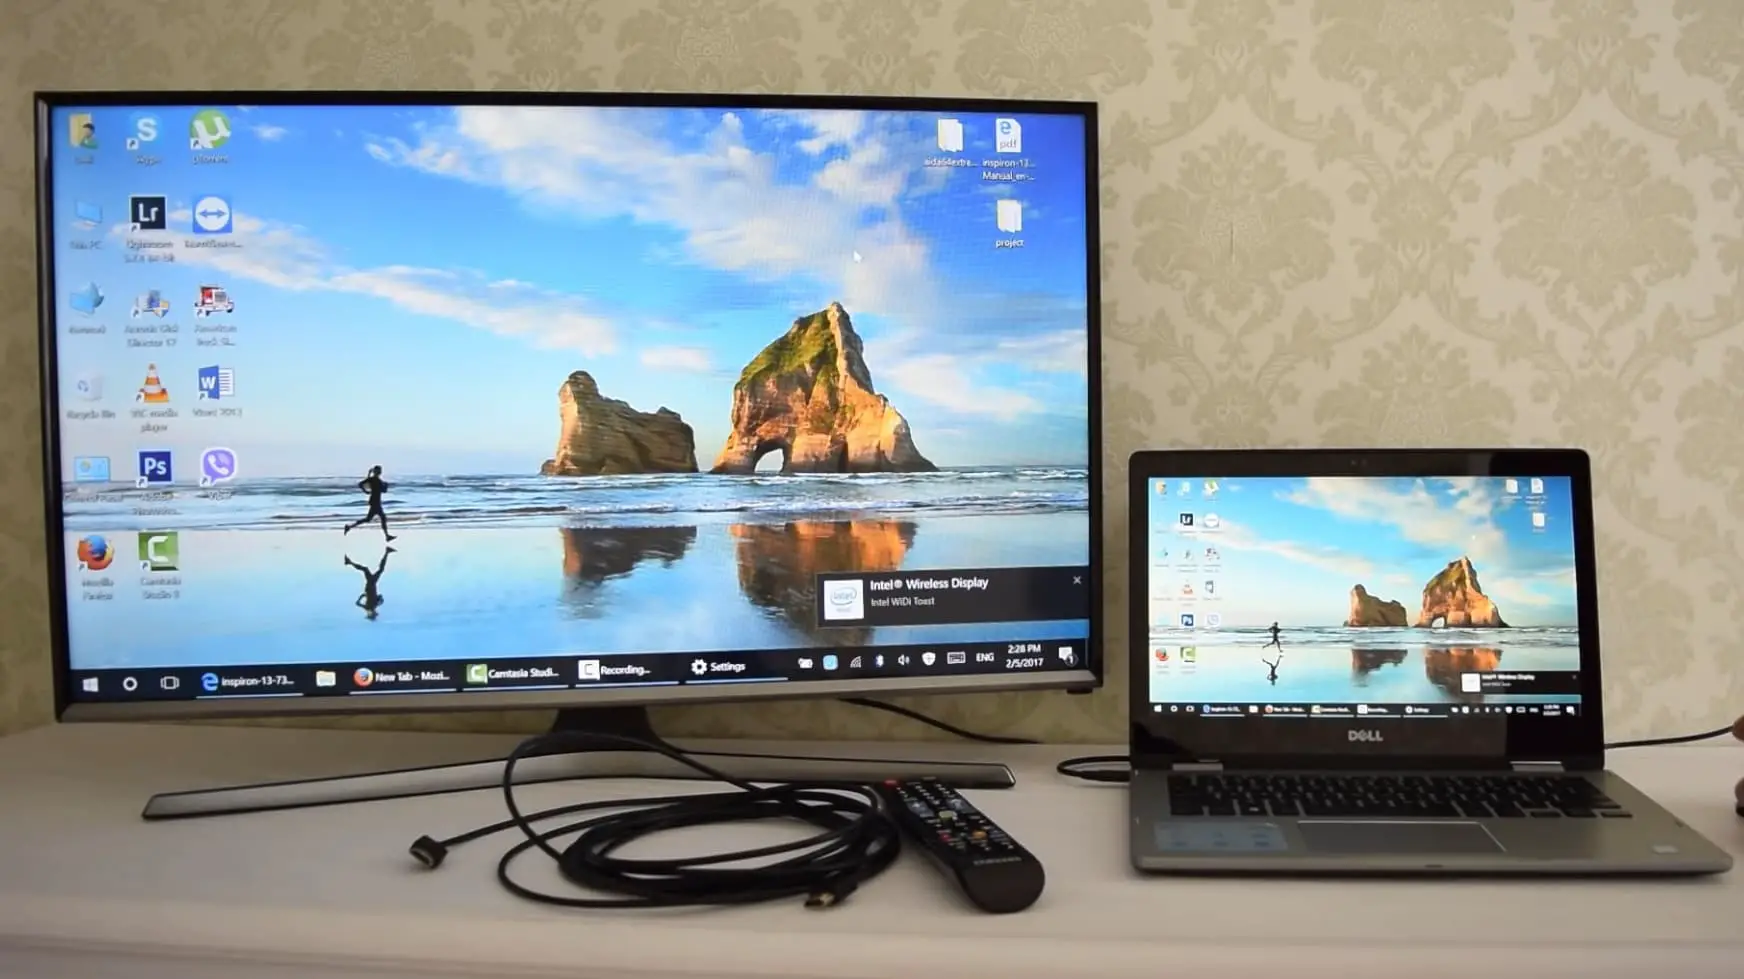
The latest Windows 11 operating system comes with a number of new features and improvements and the Wireless Display feature is one of them. With this feature enabled, windows 11 users can connect external devices to the laptop or computer display wirelessly. Well, this feature is available in the Windows 11 operating system as an optional feature and you have to install and enable it manually. Here is How to enable the Wireless Display feature in Windows 11 and troubleshoot its related errors such as Wireless Display Feature Not Working or Wireless Display Install Failed Error on Windows 11.
Windows 11 integrates the wireless display feature to share your computer screen easily, without an additional HDMI cable.
How to enable the Wireless Display feature in Windows 11
As discussed before Wireless Display Feature is an optional feature on Windows 11 and you need to enable it from settings. Here is how to do it.
- Right-click on the Windows 11 start menu select settings,
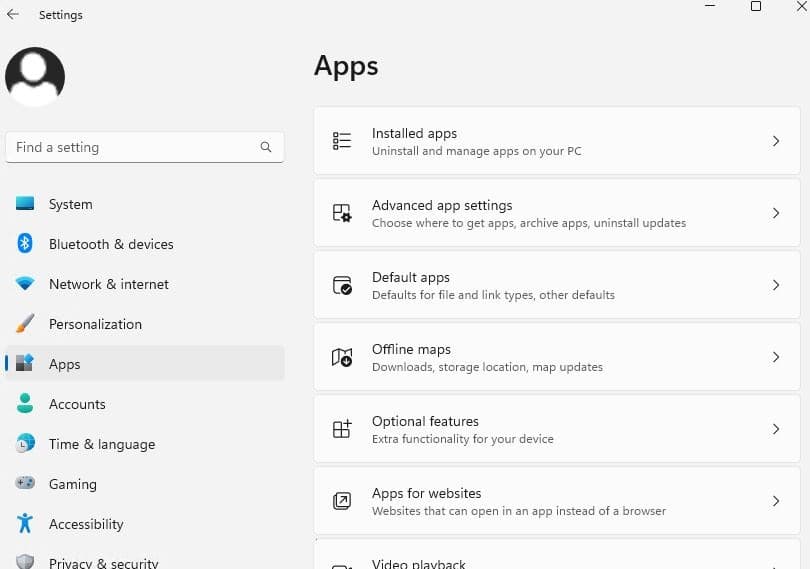
- Click on the “Apps” from the left sidebar and then select the “Optional Features” option from the right side of the pane,
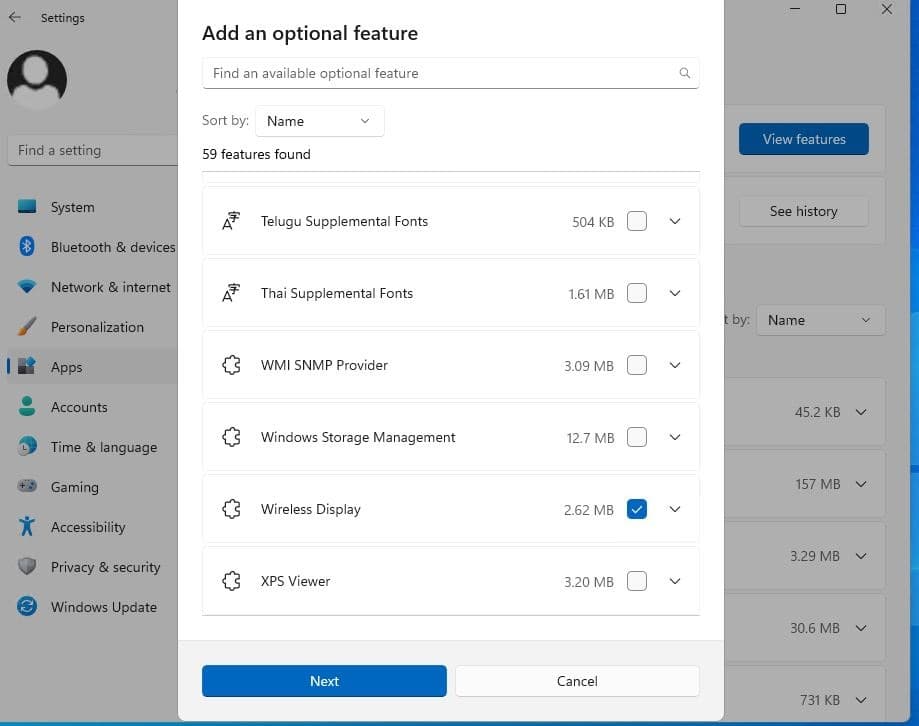
- Here click on the “View features” next to “Add an optional feature” section
- A new dialog box opens, scroll down and select the wireless display, checkmark the box next to it then click on next,
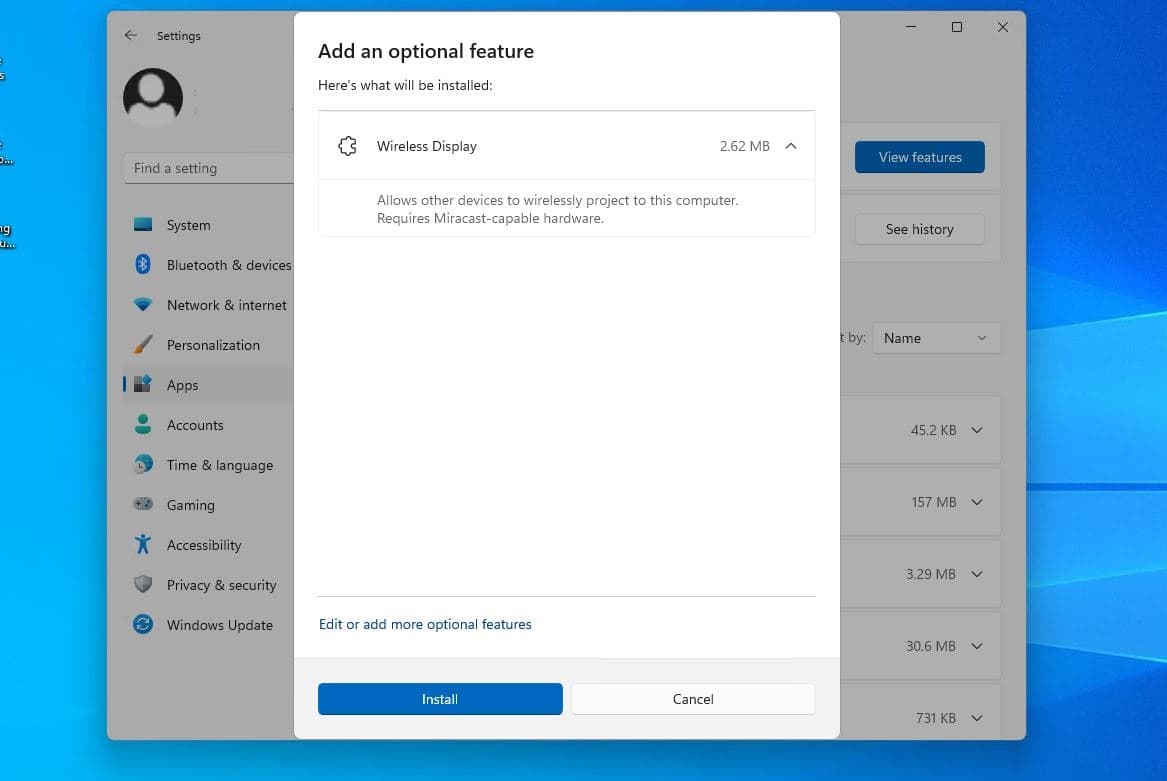
- And finally, click on the install button to download the required files from the Microsoft server and install or enable the Wireless Display feature on Windows 11 PC.
Once done restart your PC and press the Windows key + K to connect to the wireless display.
Wireless Display Feature Not Working
Sometimes you may experience problems while enable the Wireless Display Feature or wireless display feature not working on your Windows 11. Mostly its cause because of outdated graphics drivers, incorrect setup, or security software or Firewall also may cause this issue. Here we have multiple solutions to fix if the Wireless Display Feature is not working for you.
If you are getting Wireless Display Install Failed Error on Windows 11 then you need to check the Internet connection.
In addition, open Windows settings and go to Network & internet. Choose Properties on the right side of the window and Toggle off the Metered connection.
First of all to use or cast your Windows 11 PC screen to your TV, you need to make sure both devices are connected to the same Wi-Fi network.
Next check and install the latest Windows update, which may have a bug fix for Wireless Display Feature Not Working problem on Windows 11.
- Press the Windows key + I button to open Windows Settings.
- Select Windows Update from the left pane.
- Click on the Check for updates button.
Still, your wireless display is not working, Let’s restart your computer and reconnect. If this problem occurs due to a bug or glitch, there is a high chance that the issue will be fixed within moments.
Run Hardware and Device troubleshooter
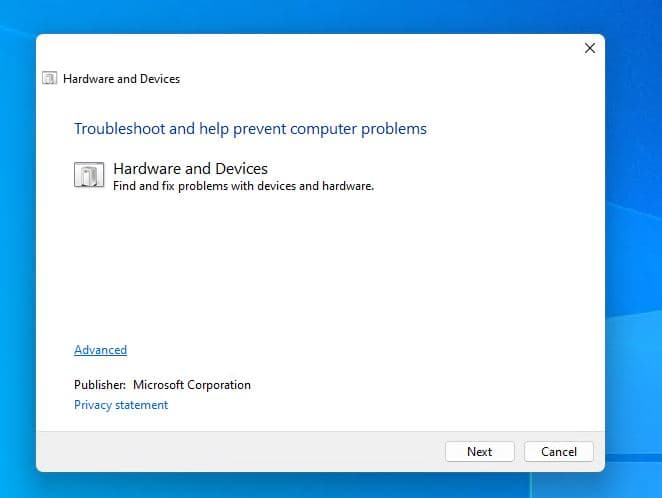
Let’s first run the built-in Hardware and Device troubleshooter that scans and automatically fixes some of the common problems that you may come across when using it.
- Press Windows key + R, type msdt.exe -id DeviceDiagnostic and click ok
- This will open the Hardware and devices troubleshooter screen,
- Click next and follow the on-screen instructions to allow the troubleshooter to detect any issues with your hardware and devices and fix them automatically.
- After the process is complete, you can start screen sharing and see if this fixes the issue or not.
Check if your PC supports Screencast
It’s important if you have old computer or laptop chances are that it doesn’t support a wireless screencast. Don’t worry you can still cast your PC’s screen to a big screen by using a physical cable, Here is how to check if your PC supports screencast or not.
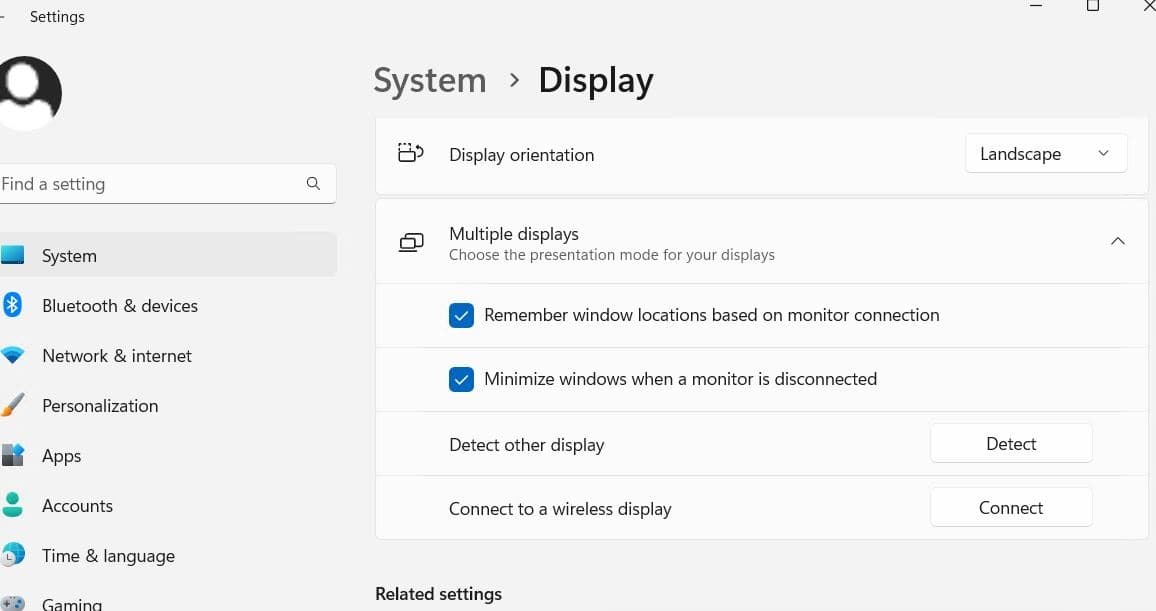
- Press Windows key + I to open the settings app on Windows 11,
- Go to System then click on the Display section on the right pane,
- On the next page, under Scale & layout, click on the multiple displays option
- Here, check if “Connect to a wireless display” option is available or not. If yes, then your PC supports screen casting.
Check Firewall settings
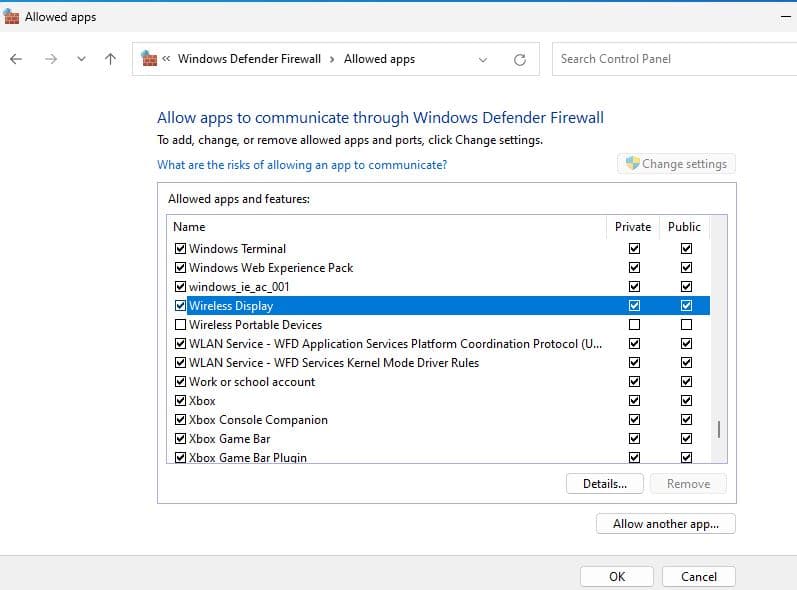
Let’s check and allow if the Windows firewall is preventing the connection to the Wireless Display.
- Press Windows key + R, type control firewall.cpl and click ok to open Windows Defender firewall on your computer
- Click on the Allow an app or feature through Windows Defender Firewall
- Next, click on Change settings, scroll down and locate the Wireless Display section
- Here check mark on Wireless Display and check mark on private and public option as well.
- Click ok button to save changes, and check it resolves your issue or not.
Update Graphics driver
Most of the time, faulty or outdated graphics drivers also prevent casting your Windows 11 PC screen with big TV screen. If still, you are unable to cast your PC screen with TV then it’s recommended to update or reinstall your graphics driver.
keeping your graphics driver up to date is essential to avoid other display issues
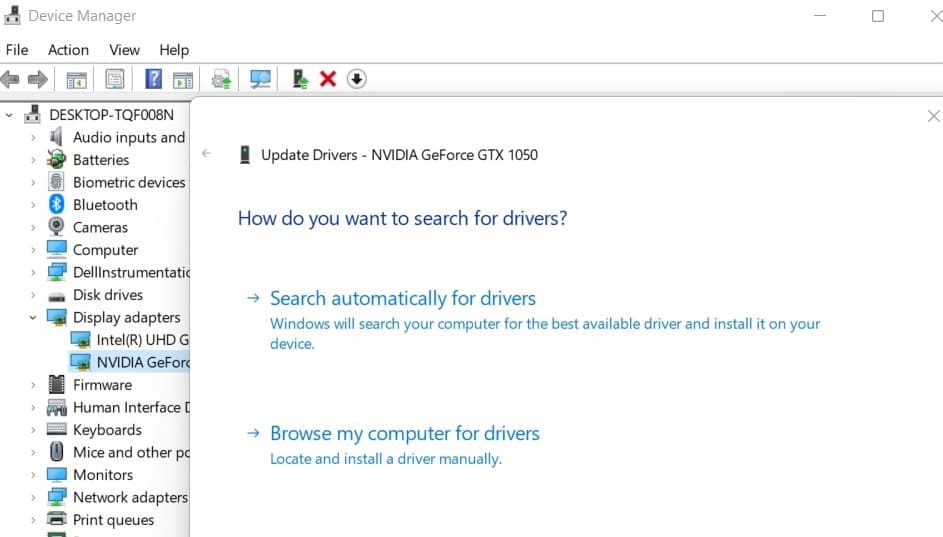
- Right-click on the Windows 11 start menu and select Device Manager, This will display all installed device driver list on your computer.
- Locate and expand the Display adapter section, Right click on your Graphics driver then select the update driver option,
- In the new window that opens, select the “Search automatically for drivers” option to allow the download of graphics driver updates from the Microsoft server.
- You computer search for new drivers and if a new driver update is available then it will install them automatically,
- You need to reboot your PC for the changes to take effect.
- Same way update your Wireless driver as well and Now try to share your PC screen using Windows key + K.
Note – Also you can download the update driver package from the manufacturer’s site and install on your computer to fix driver related problems as well.
Did the above solutions help fix Wireless Display Feature Not Working on Windows 11? Let us know in the comments below.
Also read:
- Solved: Windows 10 Cast To Device Not Working / Not responding problem
- Solved: Wireless network adapter missing Windows 10
- Chromecast not working after Windows 10 update (Solved)
- 7 Ways to Fix Microphone Not Working Issue on Windows 11
- 5 Best Cybersecurity Tips to Protect Your Windows PC From hackers
