


Microsoft Windows 11 and 10 offer many features and improvements that make them faster, more secure, and more user-friendly than ever before. Windows 11 and 10 also equipped with several built-in tools designed to keep your PC running smoothly. In this article, we’ll explore three essential tools—Memory Diagnostic Tool, CHKDSK, and SFC or DISM commands. Three tools are integrated into Windows to analyze your computer for errors and fix them automatically. Whether you use Windows 10 or 11, you will be able to access these tools very easily and quickly check if there is any problem in your system. Let’s explore how these built-in tools contribute to the optimization, speed, and error-free operation of your Windows 11 PC.
Windows Memory Diagnostic Tool – Fix RAM errors
The Memory Diagnostic Tool is a hidden gem for maintaining system stability by identifying and resolving memory-related issues.
The Memory Diagnostic Tool is a utility that can test your RAM for errors and defects. RAM is the short-term memory of your computer, where it stores the data and programs that are currently in use. If your RAM is faulty, it can cause various problems such as crashes, freezes, blue screens, or poor performance.
To run the Memory Diagnostic Tool:
- Press the Windows + R key combination, in the Run dialog box type mdsched.exe and click OK,
- This will open the Windows Memory Diagnostic Tool on your PC (applicable for both Windows 11 and 10)
- Here You will see a prompt asking you to restart your PC and run the tool, or schedule it for the next restart. Choose the option that suits you best.


- If you choose to restart now, your PC will reboot and the tool will start automatically. You will see a blue screen with a progress bar and some options.
- You can press F1 to change the test settings, such as the test mix, cache, or pass count. You can also press Esc to exit the tool at any time.
- The tool will run several tests on your RAM and report any errors it finds. If it detects any problems, it will tell you to contact your PC manufacturer or replace your RAM modules.
This tool conducts thorough tests on your system’s RAM, detecting and isolating memory problems such as faulty RAM modules or configuration issues.


When the tool finishes, your PC will restart and boot into Windows 11. You can view the test results by opening the Event Viewer and navigating to Windows Logs > System. Look for events with the source MemoryDiagnostics-Results.
You can use this information to replace or reseat your faulty RAM modules or contact your manufacturer for support. By doing this, you can prevent further damage to your system and improve its performance.
CHKDSK utility – Scan your hard drive for errors
The Check Disk (CHKDSK) utility is a powerful tool that examines and repairs issues within the file system, maintaining the integrity of your storage drives.
CHKDSK, which stands for Check Disk is a command-line tool, that can scan your hard drive or SSD for errors and bad sectors, and fix them if possible. Hard disk errors can occur due to physical damage, power failures, malware infections, or improper shutdowns and can cause data loss, corruption, or system instability.
To check the disk drive for errors:
- Press the Windows key + E to Open File Explorer and right-click on the drive that you want to check.
- For example, if you want to check your F: drive, right-click on it and select Properties. Go to the Tools tab and click on Check under Error checking.
- You will see a window that says “You don’t need to scan this drive”. This means that Windows 11 has not detected any errors on your drive. However, you can still scan it for errors by clicking on Scan Drive.


Depending on the size and condition of your drive, this may take a while to complete. You may also need to restart your PC to finish the repair.
Run chkdsk command with additional parameters:
Alternatively, you can run CHKDSK from an elevated Command Prompt or PowerShell window. To do this, press Windows + X and select Command Prompt (Admin) or PowerShell (Admin).
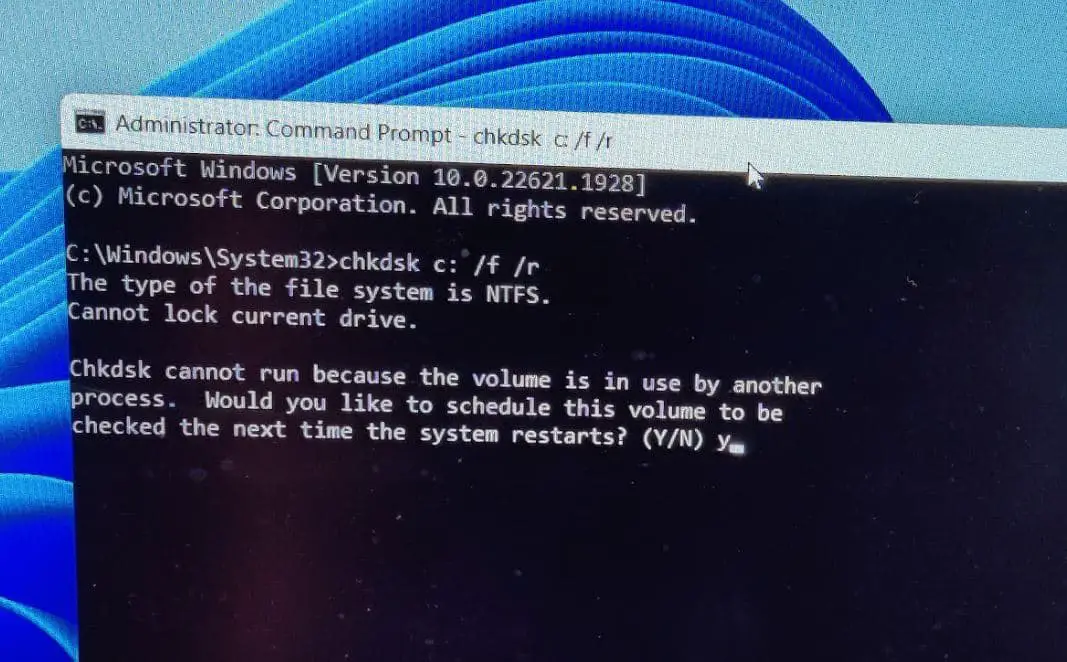
Type chkdsk C: /f /r /x and press Enter. Replace C: with the drive letter that you want to check.
- The /f parameter tells CHKDSK to fix any errors it finds.
- The /r parameter tells CHKDSK to scan for bad sectors and recover any readable information.
- The /x parameter tells CHKDSK to dismount the drive before scanning it.
Note that if you are checking your system drive (usually C:), CHKDSK will ask you to schedule the scan for the next restart. Type Y and press Enter to confirm.

CHKDSK scans for and corrects disk errors, bad sectors, and other file system inconsistencies.
CHKDSK will scan your drive for any errors or bad sectors, and try to fix them by marking them as unusable or recovering any readable data from them. This can help you avoid data loss or corruption, and improve the reliability of your drive. However, CHKDSK cannot fix physical damage to your drive, such as scratches or cracks. If your drive is severely damaged, you may need to replace it with a new one.


When CHKDSK finishes, it will display a summary of its results. You can also view the details by opening the Event Viewer and navigating to Windows Logs > Application. Look for events with the source Chkdsk.
SFC and DISM tool – Repair Corrupted Windows System Files
SFC and DISM are powerful command-line tools that focus on the integrity of system files and Windows images, respectively.
The SFC (System File Checker) and DISM (Deployment Image Servicing and Management) are two command line tools that help scan and repair corrupted system files on your Windows 11 PC. System files are essential components of your operating system that enable various functions and features. If these files are damaged or missing, they can cause various problems such as crashes, errors, or missing features.
System files can get corrupted or damaged by malware, power outages, or improper shutdowns
To run the SFC or DISM command on Windows 11/10
- Press the Windows key + S and type cmd, Right click on the command prompt and select run as administrator.
- Type sfc /scannow and press Enter. This command will scan all protected system files and replace any corrupted or missing ones with a cached copy from a backup folder.
- Wait for the scan to complete. It may take several minutes depending on the size of your system files and the speed of your PC.
- If SFC finds any problems, it will try to fix them automatically or ask you for confirmation before doing so.


When SFC finishes, it will display a message saying whether it found any integrity violations and whether it was able to fix them.
Run DISM command:
If SFC says that it could not fix some files, you may need to run DISM to repair the system image. The system image is a file that contains the configuration and settings of your Windows 11 installation. If the system image is corrupted, SFC may not be able to access or restore some system files.
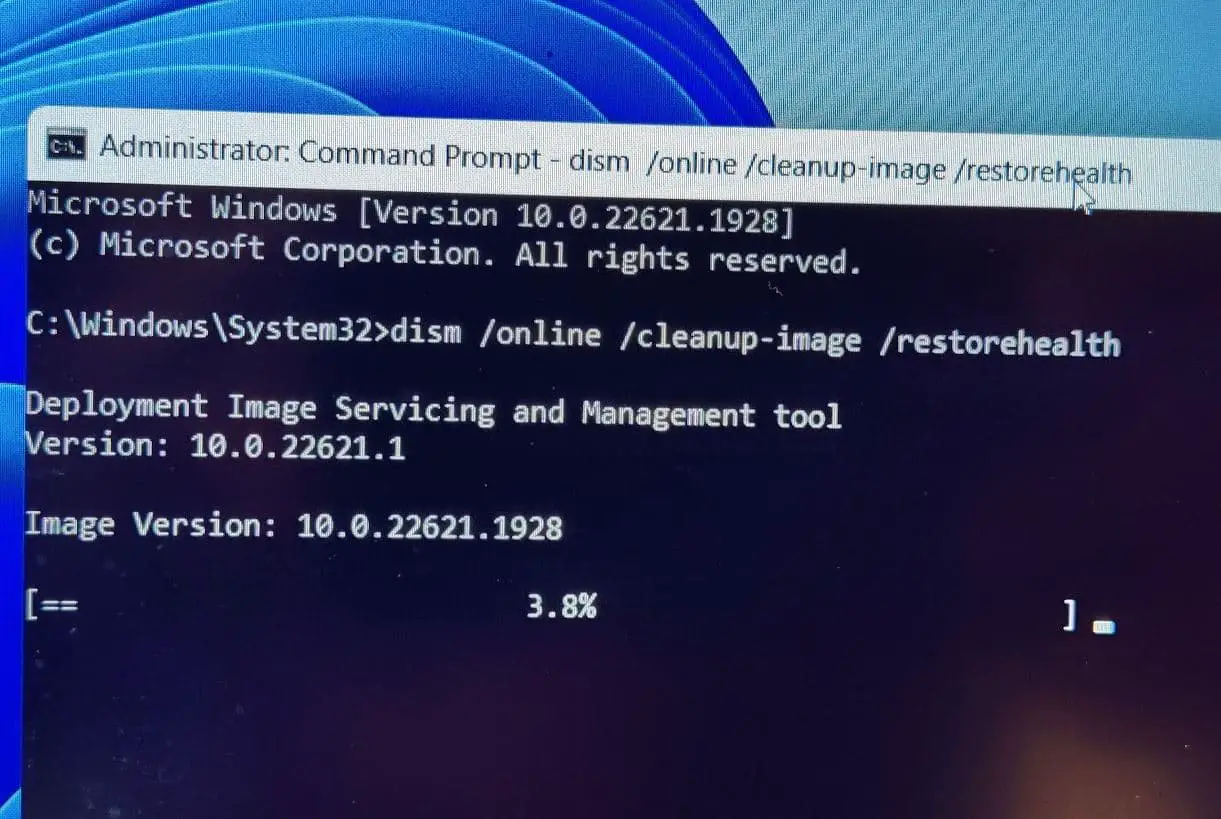
- To run DISM, type dism /online /cleanup-image /restorehealth and press Enter. This command will scan the system image and repair any corruption or inconsistency it finds.
- Wait for the scan to complete. It may take longer than SFC depending on the extent of the damage and the speed of your PC.
- When DISM finishes, it will display a message saying whether it found any corruption and whether it was able to fix it.

SFC scans and repairs corrupted or missing system files, while DISM can fix Windows image issues and enhance the overall system health.
After running DISM, you may need to run SFC again to verify and repair any remaining system files. Type sfc /scannow and press Enter. When both SFC and DISM finish, you should restart your PC to apply the changes and check if your problems are resolved.
Windows Update – The Automatic patch from Microsoft
Windows Update is a pivotal component, delivering essential updates and patches to enhance the security and performance of your operating system.
Another way to fix some common issues on your Windows 11 PC is to update your system with the latest patches and drivers from Microsoft. Windows Update is a service that automatically downloads and installs updates for your operating system, applications, and hardware devices. These updates can improve the security, stability, and performance of your PC.
To check for and install the latest Windows updates:
- Press Windows + I to open the Settings app.
- Click on Windows Update on the left sidebar.
- Click on Check for updates on the right pane, If new updates are available allow them to download and install.
Windows update include security fixes, feature improvements, and bug fixes, ensure that your system remains resilient and up-to-date.


Windows Update will scan for any available updates and download them in the background. You can see the progress and status of each update under Update history.
Some updates may require you to restart your PC to complete the installation. You can choose when to restart by clicking on Schedule the restart under Restart options.
After restarting your PC, you can check if your problems are resolved or if there are any new updates available.
By using these built-in tools and commands, you can diagnose and fix some common issues that can affect your Windows 11 PC. However, if you still encounter problems that these tools cannot resolve, you may need to contact a professional technician or Microsoft support for further assistance.
Also read:
- How to fix Windows 10 startup problems on your PC or Laptop
- Solved: File History Not Recognizing This Drive Error Windows 11
- What is the Microsoft Update Catalog? (Windows Update Catalog)
- Windows 11 Widgets Not Working and Displaying Blank Content (Solved)
- Can I use Windows 11 without activation for free? Answered


