

DISM stands for Deployment Image Servicing and Management, a command line tool prepare, modify and repair windows system images including windows recovery environment, windows setup and windows PE (winPE). Also, you can use this command dism /online /cleanup-image /restorehealth to scan and restore potential issues within the windows that may impact windows OS. Usually we recommend run system file checker (SFC) utility to scan and repair windows system files. But when sfc utility fails to repair system files the DISM restore health command services Windows images and repairs your Windows installation by downloading actual replacement files from Windows’ online servers. This article explains what is DISM command and its restorehealth function.
What is DISM command
DISM or Deployment Image Servicing and Management (DISM.exe) is a built-in Microsoft Command Line tool used to repair your Windows image or to modify Windows installation media. Using this tool you can mount Windows images in .wim, .vhd, or .vhdx format and use to address problems or errors with currently installed windows OS. It also perform advanced scan to repair system files, and its very helpful when system file checker utility fails to repair windows files on your computer.
DISM is nota complete reinstallation of Windows; instead, it finds critical core files required to run and gather information, then upgrades or repairs any files that are corrupted or out-of-date.
Use of DISM command
Whenever you experience system crash with blue screen errors or unexpected application crash or utilities or functions these are symproms of systme file corruption. And we recommend run system file checker utlity that scan all protected system files, and replace corrupted files with a cached copy that is located in a compressed folder at %WinDir%\System32\dllcache. But if system file scan results, found corrupt files but was unable to fix some of them the you can use the “install.wim” image with DISM to overcomes this issue. .
DISM command incude three options to repair an windows image
/checkhealth Starts a basic check to see if corruption has been detected in the store
/scanhealth Performs a more comprehensive scan of the store for corruption
/restorehealth Scans the store for corruption and also repairs corrupted files
In addtion:
/online Signifies that you are modifying an online image (does not signify that a scan will run over the internet)
/cleanup-image Triggers a more extensive check which can resolve issues with the store
Overall when SFC and CHKDSK fails to repair corrupted system files, then next troubleshooting step to run DISM (Deployment Image Servicing and Management).
How To Use DISM To Repair Windows Image
Press windows key + S and type cmd, right click on command prompt select run as administrator,
- First run command : DISM /Online /Cleanup-Image /ScanHealth, this will scan and determine any corruptions inside the local Windows image.
- The command DISM /Online /Cleanup-Image /CheckHealth, determine if the system image is repairable but this will not repair any errors.
- If there are porblems with system image, run command DISM /Online /Cleanup-Image /RestoreHealth to automatically scan and repair common issues. Use windows update as source to download and replace the corrupt files and restore the health of the Windows image.
Note – The scanning takes around five to ten minutes or sometimes more, depending on your system and the number of corrupted files


Make sure you are connected to internet while running the DISM command for the files to be automatically restored. This is what Microsoft says on how to best utilize DISM.
Also you can Run DISM Utility through PowerShell
- For CheckHealth: Repair-WindowsImage -online –CheckHealth
- For ScanHealth: Repair-WindowsImage -online –ScanHealth
- For RestoreHealth: Repair-WindowsImage -online -RestoreHealth
DISM with source option
DISM use your Windows Updates files to repair any corrupt files, but if Windows updates files are also corrupted and DISM unable to repair the files then you need to use a Windows installation media as a source that can be used to repair your Windows files.
- First download the Windows 11 ISO file Microsoft server,
- Right click on ISO image and select mount, And note down the drive letter (Form for its E)
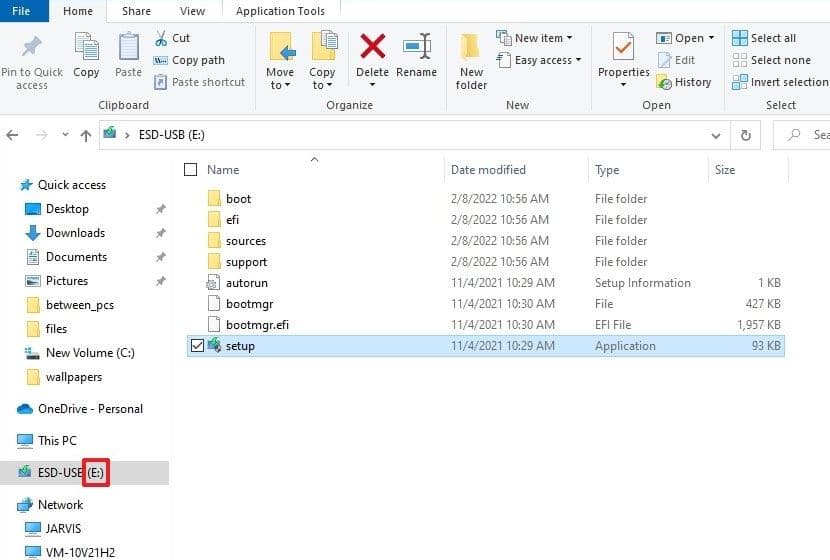

Again open command prompt as administrator and run command: DISM /Online /Cleanup-Image /RestoreHealth /source:E:\Sources\Install.wim /LimitAccess
Note – replace the source path “E” with the correct ISO mount point drive letter in File Explorer.
The command scan and repair the windows image using the “install.wim” file you specified as the alternative source.
Note – If you have windows 10 installed on your device, make sure to use windows 10 ISO as source.
In Addition Check out Microsoft’s support pages to learn more on configuring Windows repair sources and repairing Windows images.
DISM Error: 0x800f0954
Sometimes runnign DISM command may result, Error: 0x800f0954 – DISM failed. No operation was performed. Most of time third-party antivirus program interferes with the DISM during command execution result this error. In addition active proxy, read-only access install.wim or windows update service not running also cause this error.
- Temporarly Disable or uninstall Antivirus program
- Open windows services using services.msc and restart the windows update service
- Disable proxy server, right-click the install.wim file select properties and here remove the read only permission.
If you are getting DISM error 50 while runnng running the above commands, this can cause because of a misplaced registry key.
- Open windows registry editor and nivigate, HKEY_LOCAL_MACHINESYSTEMCurrentControlSetControl.
- Locate the MiniNT folder and remove it, now restart your PC and run DISM command again.
Repair the current Windows Installation
The above DISM command repair the windows image but actual windows installation files isnt repaired yet. And to repair windows files you need to run the SFC command.
- Open command prompt as administrator and run command sfc /scannow
- Let the scanning complete 100%, once done reboot your computer.
- For better result we recommend run sfc command in windows safe mode.


The System File Checker tool repair the windows files using the local image files, and the log files will be saved on %windir%/Logs/CBS/CBS.log.
- What system file checker utility do?
The sfc /scannow command-line utility scan and repair protected system files in Windows PC.
- What to do, SFC SCANNOW Cannot Repair Corrupted Files?
Run sfc command in safe mode, still the utilty unable to repair system files you need to run DISM restore health command to repair system image first.
- Difference Between SFC, CHKDSK, and DISM
The sfc command repair system files while chkdsk repair disk errors and DISM repair system files when sfc fails to complete its job.
- Did DISM command delete some of my system files?
No, DISM won’t affect any of your apps or data. It only repair critical core files required to run and gather information.
- Full form of DISM?
Deployment Image Servicing and Management (DISM.exe)
Also read:
- Fix DISM Error 0x800f081f The Source Files Could Not Be Found
- Windows 11 Critical Structure Corruption BSOD Error (5 Working solutions)
- Solved: Nvidia GeForce Experience Error Code 0x0003 on windows 11
- How to fix Your PC did not start correctly windows 11 (6 Solutions)
- How to BackUp Windows 11 to external device or cloud storage


