Backing up your data is important, And external drivers are the best option for this. Simply plug them in that appear on your computer, just drag the files over there and you are done. But what if your drive isn’t appearing when you plug it in. A number of users report Windows 10 PC fails or refuses to recognize the external hard drive even after a successful connection. This problem mostly occurs when the device driver is either corrupted or outdated. Again using the wrong file system, a problem with a USB cable or dead USB ports also result external Hard Drive not showing up or being detected in Windows 10.
External Hard Disk Not Detected
Let’s take look at What to Do When Your External Hard Drive Won’t Show Up on Windows 10 computer. Let’s start with basic troubleshooting,
Reconnect the device
- Disconnect the USB devices from your computer
- Reboot your computer (That fixes the problem if a temporary glitch causing the issue)
- Plugin the USB devices to your computer and check if this trick works for you.
Also, Unplug the device and try to connect to a different USB port (Pro tip: If ts plugged into a USB 3.0 port then try to connect it into a USB 2.0 port or try it on another computer as well.
some external drives do have dedicated power cables, If your drive came with an AC power adapter Try plugging it into another power outlet or change the power adapter.
Again if your device comes with two USB plugs, make sure they’re both plugged into your PC.
Update or Reinstall the device driver
As discussed before the primary reason for this problem could be the device driver, If Windows runs into driver issues that will render a device unrecognizable problem. Try to update or Reinstall the device driver by following the steps below.
- Open the device manager by right click on the Windows 10 start menu and select it
- This will display the list of installed device driver list,
- locate the external device from the list (expand Universal Serial Bus controllers), look at there if any yellow exclamation mark appears against the driver
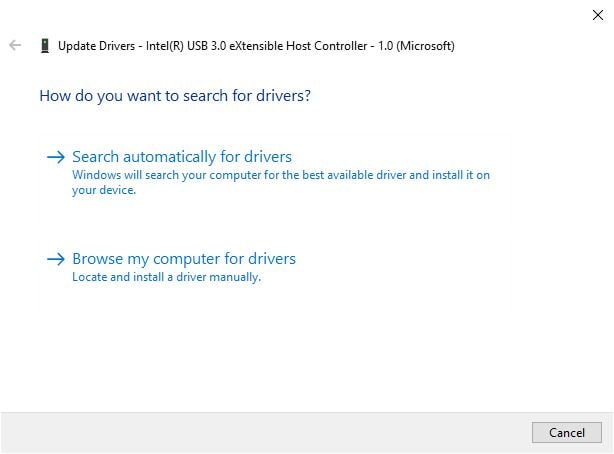
- Right-click on its name and select “Update Driver Software” Again if you find any “Unknown device”, update it too.
- Select “Search automatically for updated driver software” and then follow the instruction to finish the process.
If the update device driver does not work, still External Hard Drive Not Showing Up Or Recognized then try to uninstall and then reinstall the driver.
Check The Drive In Disk Management
Disk Management is the tool in Windows used to change drive letters, format drives, shrink partitions, and Create net partitions or perform other disk tasks like check whether disk is detected or not. Let’s open the disk management tool and check the drive showing there or not.
- Press Windows key + R, type diskmgmt.msc and click ok,
- This will open the Windows disk management utility that displays all the hard disks connected to your computer
- If your drive not listed there then the external disk might be dead.
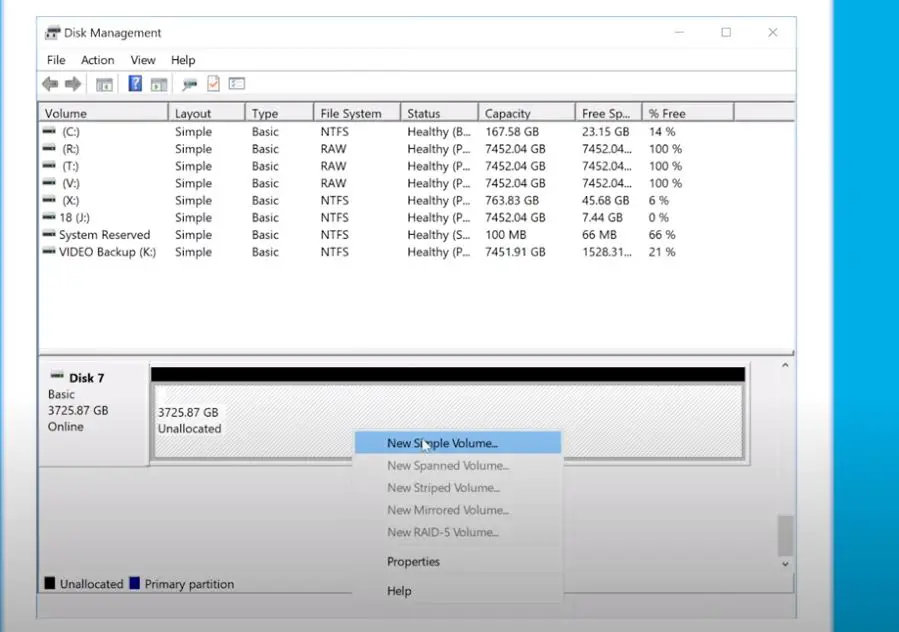
- If you do see the drive next to the removable section shows only Unallocated space, then you’ll need to create a new partition on it.
- Right-click anywhere on the Unallocated space, select New Simple Volume and go through the wizard to create a new partition.
Try to change the Drive letter
Also, try to change or add a drive letter on disk management utility.
To change the drive letter:
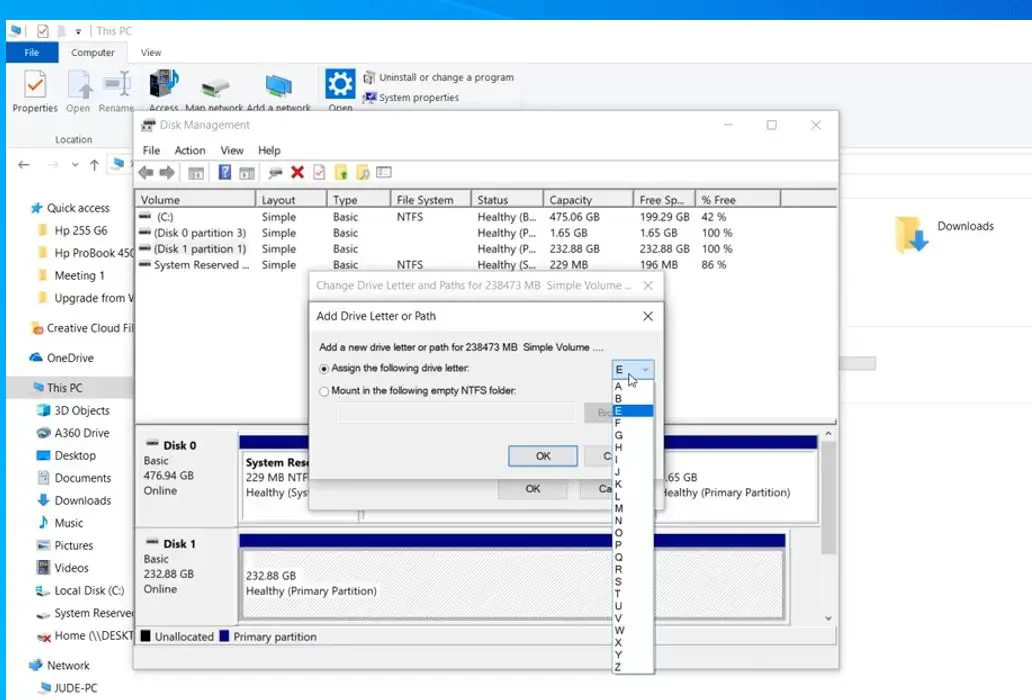
- plug the removable device, right-click the removable drive’s partition and select Change Drive Letter and Paths.
- Well If the device doesn’t already have a letter, click Add and choose one. If it does, click Change and try another one.
- Something later in the alphabet, like G or J, is standard for removable drives and will work fine.
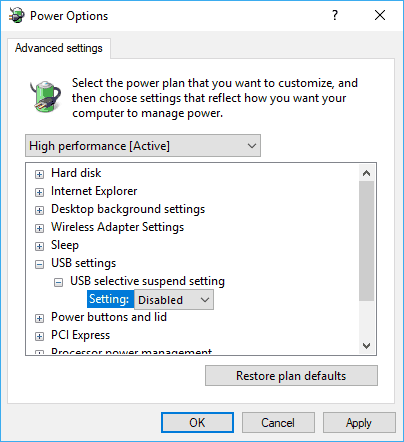
Disable USB Selective Suspend Setting
Here is another tweak, Try disabling the USB selective suspend setting that probably helps fix the External hard drive not showing up issue on Windows 10.
- Open the control panel, search for and select power options,
- Click Change plan settings next to the plan used currently.
- Next, click the Change advanced power settings link.
- Find USB settings and click on the + button to expand it.
- Click on the + button to expand the USB selective suspend setting.
- Change Setting to be Disabled.
- Click on the Apply button to confirm and click on the OK button to close.
Try to format the Drive
Note: Formatting will erase all files on your drive, we recommend backup your important using a recovery utility.
Open the Disk Management tool, using diskmgmt.msc
Here If the external drive is found listed in the Disk Management window, simply format it properly, so that it shows up next time you connect it to your PC.
Here is another tweak:
Open the Windows service console using services.msc
Scroll down and locate the virtual disk service, and make sure it’s running state.
If not double click on the virtual disk service to open its properties and change its startup type automatic. Restart your Pc and connect your external disk again.
Check if the problem is resolved.
Also read:
