The disk management tool is a built-in utility that allows users to manage their internal and external hard drives on Windows 11. Using the Disk Management utility on Windows 11 you can create and resize or delete partitions, extend or shrink volumes, monitor the health and status of disks and more. Also from Disk Management, you can quickly partition a new drive or change the drive letter on Windows 11. In this article, we will explore How to open the Disk Management tool in Windows 11 and guide you through its functionalities and usage, empowering you to optimize your storage resources efficiently.
How to open disk management in Windows 11
There are several methods to open Disk Management in Windows 11.
Using the Start Menu search:
- Click on the Start button located at the bottom-left corner of the screen or press the Windows key + S
- Type “Disk Management” in the search bar and Select the Create and Format hard disk partitions option in the Best Match section.
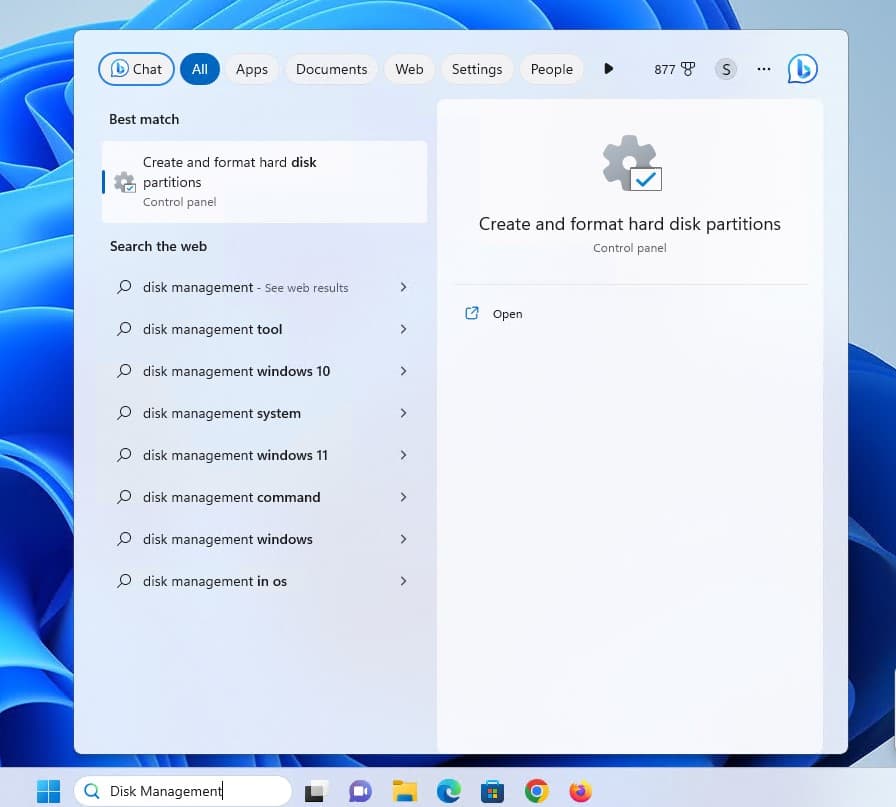
- That will directly open the Disk Management utility on the desktop
The Search menu is the easiest way to open Disk Management on Windows 11.

Using the Run Dialog or command prompt:
- You can open the command prompt and run Command diskmgmt.msc to open the Disk Management utility quickly.

- Also, you can Press the Win + R keys together to open the Run dialog. Type “diskmgmt.msc” in the Run dialog box. Click “OK” or press Enter to open Disk Management.

Using the Power User Menu:
- Again you can open the Disk Management utility from the Quick Access menu.
- Right-click on the Start button, or press the Windows key + X to open the Quick Access menu
- From the context menu that appears, select “Disk Management” option.

Using Disk Management on Windows 11
The Dism Management utility is available in almost every version of Microsoft Windows including the latest Windows 11. Once you open the Disk Management tool, you will see a clean and intuitive interface that provides a visual representation of your disks and partitions.
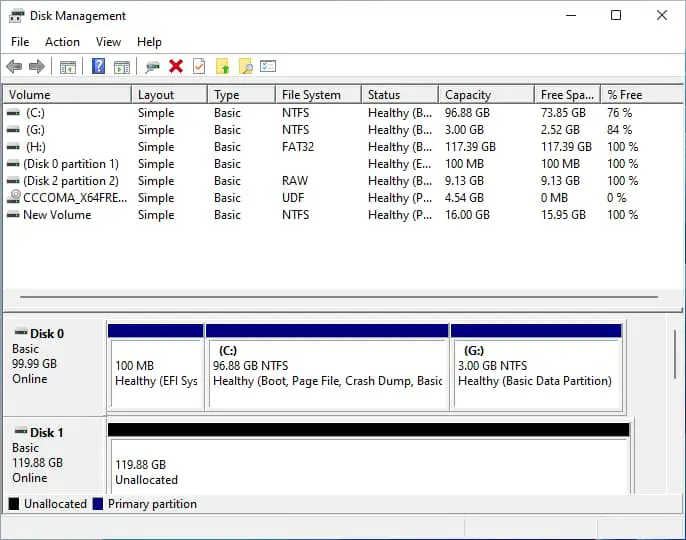
The Disk list section displays all physical disks connected to your system along with pertinent information such as Disk number, size, file system, and status.
On the volume section, you can view detailed information about the volumes and partitions on your disks. It includes data such as drive letter assignments, volume labels, file systems, capacity, and free space.
Create a New Partition
This task is useful when you want to create separate partitions for different purposes or organize your storage space.
- Right-click on the unallocated space within a disk.
- Select “New Simple Volume” from the context menu.
- Follow the on-screen instructions to specify the partition size, assign a drive letter, and format the partition.
Deleting a Partition
Exercise caution when deleting partitions, as this action will erase all data stored on the partition.
- Right-click on the partition you wish to remove.
- Choose “Delete Volume” from the context menu.
- Confirm the deletion when prompted.

Extend or Shrink a Volume
This functionality is useful when you want to resize partitions to allocate space more efficiently or create additional partitions.
- On Device Manager Right-click on a volume.
- Select either “Extend Volume” or “Shrink Volume” to increase or decrease its size, respectively.
- Follow the instructions provided to complete the process.
Changing Drive Letters
- Right-click on a volume looking for change drive letter,
- Choose “Change Drive Letter and Paths.”
- Click on “Change” and select a new drive letter from the available options.
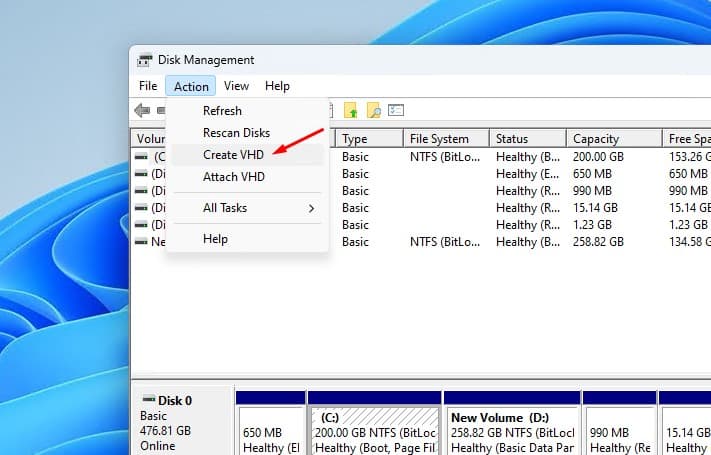
Managing Virtual Disks
Disk Management also provides tools for creating, attaching, detaching, and compacting virtual disks. You can access these options through the “Action” menu at the top of the Disk Management window.
Monitoring Disk Status and Health
The Disk Management tool on Windows 11 allows users to monitor the status and health of their disks and volumes. It provides valuable information regarding disk condition, availability, and usage. Moreover, the tool can detect errors and issues, triggering notifications and warnings to prompt users to take appropriate actions promptly.
Also read:
- Solved: MsMpEng.exe High CPU usage on Windows 11
- 8 Ways to Fix Slow Internet Speed Problems in Windows 11 Laptops
- What is OSI Model in a Computer Network? 7 Layers Explained
- Solved: Your DNS Server Might Be Unavailable In Windows 10
- Windows 11 settings you should change now for a better user experience