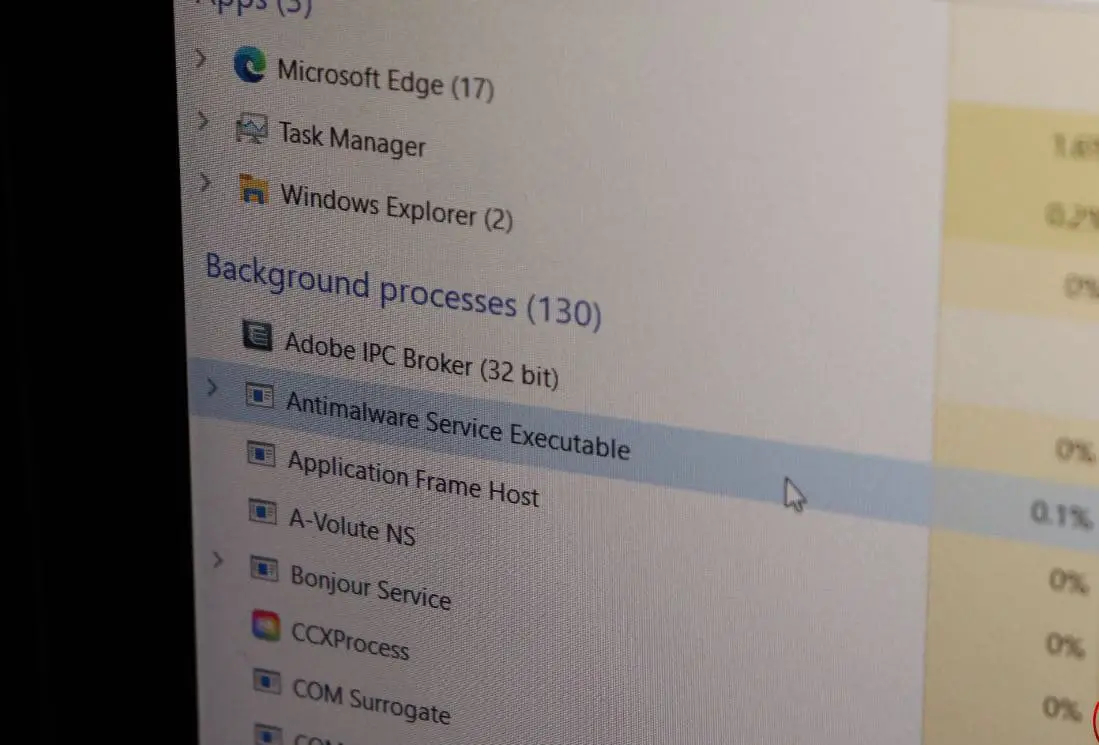
MsMpEng.exe also known as Antimalware service executable is a core process of Windows security (known as Windows Defender), it’s not a virus. And the main purpose of MsMpEng.exe is real-time scanning, monitoring, and protecting your computer from potential threats such as viruses, malware, and spyware. And this is the reason why MsMpEng.exe or Antimalware service executable always running in the background. Although it protects your PC, sometimes you may notice MsMpEng.exe High CPU usage after Windows 11 update.
A number of users report MsMpEng.exe is using an absurd amount of CPU resources almost 80% to 100%, significantly impact system performance and causing slower response time. There are multiple reasons may behind this problem, Here in this article we explore the effective solutions help you resolve MsMpEng.exe high CPU usage on Windows 11.
How to fix MsMpEng.exe High CPU usage problem
This is part of Windows Security (Windows Defender) and helps protect your PC against malware threats. However, if MsMpEng.exe is consuming too much CPU power on your computer it could be due to Conflict with Third-Party Software, System Resource Limitations, Of course, it can also be the case of malware installed on your PC.
And adjusting scan schedules, excluding specific files or folders, or disabling real-time protection probably help fix the high CPU usage problem on Windows 11. Additionally, keep in mind that Microsoft regularly releases updates and patches to address performance issues, including CPU usage related to Windows Security. We recommend regularly check for Windows updates and install them to keep your system secure and optimized.
Disable Windows Defender Real-Time Protection
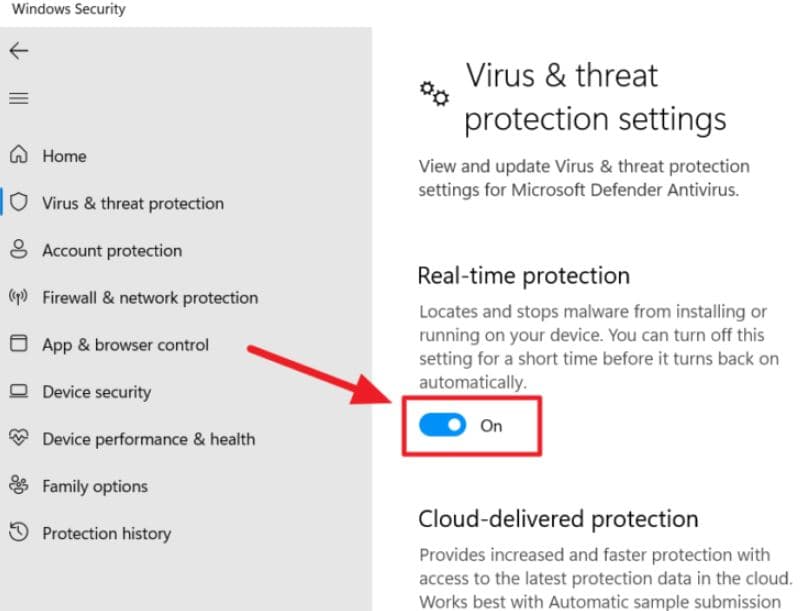
Hence MsMpEng.exe protect your device from threats we won’t recommend disable it. But if you are experiencing serious slow down issues, you can disable the Real-time protection on Windows security to stop disable Antimalware Service Executable scanning on the background and reduce CPU usage.
- Press Windows key + S, type Windows security then select the first result.
- Open Virus & threat protection then click manage settings next to Virus & threat protection settings.
- And finally toggle off the button next to Real-time protection.
- In addition, disable the Cloud-delivered Protection, Automatic Sample Submission and Tamper Protection
Note: Disabling real-time protection will leave your system vulnerable to threats.
- Reboot your computer and check if there is no more MsMpEng.exe High CPU usage on Windows 11.
Prevent Windows security from scanning its own directory
The main responsibility of MsMpEng.exe is real-time scanning and protection. But sometimes MsMpEng.exe scan its own directory that result endless scan and high resource usage including CPU usage 100%. Let’s Exclude the windows defender folder from scanning to fix the problem on Windows 11.
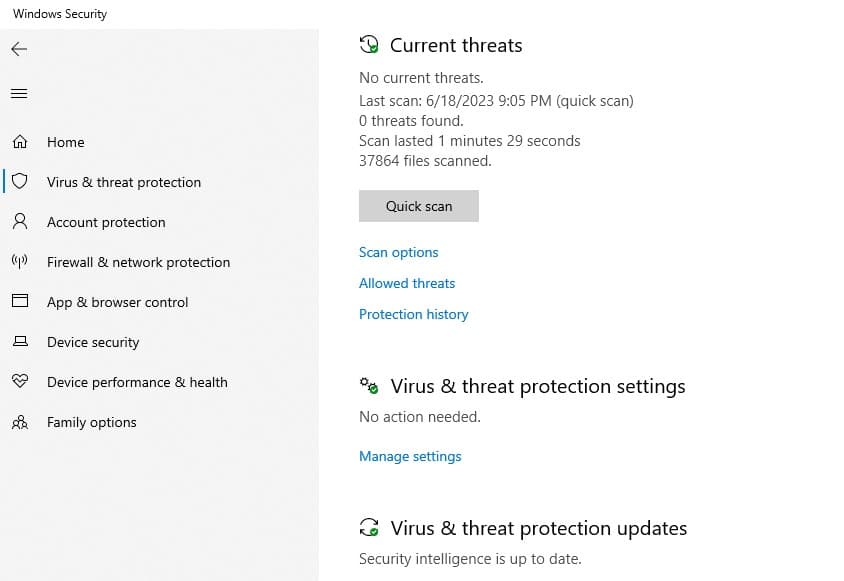
- Open Windows Security and go to “Virus & Threat Protection.”
- Select “Manage Settings” under the “Virus & threat protection settings” section.
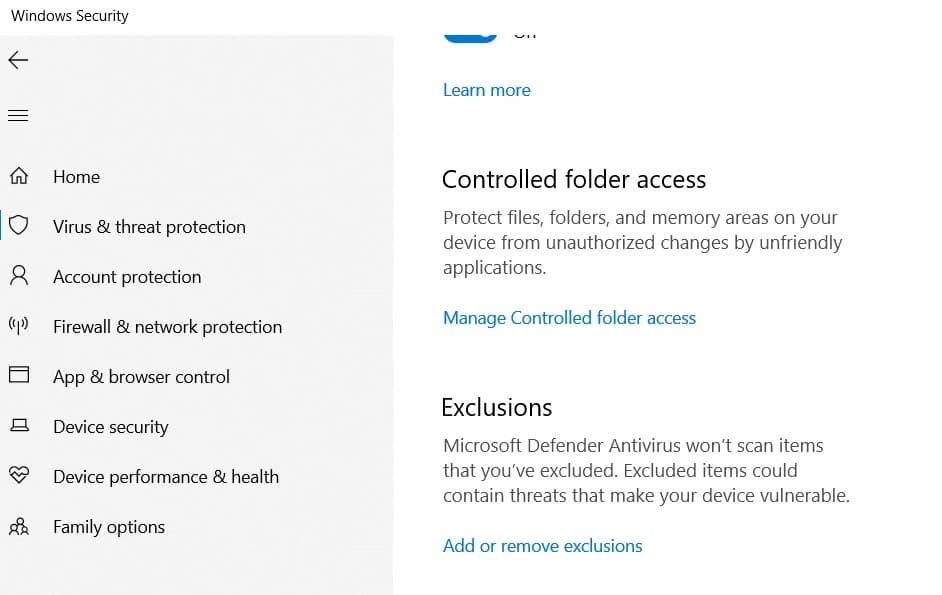
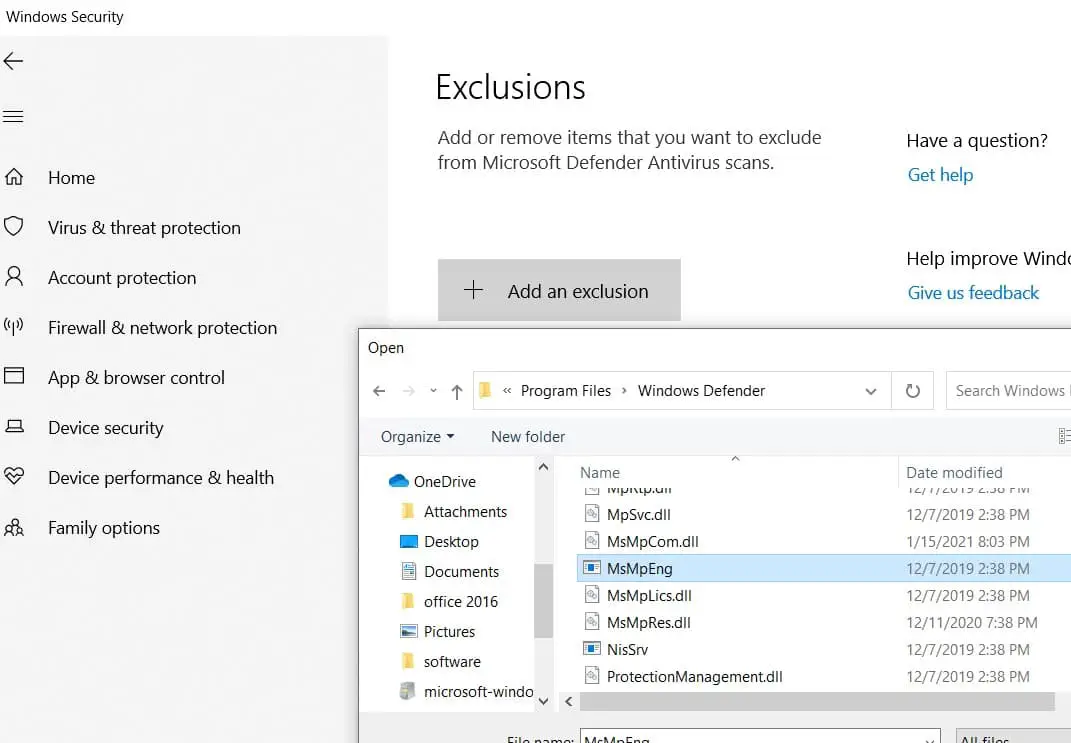
- Scroll down and click on “Add or remove exclusions” under exclusions.
- Select Add an exclusion and choose folder C: Program files\Windows defender
- Also here you can Exclude any files or folders that you believe are causing high CPU usage by MsMpEng.exe.
- Restart your computer and check if the CPU usage has reduced.
Perform a Full System Scan
Sometimes it may be malware or virus infection hijacked the MsMpEng.exe process that continuously running in the background and eating up system resources. In such situations, we recommend performing a full system scan with the latest updated anti-malware application such as Malwarebytes and Trend Micro to identify and delete any malware that could be residing on your PC and causing such PC errors.
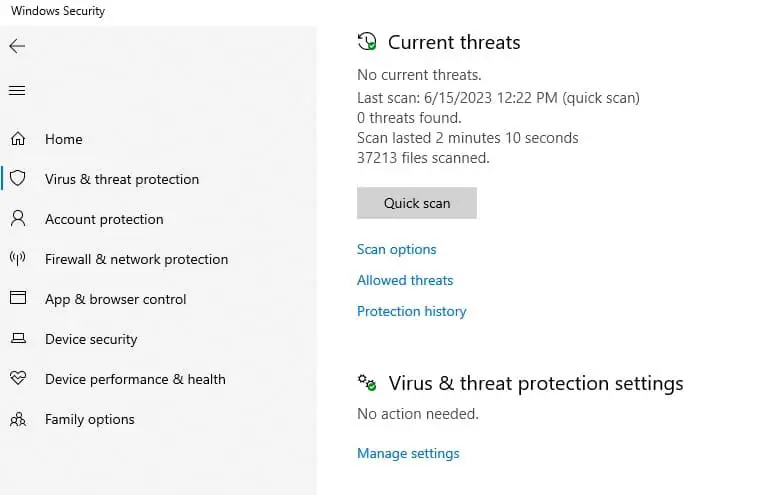
Also, you can use Windows security to perform a quick scan and remove any virus malware infection.
- Press Windows key + S, type and Open Windows Security on your PC,
- Click on “Virus & Threat Protection” and select “Quick Scan” to initiate a scan.
- If any threats are detected, Windows Defender will take appropriate actions to resolve them.
- After the scan completes, restart your computer and observe if the CPU usage improves.
Limit CPU usage for MsMpEng.exe
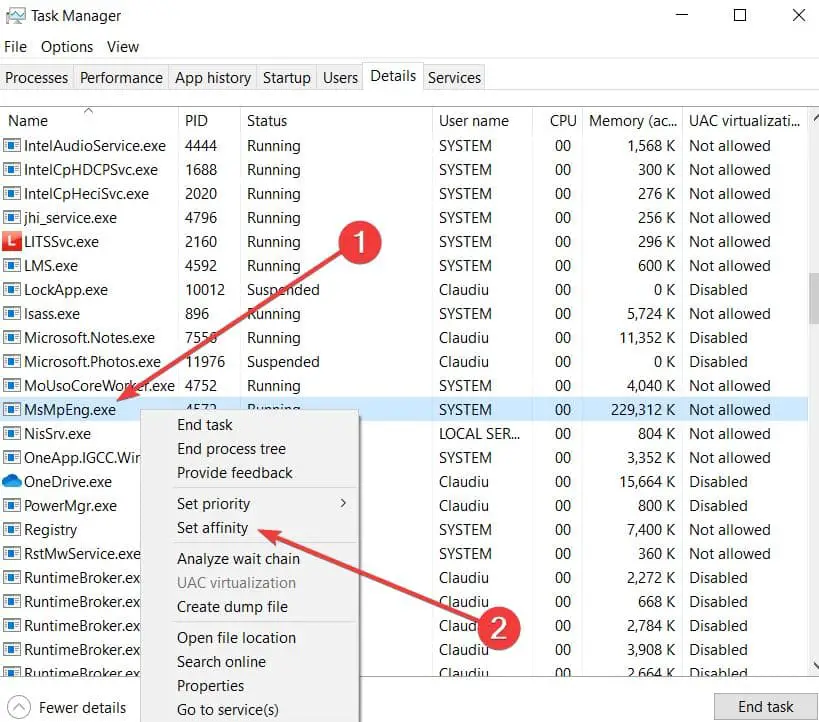
Also, you can set MsMpEng.exe to use fewer resources from the Task Manager.
- Press Ctrl + Shift + Esc to open taskmanager
- Move to the details tab, Right-click msmpeng.exe, then select Set affinity.
- Select which cores you want to use for the particular process.
- This will limit the amount of processing power that is allocated to the process, so you won’t have to worry about high CPU usage.
Reschedule Windows security scan
Usually, Windows Security runs periodic scans in the background, some users report rescheduling the scan helps them fix the Antimalware Service Executable High CPU usage problem.
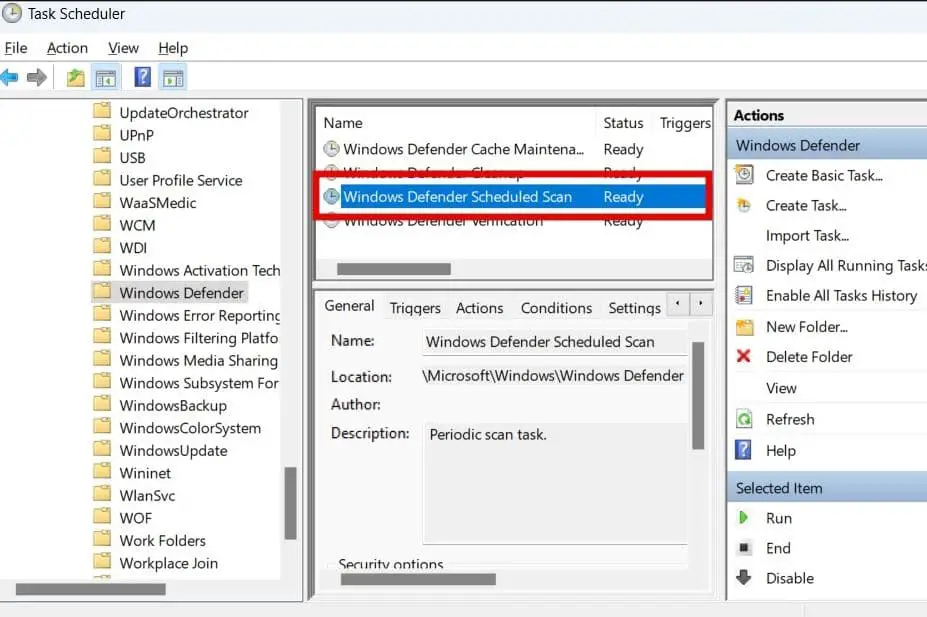
- Press the Windows key + R, type taskschd.msc and click ok to open the Task Scheduler.
- Now navigate Task Scheduler Library > Microsoft > Windows > Windows Defender
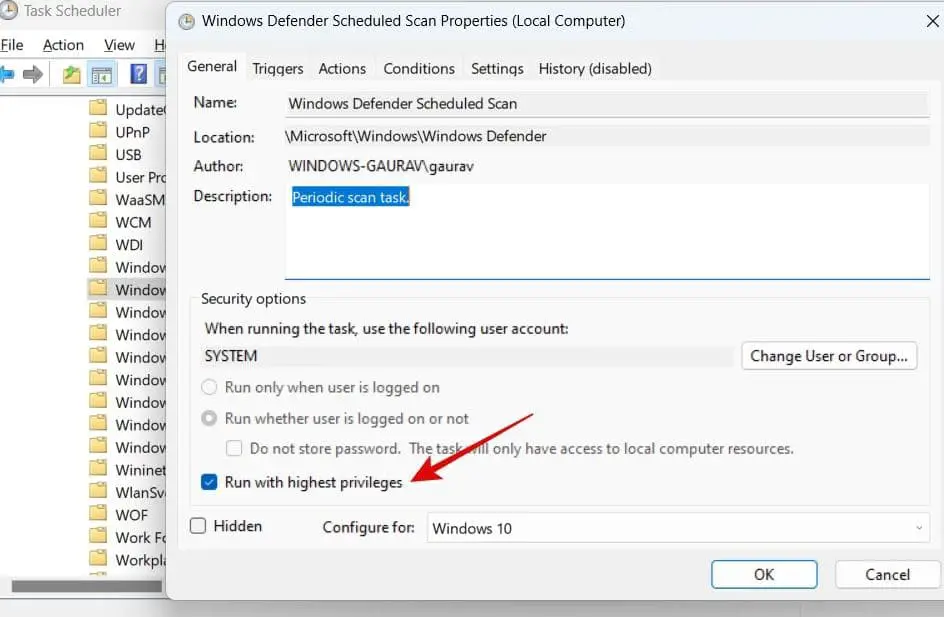
- Double-click on Windows Defender Scheduled Scan to open the properties option
- In the new popup window, uncheck the “Run with highest privileges” option under the General tab.
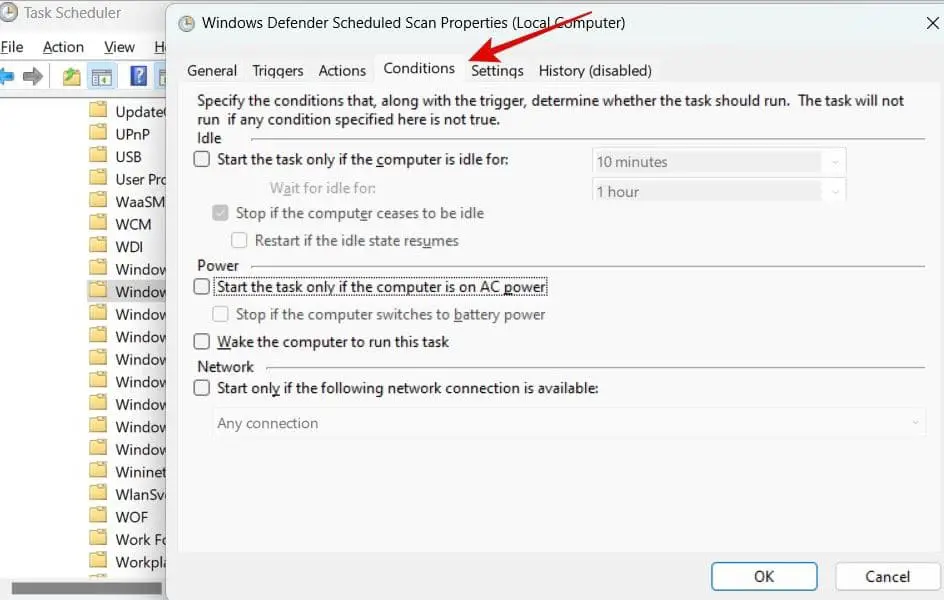
- Now move to the conditions tab and Uncheck all options there and Click on OK to save all settings
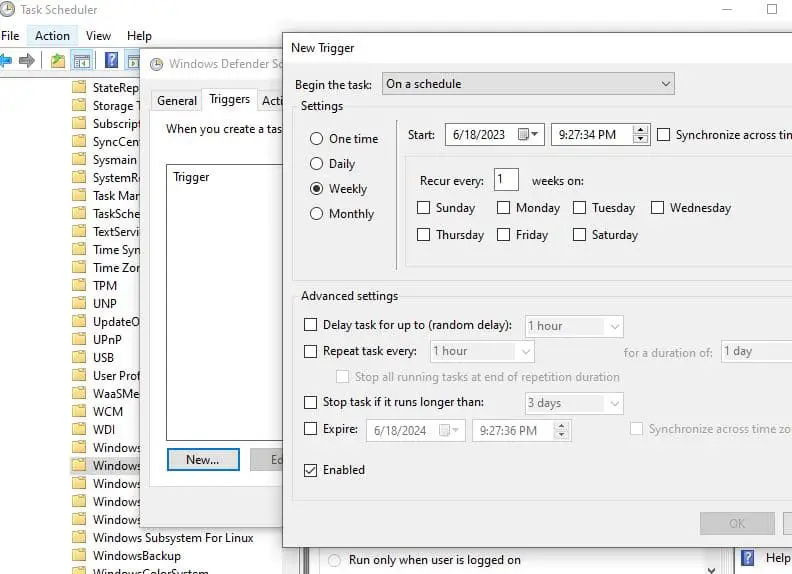
- Now click the Triggers tab then click new. Select the Monthly or Weekly option, select the preferred Day and enable it.
- That’s all, Click OK, then close all windows and reboot your PC.
Turn off Windows Defender
If all the above solutions didn’t fix the problem still MsMpEng.exe causing high CPU usage in Windows 11 you should try Turn off Windows Defender from the Group policy editor. But be careful because this will leave your system vulnerable to virus attacks.
- Press the Windows key + R, and type gpedit.msc and click ok
- In the Local Group Policy Editor window, Navigate to “Computer Configuration” > “Administrative Templates” > “Windows Components” > “Microsoft Defender antivirus”
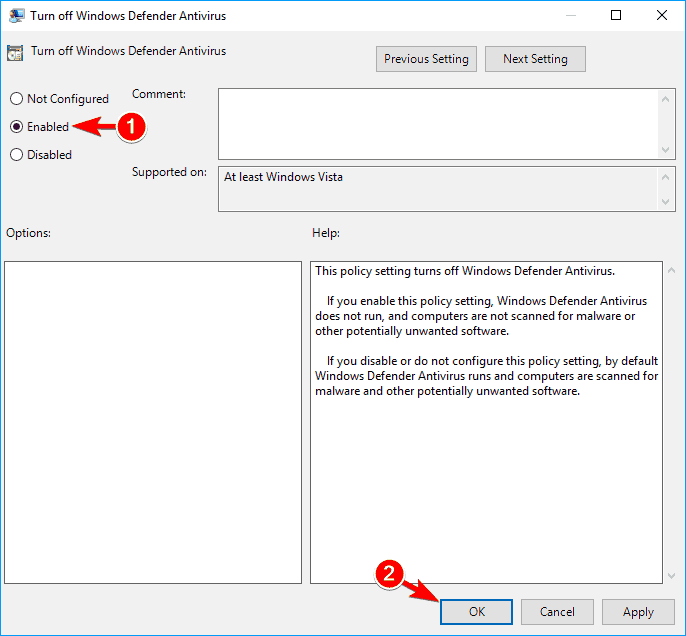
- Now on the right pane double-click on “Turn off Microsoft Defender Antivirus” to open the “Properties”
- And in the Turn off Windows Defender Antivirus window, click on “Enabled“.
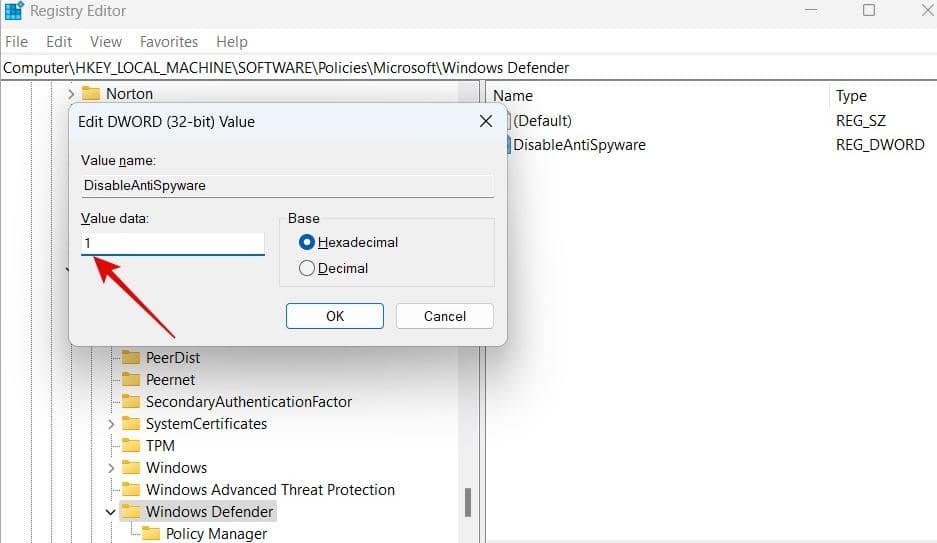
The group policy feature is not available for Windows 11 Home editions, in such situation you can tweak the Windows registry editor to disable it.
- Press the Windows key + R, type regedit and click ok to open the registry editor.
- Navigate to HKEY_LOCAL_MACHINE\SOFTWARE\Policies\Microsoft\Windows Defender
- Right-click on windows defender New > DWORD (32-bit) Value and name it DisableAntiSpyware.
- double-click to open the newly created file and enter the Value data as 1.
Uninstall third-party antivirus
Sometimes Third-party Antivirus software conflict with MsMpEng.exe and result High CPU usage on Windows 11. If the above solutions didn’t fix the problem, we recommend Uninstall Third-party Antivirus Software if installed on your PC.
- Right-click on Windows 11 start menu select installed apps,
- Locate the third-party antivirus option, click 3 dot menu and select the uninstall option.
Sometimes corrupted system files also cause Windows 11 High CPU usage problems, run the system file checker utility and DISM restore health command that probably repairs system files and optimizes Windows performance.
Also read:
- Essential Security Tips for Windows 11 to Protect Your Device and Data
- 8 Ways to Fix Slow Internet Speed Problems in Windows 11 Laptops
- Solved: Your DNS Server Might Be Unavailable In Windows 10
- What is a software update and why you should keep software updated
- Did you really need to use VPN on public Wi-Fi (Use of VPN)
- Wi-Fi connected but no internet access after Windows 11 update [solved]
