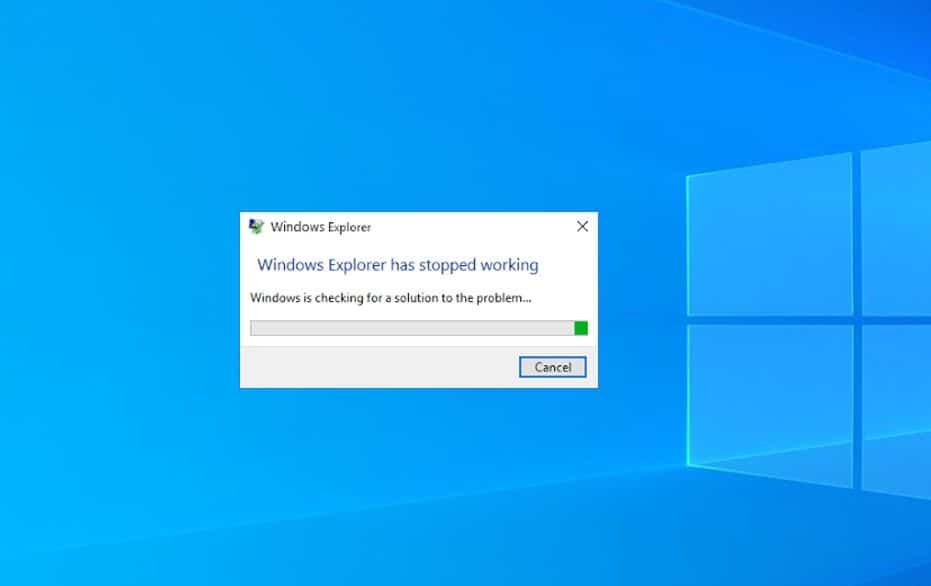
Windows Explorer (Microsoft renamed Windows Explorer to File Explorer in Windows 10 and 8.1) is an important part of windows, which helps us browse our files, folders and other data on our computer. It is one of the backbones of the operating system powering not only file browsing and operations but also the taskbar and start menu. Some Times Windows 10, 8.1, 8, 7 Users may face several common problems related to it but The most common one is windows explorer not responding on right-click, Windows Explorer stopped working, windows explorer not responding, Keeps Restarting and crashes again and again.
As it is one of the undeniable parts, Windows will try to start it automatically. After getting started, It may crash again. As a result, Users will see it is crashing and restarting continuously. These Users are unable to work on their system. If you also suffering with this problem Windows Explorer stopped working, windows explorer not responding on right click Keeps Restarting Don’t Worry Here This Post We have some tips To fix This.
Reasons Behind windows explorer stopped working
There are several things that can cause this problem. The users who don’t update windows regularly are the main victim of it. some other things are Outdated windows, Corrupted system files, Malware, and other virus infections, Third-party incompatible programs etc.
Contents
- 1 Fix windows explorer stopped working
- 1.1 Find and Disable Problematic Startup Programs or Services
- 1.2 Boot Windows into Safe Mode
- 1.3 Uninstall Recently Installed Program Completely
- 1.4 Update Graphics Card Driver
- 1.5 Run A SFC Utility to Repair Corrupted files
- 1.6 Copy Explorer.exe to System 32 Folder
- 1.7 Check for the Virus and Malware
- 1.8 Delete Corrupted explorer.exe on Registry
Fix windows explorer stopped working
Here Fallow bellow Troubleshooting Steps to Fix this Windows Explorer Keeps Restarting and Crashing problem for Windows 10, Window8.1, , windows 7.
Find and Disable Problematic Startup Programs or Services
Due to incompatible startup items, You may experience explorer.exe crashing problem. So, You should disable recently added or updated startup programs and services so that Windows will run smoothly. Here fallow bellow Steps to Disable Problematic Startup Programs or Services.
To disable startup programs
- For Windows 10, 8 and 8.1, Right-click on Taskbar and choose Task Manager.
- Click on the Startup tab and then disable the programs from the list.
- Earlier windows users can press Win + R. Then type msconfig and hit Enter.
- Then click on Startup and click on Open Task Manager.
- Here you will find the Startup programs, right-click, and select disable to disable startup programs.
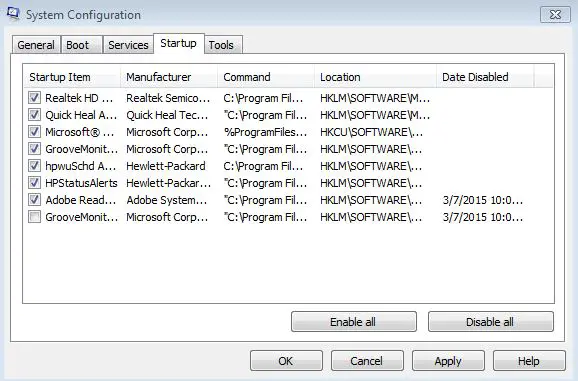
To disable startup services:
Press Win + R to Open RUN, type msconfig and hit enter. Here click on the services tab. Now Check to Hide all Microsoft services.
Now, Disable recently added services. Click Apply and ok to make save changes. After doing the following things, Restart your computer and see if it fixes the problem.
Boot Windows into Safe Mode
Safe mode is a inbuilt troubleshooting feature that disables unnecessary and programs during the startup process. windows 10 safe mode loads the operating system with a minimal set of system device drivers just enough to boot windows os and in safe mode the startup programs, add-ones etc do not run. If Due to this problem you are unable to perform the troubleshooting steps then safe mode boot can help you alot.
Refer to This Video to Know More about the Safe Mode boot option on windows.
Follow Bellow Steps to boot Windows into Safe mode. Click on Start – select Update And Security – Select Recovery form Left side – Now Click Restart from bellow to Advanced Startup.
This Will Restart windows into Advanced options Here Select Troubleshooting on next Select Startup Settings. Now press F4 to Simply Enable Safe Mode. This will start Windows into Safe mode where We can Easily Troubleshoot the Explorer problem without Any Error.
Uninstall Recently Installed Program Completely
If you face this problem ( Explorer keeps Restarting ) after installing a Third-party application or program, Then may This Application Not Compatible with Windows or contains Virus so that this Error happened, uninstalling the Application may Fix your problem. Here how to uninstall any Recently Installed Application.First, open the control panel Here Select view by Category and click on Uninstall a Program.
Now when the uninstall and change program Screen opens select the recently installed application Right-click on it and select uninstall to Completely Remove the program from your system.
Update Graphics Card Driver
Sometimes your graphics card issues may create windows explorer unresponsive or problematic. It is possible that the video card problem is creating the restarting loop of explorer.exe. So, try to update the graphics card and see if it fixes the problem. To update the Graphics driver on your system right-click on This PC select Manage this will open the Computer Management window here select Device manager from the left side. this will display all installed device drivers Now expand the display adapters select your installed graphic Driver, right-click on it and select Update driver software.
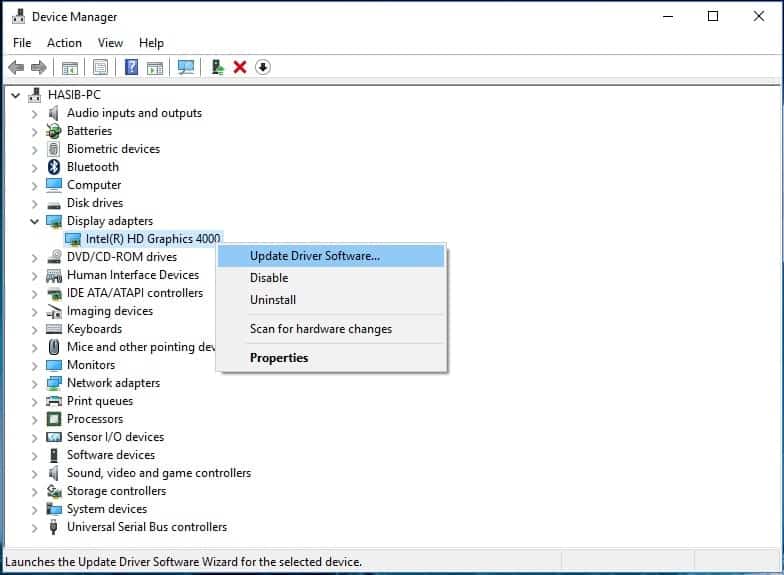
This will install the best available Driver for your windows. if this not work for then just uninstall the driver and get the latest driver from the Manufacturer website
To get an updated version of drivers for your graphic card, visit your graphic card manufacturer’s website. Search by the card’s model and download the appropriate drivers compatible with your operating system and system type (x64 or x86). To know them both, hold the Windows key and press R, type msinfo32 and press Enter.
Most of times windows explorer stopped working fixed after update, Rollback driver or reinstall the graphic driver.
Run A SFC Utility to Repair Corrupted files
System File Check is an command prompt syntax to check for system file corruption, it scans the integrity of all protected operating system files and replaces incorrect, corrupted, changed, or damaged versions with the correct versions where possible. Since SFC scans the protected operating system files, you will need an administrator rights to perform this command. Click on Start menu and type CMD and right-click on it and click Run as administrator.
This Will open command prompt with administrative privileges. Now Type command “Sfc /scannow” and enter to run. This will start to Scan your windows for errors.
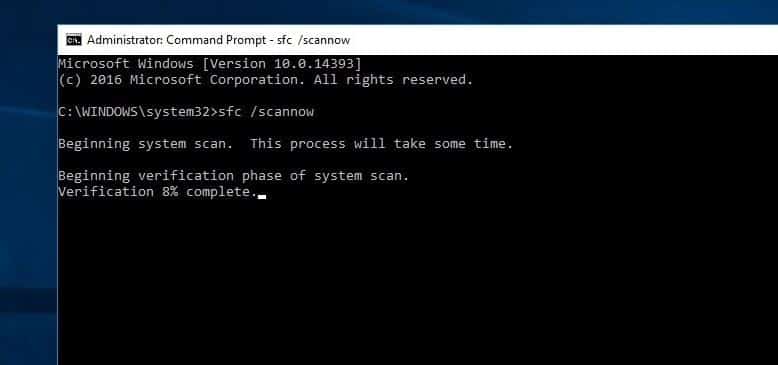
Sfc /scannow will inspect all of the important Windows files on your computer, including Windows DLL files. If System File Checker finds an issue with any of these protected files, it will replace it.
wait until complete the scanning process after complete 100% Restart your system.
Copy Explorer.exe to System 32 Folder
Some Times Copy the Explorer.exe to System 32 Folder can fix this issue. Here how to Do first open this pc – Windows installed Drive C – Windows – and find out the explorer folder right-click on it and select copy. Now look for System 32 folder on the Same directory open the folder and paste the copied Explorer folder here. That’s it.
Check for the Virus and Malware
In virus-infected PCs, the Explorer.exe problem happens more frequently. Else, You also may experience this problem only when you are going to open any specific folder or file explorer. In that case, A full scan with a good antivirus program can help. It will detect malicious programs and viruses and delete them. As well as it may correct the windows explorer restarting issue.
Now perform A full system Scan. After scanning the process complete Simply Restart the windows and check Windows working smoothly. Also, Run Third-party system Optimizer Tool like Ccleaner to clean system junk files, and clear Corrupt Registry files.
Delete Corrupted explorer.exe on Registry
Open Registry Editor: Press Windows Button and type “regedit“. Click on it to open. Click YES on the User Account Control Prompt.
Before making any changes first Back up the registry just in case anything wrong.
Registry Editor > File > Export > Provide a file name > save to computer.
Delete the “explorer.exe” key from Registry First open registry windows from Win + R and type regedit and click on ok this will open the Windows Registry window.
Go to “HKEY_LOCAL_MACHINESOFTWAREMicrosoftWindowsNTCurrentVersionImage File Execution Options” and delete the key “explorer.exe” from the left sidebar Close Registry editor.
And after that Just restart the windows, Hope After perform This Steps your problem will get solved.
If you have any comments, questions or suggestions, just reach for the comment section below.
Also, Refer to Bellow Video Steps Performed to Fix windows explorer stopped working Keeps Restarting and Crashing problem on windows 10.
These are some best working solutions to fix windows explorer stopped working, windows explorer not responding, windows explorer has stopped working and keeps Restarting and Crashing problem for windows 10, 8.1, and Windows 7 computers.

