Windows updates are essential for maintaining the security and functionality of your system. It includes critical patches and enhancements to protect against emerging threats and vulnerabilities. Installing regular Windows updates keeps your device up to date with the latest security patches and features. However, despite the numerous benefits, there are instances when a specific update causes issues on your system. Such as after installing recent Windows 11 KB5040442, users report encountering taskbar problems, and some cannot use File Explorer. Fortunately, Microsoft provides a straightforward method to address such issues: uninstall problematic Windows updates. This process allows you to roll back problematic updates and revert your system to a state where it operates smoothly. Here’s how you can uninstall Windows update.
Contents
How to Uninstall Windows update
There are different ways you can uninstall a problematic Windows update. Let’s look at Windows 11 KB5040442, this update crashes the taskbar and File Explorer for some users.
Uninstall Windows updates via Settings
You can uninstall a problematic Windows update from the Windows 11 settings app.
- First, you need to open the Settings app in Windows 11. To do this, click on the Start menu, then ” Settings ” or use the keyboard shortcut Windows key + I.
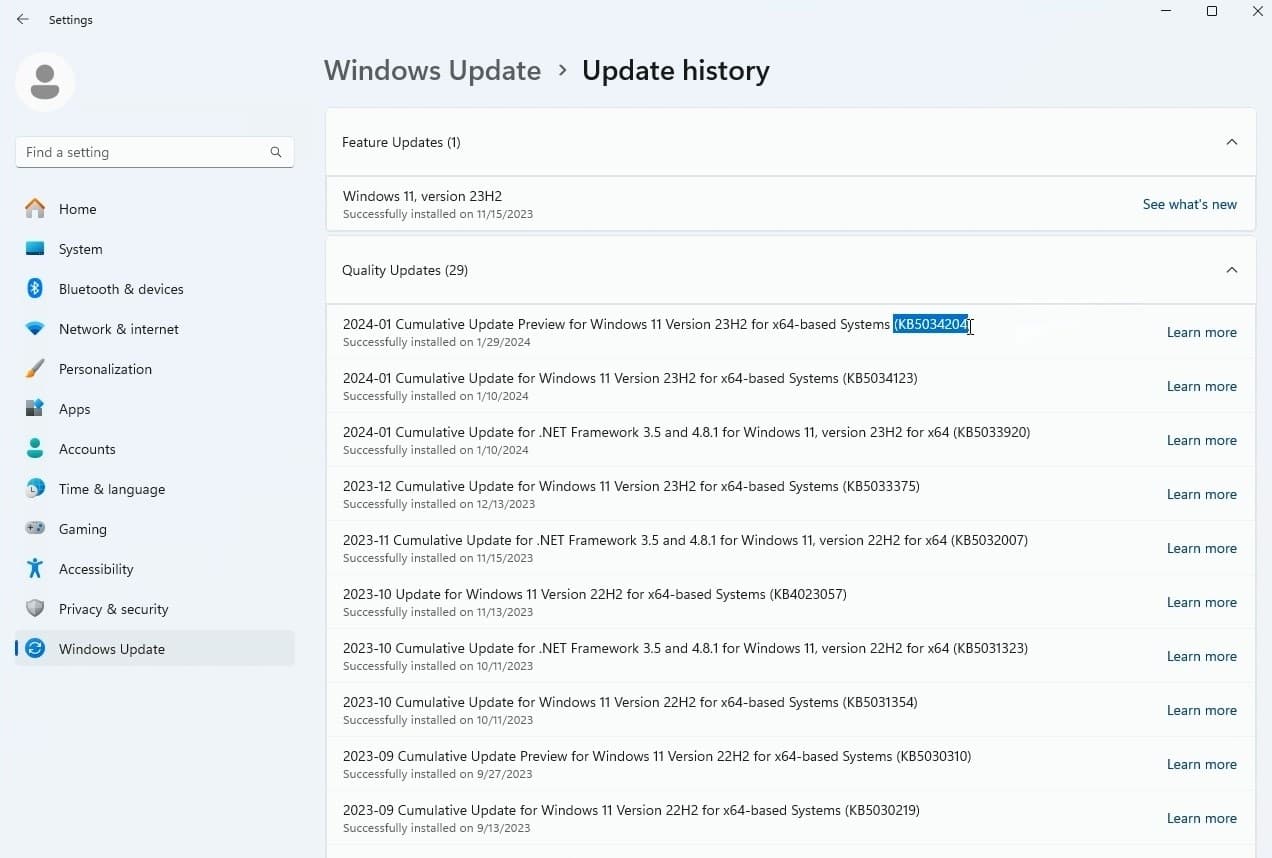
- In the left pane, click ” Windows Update “, then click “Update History ” in the right part. Here note down the problematic Windows update KB number.
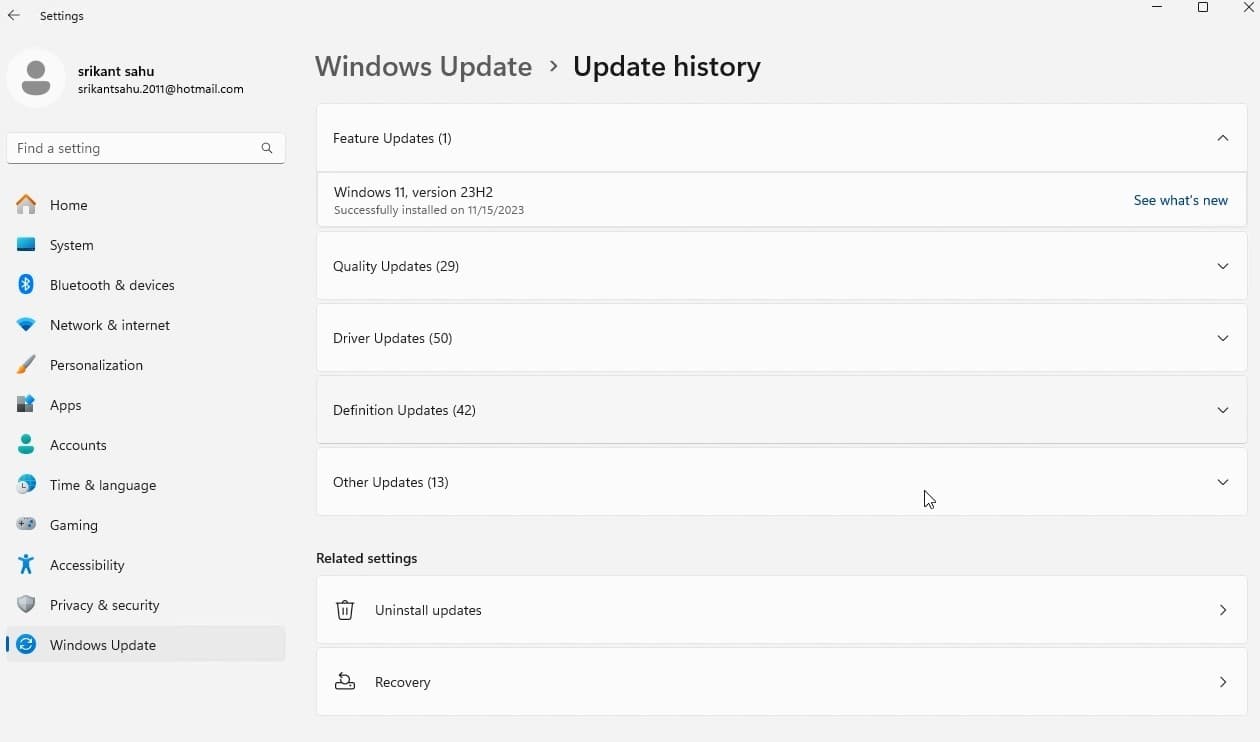
- Scroll down and click on “ Uninstall updates ” option.
- Locate the problematic update, click ” Uninstall ” next to it
- Confirm the removal of the update by clicking ” Yes ” and Wait a few minutes while the update uninstalls.
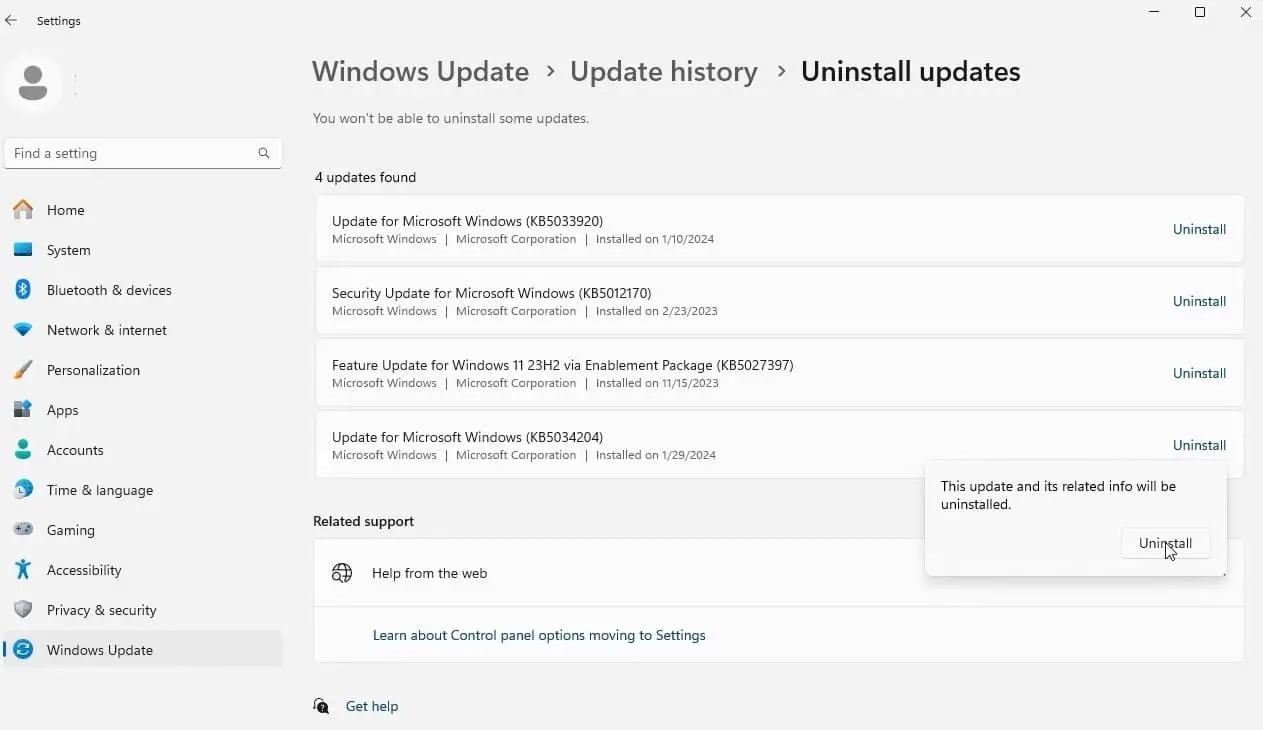
- Wait a few moments to complete the uninstall. After uninstalling the update, it’s recommended to restart your computer to apply the changes.
- That’s it, Windows Update has been uninstalled from your Windows 11 PC.
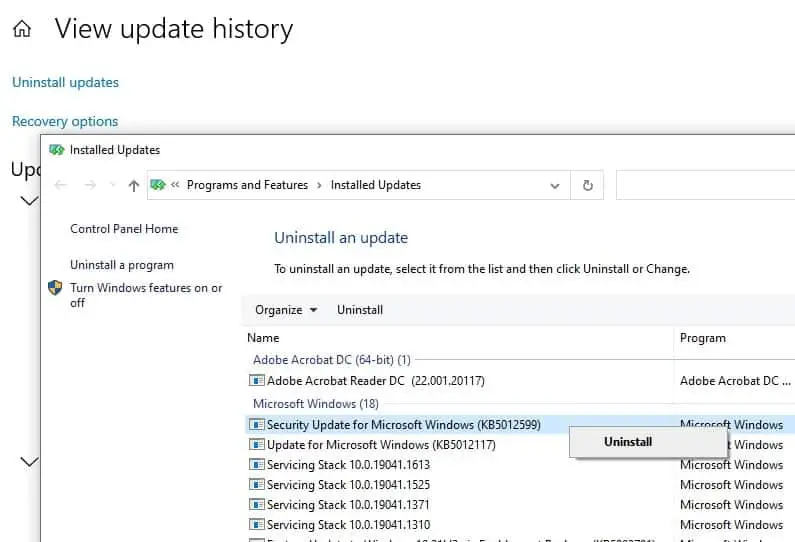
Note: If you are a Windows 10 user, Open settings -> Update & Security -> View update history. Click on Uninstall Updates, select the update KB number then click on uninstall option.
Remove Windows update Via Command Prompt
Also, you can remove or uninstall a Windows update using the command prompt. It’s easy and quick, but you need to know the kb number, Let’s see how to do this.
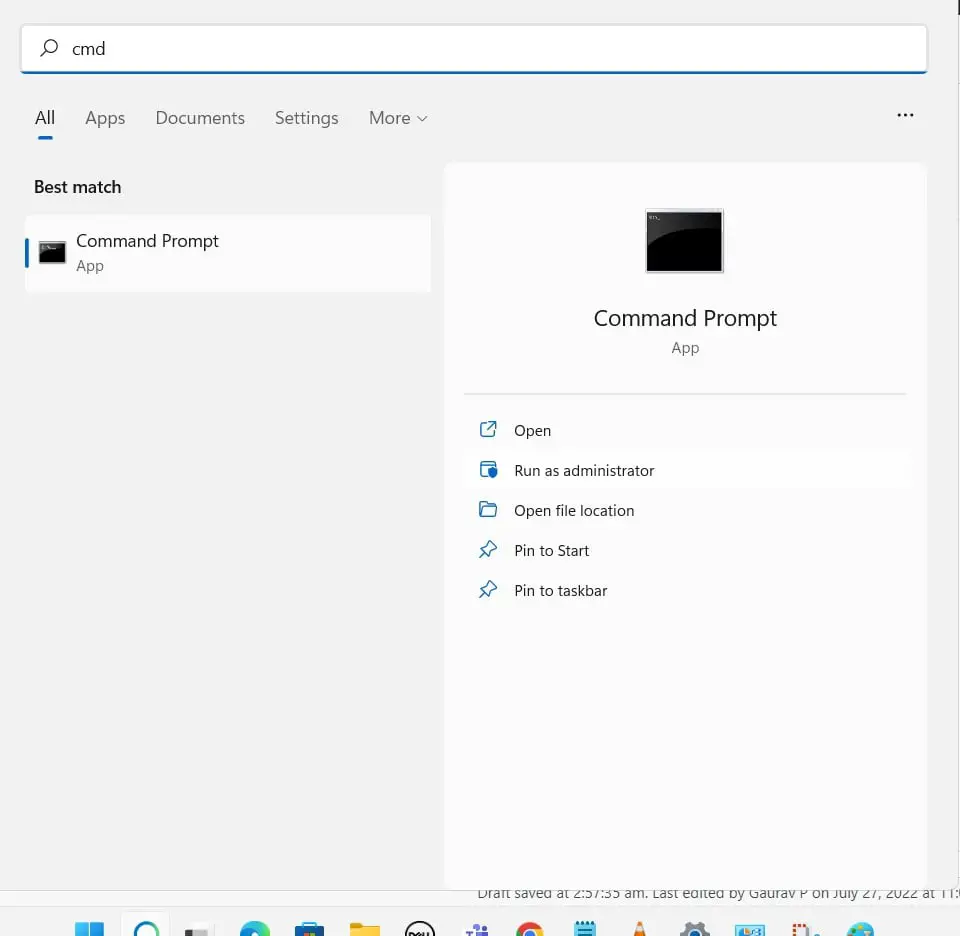
First, we have to Open a new Command Prompt window. To do this, click on the start menu, then search for “cmd ” (without the quotes) and click on ” Run as administrator ” in the right pane.
- Click on Yes, if UAC prompts for permission.
- Now type the command wmic qfe list brief /format: table and press the enter key to display the update history or installed Windows update list.
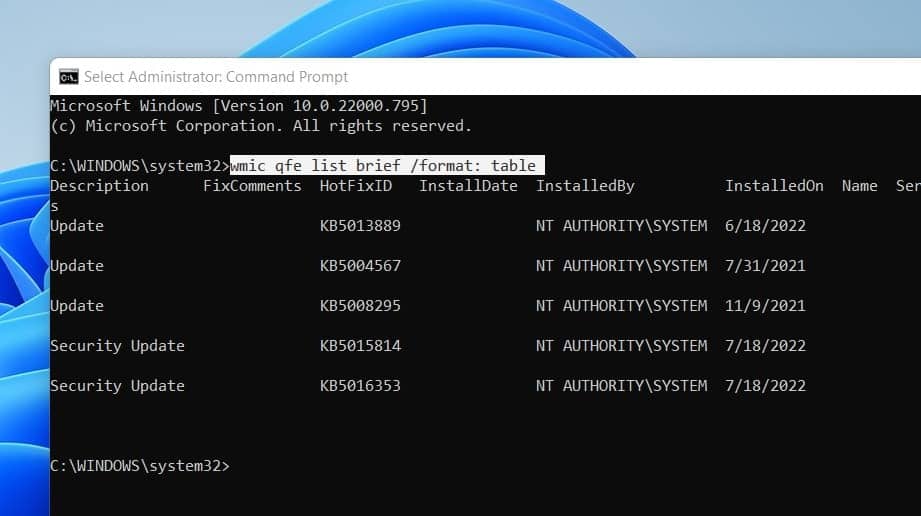
- In the list of updates that appear, locate the problematic update using its “HotfixID”.
- Then, type the command wusa /uninstall /kb:HotFixID and press enter key on the keyboard to uninstall the update from your computer.
Note: in the command below, replace ” KBhotfixid ” with the KB number corresponding to the update you wish to uninstall. For example, the following command will remove update KB5023706:
wusa /uninstall /KB:5036893
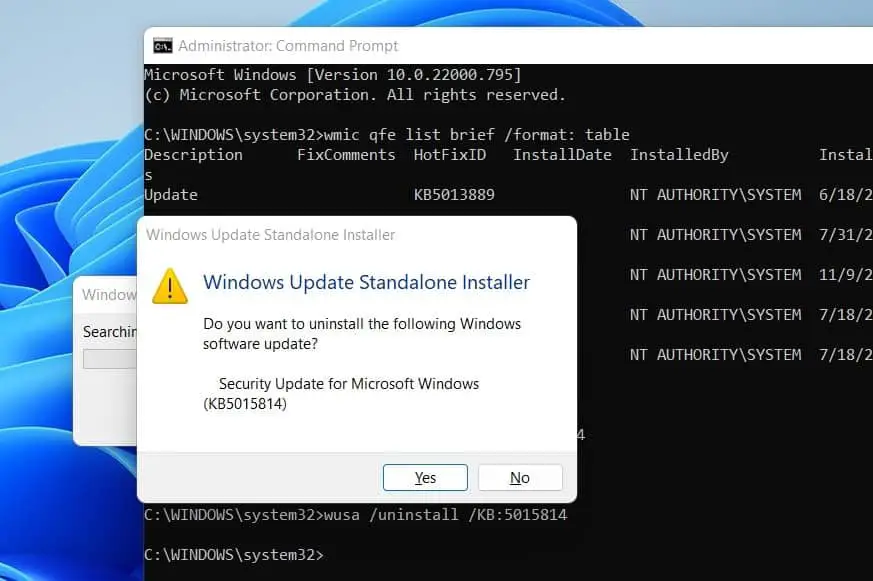
To confirm the uninstallation of the update, click ” Yes “.
Here you are, you have just uninstalled the update that was causing problems on your Windows 11 PC.
Windows Recovery Environment (WinRE)
Well, if Windows won’t start normally after installing the latest Windows update, or you think it’s an update causing the issue. In such case, you have the option to uninstall the Windows update using the Windows Recovery Environment (WinRE). To do this, follow these instructions:
Go to Advanced Boot Options (WinRE). You can perform the command shutdown /r /o to restart your PC and boot into the Windows recovery environment.
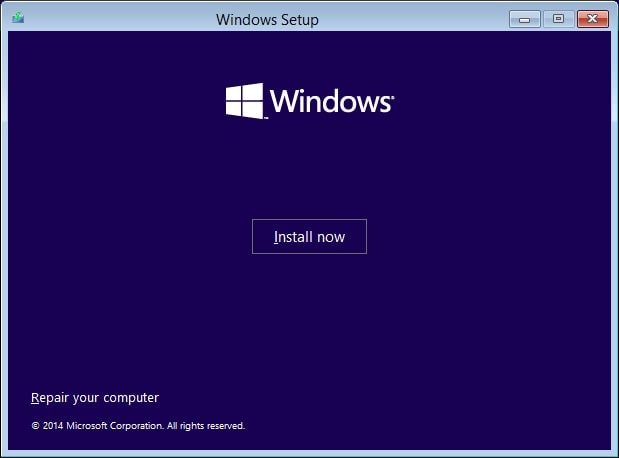
Or you need to boot from installation media, Click on Repair your computer -> Troubleshoot then Advanced Options.
Finally, you will get the advanced options screen with various options, including Startup Repair, System Restore, Command Prompt, and more. Instead, click ‘Uninstall Updates.
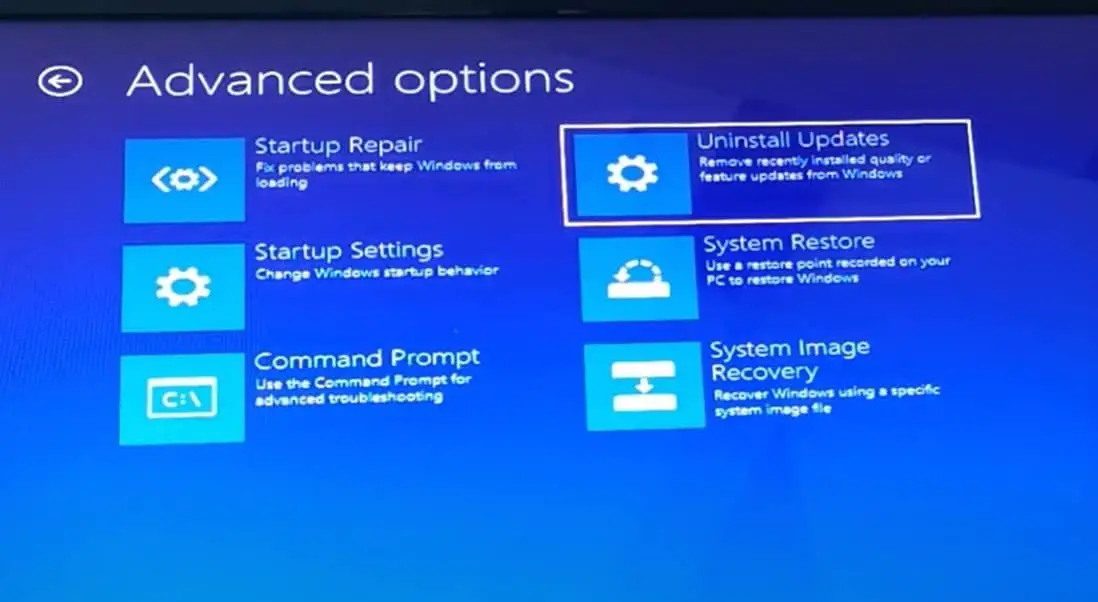
- Finally, click on the “Uninstall the latest quality update” option. Confirm the uninstallation of the last problematic quality update by clicking on the ” Uninstall a quality update ” button.
There you go, you have just uninstalled the most recent update that was causing problems on your Windows 11 PC.
Via Safe Mode
Safe mode is a diagnostic mode of a computer operating system, and it is widely used for removing rogue security software. Also, you can start Windows 11 in safe mode and try to uninstall the Windows update by following the steps below.
- Begin by starting your PC in safe mode, here is an article guides you, on different methods to start Windows 11 in safe mode.
- Once your Windows 11 PC has booted into Safe Mode, open the Control Panel. To do this, press the Windows key + R simultaneously, type control panel and press ok or hit the enter key,
- From the Control Panel, click on “Programs”, Next, click on “View installed updates”.
- Finally, select the update you want to remove, then click the ” Uninstall ” button. Confirm deletion and restart your PC.
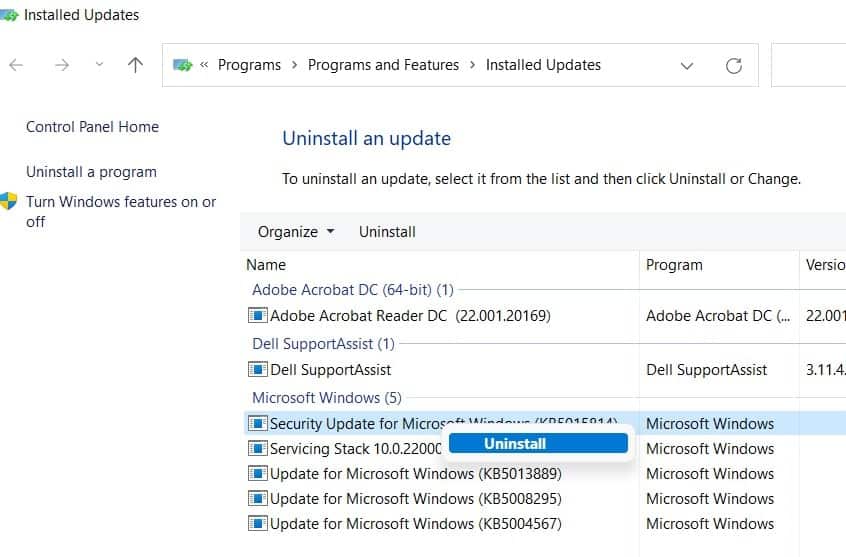
That’s all! The update that was causing problems on your Windows 11 PC has been uninstalled.
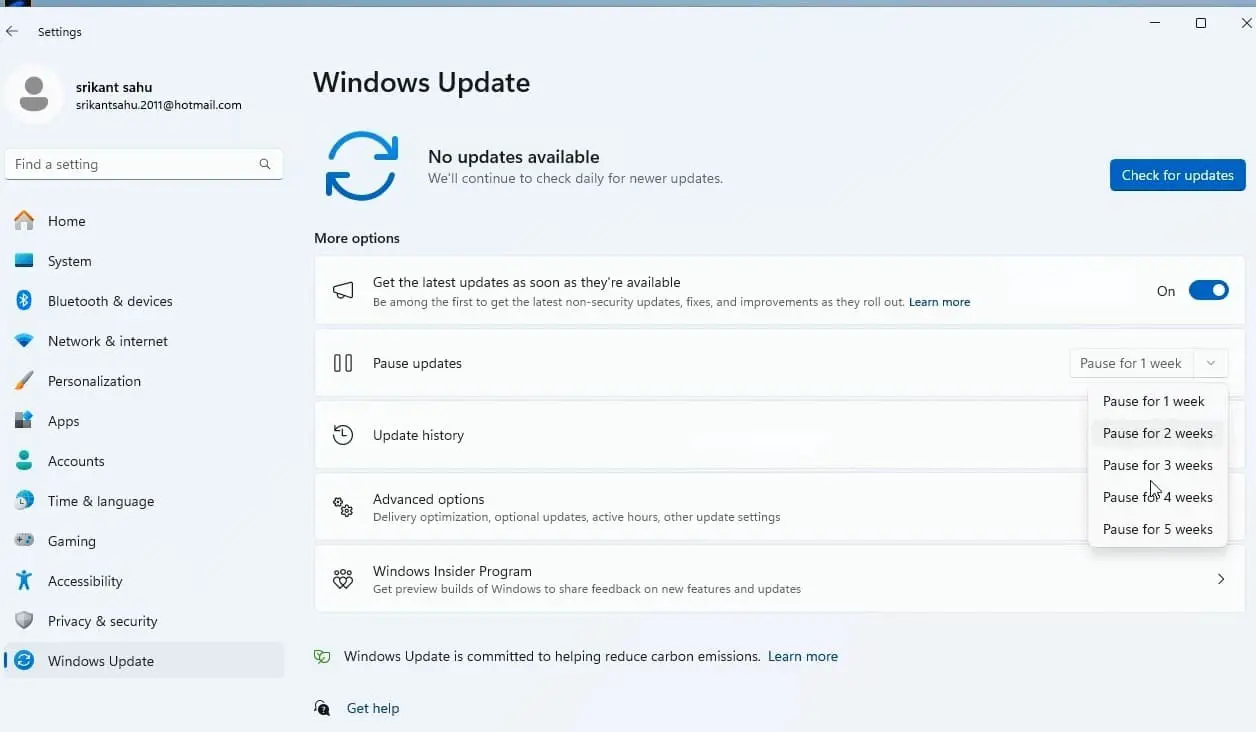
Note: If you are trying to uninstall a security update (Usually release on the second Tuesday of the month), it automatically downloads and installs again. To prevent it you can pause Windows updates for 3 to 4 weeks and wait for Microsoft to come with the latest bug fixes.
Remember to keep your system updated regularly to ensure optimal performance and security in the long run.
Also read:
- Windows 11 privacy settings you should change now (protect your privacy)
- Windows 11 Laptop freezes randomly? Try these 11 solutions
- 7 Ways to Fix ERR_CONNECTION_RESET in Google Chrome
- Speed Up Windows 11 and Improve Performance (7 effective tips)
- Solved: Minecraft launcher not responding with black screen or white screen