windows 10 printer not working? Having Different problems with the network Printer, cannot print documents after windows 10 update? Printer not showing in devices and printers or print job stuck in a queue, Print spooler not running or unable to connect to the printer. There is a various reason that may cause the problem such as incomputable printer driver, incorrect configuration, print spooler service stopped or print spooler file corrupted. And most probably reinstall the latest printer driver and Clearing the Print Spooler probably fixes the problem for you.
Windows 10 printer not working
If you’re unable to print or connect to your printer in Windows 10
- Make sure that your printer is plugged into the power supply and turned on.
- Check the USB connection (for wired printers) or the wireless connection (for wireless printers).
Run printer troubleshooter
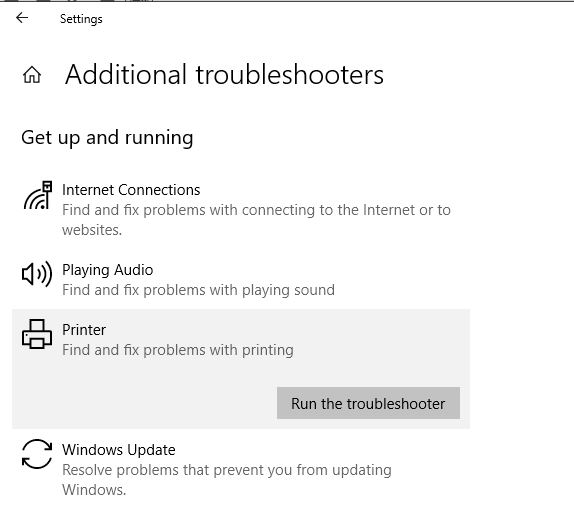
Run the build-in printer troubleshooter that automatically detects and fixes the problems that prevent the printer to function properly.
- Press Windows + I to open the settings app,
- Click Update & security, then troubleshoot,
- Here on the right-hand side select printer and click run the troubleshooter,
- This will scan and detect problems and try to fix them
- During the troubleshooting process, this will restart the print spooler service
- Automatically clear the corrupted print spooler files
- Also, detect if an outdated printer driver causing the problem
- Restart windows after complete the process and check the printer working properly.
Clearing the Print Spooler
If running the printer troubleshooter didn’t fix the problem, let’s manually Clear the Print Spooler which most probably fixes the problem for you. Follow the steps below to clear the print spooler on Windows 10, 8.1 and 7.
- Press Windows + R, type services.msc and ok
- This will open the windows service console, scroll down and look for print spooler
- Right-click on print spooler service select stop, and minimize the Windows service console
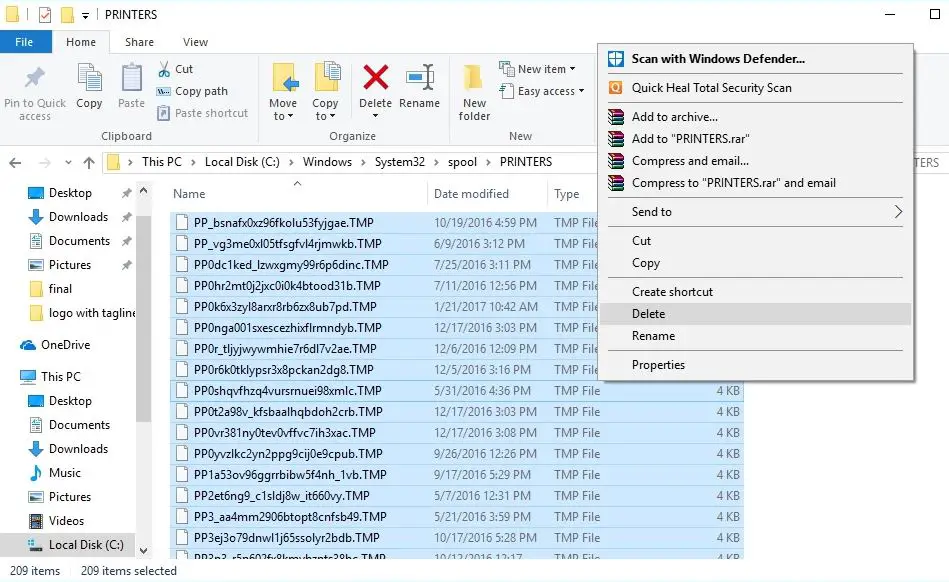
- Now press Windows + R, type %WINDIR%\system32\spool\printers and ok
- And delete Delete all the files of inside this folder
- Again go to the ‘Services’ console.
- Find the ‘Print Spooler’ service,
- right-click on it and choose ‘Start’.
This would fix if the printer stuck printing documents, printer is pending but not printing documents, or clear the print queue if a document is stuck
Update printer driver
If you’re still having problems, your printer may need a new driver.
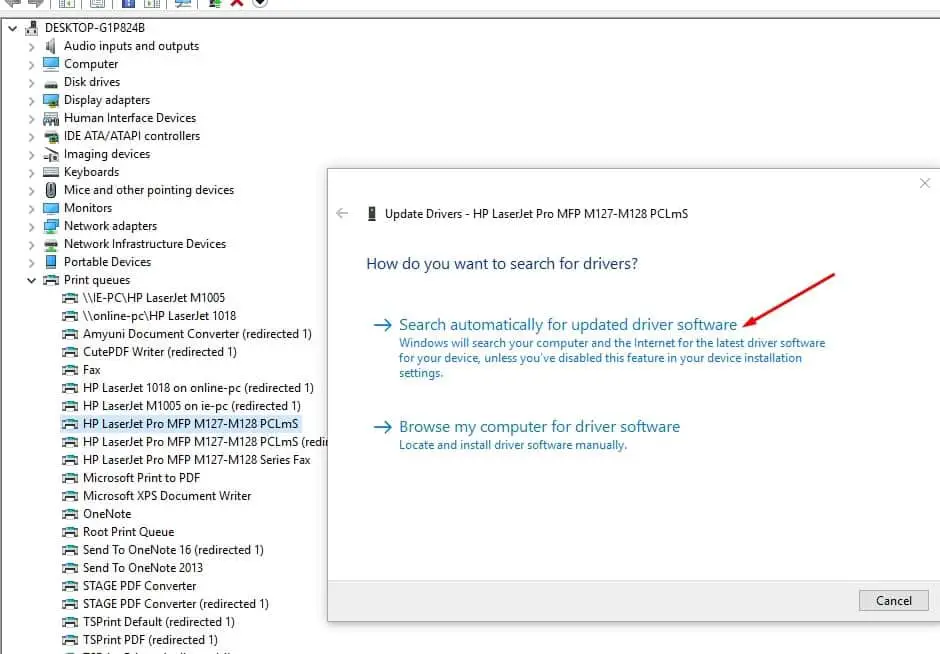
- Press Windows + X and select Device Manager.
- Expand Printers, and find your printer in the list,
- right-click it, then select Update Driver.
- Click on the ‘Search automatically for updated driver software option.
- It will start looking for the latest drivers on the internet and ask you to install them.
Reinstall printer driver
If updating the driver software didn’t work, then try removing the driver completely and reinstalling them again.
- Press Windows + I to open settings,
- Then navigate to ‘Devices > Printers & Scanners’.
- Find your printer, click on it to expand options and click on the ‘Remove device’ button.
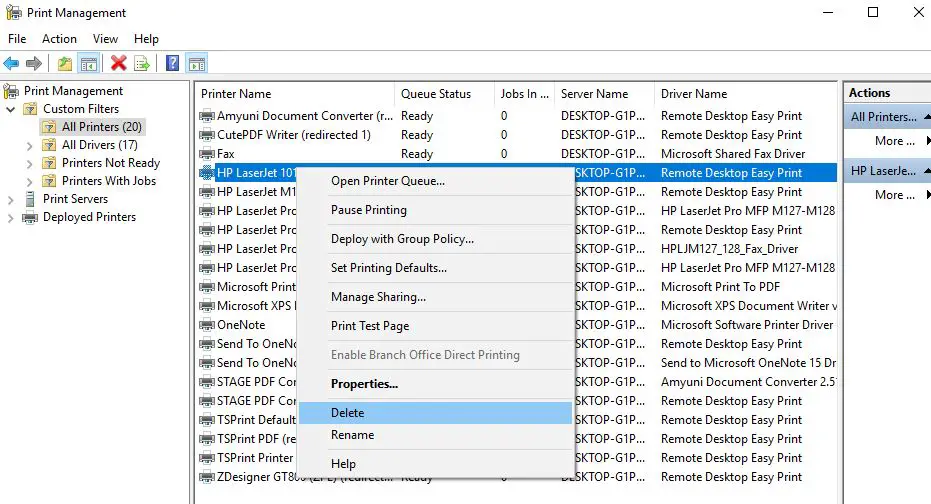
- Go to the ‘Start menu, type ‘Print Management’ and press ‘Enter’ key.
- Select all the printers, right-click on it and ‘Delete’ all of them.
- Restart your PC, plug back the printer’s cable and start installing the drivers again.
Also, you can visit the printer manufacturer’s website to download and install the latest available driver. Check if this helps to fix printer problems on windows 10. Here are some links to driver download pages for the most common makes of printer:
Note: Printer drivers tend to be .exe files. To install the driver, just download and run the file.
Set Default Printer
Sometimes Windows 10 could not manage the default printer when you have multiple printers connected or using network printers. And manually set a specific device as the default printer probably helps.
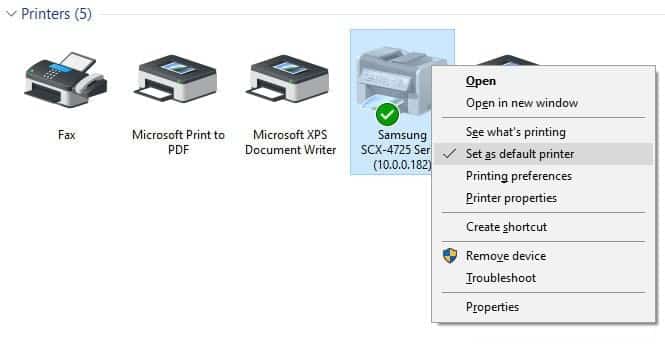
- Go to ‘Control Panel’ and change the view to large icons.
- Search for the ‘Devices and Printer option.
- Click on any of the connected printers and choose ‘Set as default printer option.
Add Printer Again
Sometimes, adding up the printer again can help in fixing the issue also.
- Press the ‘Windows key + I’ keys to open Windows Settings
- Navigate to the path ‘Devices > Printers & Scanners’.
- Click on the previously added printer and choose ‘Remove Device’.
- Unplug and then plug back the printer in the USB port.
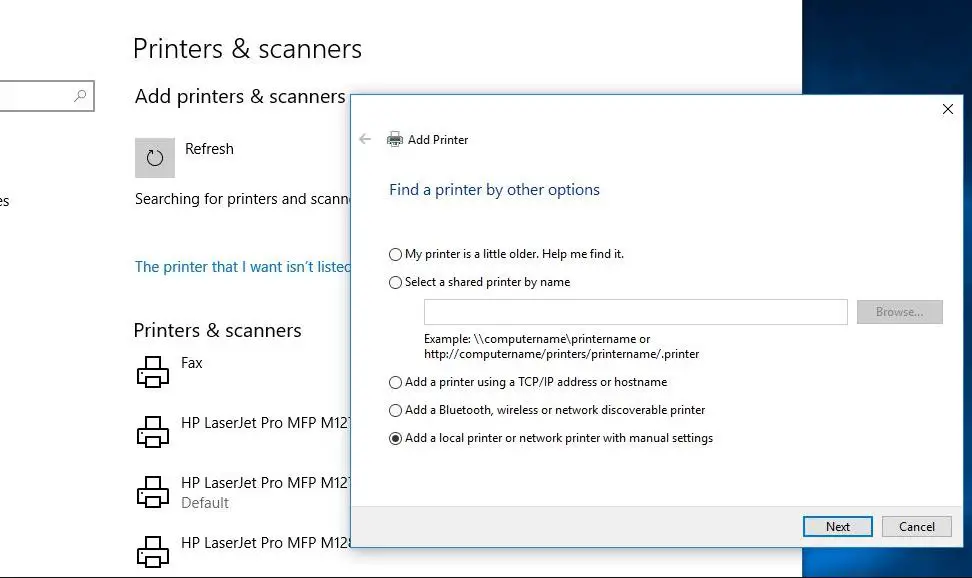
- Click on ‘Add a printer or scanner’ and let it find your device again.
- Click on your device and add it.
- Check if this helps
Fix Network printer problems
If you are having a problem with network sharing printer
Check the firewall and Antivirus/network protection software. These programs might block the incoming connection to the shared printer.
Disable VPN if configured on your system.
Turn on network discovery
- Open Control Panel.
- Then click Network and Sharing Center,
- In the left pane, click Change advanced sharing settings.
- Click Turn on network discovery, and then click Save changes.
Did these solutions help to fix Different printer problems on windows 10? Let us know in the comments below, Also read:
- Step By Step Install and Configure Printer on Windows 10
- Solved: Print Spooler keeps stopping Not Running on Windows 10
- Windows 10 Stuck on Welcome Screen? Here 5 working solutions to get rid this
- Fix Windows Has Detected An IP Address Conflict In Windows 10
- How To fix Devices and Printers not Loading on Windows 10
