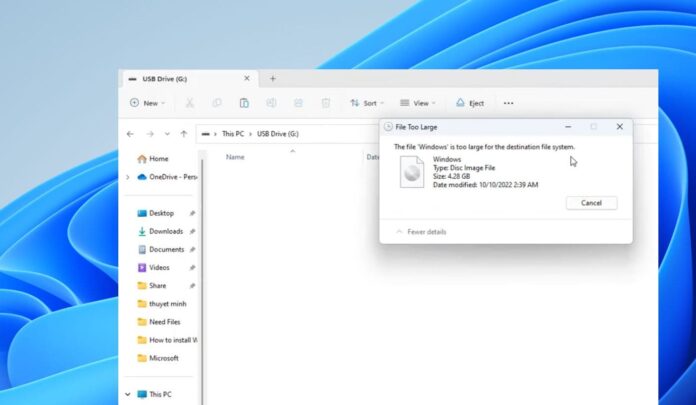
Have you ever encountered the frustrating error message, “The File Is Too Large for the Destination File System,” while trying to copy or move files on Windows 11? This can be frustrating, especially if you have enough free space on your target drive. Several Uses report, “The file is too large for destination” when the destination has more than enough space. Well, this error usually occurs when the file size exceeds the maximum limit of the file system on the destination drive. In this article, we will explain what causes this error and how to fix it in different ways.
Contents
The File is Too Large for the Destination File System
The error is caused by the incompatibility between the file system on the source drive (Your PC HDD) and the destination drive (USB drive). A file system is a way of organizing and storing data on a disk. There are different types of file systems, such as FAT32, NTFS, exFAT, etc. Each file system has its own advantages and disadvantages, but also its own limitations.
One of the limitations of FAT32, which is a common file system for USB flash drives and external hard drives, is that it cannot store files larger than 4 GB. This means that if you try to copy a file that is larger than 4 GB to a FAT32 drive, you will get the error message “The file is too large for the destination file system“.
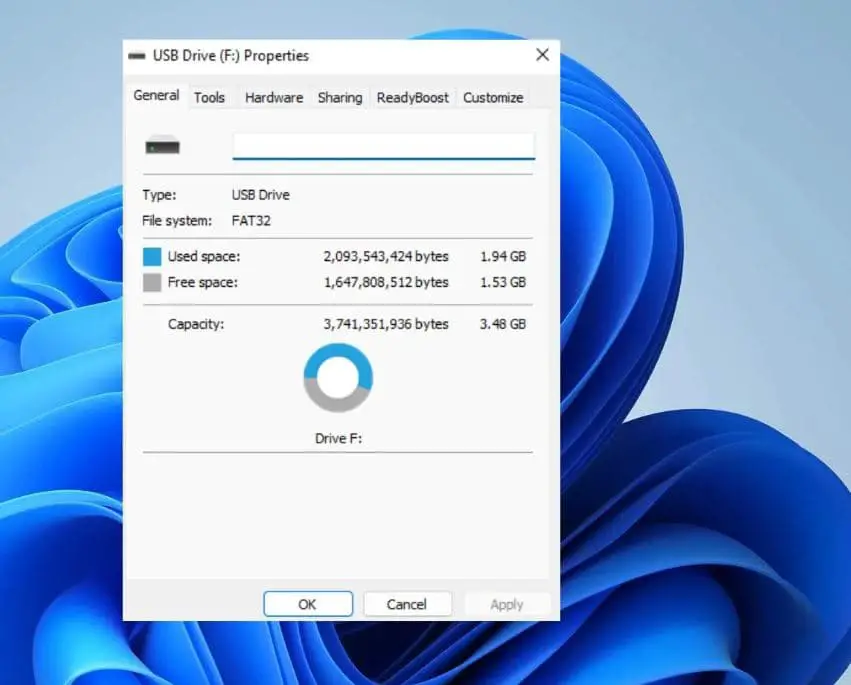
Note: To check the File system: Right-click on the destination drive in File Explorer, choose “Properties,” and check the “File system” information. If the file system is FAT32 or exFAT, these have file size limitations that may trigger the error.
NTFS, on the other hand, is a more advanced file system that can store files up to 16 TB in size. NTFS is the default file system for Windows operating systems and internal hard drives. Therefore, if you try to copy a large file from an NTFS drive to a FAT32 drive, you will encounter the error.
There are two most effective ways to fix the error, either Convert the destination drive to NTFS file system or Split the large file into smaller parts.
Format the destination drive to NTFS file system
This is the easiest and fastest way to solve the problem. By converting the destination drive to NTFS, you will be able to copy any size of files to it without any errors. However, this method has some drawbacks.
First, you will lose all the data on the destination drive during the conversion process, so make sure you back up your important files before proceeding.
Second, some devices may not be compatible with NTFS drives, such as some TVs, game consoles, media players, etc. Therefore, if you want to use your destination drive with these devices, you may not be able to do so after converting it to NTFS.
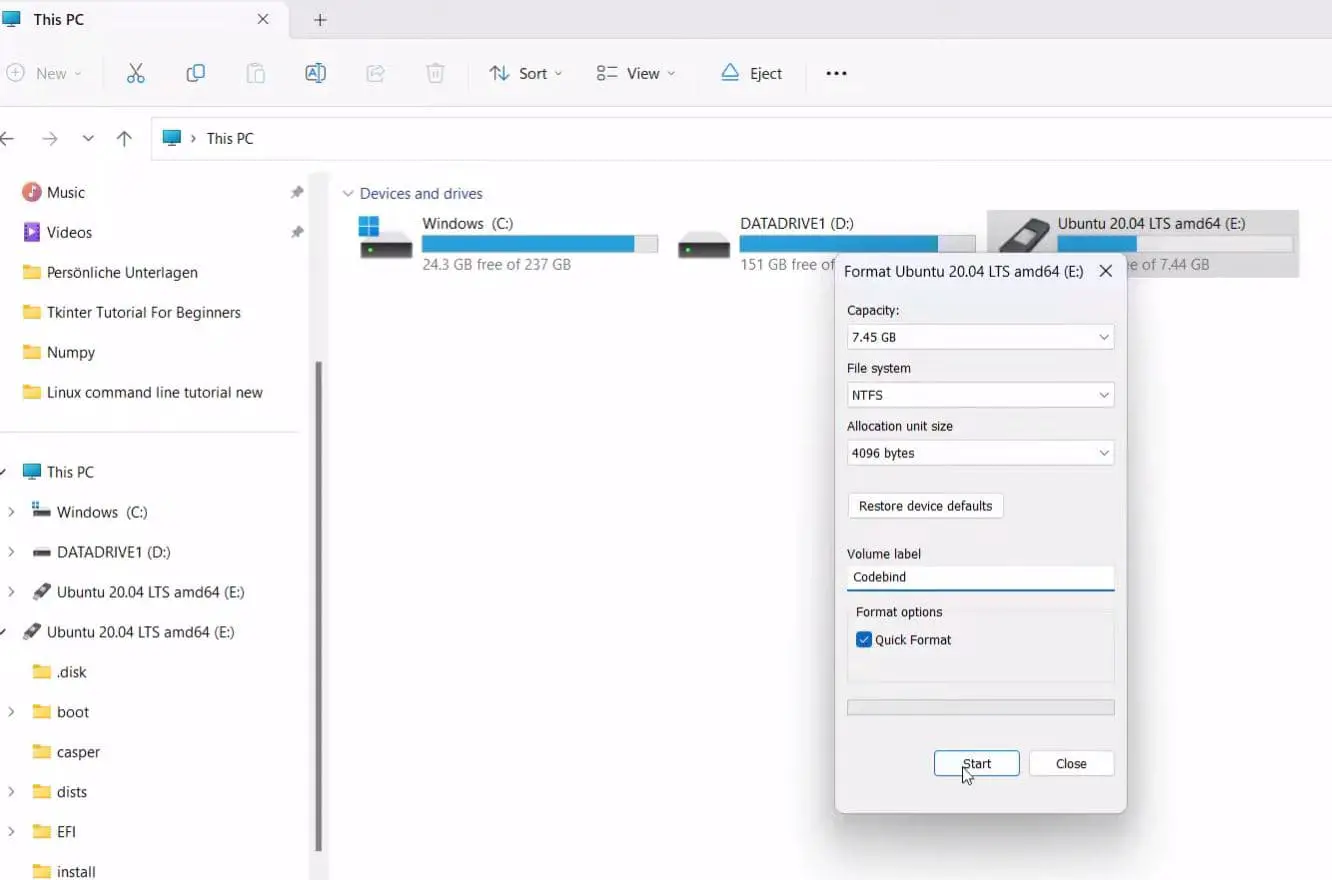
To convert a FAT32 drive to NTFS, follow these steps:
- First Connect your destination drive to your computer and open File Explorer.
- Right-click on your destination drive and select Format.
- In the Format window, choose NTFS from the File system drop-down menu.
- Check the Quick Format option and click Start.
- Wait for the format process to complete and click OK.
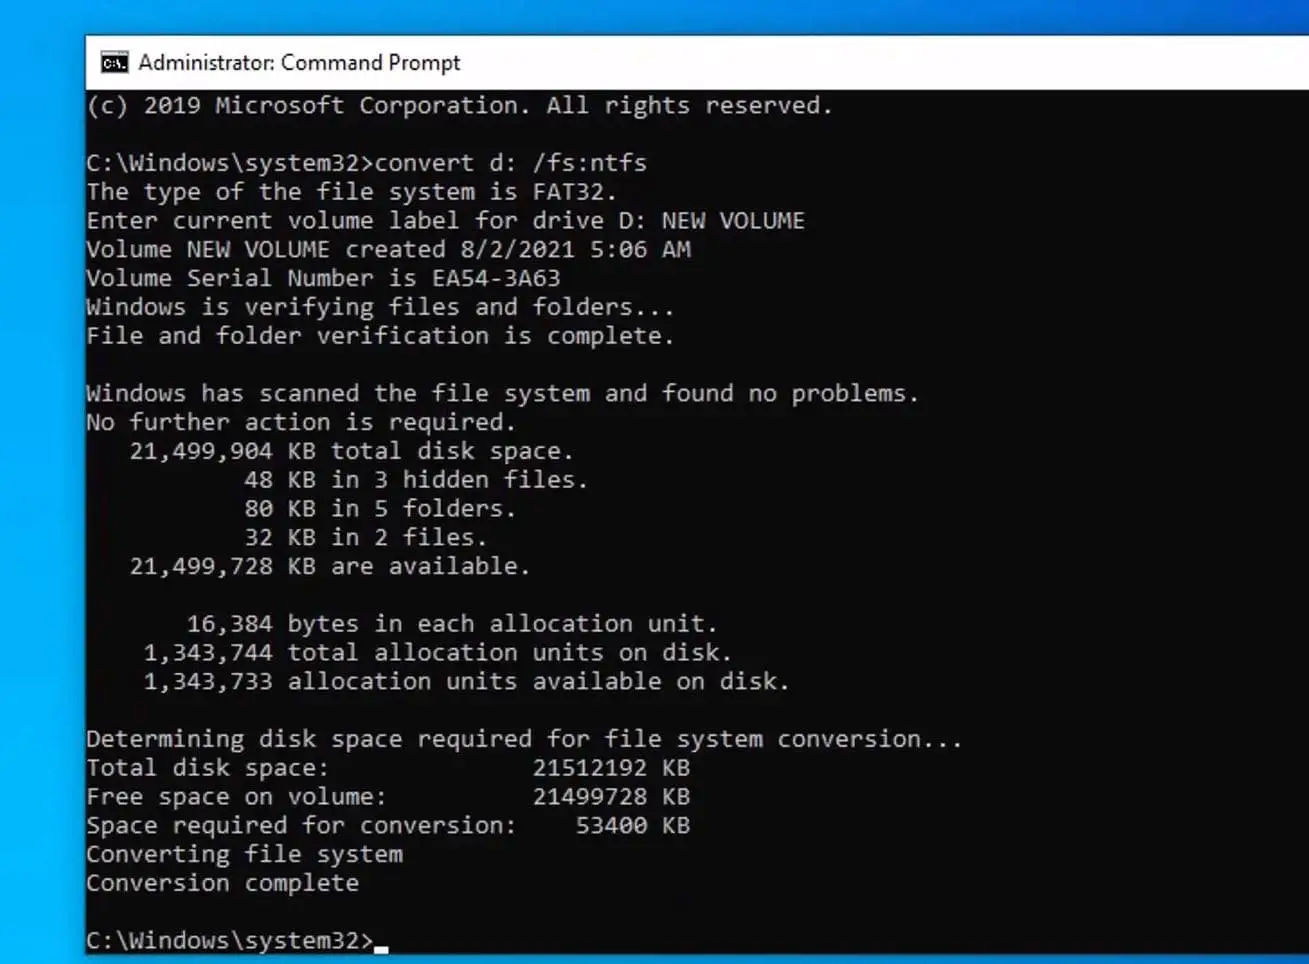
Or you can open Command Prompt as an administrator and use the following command:
convert <drive letter>: /fs:ntfs
Replace <drive letter> with the letter assigned to your destination drive. for Example D
Note: This process could take some time, and it’s recommended to back up your data before proceeding.
The tool will start converting the drive to NTFS. This may take some time depending on the size of the drive and the amount of data on it. Do not interrupt the process or turn off your computer.
After converting your drive to NTFS, you should be able to copy or move any file without getting the error message “The file is too large for the destination file system”.
Split the large file into smaller parts
This is another way to fix the error without changing the file system of your destination drive. By splitting the large file into smaller parts, you can copy each part separately to your destination drive without exceeding the 4 GB limit of FAT32. However, this method also has some drawbacks.
- First, you will need a third-party software tool to split and join your files, such as 7-Zip, WinRAR, etc.
- Second, you will need more space on your source and destination drives to store the split parts.
- Third, you will need to join the parts back together before you can use your original file.
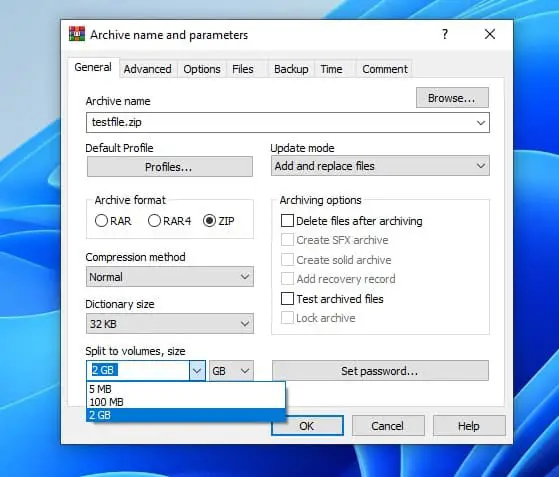
To split a large file into smaller parts using WinRAR, follow these steps:
- Download and install WinRAR from https://www.win-rar.com/
- Locate your large file on your source drive and right-click on it, Select WinRAR > Add to archive.
- In the Add to Archive window, choose ZIP from the Archive format drop-down menu.
- Choose a suitable size from the Split to volumes option (for example, 2 GB).
- Click OK and wait for WinRAR to create multiple ZIP files with your chosen size.
- Copy each ZIP file separately to your destination drive.
To join the split parts back together using WinRAR, follow these steps:
- Connect your destination drive to your computer and open File Explorer.
- Locate the first ZIP file (the one with .001 extension) on your destination drive and right-click on it.
- Select WinRAR > Extract here, Wait for WinRAR to extract and join all the ZIP files into one original file.
Additional troubleshooting tips
However, if you still encounter this error, there may be other reasons behind it, such as:
- The file is corrupted or damaged and cannot be read by Windows 11.
- The destination drive has bad sectors or physical damage that prevent writing data to it.
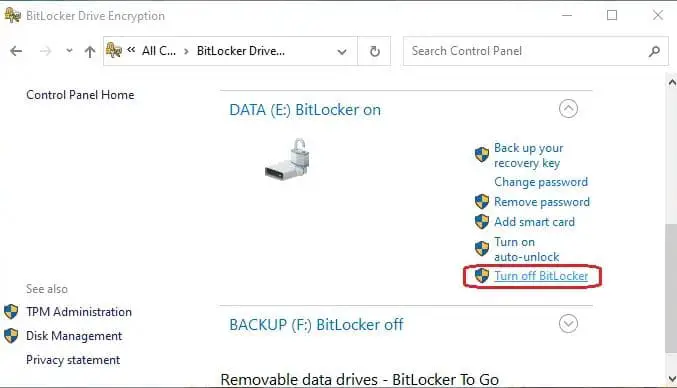
- The destination drive is encrypted or protected by BitLocker or other software that restricts access to it.
- The destination drive is full or has insufficient free space to accommodate the file.
To troubleshoot these issues:
Scan the file with an antivirus or anti-malware program to check for any infections or threats.
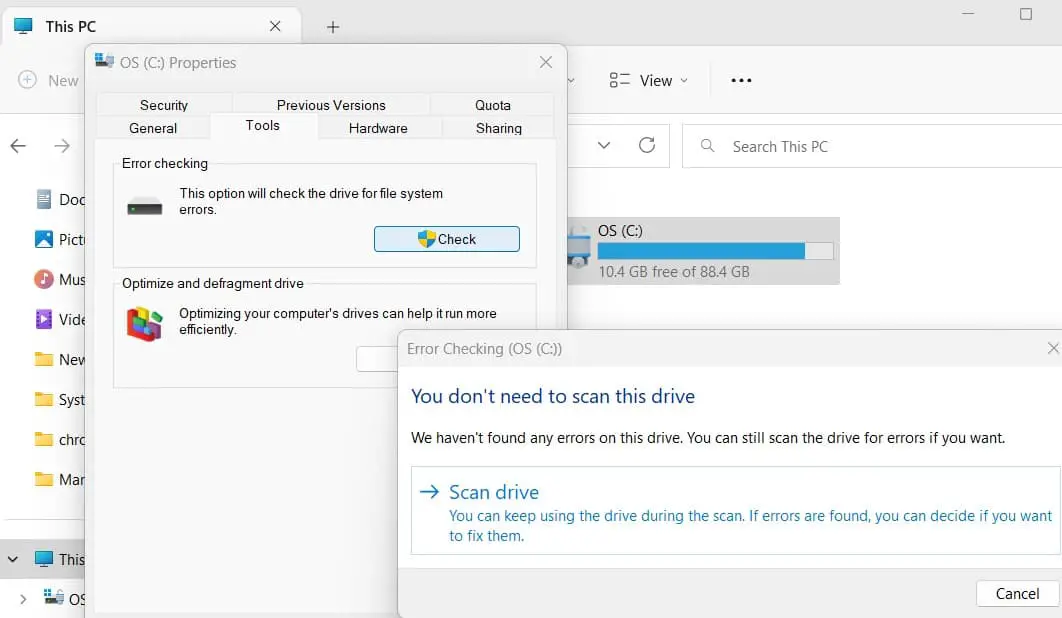
Run a disk check on both the source and destination drive to repair any errors or bad sectors. You can do this by opening File Explorer, right-clicking on the drive, selecting Properties, clicking on Tools, and then clicking on Check under Error checking.
Decrypt or unlock the destination drive if it is encrypted or protected by BitLocker or other software. You may need to enter a password or a recovery key to do this.
Sometimes, hardware issues can lead to file transfer problems. Try using a different USB port or cable to connect your external hard drive. Also Make sure you’re not trying to copy any hidden or system files that could be restricted.
Delete some unnecessary files or folders from the destination drive to free up some space. You can also use Disk Cleanup or Storage Sense to remove temporary files, downloads, recycle bin items, and other junk data.
Frequently Asked Questions (FAQs)
What causes the “File Is Too Large for the Destination File System” error
- This error occurs when you try to transfer a file that exceeds the size limitations of the destination file system, such as FAT32 or exFAT.
How can I check the file system of my drive?
- Right-click on the drive in File Explorer, select “Properties,” and look for the “File system” information under the “General” tab.
How do I split large files to overcome file size limitations?
Use file archiving tools like WinRAR or 7-Zip to create segmented archives, ensuring each segment fits within the destination file system’s limits.
What is the maximum file size supported by NTFS?
- NTFS supports much larger file sizes compared to FAT32 and exFAT, with a maximum file size of 16 exabytes (EB).
Also read:

