Unable to Connect to the internet, Wi-Fi Disconnect frequently or No Internet Access after Windows 10 Upgrade? Applied different solutions to troubleshooting network problems in Windows 10, but still, there is No internet access. Basically, we recommend run a built-in troubleshooter on Windows 10 can help you fix most of the common network & Internet issues. But if you are unable to solve one or more network issues using built-in troubleshooters, you should consider resetting network settings to default. Here this post explains how to reset network settings in Windows 10.
Before this, we recommend applying basic Network and internet troubleshooting steps.
- Restart all your networking devices, including router and your PC,
- Temporarily disable antivirus or security software and remove VPN if configured on your system.
- Make sure the latest Windows updates are installed on your system.
- Perform a Windows 10 clean boot to determine if any startup service conflict causing the problem.
- Right-click on the network (WiFi) adapter icon and select Troubleshoot problems. Follow on-screen instructions and restart windows after complete the process. Check if this helps.
- Also, try reinstalling the driver for the network/WiFi adapter. If none above solutions worked for you, then you can consider reset network settings in Windows 10. Here apply the solutions below.
Reset Network Settings in Windows 10
Network reset can be considered As “hard reset” solution for solving most of the network issue. When you perform the network reset option this will reinstall all network adapters and set other networking components to their default settings.
Note: Perform network reset will forget all Wi-Fi networks and their passwords. That means after resetting network settings, you will need to manually connect your Laptop to a Wi-Fi network again by entering the password. So, if you don’t remember the Wi-Fi password that your PC regularly connects to, you should know or back up the saved Wi-Fi password before resetting network settings.
Perform Network Reset from settings
Note: Network Reset Option Available on Windows 10 only, If you are a Windows 7 or 8.1 user looking for reset network settings jump to next step.
- Press the Windows + I keyboard shortcut to open the Settings app,
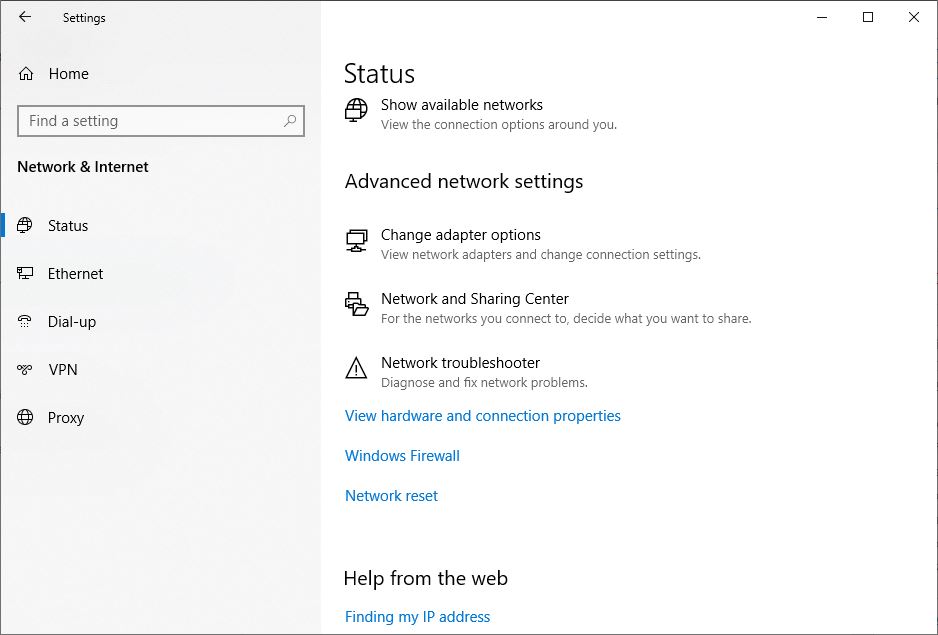
- Here click on “Network & Internet” then “Status” on the left.
- Scroll Down, You’ll find an option on the right called “Network reset.” Click on it.
- The Settings app will open a new window called Network Reset
Make sure to read all the parts in this screen so you know what’s about to happen. Notably, your PC will be restarted itself, so make sure you have everything saved and ready to shut down.
- Click the “Reset now” button when you’re ready.
- The Network Reset Confirmation popup will appear,
- Click Yes to confirm the same and Reset the Network Settings to the default setup.
- It will take Flew minute to Perform the Reset process,
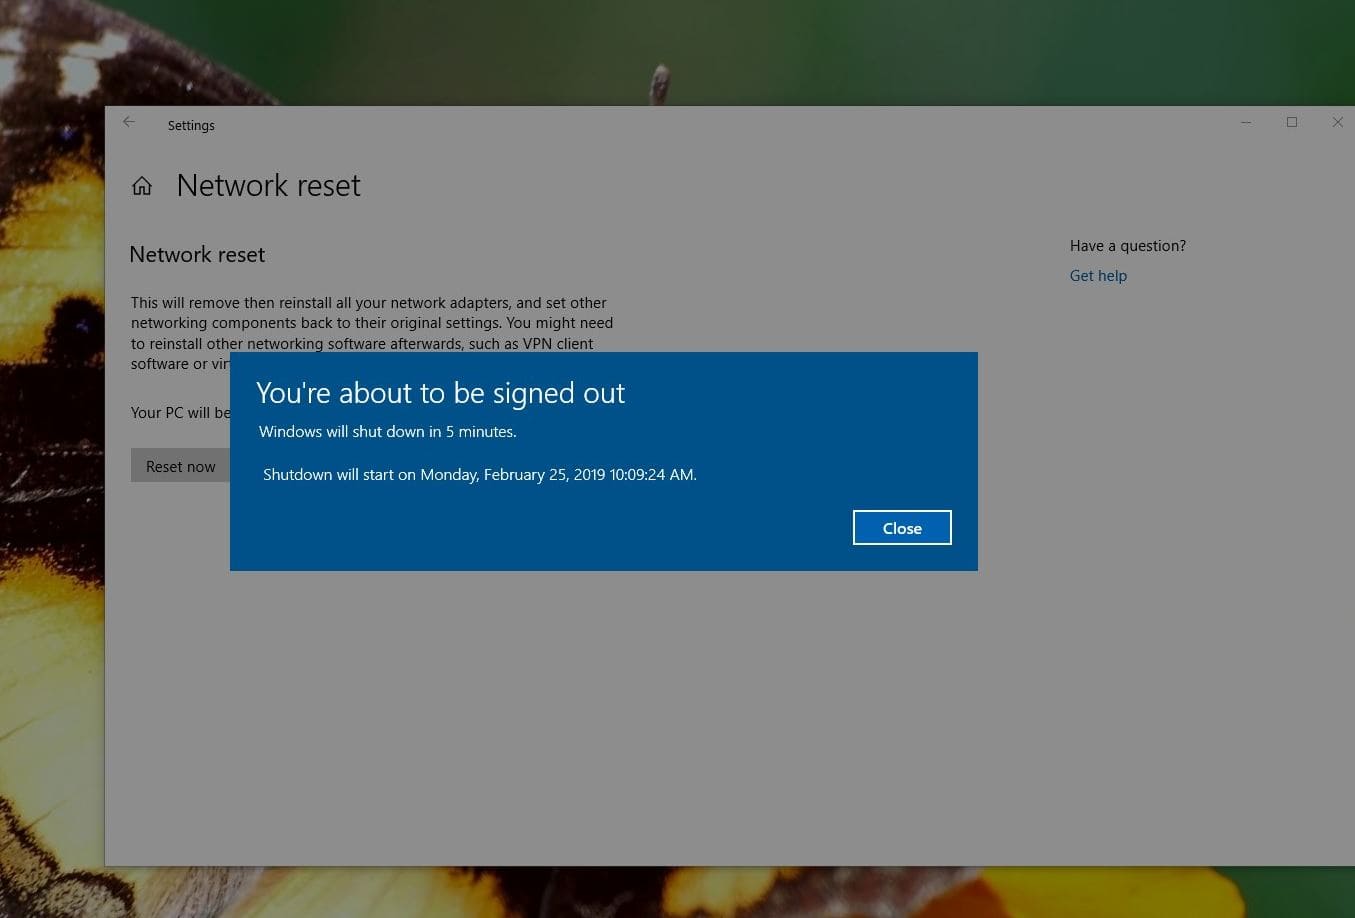
- Then After A prompt message will open you’re about to be signed out.
After the restart, your PC will have its network drivers and settings reset. Allow Windows to reinstall drivers or install them manually if you like. Once you’re set back up, try to connect again and see if the reset helped fix your issues.
Note: After the network reset, Your Wifi Connection will be get disconnected, So you need the Wifi Password to Connect again. Also your network connection could be set to public network mode. Therefore the PC is not discovered by other devices in the network. So to make it discoverable edit the adapter properties and turn on the switch under Make this PC discoverable. If you are using VPN client software or virtual switches, even they have to be reconfigured again.
Reset network settings using cmd
If you are using a Windows 7 or 8.1 computer then There is no option to Reset Network configuration. You Can Reset Network Settings To Default by using some commands.
Note: The command below also applicable to reset network settings in Windows 10 using cmd.
First search for Command Prompt, Rightclick and select As an administrator,
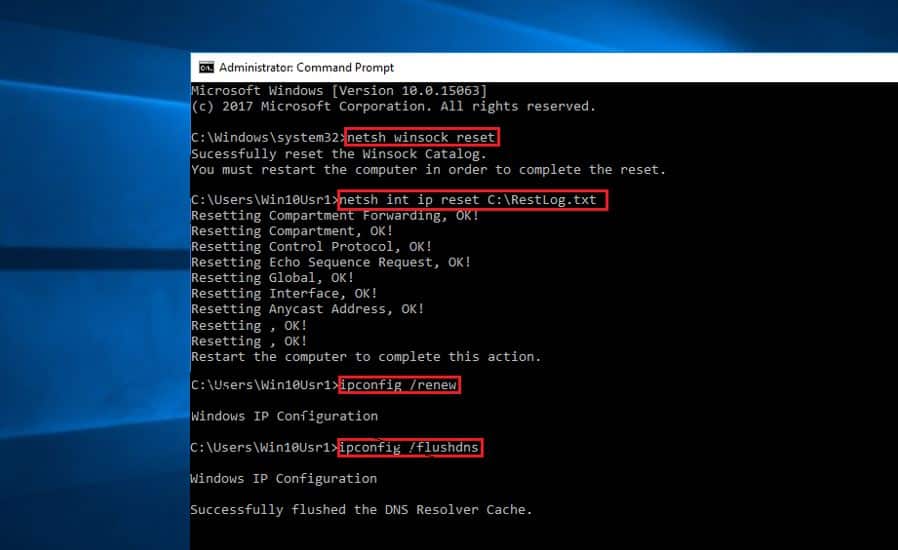
Now perform the Commands below one by one and press enter key after each.
- netsh winsock reset
- netsh int ip reset
- ipconfig /release
- ipconfig /renew
- ipconfig /flushdns
That’s all After performing The commands simply restart Windows, to take effect the changes you have made. Now Check All Internet or network related problems are solved.
Read more:
- Fix We can’t find your camera error 0xA00F4244 on Windows 10
- How to Upgrade and Install Microsoft Office Professional Plus 2016
- Background Intelligent Transfer Service ( BITS ) on Windows 10
- Fix inaccessible boot device Windows 10 Blue Screen Of Death error
- [Fix] The application was unable to start correctly 0xc000007b


