Whether you are working from home, studying online, or streaming your favorite shows, having a stable and fast Wi-Fi connection is essential for your productivity and entertainment. However, there are times you may experience, Laptop wifi not working or Wi-Fi keeps Disconnecting or trouble connecting to the internet. Several users report Windows 11 laptop wifi connection issues after update. Many factors can affect your Wi-Fi performance and cause issues such as slow speed, intermittent connectivity, or no connection at all. Driver issues to incorrect network configuration, third-party Software Interference or problems with Wifi routers are common. Here are some possible solutions to fix WiFi not working problem on Windows 11 Laptop and get back online.
How to fix Wi-Fi problems in Windows 11
There are many possible causes of Wi-Fi connection issues on Windows 11 laptops, but some of the most common ones are:
Outdated, corrupt, or incompatible Wi-Fi drivers, that need to be updated through the Device Manager or using a third-party driver update tool to ensure you have the latest and compatible drivers.
Incorrect network settings or configuration, and you need to Check and reset network configurations in the laptop’s settings to restore internet access. Sometimes, updates may introduce compatibility issues that affect Wi-Fi connectivity.
Third-party security software, firewalls, or VPNs can sometimes interfere with the Wi-Fi connection, Temporarily disable or configure security software to allow Wi-Fi connectivity.
Again Malfunctioning hardware components, such as a faulty wireless adapter or issues with the laptop’s internal hardware, can result in Wi-Fi problems. Also, Problems with the Wi-Fi router, such as overheating, outdated firmware, or misconfigurations, can impact laptop connectivity.
Restart your laptop and router
Sometimes, a simple restart can solve many network problems. Try turning off your laptop and router, wait for a few seconds, and then turn them back on. This can refresh your network settings and clear any temporary glitches.
Power cycling can resolve temporary connectivity issues.
- Turn off your laptop, router, and modem.
- Wait for at least 30 seconds.
- Turn on the modem and wait for it to fully restart.
- Turn on the router and wait for it to restart.
- Finally, turn on your laptop and check if the Wi-Fi is working.
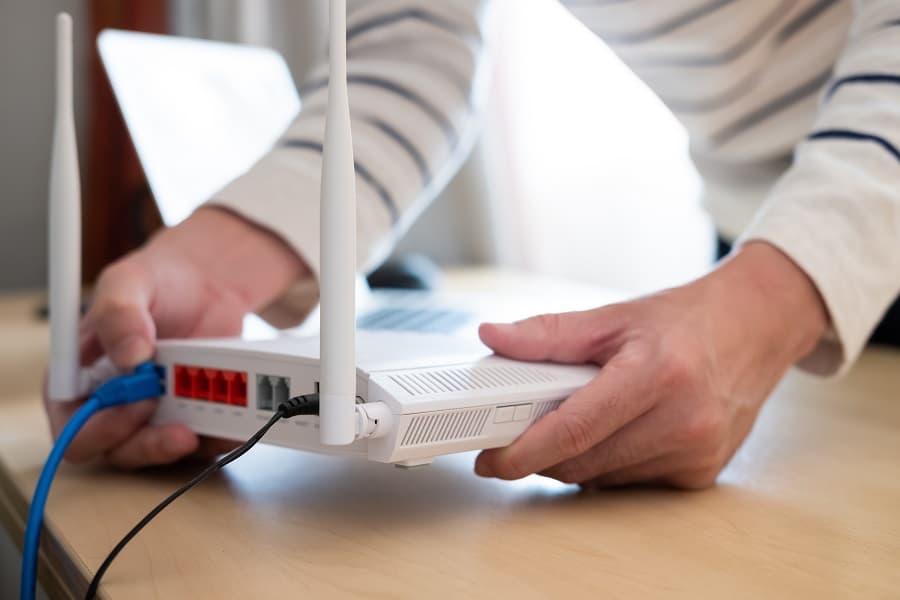
In addition check the Wi-Fi signal on your Laptop, if it’s low this is the reason why WiFi keeps disconnecting. Take your laptop closer to the WiFi router or consider an Ethernet cable for stable internet access.
Run the network troubleshooter
Windows 11 has a built-in network troubleshooter that can help you diagnose and fix common network problems.
- Click on the Start menu and select Settings.
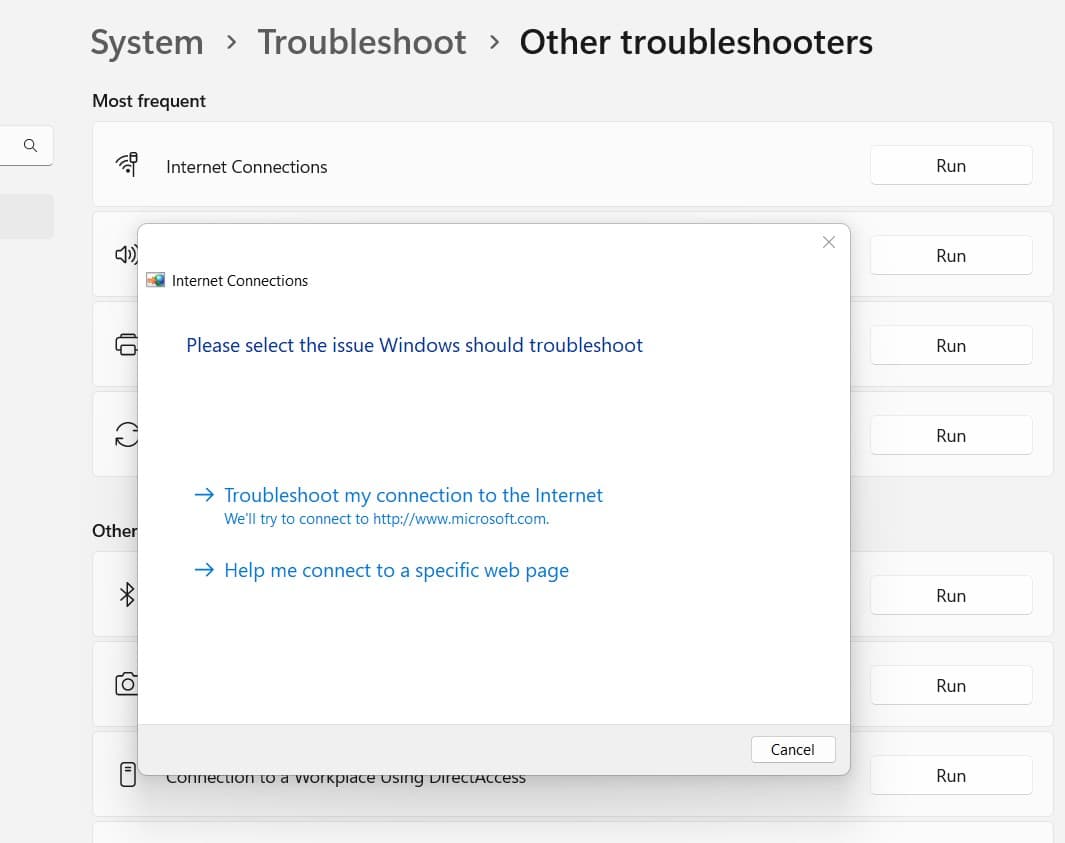
- Go to Network & internet then Troubleshoot and click on Other Troubleshooters
- Click on Run next to Network Troubleshooter.
- Follow the on-screen instructions to complete the troubleshooting process.
- In addition, run the troubleshooter for Internet connections as well.
Once done, reboot your laptop and check if internet access is restored, there is no problem with wifi connectivity.
Update your wifi driver
A driver is software that allows your laptop to communicate with your wifi adapter. Outdated or incompatible Wi-Fi drivers can be a significant culprit behind Laptop WiFi connectivity issues. You need to update the WiFi driver for Windows 11 with the latest version to ensure compatibility.
You can do this manually through Device Manager or use third-party driver update tools for convenience.
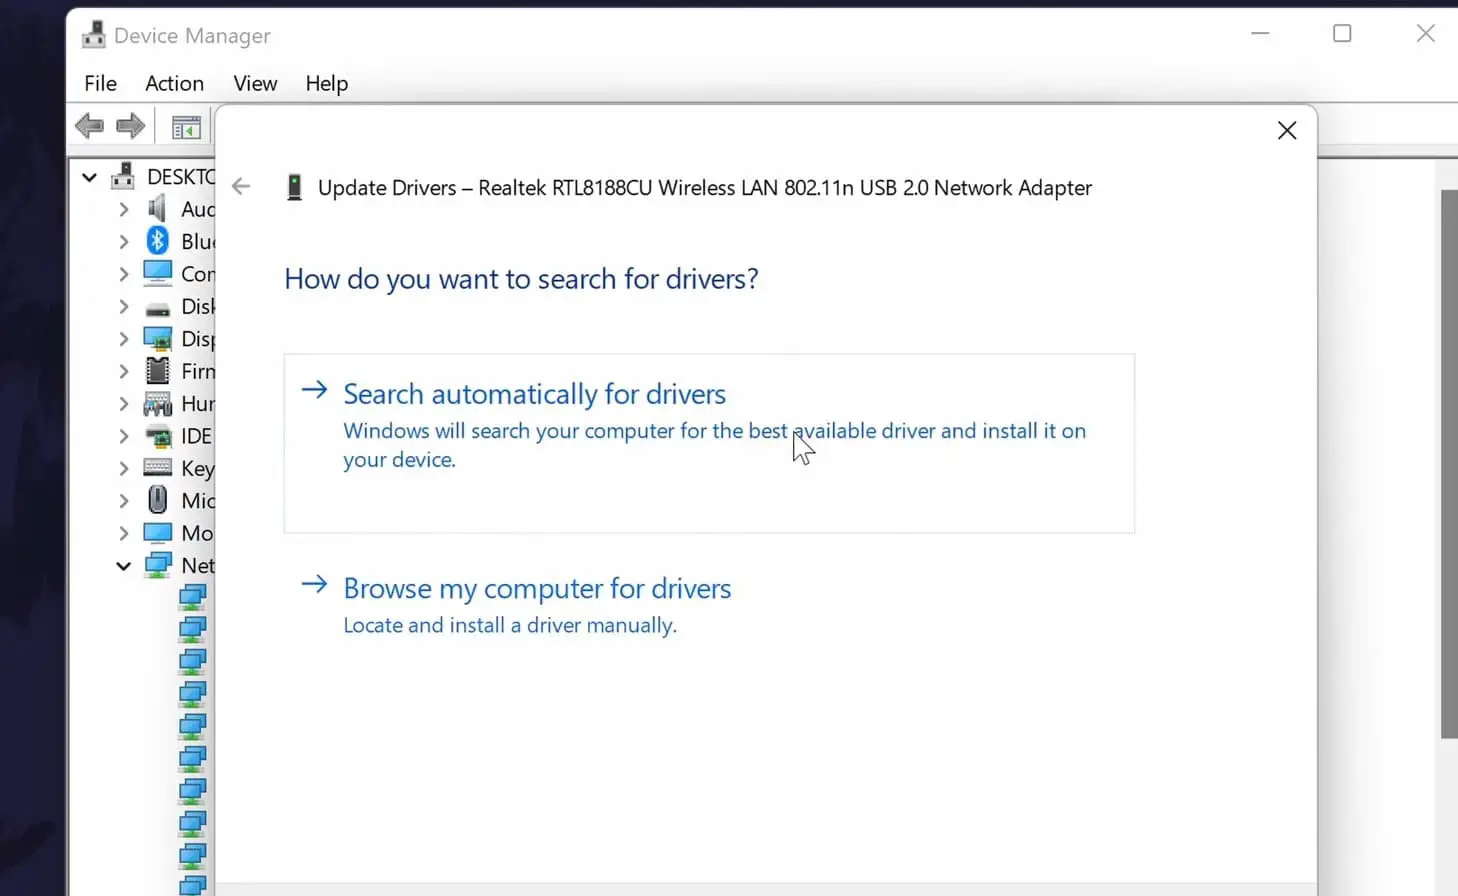
- Right-click on the Start menu and select “Device Manager.”
- Locate and expand the “Network adapters” category.
- Right-click on your Wi-Fi adapter and choose “Update driver.”
- Choose Search automatically for drivers and wait for Windows to find and install the latest driver for your wifi adapter.
Also, you can visit the device manufacturer’s site to download and install the latest wifi driver for Windows 11. or Utilize reputable third-party driver update tools like Driver Booster or Driver Easy for a hassle-free driver update experience.
Check Network Settings
Incorrect network settings can lead to Laptop WiFi connectivity problems. Check and Ensure that IP addresses, DNS servers, and gateway settings are accurate.
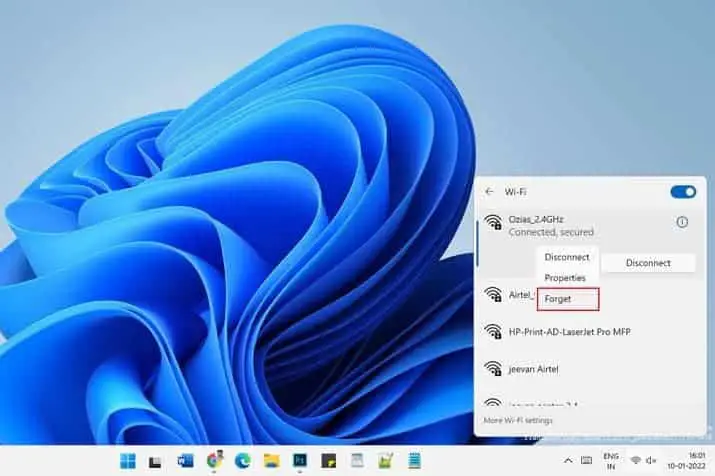
- Click the Network icon in the action center on the taskbar.
- Click the network status button
- Right-click the connected wifi network and select the forget option.
Or you can open settings -> network & Internet -> WiFi. Click Manage Known Networks and click Forget next to the connected WiFi network. Now reconnect the WiFi network by entering the correct password if required.
Forgetting and reconnecting to a WiFi network can establish a fresh connection, resolving potential authentication or configuration issues.
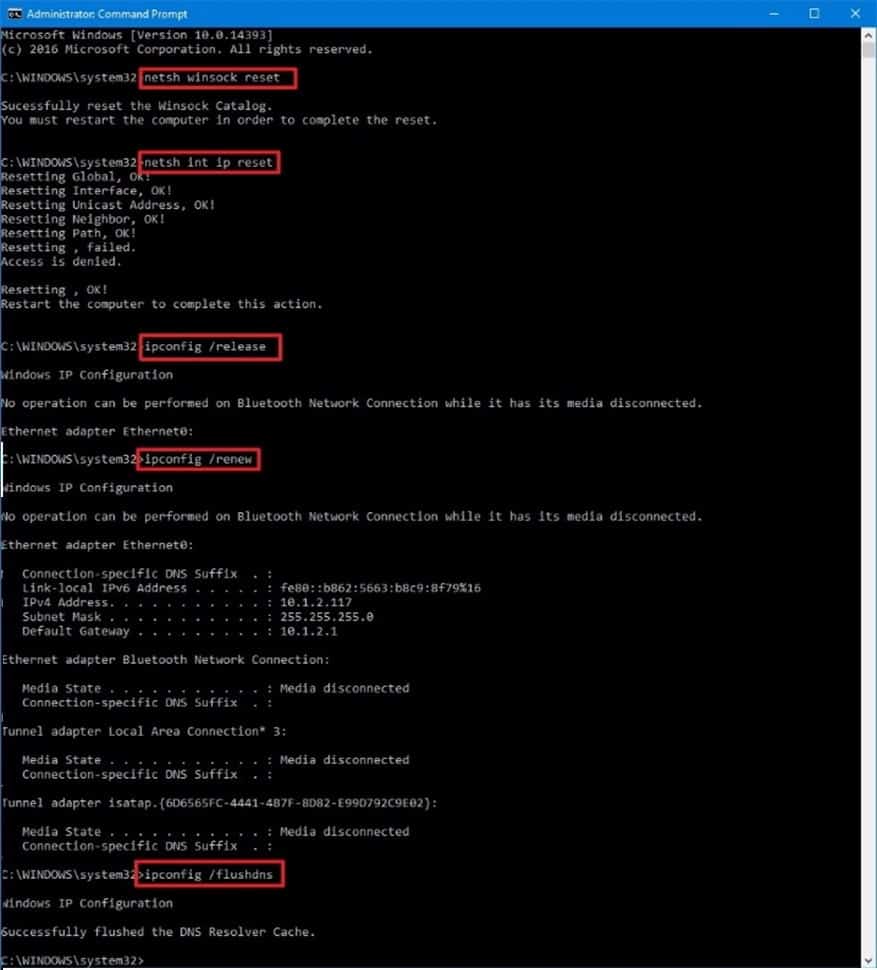
Additionally, Reset TCP/IP stack and check IP configurations using the Command Prompt:
Open the command prompt as administrator and run the command netsh int ip reset. Resetting the Transmission Control Protocol/Internet Protocol (TCP/IP) stack can resolve network-related issues.
In addition, run following command to flush DNS and reset IP configuration.
ipconfig /release
ipconfig /flushdns
ipconfig /renew
Now restart your Laptop and check if the WiFi connection is stable and the internet working without any problems.
Disable Third-Party Security Software
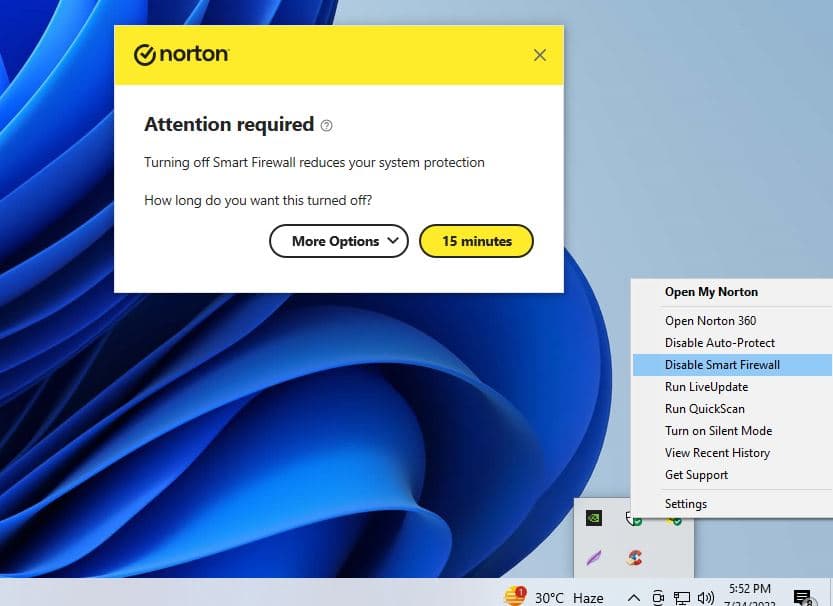
Security software, including firewalls and VPNs, can sometimes interfere with Wi-Fi connections. Temporarily disable them to check if they are causing the connectivity issues. If so, consider adjusting their settings or seeking alternative security solutions.
Launch the user interface of your third-party security software. This could be an antivirus program or an all-in-one security suite. Look for an option within the security software settings to disable or turn off the firewall and real-time protection features. These settings may vary depending on the software you are using. For firewalls, find an option related to network protection and temporarily turn it off.
If you have a VPN installed, locate its application or settings. Turn off the VPN by disconnecting from the server or using the provided “disconnect” option.

After disabling both the security software and VPN, restart your computer. Now try to connect to the Wi-Fi network. Check if the Wi-Fi connection has improved or if the issue persists.
Check the WLAN service startup type
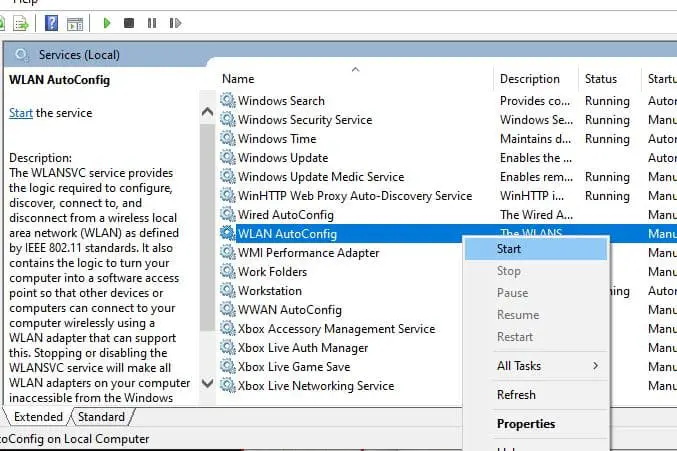
The WLAN AutoConfig service service that must be running for Wi-Fi functionality in Windows 11. If for some reason this service stopped or not started automatically, you may experience problems or not be able to establish WiFi connection on your Laptop. If you encounter Wi-Fi connectivity issues, confirming the correct startup type for this service is a good troubleshooting step.
- Press “Windows + R”, type “services.msc” in the “Run” dialog box, and press the “Enter” key
- In the Services Manager window, scroll down to locate “WLAN AutoConfig.”
- Right-click on the “WLAN AutoConfig” service and select restart.
- If the service not started, right-click on it select “Properties” from the context menu.
- Change the startup type is not set to “Automatic,” Click “Apply” and then “OK” to save the changes.
Check your WiFi Settings
Sometimes, your wifi settings may be incorrect or incompatible with your router. For example, you may have enabled airplane mode, disabled wifi, or selected the wrong network band.
- Press the Windows key + X and select Settings.
- Click on Network & internet then Wifi on the left pane.
- Make sure the Wifi toggle is On and airplane mode is Off.
- Click on Manage Known Networks and select your wifi network.
- Click on Properties and make sure the Network band is set to Auto or matches your router’s band.
Reset your network settings
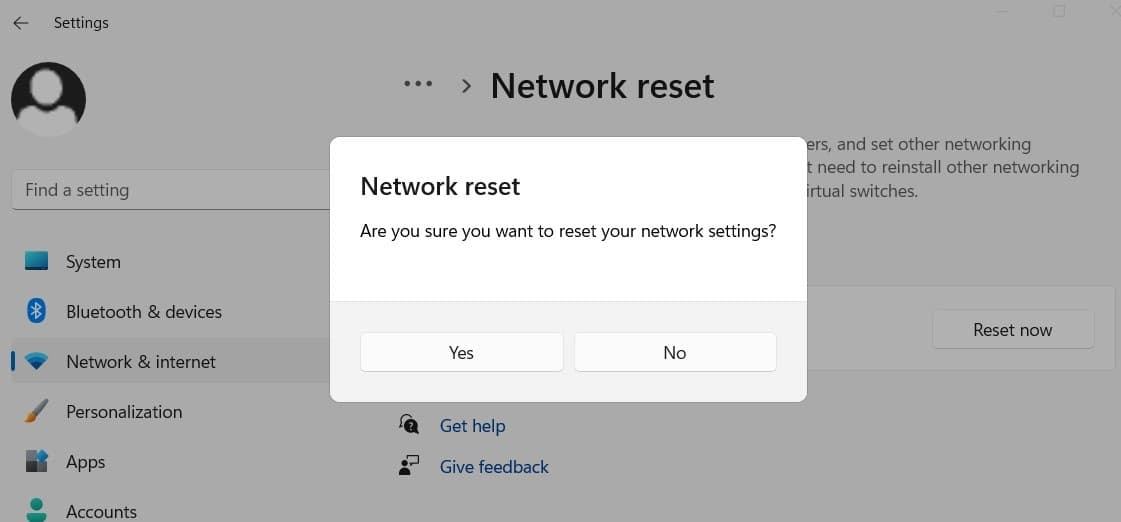
If none of the above solutions work, you may need to reset your network settings to their default values. This can help resolve any configuration errors or conflicts that may be affecting your wifi connection.
To reset your network settings:
- Click on the Start menu and select Settings.
- Go to Network & internet then Advanced network settings on the right pane.
- Under the “ Other Settings ” section, click “ Network Reset .” Click on Reset now and confirm your action.
- Wait for your laptop to restart and reconnect to your wifi network.
All network cards will be reinstalled, and associated settings will be restored to their default values. Now Check if the Windows 11 Wi-Fi connection issue is resolved.
Also read:
