
Windows Updates include essential security patches to protect your system from the latest security threats and vulnerabilities. Regular updates from Microsoft, address bugs and issues, enhancing system stability and minimizing unexpected errors. However at times, while trying to update your Windows 10 or 11 PC, you may encounter an error message that says “We couldn’t connect to the update service“. This error means that your PC is unable to communicate with the Microsoft servers that provide the latest updates for your system. This article explores what causes this error and how to fix Windows 11 Update error: We couldn’t connect to the update service.
Windows 11 cannot connect to update service
This error “We couldn’t connect to the update service” usually means that your PC is unable to communicate with the Microsoft servers that provide the latest updates for your system. Several factors can contribute to this issue, Some of the most common ones are:
- A stable internet connection is essential for the update service to communicate with Microsoft servers. Connectivity problems, such as a weak signal or issues with the internet service provider, can lead to this error.
- Incorrect date and time settings, VPN or proxy configurations, or issues with Windows Update components may disrupt the connection, resulting in the error.
- Third-party antivirus programs or security software might interfere with the update process. Temporarily disabling such software can help identify if they are causing the connectivity problem.
- Over time, the update cache and components may become corrupted, leading to connectivity issues. Manually resetting these components can often resolve the problem.
- Your device has a firewall or antivirus software that is blocking the connection to the update service.
Check Your Internet Connection
A stable internet connection is crucial for Windows Update to function properly. The update service requires a reliable connection to Microsoft servers to download and install updates. Make sure that your PC is connected to a stable and fast network.
- You can use a speed test tool to measure your connection speed and quality,
- You can try to restart your router or modem, or use a different network if possible.
- Verify that you can access other websites and online services without any problems.
- If using a Wi-Fi connection, try connecting via Ethernet to rule out any wireless connectivity issues.
Restart Your Computer
Sometimes, A simple restart can often resolve temporary glitches that might be affecting the update service. It clears the system’s memory and restarts essential processes.
- Save your work and close all open applications.
- Click on the Start menu, select the power icon, and choose “Restart.”
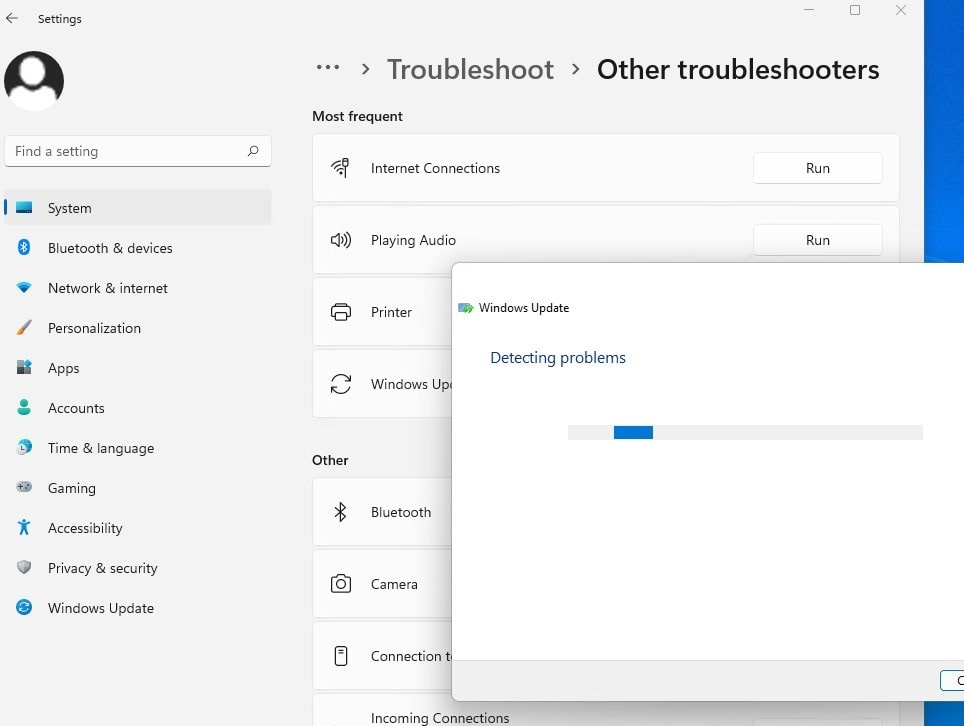
Run Windows Update Troubleshooter
The Windows Update Troubleshooter is a built-in tool designed to automatically detect and fix common issues that can prevent updates from being installed.
- Press Win + I to open the Settings menu
- Go to system then troubleshoot and click on Other troubleshoters
- Click Run next to the window update and follow on-screen instructions to diagnose and fix Windows update errors automatically.
This will attempt to identify if any problems exist which prevent your computer from downloading and installing Windows Updates.
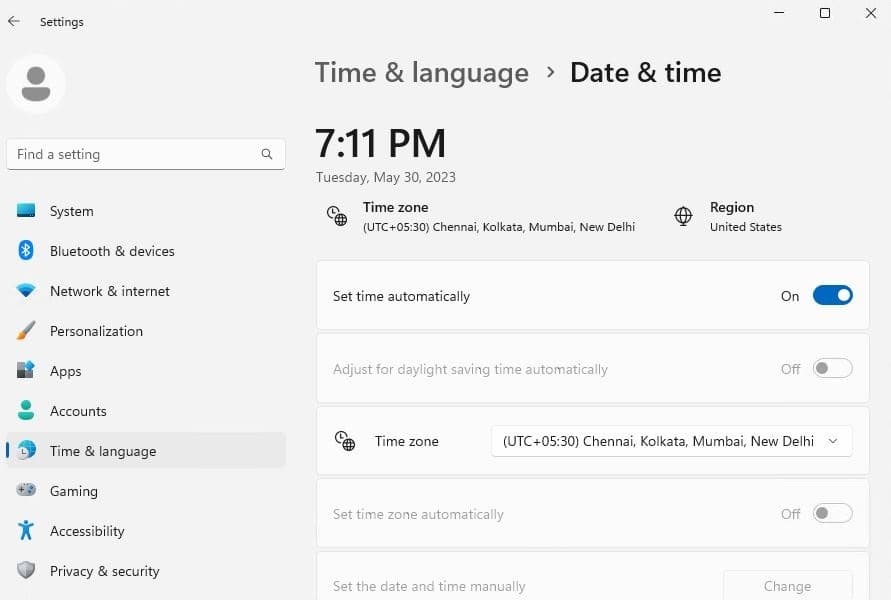
Check Date and Time Settings
Incorrect date and time settings can interfere with Windows Update. Ensuring the correct date and time is crucial for the system to establish a secure connection with Microsoft servers.
- Open the Settings menu (Win + I), go to “Time & language.”
- Verify the date, time, and time zone settings.
Make sure that the option “Set time automatically” is turned on, or manually adjust the date and time to match your time zone.
Check for Third-Party Antivirus Interference
Some third-party antivirus programs may interfere with Windows Update. You can try to turn off your firewall or antivirus software for a while and see if the error goes away. Remember to turn them back on after you finish updating your PC.
- Open your antivirus software and disable real-time protection temporarily.
- Check if the Windows Update issue persists.

Change DNS Address
Domain Name System (DNS) makes it possible for you to open websites and access internet services. The DNS directs your computer to access a service, and problems with the DNS can make services such as Windows Update temporarily unavailable. And you can fix this “we couldn’t connect to the update service error” by changing the DNS settings on your PC. You can switch to Google DNS or Cloudflare’s privacy-focused DNS to address the Windows Update issues.
To change the DNS settings on your Windows 10 device, do the following:
- Press Windows + R, type ncpa.cpl and ok
- This will open the network connections window,
- Right-click the network interface which is in use.
- For example: right-click the connected ethernet adapter displayed on the screen. Select Properties.
- Double-click on Internet Protocol Version 4 (TCP/IPv4) from the list to get its properties window.
- Here select the radio button Use the following DNS server addresses
- Preferred DNS server 8.8.8.8
- Alternate DNS server 8.8.4.4
- Click on validate settings upon exit and ok
- Now check for updates, there is no more Update service error

Turn off the Automatic proxy setup
If you are using a proxy server, it might be causing the update issue. Disabling proxy settings ensures a direct connection to Microsoft servers.
- Press Windows key + I to open windows settings
- Select Network & Internet then Click on Proxy
- Here turn off Automatically detect settings.
- Now press Windows + R, type inetcpl.cpl and ok.
- Move to the Connections tab, click LAN settings.
- uncheck, Use a proxy server for your LAN
- And make sure the Checkmark on Automatically detect settings

Restart Windows update Service (And its related services)
- On the Start menu search type services.msc and hit enter key to open Windows services.
- Here look for Windows update service,
- If it’s running state simply right-click on it and select restart.
- If it’s not running then right-click and select start the service.
- Now double click on Windows update service to get its properties.
- Here change its startup type is set to automatic.
- Now switch to the Dependencies tab, and make sure the dependency services listed here are running.
- In this case, the dependency service is the Remote Procedure Call service.
- So ensure it is Running and has Automatic Startup type.

Also Check whether windows update-related services (Background Intelligent Transfer Service, Superfetch) are running or restart these services.
Run System File Checker Utility
Corrupted system files may be the possible cause of why you’re unable to get an update. Simply Run the System file checker utility to check and restore if any missing corrupted system files causing the issue. To do this
- Open the command prompt as administrator,
- Type sfc /scannow and hit the enter key.
- This will check for missing corrupted system files
- If found any the utility will restore them from %WinDir%\System32\dllcache.
- Wait until 100% complete the scanning process After that restart windows and check for updates.

Also if the SFC scan fails to restore corrupted system files, simply run the DISM command which repairs the system image and enables SFC to do its job.
Reset the Windows Update components
If nothing seems to solve the problem, you can try to reset the Windows Update components, and manually clear the Windows Update cache that fixes Windows Update download and installation issues. Before clearing the cache, first, we need to stop the Windows update service and its related service.
- To do this Open Command prompt as Administrator
- Perform the command below to Stop the Background Intelligent Transfer Service (BITS), Windows Update service, and Cryptographic service.
- net stop bits
- net stop wuauserv
- net stop cryptsvc
- And minimize the command prompt window (we use the same later)
Now to clear the Windows update cache
- Press “Windows + R,” enter the below path and press the Enter button.
- C:\Windows\SoftwareDistribution\
- This folder has all the files related to Windows updates.
- Open the “Download” folder, select all the files and delete all the files.

Now again open the Command prompt window and perform the command below to Reset the network configurations that might be part of the problem.
netsh winsock reset
netsh winsock reset proxy
And then perform the command below to restart the BITS, Windows Update, and Cryptographic services that we previously stopped.
net start bits
net start wuauserv
net start cryptsvc
That’s all now close every window and restart your system.
On the next login check for updates from settings -> update & Security -> Windows update And check for updates.
Also, Read