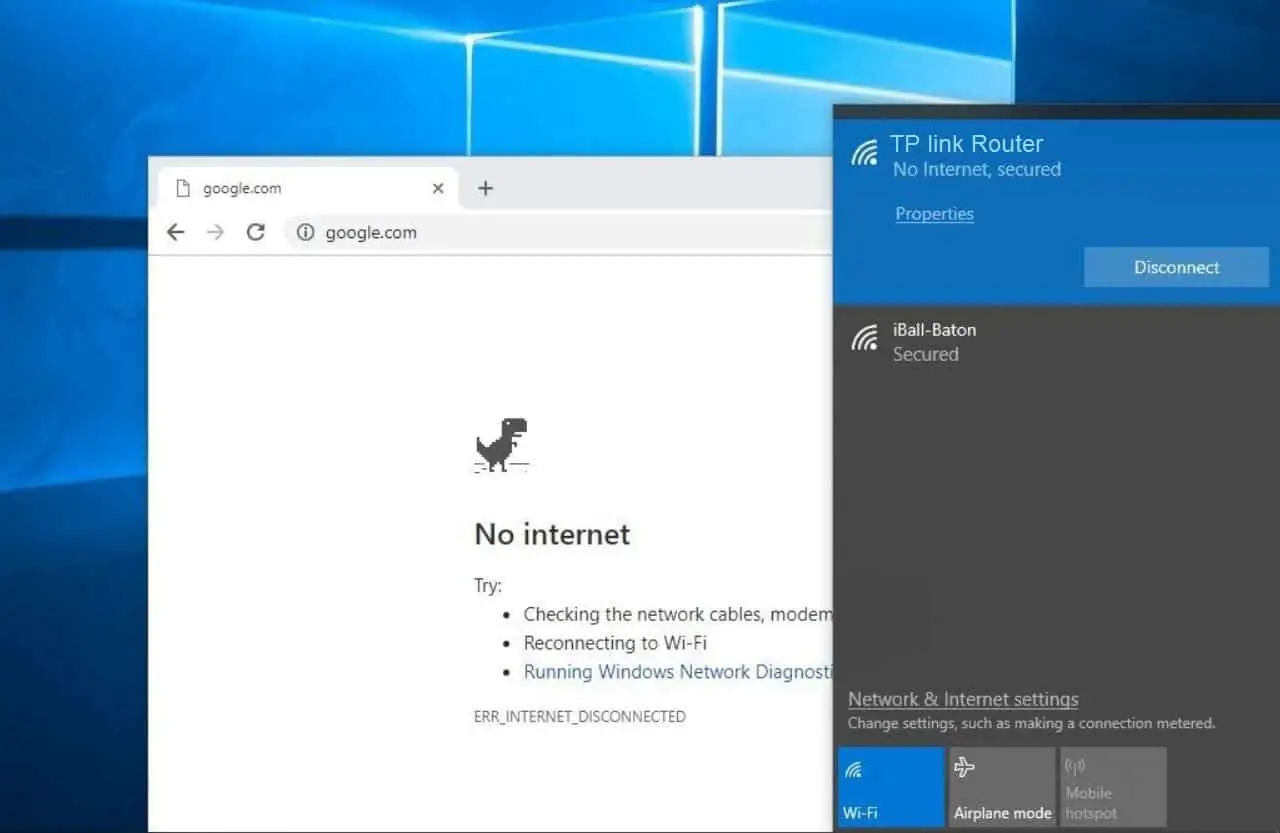
The laptop Is connected to the Wi-Fi network but there is no internet access, or unable to visit web pages. Several users reported the Internet not working since installing the latest Windows 10 Update. At the same time, other devices connect to the Wi-Fi network and internet just fine but the Laptop shows Wi-Fi connected but No Internet Access Or “Limited Access” with a yellow exclamation mark.
Well if all your other devices (mobile phone, tablet, or different laptop) are connected to the Wi-Fi just fine, but your laptop has no Internet access, then the problem might be incorrect network configuration, Faulty network hardware, or outdated network driver. Whatever the reason, When you come across a similar problem, the following tips should help you get online again.
WiFi Connected No Internet Access
There are several possible reasons why a device may show as connected to Wi-Fi but still not be able to access the internet. It may be the WiFi router experiencing technical problems or signal interference, resulting in a loss of internet connectivity even though the Wi-Fi connection appears stable.
- Problems with the Domain Name System (DNS) settings can prevent the device from translating domain names into IP addresses, resulting in no internet access.
- Outdated or incompatible network drivers can cause connectivity issues, preventing the device from accessing the internet despite being connected to Wi-Fi.
- Incorrect network settings on your device, such as DNS server settings or proxy configurations, can prevent internet access even when connected to Wi-Fi.
Restart WiFi router
To Fix internet connectivity problems, the first thing we recommend Power cycle your router by unplugging it for 30 seconds and then plugging it back in. In addition, restart Windows PC as well, this helps resolve temporary glitches or conflicts that may be preventing internet access.
Also, check and Ensure you’re within range of your Wi-Fi router to get a stronger signal. Temporarily Disable Antivirus firewall protection, and also disconnect the VPN if configured and check if the Internet connection working as expected.
Switch to Google DNS server
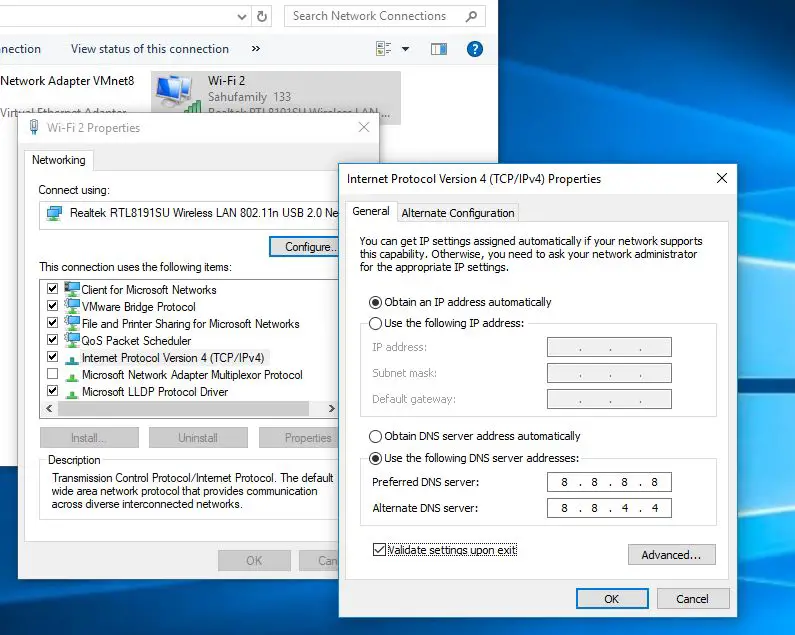
DNS (Domain Name System) servers translate domain names into IP addresses, allowing your device to access websites and services on the internet. Switching to Google’s public DNS servers (8.8.8.8 and 8.8.4.4), bypass potential DNS issues and help several users resote internet access on their devices.
If your device is connected to WiFi network but the internet not working, change the DNS server address by following the steps and check if this helps.
- Press the Windows key + R, type ncpa.cpl and click ok to open network connections,
- Right-click on your active Wi-Fi or Ethernet connection and select “Properties.”
- In the Properties window, select “Internet Protocol Version 4 (TCP/IPv4)” and click on the “Properties” button.
- Check the option “Use the following DNS server addresses” and enter Google’s DNS server addresses 8.8.8.8 and 8.8.4.4.
- And finally, Click “OK” to save the changes and restart your device.
Run Network Troubleshooter
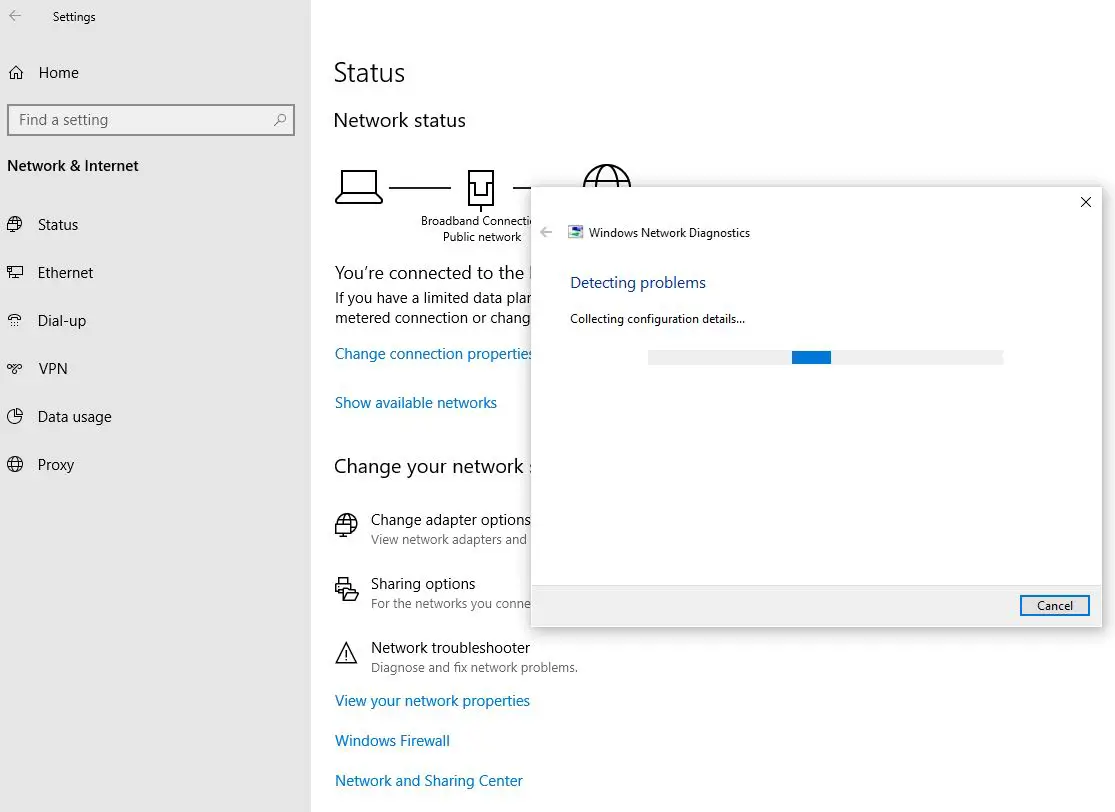
Whenever you face Network and internet problems the first thing we recommend, run the built-in troubleshooter that is designed to detect and fix the problems itself only.
Running the Network Troubleshooter is a quick and convenient way to diagnose and fix network issues.
To run the troubleshooter:
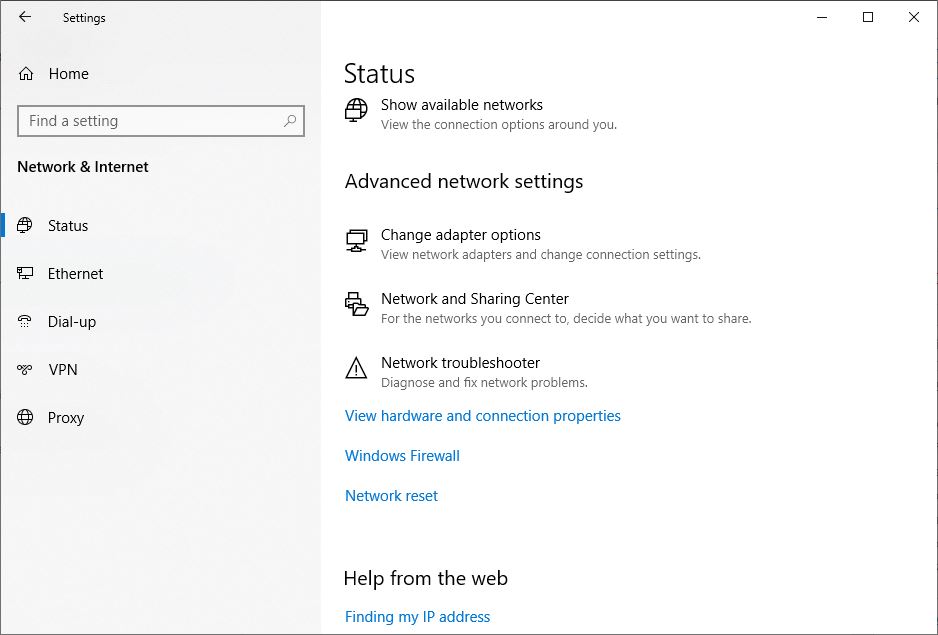
- Open the Settings app using Windows key + I,
- Network & Internet then Status
- Click Network Troubleshooter to start the diagnosis process
It scans your network configuration, checks for issues with your network adapters, DNS settings, and internet connectivity, and offers solutions to resolve any detected problems.
After completing, these steps restart your PC and connect to the Wi-Fi network to check the internet connection working normally as expected or not.
Obtain IP and DNS Automatically
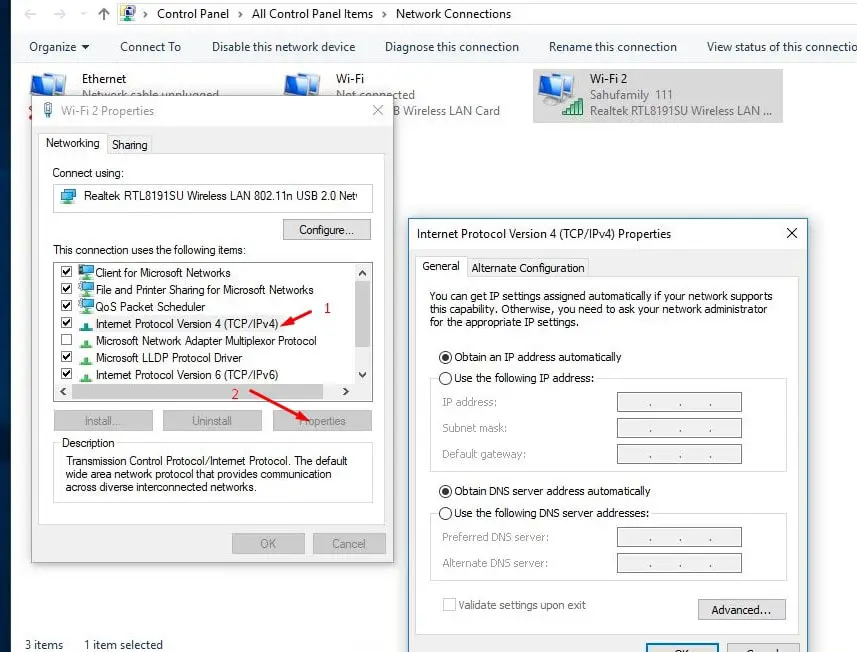
Your device’s IP address and DNS server settings play a crucial role in establishing a connection to the internet. Automatically obtaining these settings from your router’s DHCP (Dynamic Host Configuration Protocol) server ensures that your device receives the correct network configuration, including a unique IP address and DNS server information.
- Press Windows key + R, type ncpa.cpl and click ok,
- Right-click on your active Wi-Fi or Ethernet connection and select “Properties.”
- Select “Internet Protocol Version 4 (TCP/IPv4)” and click on the “Properties” button.
- Here Ensure that the options “Obtain an IP address automatically” and “Obtain DNS server address automatically” are selected.
- Click apply and ok to make save changes and check the internet started working.
Manually configuring IP and DNS settings can lead to misconfiguration and connectivity issues, whereas automatic configuration ensures compatibility and consistency across devices on the network.
Reset Network configuration
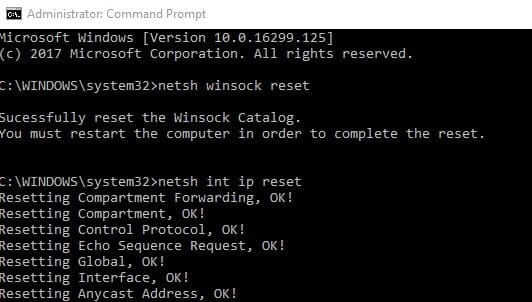
Sometimes wrong network configuration or DNS cache conflict can lead to not being able to access websites. It will show WiFi connected but there is no internet access. That causes Flush DNS cache, Reset TCP/IP stack is very helpful to deal with issues like this.
First Open the Command Prompt with administrative privileges by searching for “cmd” in the Start menu, right-clicking on “Command Prompt,” and selecting “Run as administrator.”
In the Command Prompt window, type the following commands one after one and press Enter:
netsh winsock reset
netsh int ip reset
If that doesn’t work, try releasing your computer’s IP address and obtaining a fresh one with these two commands one at a time:
ipconfig /release
ipconfig /renew
Finally, refresh your computer’s DNS settings with this command:
ipconfig /flushdns
Now type exit to close the command prompt, and restart windows to take effect the changes.
Resetting the TCP/IP stack removes invalid or incorrect network configurations, resets network interfaces, and restores the TCP/IP stack to its default state, allowing your device to establish a new and stable connection to the internet.
Perform Network Reset
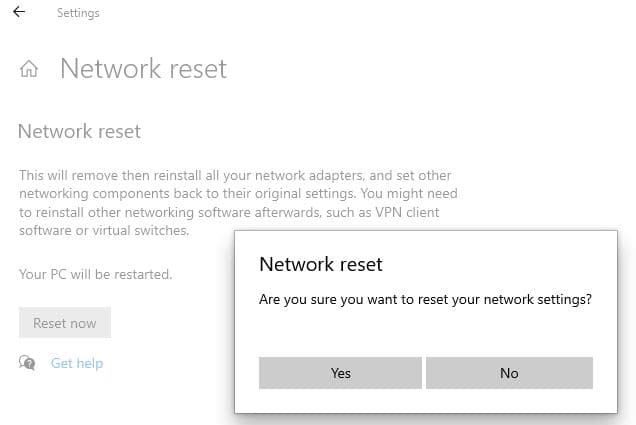
Still need help, let’s utilize the network reset feature, it removes and reinstalls every network adapter currently installed on your system and resets network-related settings to their default configurations. It effectively restores your device’s network components to a clean state, allowing you to start fresh and resolve connectivity issues.
- From the Start button search for and select Network Reset,
- Also, you can open the same from Settings > Network & Internet > Status, Click the Network reset text at the bottom of the screen.
- A new window will open warning you about what will happen when your network.
- Click the “Reset now” button to reset the network and restart your PC.
Note that this will remove and reinstall all network adapters and reset network settings to default.
Disable Internet proxy or Disconnect VPN
Proxies and VPNs can sometimes interfere with internet connectivity, either due to misconfiguration or server issues. Disabling them temporarily allows your device to establish a direct connection to the internet, bypassing any potential proxy or VPN-related issues.
If you’re using VPNs, locate the VPN software or settings on your device and disconnect from the VPN server. Alternatively, disable the VPN software temporarily.
To check proxy server:
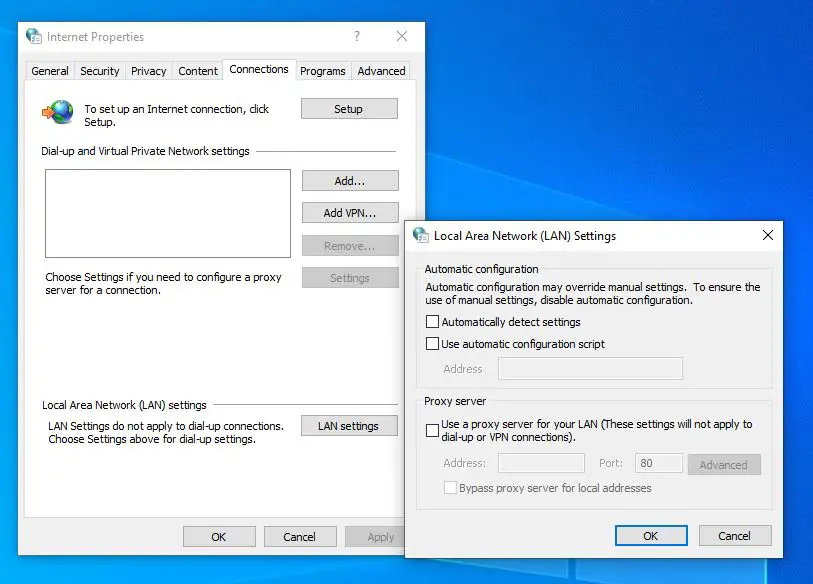
- Click on the start menu search type “or “internet options” hit the enter key.
- Here on Internet properties go to the Connections tab and then click on LAN settings.
- Make sure that “Automatically detect settings” is checked and “Use a proxy server for LAN” is unchecked.
After disabling the proxy or disconnecting from the VPN, check if your internet connection is restored.
Fix Network Driver Issues
Outdated or corrupted network drivers can cause compatibility issues and prevent your device from connecting to the internet. Since you’re still having an issue, you should check for driver updates that help ensure optimal performance and resolve connectivity problems.
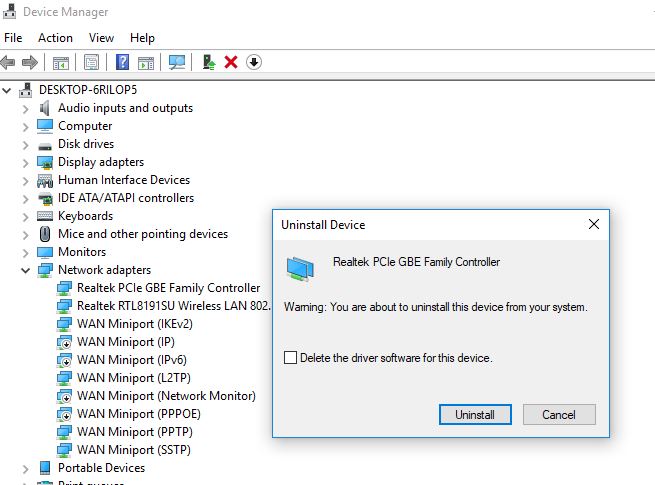
- Right-click on the Start button and select “Device Manager.”
- Expand the “Network adapters” category to view your network adapters.
- Right-click on each network adapter and select “Update driver” to check for updates automatically.
- Alternatively, you can select “Uninstall device” and then reboot your computer to let Windows reinstall the drivers automatically.
- Or you can open the device manager -> click action and select scan for hardware change to install the driver.
- If Windows fails to install the driver, On a different computer, you need to download the latest driver from the manufacturer’s website and install it.
Also read
- Tor Vs. VPN – Which Online Privacy System Is Better?
- Solved: Server DNS Address Could Not Be Found Windows 10, 8.1, 7
- How to configure and setup the FTP server on Windows 10
- Solved: Headphones not recognized (Not working) on Windows 10
- How to fix Connection Failed error 651 in Windows 10
- Windows 10 start menu not opening after the latest Windows update? Let’s fix it
