
Microsoft’s latest Windows 11 23H2 brings a number of new features and improvements. With regular Windows updates company patches recent security issues, and bugs and optimizes overall system performance. But still, sometimes you may experience startup problems, windows 11 won’t boot or the computer freezes at startup or the PC restart automatically and more. There are a number of reasons from system file corruption to update bugs, virus malware infection to outdated drivers or disk drive errors that cause startup problems on Windows 11. Here in this article, we have a few effective solutions apply to Fix Common Windows 11 problems and get your system back to its best.
Note: If your computer freezes continuously and unable to perform any task we recommend start Windows 11 safe mode and apply the solutions listed below.
Install the latest Windows 11 updates
This is the very first thing you need to perform. Microsoft regularly releases Windows updates with the latest security enhancements and bug fixes for previous problems reported by users. And whenever you experience problem with Windows 11 PC check for and install the latest Windows update that not only brings fix for the problem but also optimizes and Speed up Windows 11 PC.
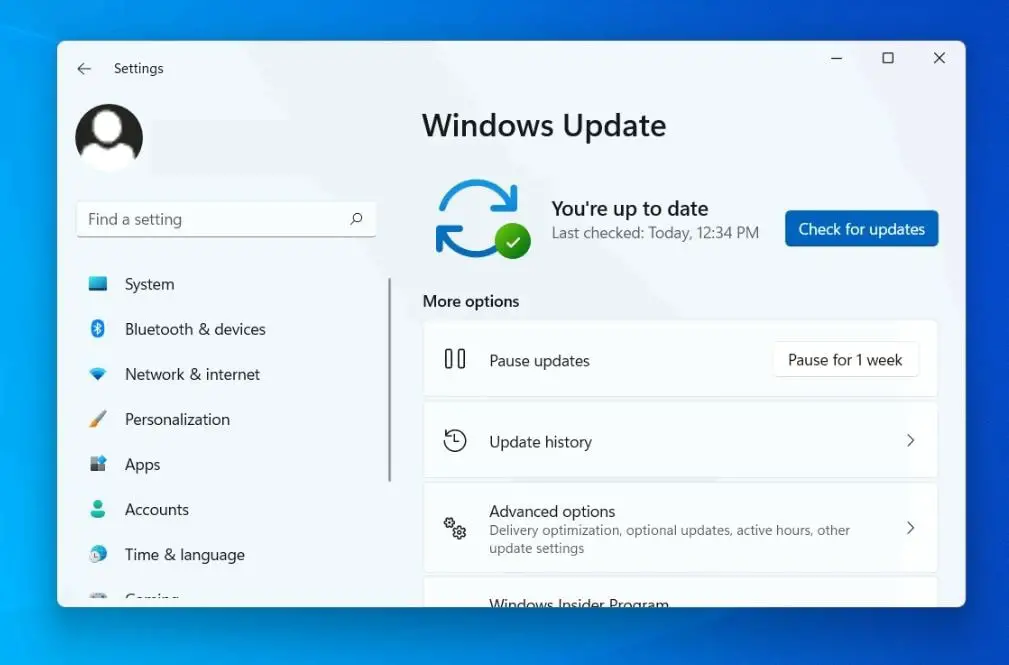
Check for Windows updates
- Press Windows key + I and select settings from the context menu,
- Select Windows Update then hit the check for updates button,
- If pending updates are there, allow them to download and install on your computer,
Look for optional updates
- In addition, click on Advanced options and select optional updates,
- Expand the driver update section, if pending driver updates there check mark on it, and click on download and install.

Once done you need to reboot your Windows 11 computer to apply the latest updates.
Repair corrupted Windows system files
Corrupted or missing system files on your computer is another common reason why Windows 11 freezes, not responding, or display error while opening apps or take longer to start or shut down Windows 11. If you experience Windows 11 is very slow or not responding running the system file checker (SFC) utility and Deployment Image Servicing and Management (DISM.exe) command is very helpful.
Run system file checker
- Press the Windows key + S and type cmd, Right click on the command prompt select run as administrator,
- First, run the sfc /scannow command, this will start scanning all protected system files on your computer.
- If found any the utility automatically replaces corrupted files with a cached copy that is located in a compressed folder at %WinDir%\System32\dllcache.

Let the scanning complete 100%, once done look at the scan results, if it displays did not find any integrity violations, there are no missing or corrupted system files on your system, and no further action is needed.
If the SFC scan results found corrupt files but was unable to fix some of them, in such case you need to run the DISM restore health command that repairs the system image and enables SFC to complete its job.
DISM Restore Health command
Again open the command prompt as administrator and run the following command.
DISM /Online /Cleanup-Image /RestoreHealth

- This will scan the Operating System for corrupt files, scan for any potential error and try to resolve it before it can impact the OS
- Make sure Your computer is connected to the Internet for the files to be automatically restored.
- Once the scanning completes, again run the sfc /scannow command, and check if there is no more corrupted system files present on Windows 11.
Look for device driver updates
Device drivers play an important role on your computer that lets the Windows 11 operating system and a device communicate with each other. Device manufacturers regularly update their driver software to make it compatible, error-free and optimized. If you have older or outdated drivers, especially for the essential ones (Graphics driver, Audio driver, and network adapter driver) you may experience different problems with Windows 11. Such as the PC automatically restarting with a blue screen error, a black screen at startup, the system being very slow or not responding or slow start and shutdown, and more.
You can update the driver using the device manager, look for the device manufacturer site for the latest driver version or you can prefer third-party driver update software to make the process automatic.
Update drivers on the device manager
- Press the Windows key + X and select the device manager
- This will display a list of devices and peripherals connected to your computer,
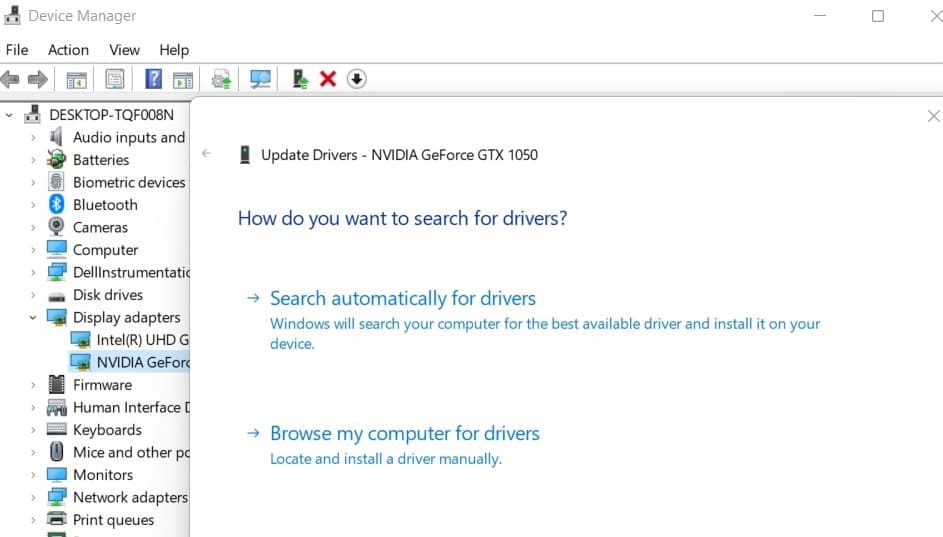
- Locate the driver, for example, expand display adapters and right click on the installed graphics driver and select the update driver option.
- Next, select the search automatically for the driver option or you can locate the driver on the local drive using Browse my computer for drivers.
- If you select the first option windows automatically locate the updated driver on your computer or look at Windows updates for the latest available driver and install it on your computer.
Download the driver from manufacturer’s site
Also, you can download and install the latest driver from the device manufacturer’s site. for example, if you are looking for update NVIDIA graphics driver.
- First, visit the official site of NVIDIA site,
- Locate the download section, select product type operating system, and click on search,
- Download the latest NVIDIA graphics driver on your computer and double-click on it to run and install on your computer.

Also, you can download third-party driver update software like Driver Booster, or DriverPack Driver Genius that automatically scans for outdated drivers on your computer and suggest update to the latest version.
Repair disk drive errors
If you notice the computer becomes extremely slow, 100 disk usage, PC frequently freezes, stuck in the blue/black screen of death or slow processing speed and startup. all these are symptoms of disk drive problems or Increasing bad sectors on hard drives. If you are experiencing such problems you need to repair disk drive errors using chkdsk command.
Run check disk command
- Press Windows key + S and type cmd, right-click on the command prompt select run as administrator,
- Here running chkdsk command only scan for disk errors but won’t repair them.
- To locate and repair disk errors we need to add some extra parameters with chkdsk command.
- You can get this parameter using the command chkdsk /?

- Here chkdsk command checks the disk drive for errors
- /F Fixes errors on the disk.
- /R Locates bad sectors and recovers readable information
- In addition, you can add /X to Force the volume to dismount first if necessary.
The command to repair disk errors is chkdsk C: /f /f
Note: C is the drive letter where to scan for errors.

Type Y and press enter key when the disk check utility asks for schedule scan drive for errors on the next start. close all programs and restart your PC to check for disk drive errors and fix them.
Perform system restore
If the above actions fail to fix the problem on the Windows 11 PC, using the system restore feature can help you. It’s applicable only if you have enabled the system protection feature previously on your computer. with this feature enabled, windows 11 creates snapshots of the current working status of your computer and saves them as restore points. When you experience problem with Windows 11 PC you can perform a system restore to revert your system to its last working state.
To perform a system restore:
- Press the Windows key + R type rstrui.exe and press OK,
- By default recommended restore option is selected, Click the “Next” button to proceed (Also you can choose a different restore point there)

- Click next and Tap on the “Finish” button, this will restart your Windows 11 for the System Restore process.
Windows fails to start or won’t boot
Sometimes you may experience Windows 11 fail to start or won’t boot normally. This probably occurs because of corrupted system files that need to be repaired at startup repair. Again the problem with the Master boot record (MBR) file also causes the computer won’t boot normally.
Perform startup repair
- Hence windows won’t start normally, we need to start with installation media. Select the repair your computer option from the popup window.

- In the next window, select the option of troubleshoot, followed by selecting advanced options. And finally, click on startup repair in the next window.

- This will restart your PC, scan your PC for problems like missing or damaged system files and fix problems with files that are required to boot the operating system.
Repair master boot record
Startup repair fails to fix the problem and Windows 11 won’t boot normally. You need to look at the Master Boot Record (MBR) file and repair it by running the following commands.
Again access advanced options and click on the command prompt. Now run the following commands.
- Bootrec /fixMbr
- Bootrec /fixBoot
- Bootrec /RebuildBcd
- Bootrec /ScanOS
Once done reboot your computer and check if this time windows start normally.
Reinstall windows 11
Also, there is an option to reset or reinstall Windows 11 without losing any data and make it fresh and new.
- Press the Windows key + X and select settings from the context menu,
- Click on the system then the Recovery option, and click on the Reset PC option,
- Select the option between Keep my files and Remove everything

- Next, click on local reinstall then click next, And finally, when you are ready click on the reset button.
- Your computer will reset to the factory settings preserving your files.
Frequently Asked Questions (FAQs)
Internet is slow after upgrading to Windows 11
- You need to update the network or wifi driver, if connected to a VPN server disconnect and check the internet speed.
Wifi disconnects frequently after update
- First thing you need to check Make sure your laptop is closer to wifi router, and the second thing you need to reboot your router and laptop which probably fix the issue. In addition, you need to run the Internet troubleshooter and network troubleshooter on Windows 11 troubleshooting options.
Unable to search in Windows 11 Start Menu
- Open Windows services using services.msc and look at there Windows search service that is running. In addition, run the search troubleshooter and rebuild the search index to fix the problem.
Windows 11 Start menu is unresponsive
- corrupted system files are the common reason for this problem, open the command prompt as administrator and run sfc /scannow command. In addition, run the DISM restore health command DISM /Online /Cleanup-Image /RestoreHealth to fix the problem.
Windows 11 No Sound after update
- You can fix the problem by running the audio troubleshooter. To do so right-click on the speaker icon on the taskbar and Select Troubleshoot sound problems.
Also read: