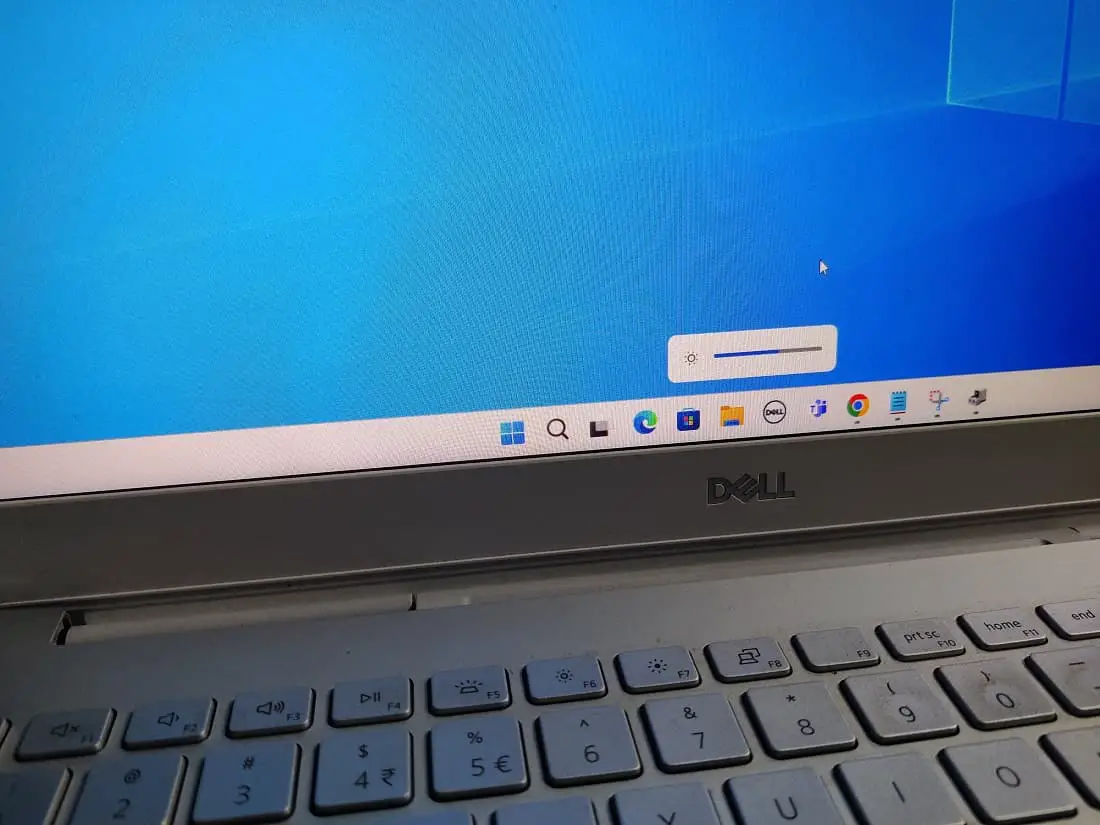
Can’t adjust the screen brightness on your windows 11 laptop? Reducing or Adjusting screen brightness on your laptop not only avoids eye strain but also optimizes laptop battery life as well. But few users reported, the brightness control not working on their laptop after the windows 11 update, and it prevents changing the brightness of the screen. Recent windows update bugs, misconfigured settings, outdated Graphics drivers or corrupted system files are some common reasons why can’t change the brightness on windows 11. And reinstalling the monitor driver, updating the graphics driver, or running the system file checker scan are some common solutions apply to fix and adjust brightness in windows 11 using the keyboard.
Brightness control not working windows 11
Well first reboot your Laptop and try to adjust the brightness on your laptop. This would fix the problem if there is a temporary glitch that prevents adjusting screen brightness on your laptop. Again restarting your laptop also refresh the operating system and fixes different problems as well.
Sometimes you may experience such problems on your laptop if not having enough battery (low battery power,) or your laptop is in power saving mode and it can easily be solved by plugging your laptop into electricity.
Try to adjust the screen brightness on setting or action center
If you can’t change screen brightness using the Function key on your laptop, then Press Windows key + A to launch the Action Center on Windows 11 and use the slider next to brightness to modify it.
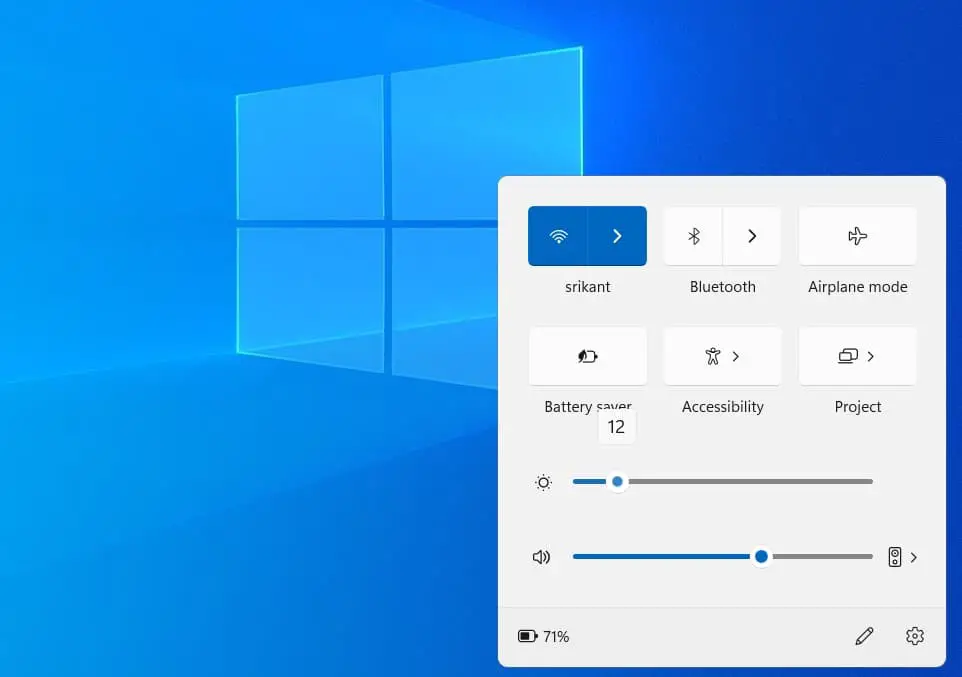
Also, you can open windows 11 settings using windows key + I, navigate the display and Use the slider under Brightness to adjust the screen brightness.
Disable Auto Brightness on Windows 11
The auto brightness feature on windows 11 adjusts the screen brightness based on ambient surroundings or using the built-in light sensors. Also recently Microsoft has introduced a feature Content Adaptive Brightness Control (CABC) to adjust brightness and contrast based on the content being displayed. Let’s check if the auto-brightness is enabled on your laptop, might not let you adjust brightness manually.
- Press the Windows key + X and select settings from the context menu,
- Navigate the system tab then click on display on the right side.
- Now you need to click on the arrow next to brightness expand it and uncheck the following options.
“Change brightness automatically when lighting changes” and “Help improve battery by optimizing the content shown and brightness.”
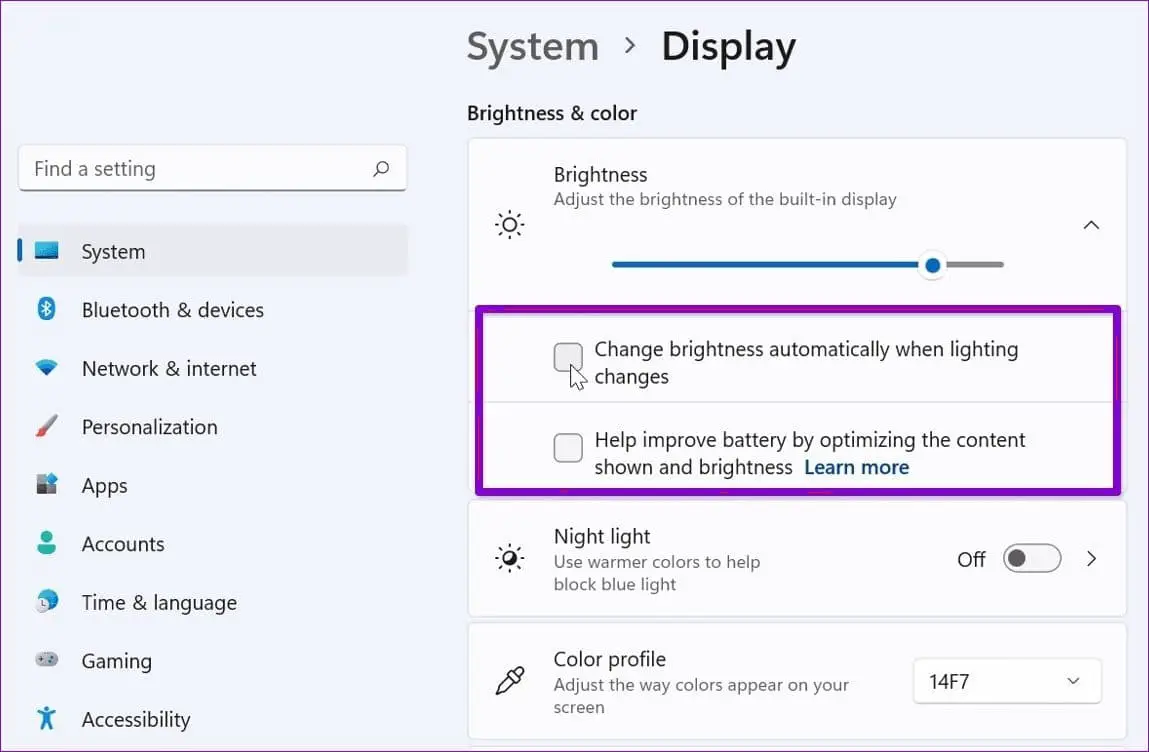
- And now try to change or adjust the screen brightness on your laptop to check if that work for you.
Update Graphics driver
If the installed graphics driver are corrupted or outdated you might experience such problems “can’t adjust brightness on windows 11”. Try to update the display driver following the steps below probably allow adjust the screen brightness again.
If you have an outdated graphics driver installed, the possibility of the brightness slider not working in Windows 11 is high.
- Press the Windows key + X and select the device Manager option,
- This will display all installed device driver lists on your laptop, locate and expand the display adapter option,
- Here right click on the graphics adapter and select Update driver from the context menu.
Select the option Search automatically for drivers to allow check for and download or install the latest driver update from the Microsoft server.
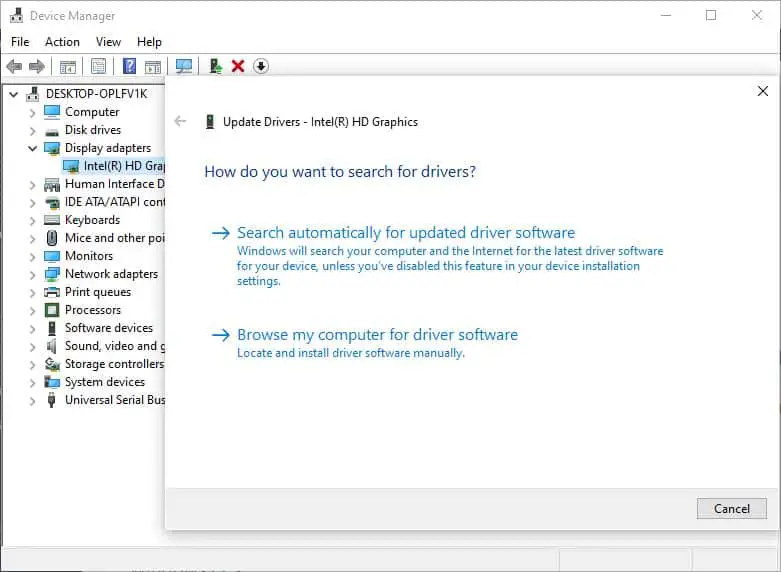
In addition, you can update graphics card drivers on a windows 11 laptop by downloading the driver from the official website and installing it on your PC.
Repair Corrupted ieframe.dll element with sfc command
Sometimes Corrupted ieframe.dll (dynamic link library file) element is responsible for breaking the ability to adjust screen brightness on windows 11 laptops. Running a couple of SFC commands can identify problems with the ieframe.dll file and the other corrupt system files and replace them with their cached copy.
Press Windows key + S and type cmd, right click on command prompt and select run as administrator,
- First, run the chkdsk command and let the scanning process complete, once done type the command prompt and press enter key,
- Now run the following two commands one after one to fix issues with the ieframe.dll file.
sfc /scanfile=c:\windows\system32\ieframe.dll
sfc /verifyfile=c:\windows\system32\ieframe.dll
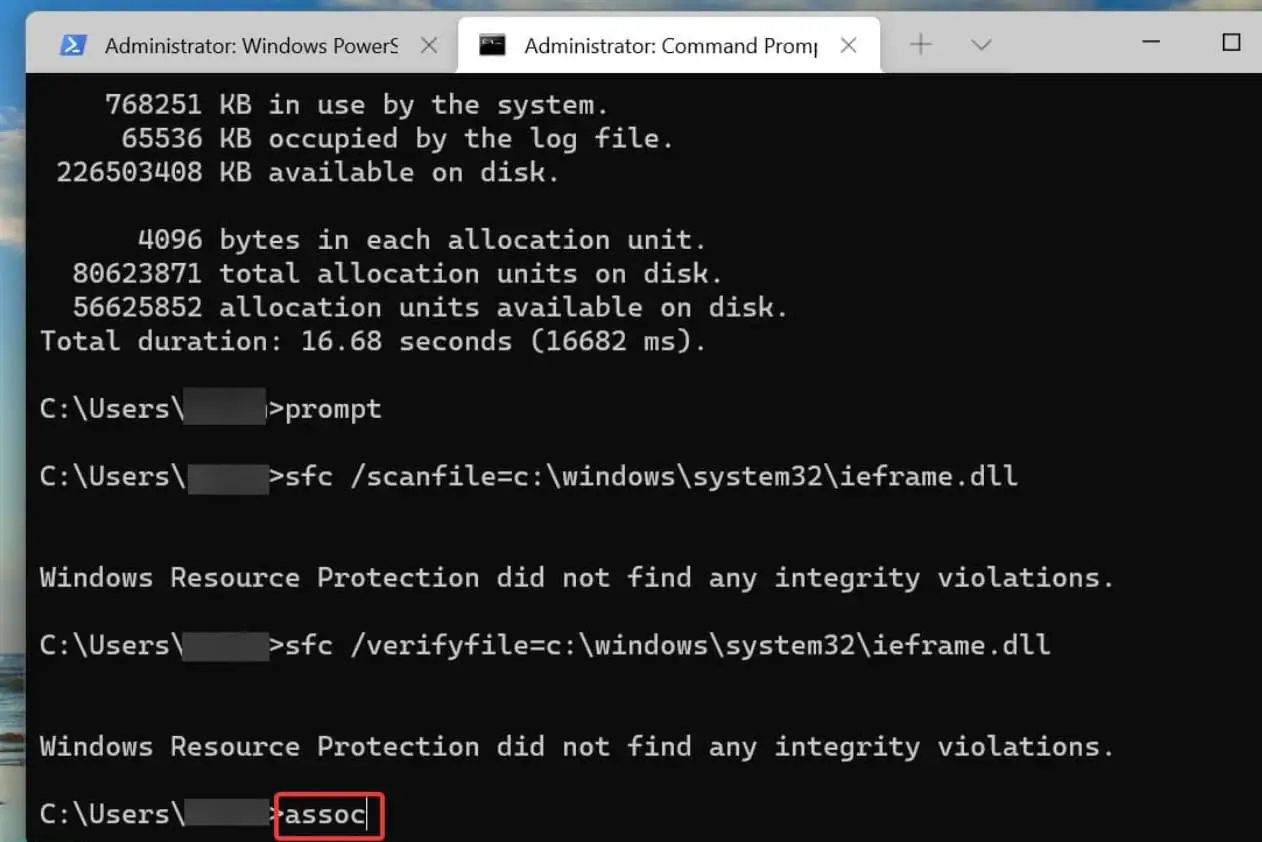
- Once the scanning process completes, run command assoc, And finally, run system file checker command sfc /scannow
- Once the SFC scan is complete 100% restart your PC After that check if the brightness slider is now working in Windows 11.
Update Windows 11
Microsoft frequently releases windows updates to fix recent problems with windows 11, and that also includes security enhancements that optimize the system performance. But sometimes they are shipped with unexpected bugs that may cause different problems include this brightness control not working n windows 11.
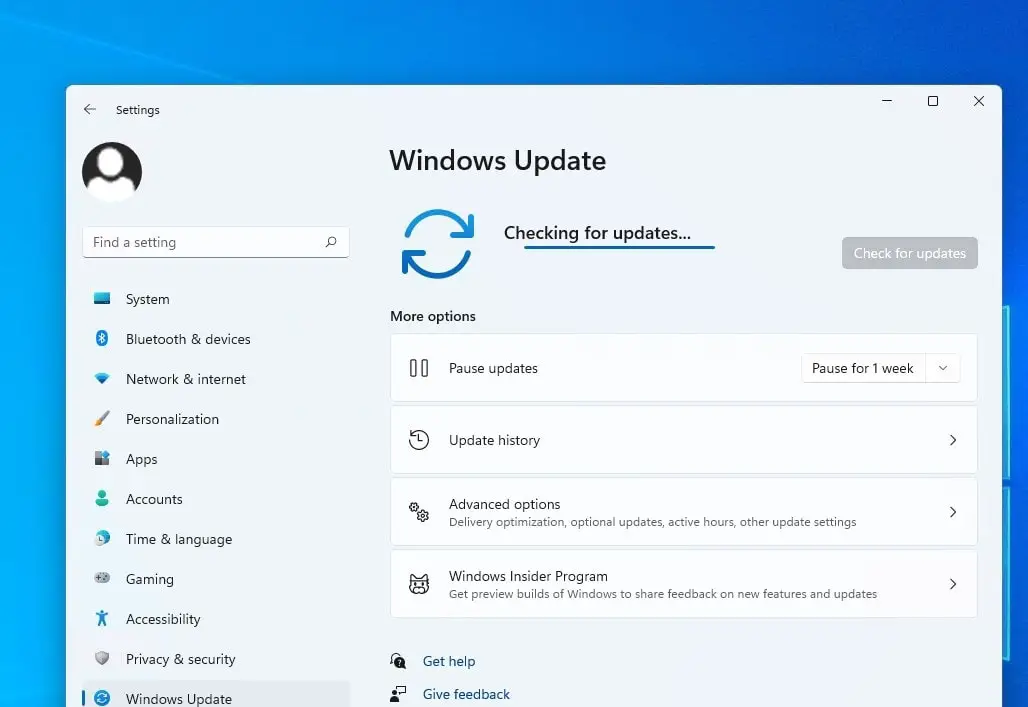
Let’s check for and install the latest windows updates that may have a bug fix for the windows 11 brightness control not working problem.
- Press Windows key + X and select settings from the context menu,
- Navigate to windows update and hit the check for updates button,
- If new or pending updates there allow them to download and install on your laptop,
- Once done you need to reboot your laptop to apply the changes.
Use Microsoft basic display adapter
If the above methods fail to fix the problem, or still the issue persists even after updating the display driver or installing the latest windows updates, then few users reports
switching to Microsoft’s basic display adapter driver help them get rid of such problem.
- Press Windows key + R, type debmgmt.msc and click ok to open the device manager,
- This will display all installed device driver lists on your laptop, locate and expand the display adapters option,
- Right-click on your installed driver and select update driver from the context menu,
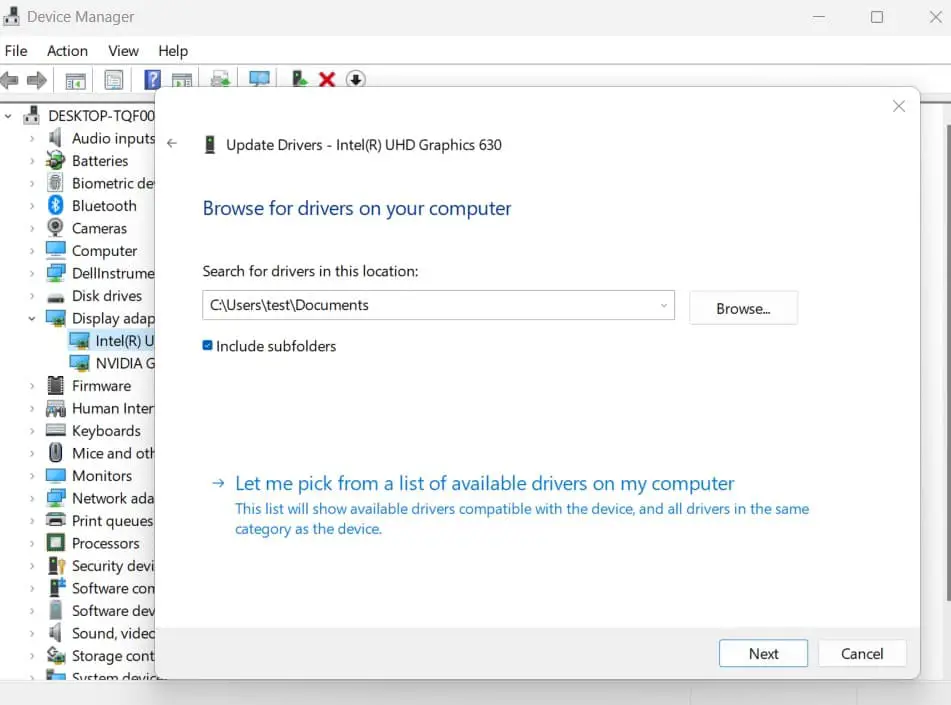
- Next Select ‘Browse my computer for drivers then click on ‘Let me pick from a list of available drivers on my computer.’
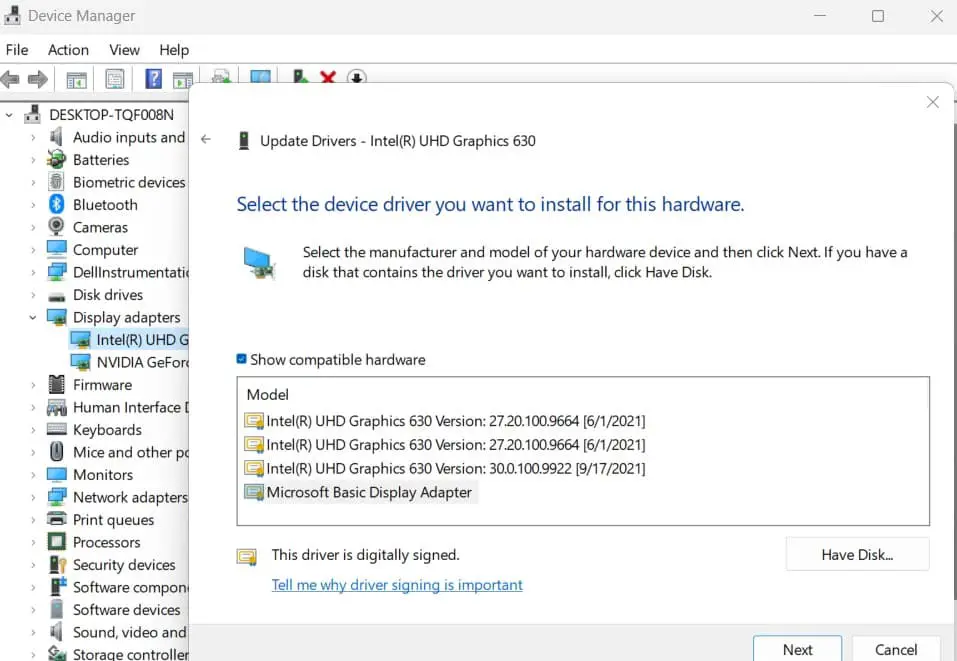
 Now Select Microsoft Basic Display Adapter drivers and hit Next to install them.
- Once installed, restart your PC and then check if you can change the brightness.
Reinstall the monitor driver
Also, a few users mention that Reinstalling the monitor driver helps them fix the problem and allows adjust the screen brightness on their laptop.
- Right-click on the Windows 11 Start menu and select Device Manager
- Locate and Expand the Monitors section, Right-click on the Generic pnp Monitor driver and select Uninstall device from the context menu.
Again, click Uninstall in the confirmation prompt that pops up, and restart your laptop.
This will automatically install the basic driver for your monitor and check if this help fix the screen brightness problem on windows 11.
Also read:
- 7 Tips To Maximize Battery Life on Windows 10 Laptops
- Solved: Windows 10 not detecting the second monitor after update
- Windows 11 is very Slow after update? Let’s Improve Windows 11 Performance
- DPC Watchdog Violation in Windows 11 (9 solutions to fix it)
- Fix Internal Power Error BSOD on Windows 10 version 22H2

