
Regularly backing up files and folders is helpful, in the event of Accidental deletion, hardware failure, or corruption. Backups ensure that your important files are not lost permanently. On Windows 11 and 10 “File History” is a built-in backup and restore feature that allows you to back up your personal files/Folders (Data) to an external drive or a network location. This feature keeps track of the changes made to your files over time, so you can go back to previous versions if you need to. Also, File History can help you restore your files if they are accidentally deleted, corrupted, or infected by malware. Here is how to enable and configure File History backup on Windows 11 to Protect your files from accidental deletion, modification, and corruption.
File History Feature in Windows 11
The File History feature on Windows 10 and 11 allows you to create a backup of essential files and folders on an external storage device. It is different from a system image or Windows backup because it backs up only specific files and folders, rather than duplicating the complete C: drive. File History works by taking snapshots of your files in the folders associated with your user account, such as Documents, Music, Pictures, Videos, Desktop, and OneDrive. You can also add or exclude other folders as you wish.
- File History runs in the background and automatically backs up your files at regular intervals, ensuring you have up-to-date copies of your important data.
- It maintains multiple versions of your files, allowing you to revert to a previous state if needed. This is useful if you accidentally delete or modify a file and later realize you need an earlier version.
- If you lose a file or folder, you can easily restore it using the File History feature.
How to Enable File History in Windows 11
To enable File History in Windows 11, you need to connect an external storage device to your computer and follow these steps:
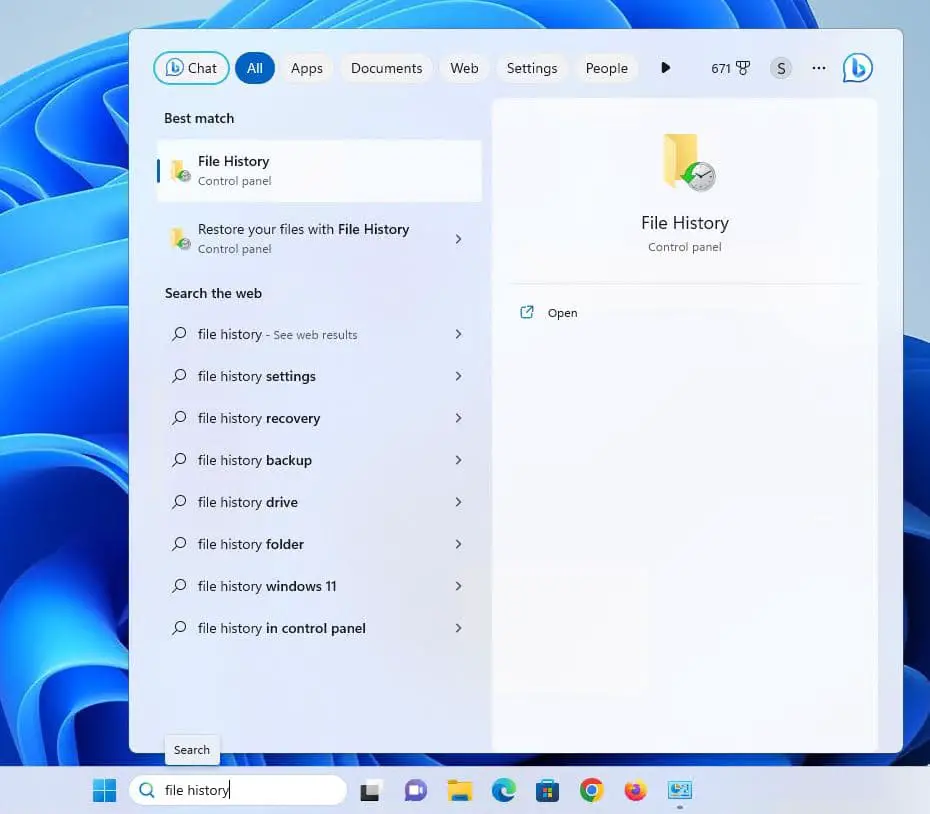
- First, open the control panel, Click on System and Security then File History.
- Or you can search for File history using the Start menu search (windows key + S)
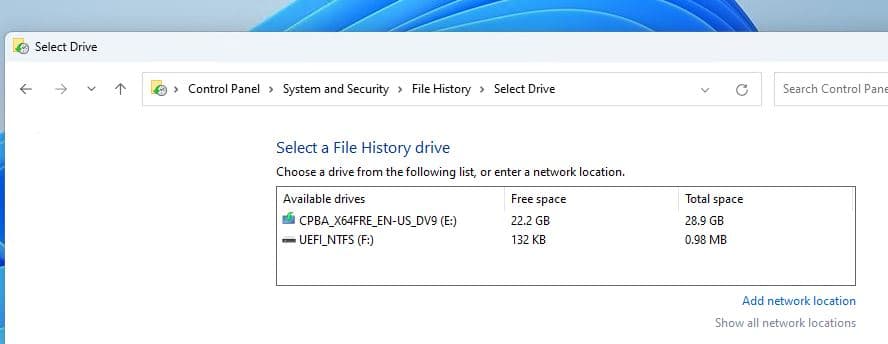
- Click the Select drive option from the left pane.

- Here you can select your external drive (To store backup copies) or click on Add network location to store the backup copies on the network drive.
- And finally, Click the “Turn on” button to enable Windows 11’s File History.

How to Customize File History Settings in Windows 11
You can customize various settings of File History in Windows 11, such as:
– How often File History takes snapshots of your files
– How long File History keeps your snapshots
– How much space File History uses on your backup drive
– Which folders File History includes or excludes from backups
– How to restore files from backups
Add Folders to File History:
Let’s start with how to Add Folders to File History. Usually, File History backs up important folders like Documents, Pictures, Videos, and Desktop by default. But you can add any folder to backup using file history, you have to add that folder to one of those primary libraries.
- Locate and right-click on the folder (you want to add File history for Backup) and select Show More Options.
- Select Include in Library from the menu and select the directory you want to put the folders or files.

To exclude folders from File History:
- In the File History window click the Excluded Folders link from the list on the left

- Click the Add button and select the folders or subfolders you want to exclude from the File History backup.

- After excluding folders, ensure you click the Save button at the bottom of the screen
Change File history Backup Frequency
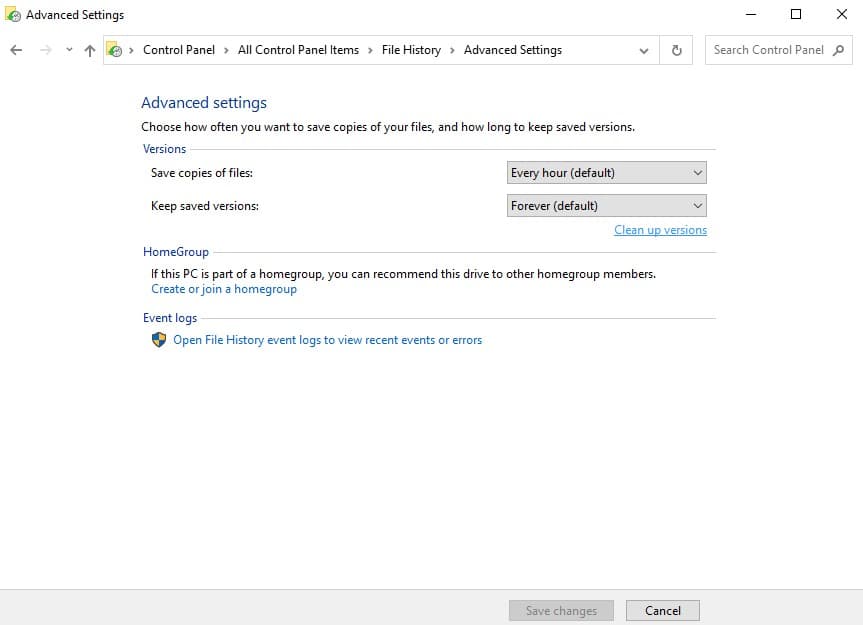
- To change how often File History takes snapshots of your files, click on Advanced Settings on the left pane.
- Under Versions, use the drop-down menu next to Save copies of files to choose the backup frequency.
- You can choose from every 10 minutes, 15 minutes, 20 minutes, 30 minutes, 1 hour, 3 hours, 6 hours, 12 hours, or once a day.

Change File history Backup Duration
- To change how long File History keeps your snapshots, click on Advanced Settings on the left pane.
- Under Versions, use the drop-down menu next to Keep saved versions to choose the backup duration.
- You can choose from one month, three months, six months, nine months, one year, two years, or forever.

How to Restore Files Using File History on Windows 11
The file History feature on Windows 11 not only backs up your files and folders but also allows you to recover deleted files in case of accidental deletion, modification, or corruption.
- To restore files from backups click on Restore personal files on the left pane.
- This will open a window where you can browse and search for previous versions of your files.
- You can use the arrows at the bottom to navigate through different snapshots.
- To restore a file or a folder, select it and then click on the green button with a circular arrow at the bottom.
- You can also right-click on a file or a folder and choose Restore, Restore to, or Open.
How to disable File History in Windows 11
In the File History window that opens, click on Turn off to stop File History from taking new snapshots of your files.
If you want to delete the existing snapshots from your backup drive, click on Advanced Settings on the left pane. Under Versions, click on Clean up versions.
- In the pop-up window that appears, choose how long you want to keep your saved versions. You can choose from several options, such as one month, three months, six months, one year, two years, or forever.
- If you want to delete all versions, choose Until space is needed, which means that File History will delete all versions except the latest one.
- Click on Clean up to confirm your choice.

Difference Between File History in Windows 11 and 10
File History is mostly the same in Windows 10 and 11, but there are some minor differences that you should be aware of:
- In Windows 10, you can access File History from both Control Panel and Settings. In Windows 11, you can only access File History from Control Panel.
- In Windows 10, File History backs up files in all folders that are part of your user account’s libraries, such as Documents, Music, Pictures, Videos, Desktop, and OneDrive. In Windows 11, File History only backs up files in your Desktop and OneDrive folders by default. You can add other folders manually if you want.
- In Windows 10, File History has an option to recommend drives for backups. In Windows 11, this option is not available.
File History is a useful tool that can help you protect your personal files from accidental loss or damage. However, it is not a complete backup solution that can restore your entire system in case of a major failure or disaster. For that purpose, you need a system image backup tool that can create a full copy of your entire drive, including Windows, programs, settings, and files.
Also read: