Well, Microsoft products including Windows 11 need a valid product key or a digital license to activate the product to get regular Windows updates and enjoy the full features. That means If you have downloaded Windows 11 ISO and installed it on your computer, you have 30 days to activate the product. And if you fail to do so some features may be restricted with activate Windows watermark on the desktop. Well if you have a genuine Windows 11 product key or digital license use the same to activate Windows 11. But if you don’t have one, don’t worry here we have a few tricks to remove the evaluation copy watermark on Windows 11 permanently.
Contents
How to Remove Activate Windows 11 Watermark?
The simple and easy way to remove the active Windows 11 watermark is to buy a legitimate Windows 11 license copy and use the product key to activate Windows 11. If you have a Free upgrade to Windows 11 from Windows 10 enter the Windows 10 product probably active the Windows 11 copy and remove the active Windows watermark.
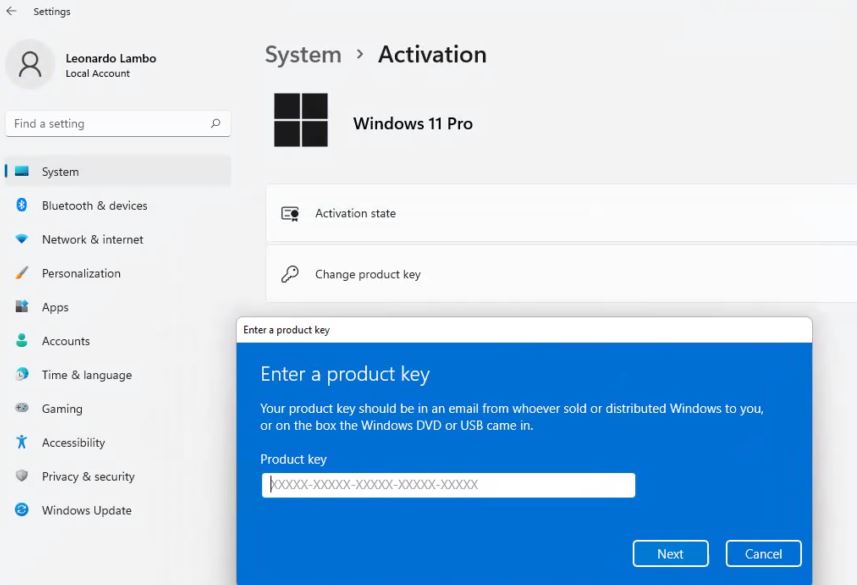
- Press Windows key + x then select settings,
- Go to the system then activation and click on change, next to the change product key section,
- In the enter product key window, insert the product key and click next.
- Select the active option and reboot your system, That’s all your Windows 11 is activated.
Remove the active windows watermark without the product key
Well if you don’t have a Genuine product key or digital license then you can apply the following tips to remove the active Windows 11 watermark permanently.
Tweak windows Registry
You can tweak the Windows registry to hide or remove the active Windows watermark on Windows 11, here is
- Press the Windows key + R, type regedit, and click ok to open the Windows registry editor,
- Now expand and navigate to Computer\HKEY_LOCAL_MACHINE\SOFTWARE\Microsoft\WindowsNT\CurrentVersion\SoftwareProtectionPlatform\Activation
- Next, double-click on the Manual then changes the value data from 0 to 1 after that click on Ok.
- Finally, click ok to save changes.
One more registry tweak:
- Open the registry editor and navigate to Computer\HKEY_CURRENT_USER\Control Panel\Desktop
- Double-click on PaintDesktopVersion, then Change the value data to 0 and click on Ok.
Now restart your PC and check if the active Windows watermark is gone.
Notepad Tweak (Running Batch File)
Also, you can run a batch file to Remove Active Windows 11 Watermark permanently.
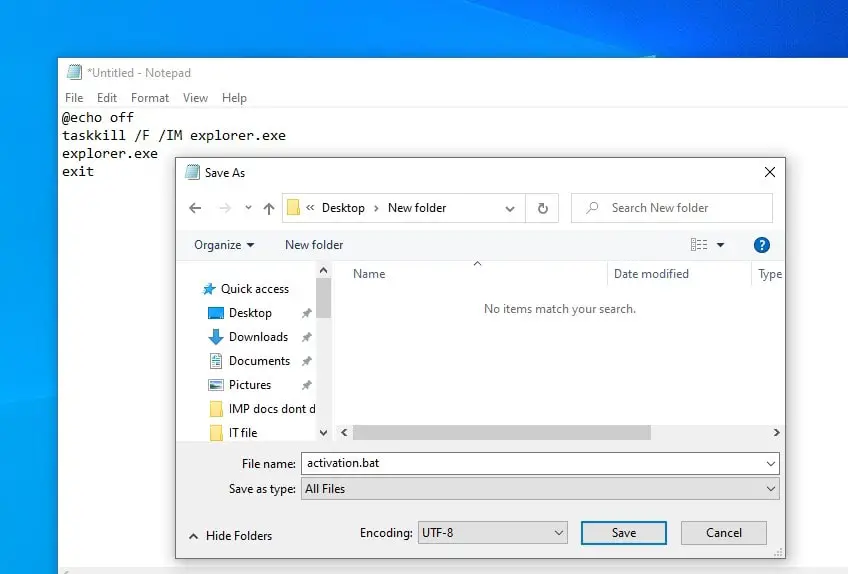
- Press the Windows key + S type notepad.exe and hit enter key to open Notepad,
- Copy and paste the following code on the notepad and press the ctrl key + S to save the same.
@echo off
taskkill /F /IM explorer.exe
explorer.exe
exit
- Name the new file activation.bat (make sure to give .bat extension) and choose All Files from the Save as type drop-down menu.
- Now locate the file (activation.bat) right-click on it select run as administrator,
- A command prompt window prompt and close automatically, restart your PC and check if the active Windows watermark is gone.
Universal watermark disabler
Universal watermark disabler is a popular third-party utility help remove active Windows watermark on Windows 11 and 10. It’s simple and easy to use, with a few clicks you can remove the active Windows 11 watermark permanently.
- First, download the Universal Watermark Disabler | Download Link
- Extract the .zip file to your desired location, right-click on the UWD.exe file and choose Run as administrator.
- Click yes if the UAC dialog box prompts, and click on Install to continue with the installation process.
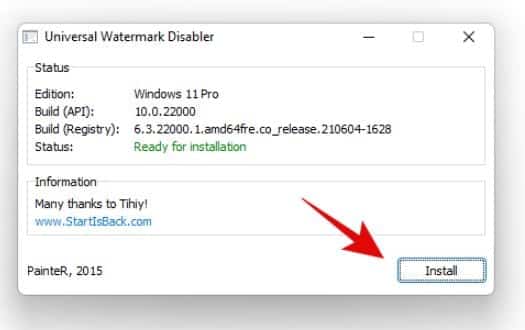
- You will receive a warning prompt, click Ok. and you are done, universal watermark disabler for Windows 11 should remove the watermark from your Windows computer.
- Restart your computer and check you should no longer have the evaluation copy watermark on your system.
Disable Windows 11 Tips
Here is another quick hack that doesn’t guarantee the removal of the watermark, but is certainly worth a try.
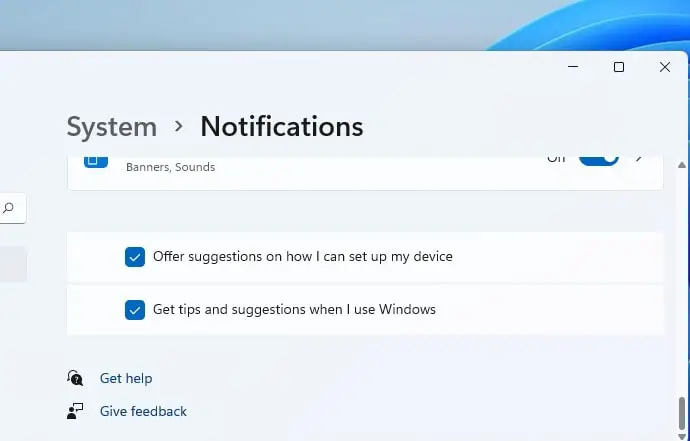
- Open settings using the Windows key + I
- Go to System then Notifications and scroll down to toggle OFF, Offer suggestions on how I can set up my device and Get tips and suggestions when I use Windows
Remove Windows 11 Unsupported Hardware Watermark
The above tips help remove the Active Windows 11 watermark, but if you are getting Windows 11 unsupported hardware watermark you can remove the same following registry tweak.
- Access the Registry Editor by typing ‘Regedit’ in the Windows 11 search box and hitting OK to open it.
- Here expand and navigate to HKEY_CURRENT_USER then Control Panel
- Find and select the entry called UnsupportedHardwareNotificationCache.
- On the right-hand side look SV2 DWORD key, double-click on it and Change the SV2 DWORD value from 1 to 0.
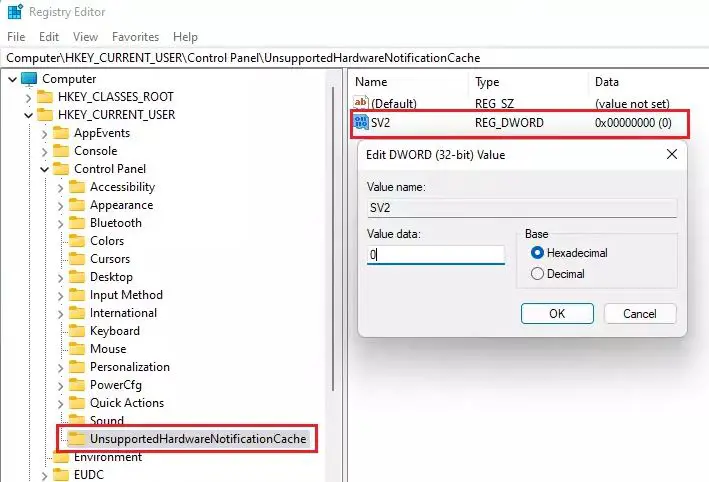
Save, exit, and then restart your PC.
Also read:

