Sometimes, you might need to take a screenshot on Windows when you want to capture and save what’s on your screen. This could be for sharing info, solving issues, creating tutorials, presentations, design work, gaming moments, recording chats, or archiving online content. Taking a screenshot on Windows involves capturing an image of the content that’s currently visible on your computer screen. It could be capturing the entire screen, a specific window, or just a portion of the screen, depending on what you want to capture. Here this article explores several methods how to take a screenshot on your Windows 11 or Windows 10 computer.
How to take a screenshot on Windows 11
You can use the Print Screen (Prt Sc) button on the keyboard or use the built-in Snipping tool to take a screenshot on Windows. Also, you can press Windows Key + G to take a screenshot with the Game Bar. Again third-party Screen Capture Software like Lightshot or Greenshot helps Take A Screenshot of the entire screen or just a piece of it.
Capture a screenshot from an active window, or the window you’re currently working in.
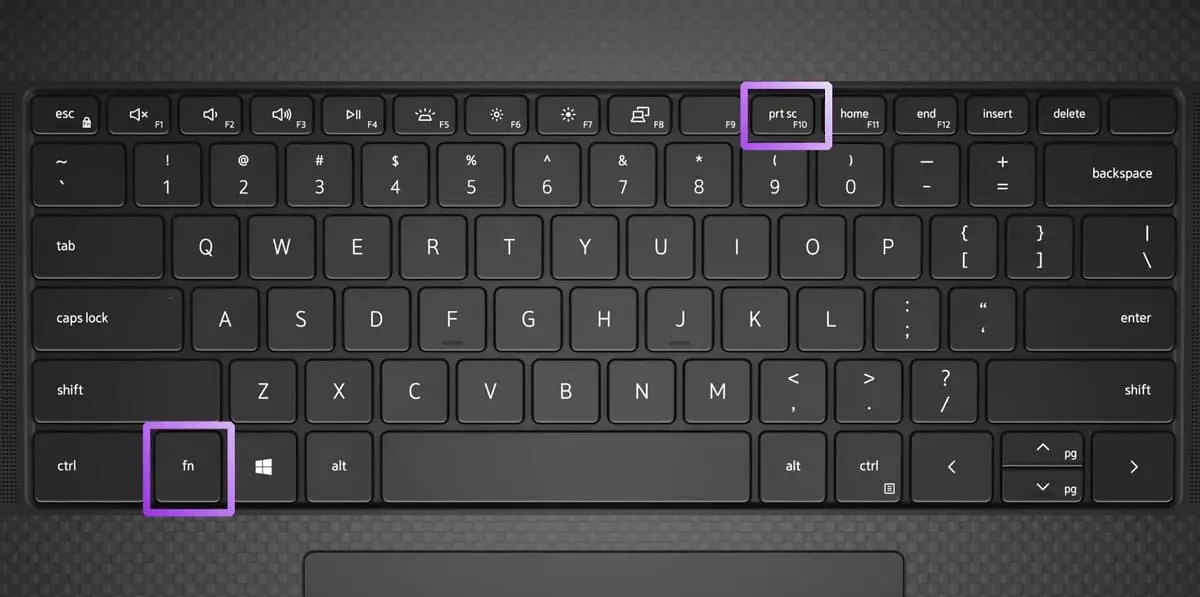
Using the Print Screen Key (PrtScn)
The Print Screen key on the keyboard is a quick and easy way to take a screenshot on Windows 11 or 10.
- Press the “PrtScn” key to capture the entire screen.
- Press “Alt + PrtScn” to capture the active window and copy it to the clipboard.
If you are using a Laptop, use the Fn + PrtScn to take screenshots on Windows 11/10.
The screenshot is copied to the clipboard, so you need to paste (Ctrl + V) it into an image editing program (like Paint or Microsoft Word) to view and save it.
Also, you can press the Windows key + PrtScn to capture the entire screen and automatically save the file to the Screenshots folder.
Press the Windows key + I to open File Explorer and open the picture folder to locate the screenshot you have taken.
Use the Snipping Tool
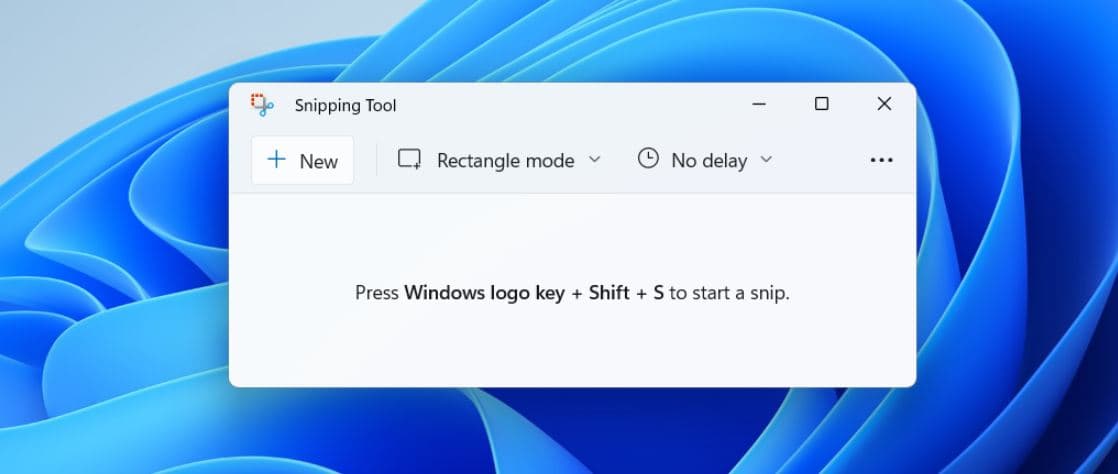
The Snipping Tool provides more advanced options for capturing screenshots on Windows, allowing you to select specific areas of the screen.
- Select the Start, enter the Snipping tool, and then select it from the results.
- Click “New,” and select the area you want to capture.
- You can then annotate the snip and save it.
Also, you can click on Mode to Choose the type of screenshot you want to take:
- Rectangular Snip: Draw a rectangle around the area you want to capture.
- Freeform Snip: Draw a freeform shape around the area you want to capture.
- Window Snip: Click on a specific window to capture it.
Use the Snip & Sketch tool
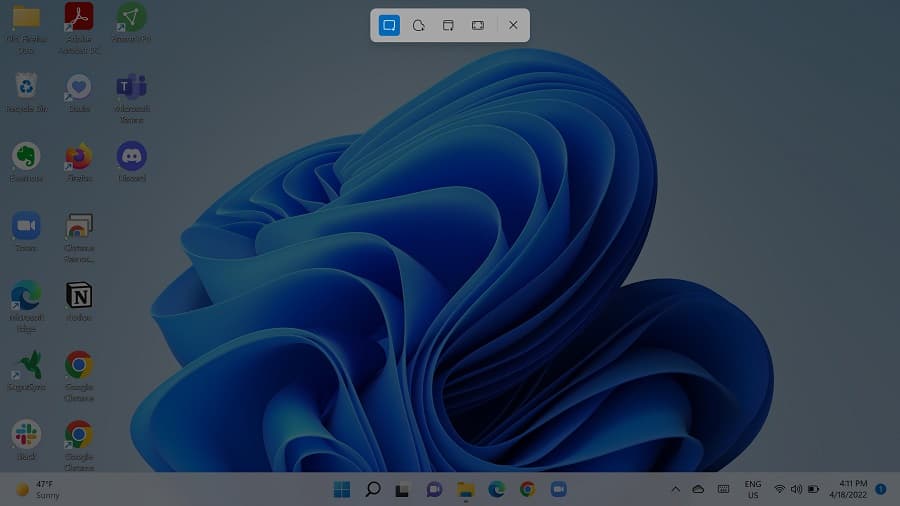
Snip & Sketch is an integrated tool that enhances the Screenshot capturing experience. It allows you to quickly capture specific areas of the screen, add annotations, and save the results as image files.
- Open Snip & Sketch using “Windows + Shift + S,”
- Alternatively, you can search for “Snip & Sketch” in the Windows search bar and open the app from there.
- Select the area you want to capture and annotate the screenshot using the available tools.
Windows + Shift + S Shortcut
This shortcut provides a quick way to capture custom areas of the screen and offers options for editing and sharing.
Press “Windows + Shift + S,” select the area you want to capture and use the toolbar that appears to annotate or share the screenshot. Click the “Save As” button to save the screenshot as an image file.
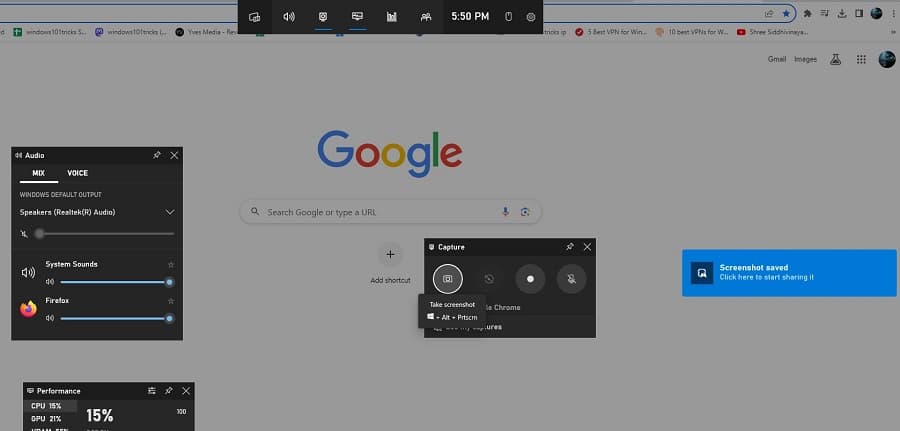
Game Bar (for Gaming Screenshots)
If you’re a gamer, the Game Bar is a useful tool for take a screenshot during gameplay.
- Go to Settings > Gaming > Game Bar and enable it.
- Press “Windows + G” to open the Game Bar, click the camera icon and save the screenshot.
Third-party screenshot app for Windows
Also, there are several third-party screenshot apps available for Windows that offer more advanced features and customization options compared to the built-in tools.
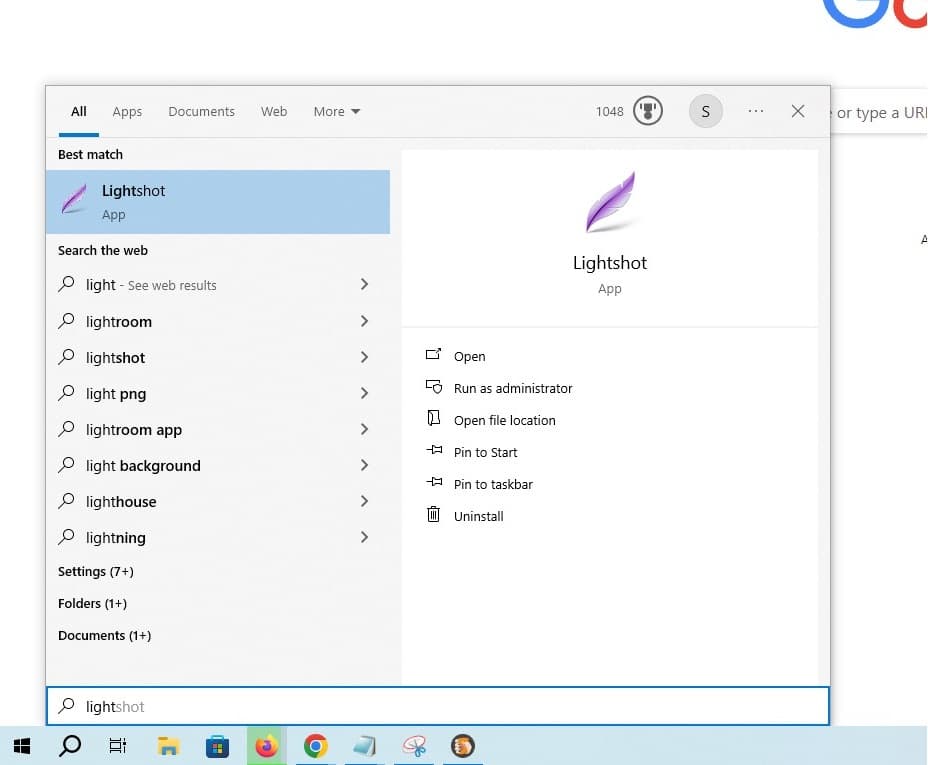
Lightshot:
This is one of the simple and free screenshot tools that allows you to take screenshots of selected regions, windows, or full screens and provides basic annotation features. This tool also offers easy sharing options and the ability to upload screenshots to their online platform for quick sharing.
Greenshot:
Also, you can use a free and open-source screenshot tool “Greenshot” offers features like capturing selected regions, full screen, or windows. It also offers various annotation tools, such as text, arrows, and shapes, to enhance your screenshots. Greenshot also allows you to send screenshots directly to different destinations, like email, social media, or image hosting sites.
Snipaste:
This is another versatile screenshot tool that lets you capture, edit, and annotate screenshots. It features a unique “paste” mode, which lets you paste screenshots directly onto other application windows. Snipaste also supports capturing multiple screenshots and arranging them as a canvas.
Also read:
