Microsoft Released Windows 11 version 23H2 with several New Features, System Improvements, and bug fixes. The company regularly releases cumulative updates to fix bugs and improve system performance. But sometimes users report various issues like Windows updates stuck downloading for hours or Windows 11 updates fails to install with different errors. For some others “Feature update to Windows 11 version 23H2 stuck at preparing to install” If you are also struggling with Windows 11 update installation problems, Here are some effective solutions you must apply.
Windows 11 update failed to install
Several reasons cause Windows 11 23H2 update failure or stuck download hours, slow internet, insufficient disk space, software conflicts, corrupted system files, or incomplete downloads are common.
Common reason behind Windows 11 23H2 update failure:
- If your internet connection is slow or unstable, it can interrupt Windows updates from downloading.
- Some third-party applications can clash with the update process, creating conflicts that prevent updates from being installed.
- If for some reason, essential system files are damaged or corrupted, it can lead to issues while trying to install or apply new updates on Windows 11.
- In rare cases, If an update is only partially downloaded or if there’s corruption in the downloaded files, it can result in update failures.
- And most importantly If your computer doesn’t have enough free space, it may struggle to download and install updates.
Check Internet connection
A stable and reliable internet connection is crucial for downloading Windows 11 23H2 update files from Microsoft’s servers. If the Internet connection is slow, intermittent, or experiencing other issues, it can lead to Windows 11 update stuck download or failures.
- Check the WiFi signal on your Laptop or use an Ethernet cable connection for reliable internet speed.
- Use an online speed test tool such as Fast.com or speedtest.net to check the speed of your internet connection.
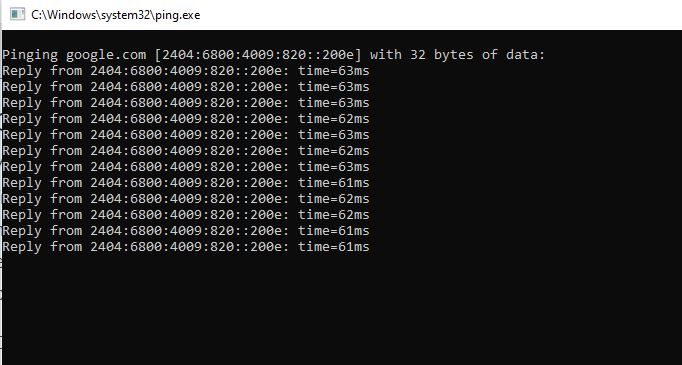
Run the Ping command to check the status of your internet connection. Press the Windows key + R, type ping google.com -t, and click ok. If you see a message like “Request timed out” or “Destination host unreachable,” it could indicate a connectivity problem.
If you’re experiencing connectivity issues, try resetting or restarting your modem or router. This can often resolve temporary network problems.
If you’re consistently experiencing slow or unstable internet, it’s advisable to reach out to your ISP for assistance.
VPNs can alter your network configuration and route traffic through different servers, which can sometimes cause problems with Windows updates. It’s possible that the VPN may be blocking or redirecting connections needed for the update process. In such cases, disconnecting from the VPN before attempting the update is recommended.
In addition Check and verify that the Time zone, Date and time are correct on your computer. A past or future date both prevent Windows Update and the Genuine Windows Validation tool from working properly.
Disable third-party Antivirus
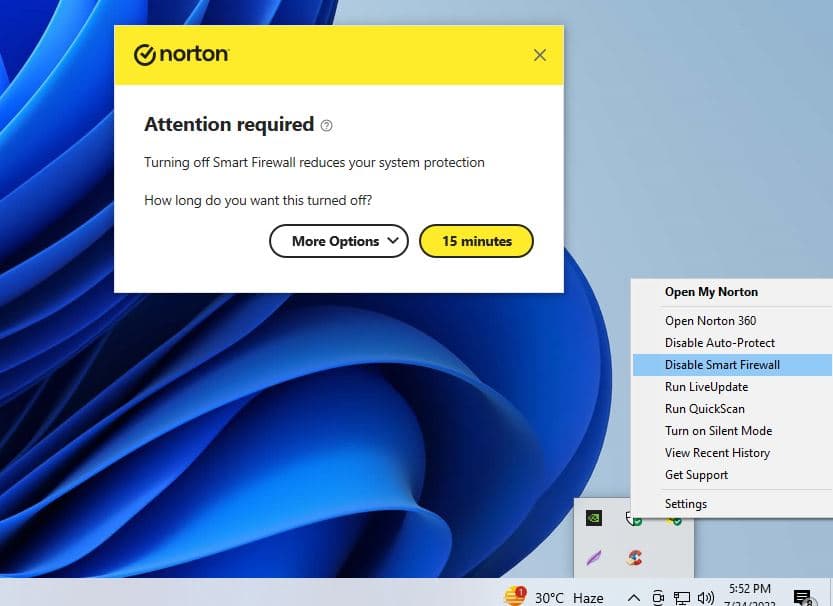
Some third-party antivirus programs have robust security features that may conflict with the Windows 11 23H2 update process. They may block certain system operations that are necessary for updates to install or apply. Temporarily disabling the antivirus software during the update process can often resolve this issue.
Ensure that your firewall settings or security software are not blocking the connection to Microsoft’s servers.
- Locate the antivirus icon in your system tray (usually at the bottom-right corner of your screen).
- Right-click on the icon to bring up a context menu.
- Look for an option like “Disable,” “Pause,” or “Turn Off” antivirus protection. Click on it.
- A confirmation window may appear. Confirm that you want to disable the antivirus protection.
Free disk space on System drive
lack of disk space on the system drive can lead to update installation failures. This is because the system needs enough temporary space to downlaod, unpack and install the Windows 11 23H2 update files. Ensuring enough free space minimizes the chances of encountering such issues on Windows 11.
- Remove any files or applications that you no longer need. This can include old documents, images, videos, or unused software.
- If you have large files or media that you want to keep, consider transferring them to an external hard drive or cloud storage.
- Go through your list of installed programs and uninstall any that you no longer use.
- Empty the Recycle Bin, and run built-in tool such as Disk cleanup or Storage sense to Clear Temporary Files and free up valuable disk space on your computer.
Run Windows Update troubleshooter
The built-in Windows update troubleshoot tool is designed to automatically identify and fix common issues related to Windows updates. The troubleshooter scans for issues that might be preventing Windows updates from installing correctly and try to resolve them automatically or provides solutions accordingly.
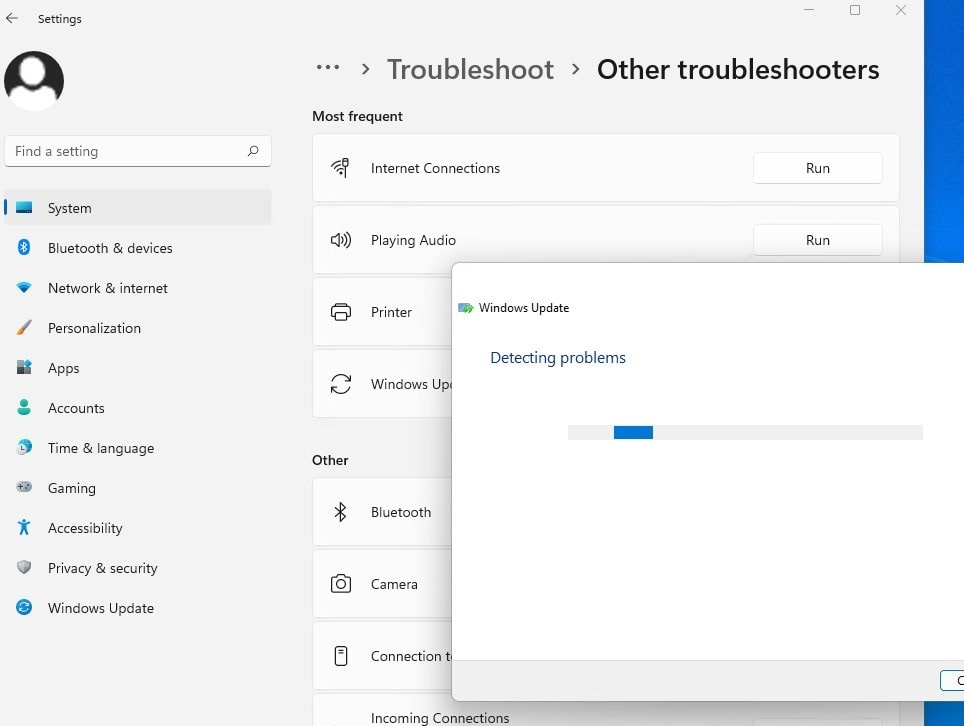
Let’s run the built-in Windows update troubleshooter and let Windows diagnose the problem for you.
- Press Windows key + I to open the settings app
- Go to system then Troubleshoot and click on Other troubleshooters
- Look for Windows Update and click Run next to it, to identify and resolve common issues related to Windows updates
The troubleshooter attempts to automatically apply fixes for common problems it encounters. This could include repairing corrupted update cache files or adjusting settings related to updates.
Restart Windows after completing the troubleshooting process, and check for updates again.
Reset Windows update components
Over time, the update components on a system may become corrupted or misconfigured, leading to update failures. If nothing seems to solve the problem, you can try to reset the Windows Update components which most probably resolves the issue.
Here’s how resetting these components can help:
- It clears out any potentially corrupted or incomplete update files that may be causing issues.
- It reverts various system settings related to updates back to their default configurations
- Resetting the update components refreshes the update database, ensuring it’s in a clean and functional state.
Step 01: Stop Windows Update and its related services
- Search for Command Prompt, right-click the top result, and select Run as administrator.
- Stop the Background Intelligent Transfer Service (BITS), Windows Update service, and Cryptographic service by running the following commands
net stop bits
net stop wuauserv
net stop appidsvc
net stop cryptsvc
Step 02: Clear Windows update cache
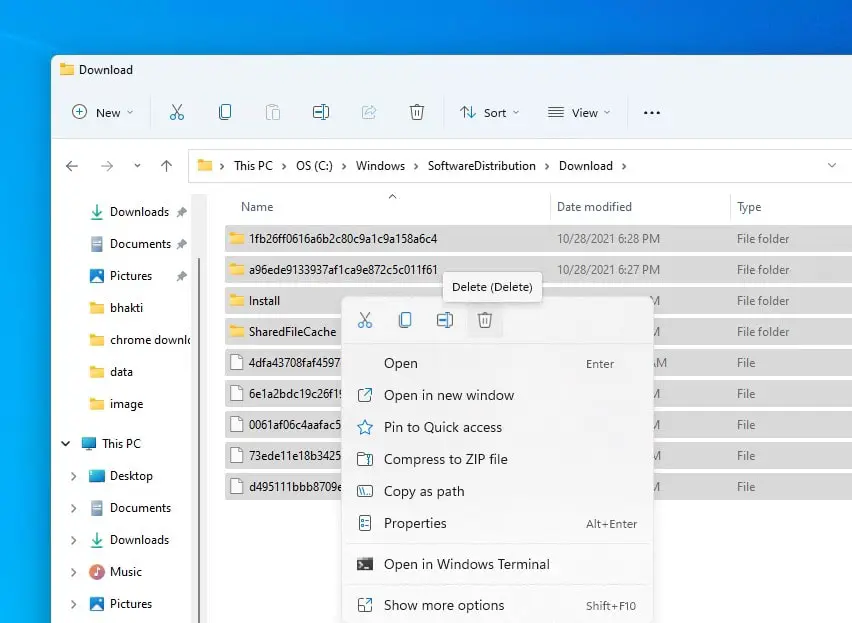
- Press “Windows + E,” to open file explorer and navigate C:\Windows\SoftwareDistribution\
- This folder has all the files related to Windows updates, Open the “Download” folder, select all the files using Ctrl + A, and hit the Del key.
Step 03: Restart the Windows services
Restart the BITS, Windows Update, and Cryptographic services using the following commands and make sure to press Enter on each line:
net start bits
net start wuauserv
net start appidsvc
net start cryptsvc
Restart your computer Now check for updates, I am sure this time you will succeed.
Run SFC and DISM command
Sometimes corrupt system files are the reason behind Windows update failure or stuck download hours. If for some reason, critical system files are damaged or missing, it can disrupt the update process. Run the System File Checker (SFC) and the Deployment Image Service and Management Tool (DISM) scan and fix underlying system file issues, which in turn can facilitate successful Windows updates.
- Open Command Prompt with administrative privileges.
- Type sfc /scannow and press Enter. Allow the scan to complete. It will attempt to repair any identified issues.
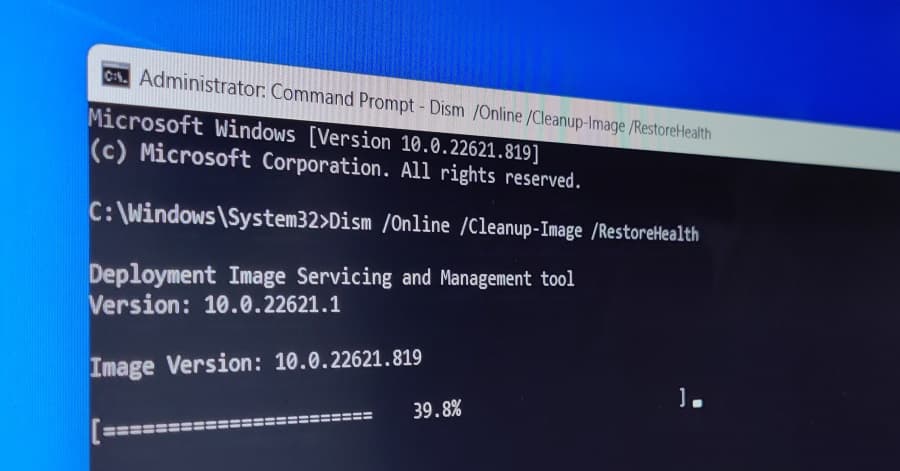
- Next Type DISM /Online /Cleanup-Image /RestoreHealth and press Enter. DISM is a more advanced tool that can repair the Windows image, which includes the operating system files.
In addition Check the Hard Disk for Errors, (If the Hard disk has errors or Bed sectors this may prevent to download and installation updates.) To do this open the command prompt as administrator and type chkdsk /f /r /x and hit enter key. press Y Close the command prompt and restart windows, Wait until 100% complete the scanning process.
Install updates manually
If you are experiencing problems installing Windows 11 cumulative updates, then you can resolve the problem manually by installing the latest Windows 11 updates.
- Visit the Windows 11 update history webpage where you can notice the logs of all the previous Windows updates that have been released.
- For the most recently released update, note down the KB number.
- Now use the Windows Update Catalog Website to search for the update specified by the KB number you noted down.
- Open the downloaded file in order to install the update.
The last step is to restart the computer after the update has been installed. This normally will fix any problems with the Windows update component and you can now cross-check by using the Check for updates button on the update section of the settings page.
Use Windows Media Creation Tool
If Feature Update Windows 11 version 23H2 is stuck installing or checking for updates then use the official media creation tool or Windows 11 installation assistant. That helps you easily upgrade to Windows 11 2023 update without any problem or error.
Upgrade Windows 11 using the media creation tool
- Download the media creation tool from Microsoft and run as an administrator.
- Click the Accept button to agree to the Microsoft terms.
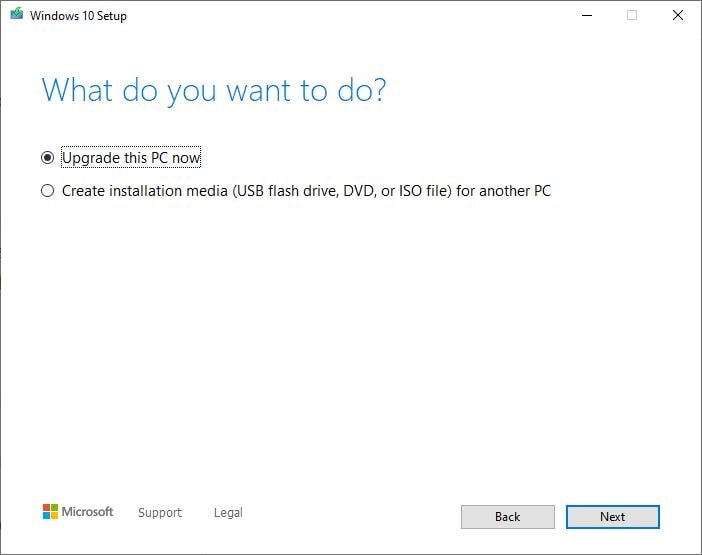
- Select the Upgrade this PC now option.
- Click the Accept button one more time to agree to the notice and license terms.
- This will download Windows update files, wait a few moments then after.
- Confirm that the Keep personal files and apps option is selected. And follow on-screen instructions to upgrade to Windows 11 23H2.
Windows update failed error 0x80070522
If you are getting error 0x80070522 while installing Windows Update or upgrading Windows 23H2, it means that you’re trying to install the Update using a standard account.
- To install the new version of Windows 11, make sure to run the setup using an account that has administrator privileges.
- Check how to enable Administrator account on Windows 11
- If you’re at work, you’ll need to contact your system administrator for assistance.
Did these solutions help to fix Windows 11 23H2 Update Installation Problems? Let us know in the comments below.
Frequently Asked Questions (FAQs)
Why did my Windows 11 update fail to install?
- Update failures can occur due to various reasons, including incompatible hardware or drivers, insufficient disk space, corrupted system files, or issues with the update itself.
What should I do if a Windows 11 update fails to install?
- You can try restarting your computer, checking for pending updates, freeing up disk space, and running the Windows Update troubleshooter.
Is it necessary to have sufficient disk space for updates to install?
- Yes, updates require a certain amount of free disk space to be able to install. Ensure you have enough space available on your system drive.
What is the Windows Update troubleshooter and how can it help?
- The Windows Update troubleshooter is a built-in tool that can automatically diagnose and resolve issues that may be preventing updates from installing.
Could corrupted system files be the cause of update failures?
- Yes, corrupted system files can interfere with the update process. Running the System File Checker (sfc) can help repair these files.
Also read:
