Microsoft just made the latest Windows 11 2024 update (24H2) available to everyone. All compatible devices receive the latest Windows 11 version 24H2 via Windows update for free. Of course, all PCs that came with Windows 11 installed on them get the update too. If you’ve not upgraded yet, you can grab a copy of the latest build directly from Microsoft’s website. However, Some users Report the upgrade process not goes well for them, experiencing different errors, Windows 11 24H2 update Stuck download, system apps missing etc. In this guide, we’ll explore solutions for some of the most common problems users may encounter in Windows 11 and how to fix it.
Contents
- 1 Windows 11 24H2 Update Not Available
- 2 Your device isn’t quite ready for Windows 11 version 24H2
- 3 Unable to Install Windows 11 Version 24H2
- 4 Windows 11 Upgrade Stuck Downloading
- 5 Windows 11 version 24H2 failed to install
- 6 We couldn’t install Windows 11 update 0x8007002C-0x400D
- 7 Windows 11 Update error 0x80070070 – 0x50011
- 8 0xC1900200 – 0x20008, 0xC1900202 – 0x20008
- 9 Windows 11 Error Code 0xC1900101
- 10 Accidentally restarted computer during Windows 11 Upgrade
- 11 Black screen during Windows 11 24H2 installation
- 12 Windows 11 Activation fails
- 13 Windows 11 Start menu not working after update
- 14 No sound after Windows 11 24H2 update
- 15 No internet after Windows 11 24H2 update
- 16 Games running slow on Windows 11
- 17 Startup and Shutdown Take Time
- 18 Roll Back Windows to the previous version
- 19 Windows 11 search not working
Windows 11 24H2 Update Not Available
Eligible computers will gradually receive Windows 11 24H2 update, but if Microsoft has not offered you Windows 11 version 24H2 yet, There May Be blocking some machines from updating due to known issues.
Check and make sure the Windows Update Service is Running:
- Press Windows key + R, type services.msc and click ok
- Scroll down to locate the Windows update, right-click on it select restart.
- If the Windows update service not running, Right-click on it and select properties,
- Here change the startup type automatic and Run the service next to the service status.
Make Sure All Available Updates are Installed:
If you’re not running the Windows 11 2024 updates, check the Windows Update Manager to ensure no issues exist with your old updates.
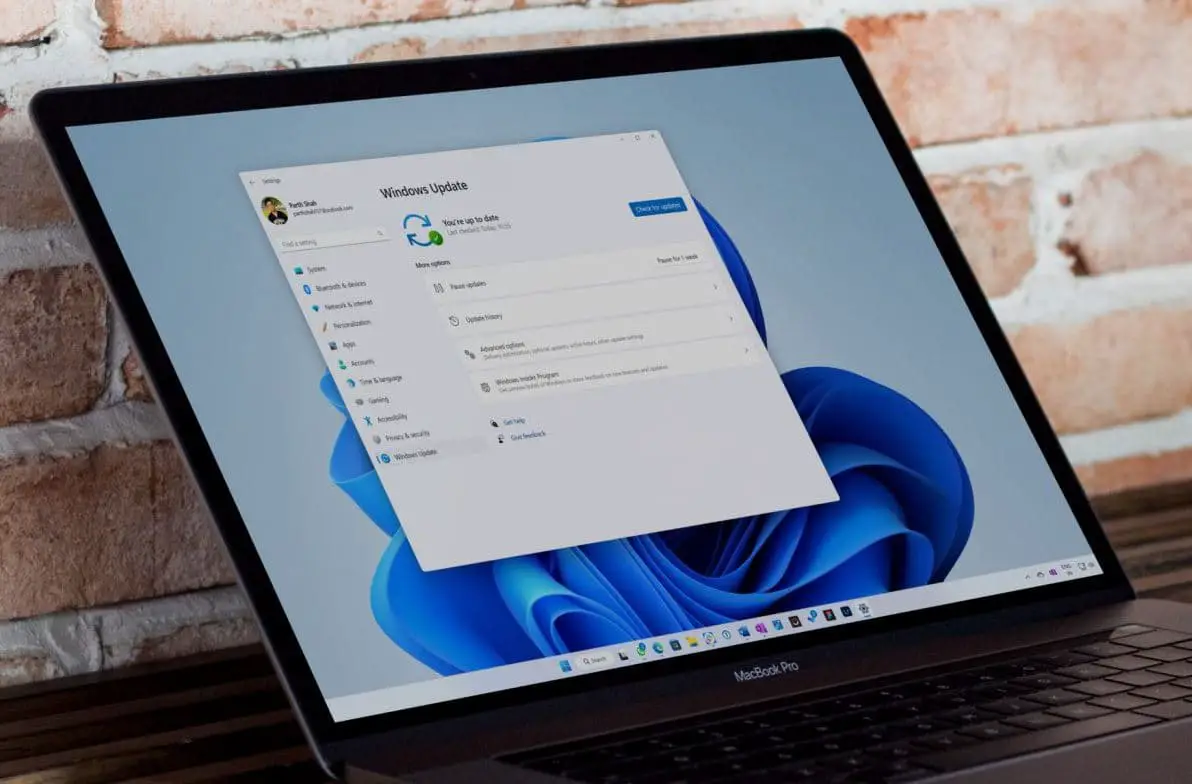
- Head to the Settings app using the Windows + I keyboard shortcut,
- Click on Windows Update and hit the Check for Updates button to check and install pending updates (if there are any)
Manually Upgrade: Also Microsoft Released the Upgrade Assistant Tool and official media Creation Tool to make the Upgrade process smoother and easier. You Can manually Upgrade To Windows 11 2024 update using these tools.
If Nothing Working you can Download Windows 11 ISO And perform a clean installation.
Your device isn’t quite ready for Windows 11 version 24H2
If you are getting the following error:
The Windows 11 2024 Update is on its way. We’re offering this update to compatible devices, but your device isn’t quite ready for it. Once your device is ready, you’ll see the update available on this page. There is nothing you need to do this time
Check Windows 11 system requirements:
Check and ensure your device meets the minimum system requirements for installing Windows 11. Your device must be running Windows 10, version 2004 or later, to upgrade. Free updates are available through Windows Update in Settings>Update and Security.
Here is what Microsoft recommends Windows 11 Specs and System Requirements:
| Processor | 1 gigahertz (GHz) or faster with 2 or more cores on a compatible 64-bit processor or System on a Chip (SoC). |
| RAM | 4 gigabyte (GB). |
| Storage | 64 GB or larger storage device Note: See below under “More information on storage space to keep Windows 11 up-to-date” for more details. |
| System firmware | UEFI, Secure Boot capable. Check here for information on how your PC might be able to meet this requirement. |
| TPM | Trusted Platform Module (TPM) version 2.0. Check here for instructions on how your PC might be enabled to meet this requirement. |
| Graphics card | Compatible with DirectX 12 or later with WDDM 2.0 driver. |
| Display | High definition (720p) display that is greater than 9” diagonally, 8 bits per color channel. |
| Internet connection and Microsoft account | Windows 11 Pro for personal use and Windows 11 Home require internet connectivity and a Microsoft account during the initial device set-up. |
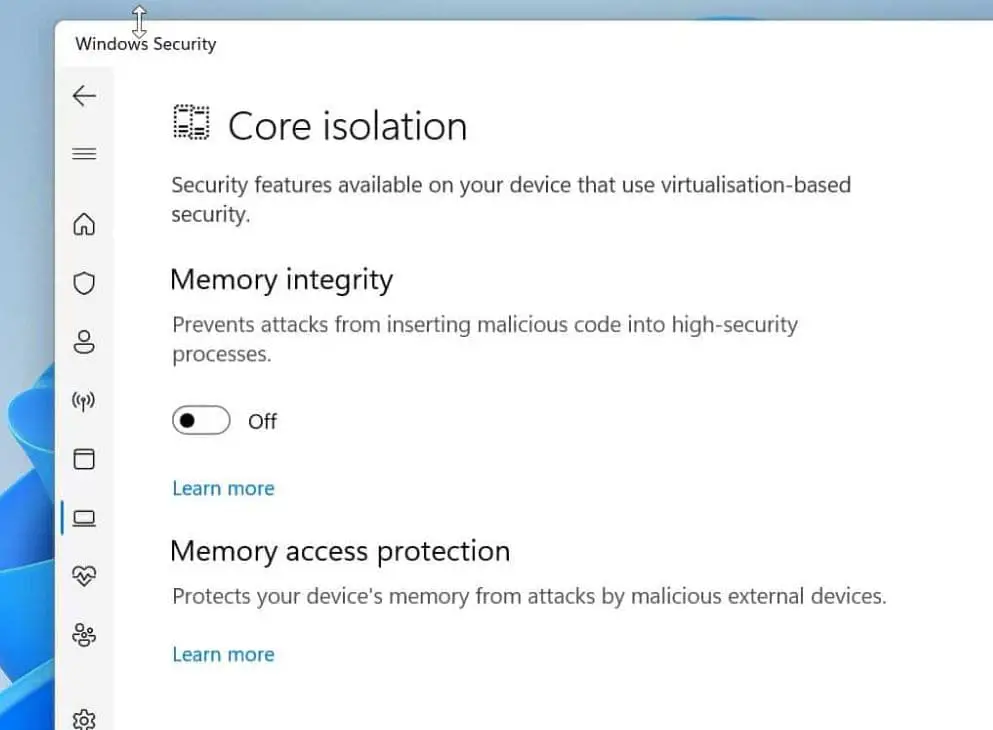
Disable Core Isolation Memory Integrity:
- In addition, launch the Settings app using the Windows key + I
- Select Privacy & security on the left side menu, and then click on Windows Security on the right side.
- Click Open Windows Security to launch the app. select Device security. Then, on the right side, click on the Core isolation details link.
- Click the toggle under Memory integrity to turn core isolation memory integrity off, check if this helps.
Unable to Install Windows 11 Version 24H2
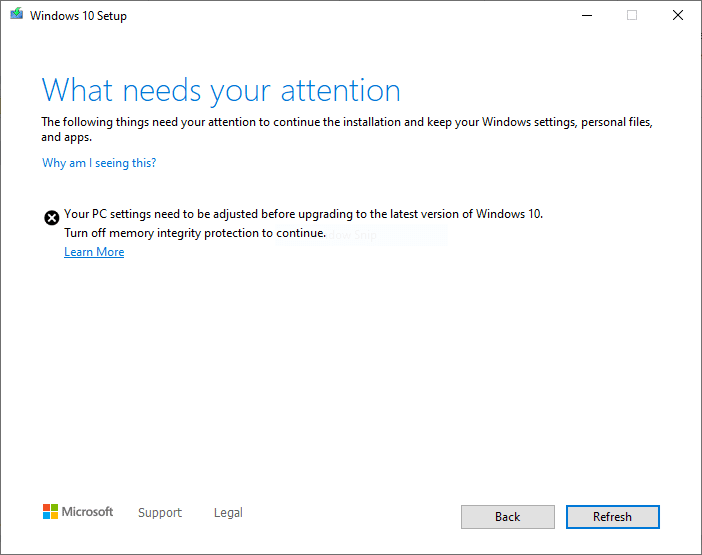
If you are trying to install the 24H2 update using Windows 11 Update Assistant or Media Creation tool you might see a quick dialog box called “What need your attention” with an error message that reads:
Your PC Settings needs to be adjusted before upgrading to the latest version of windows 11. Turn off memory integration protection “to continue
This is a compatibility issue with various display drivers. To fix this issue:
- Press the Windows key + S and search for Windows Security
- Navigate to Device Security then Core Isolation.
- Here, click on the Core Isolation Details link.
- On this settings page, you need to turn off the option for “Memory Integrity“
Windows 11 Upgrade Stuck Downloading
If the upgrade Process is Stuck While Downloading or installing updates. Then First make sure you have enough disk space to download the updates. Also Run Disk cleanup, or new Windows storage sense to Free up space to install the latest Windows 11 24H2 update.
Ensure you have a stable and fast internet connection. Restarting your router or modem might also help. If you’re using a VPN or proxy, try disabling it as this can sometimes interfere with the download process.
Press Windows key + R, then type ms-settings:windowsupdate and press Enter. Click on “Check for updates” and then “Retry” if the download is stuck.
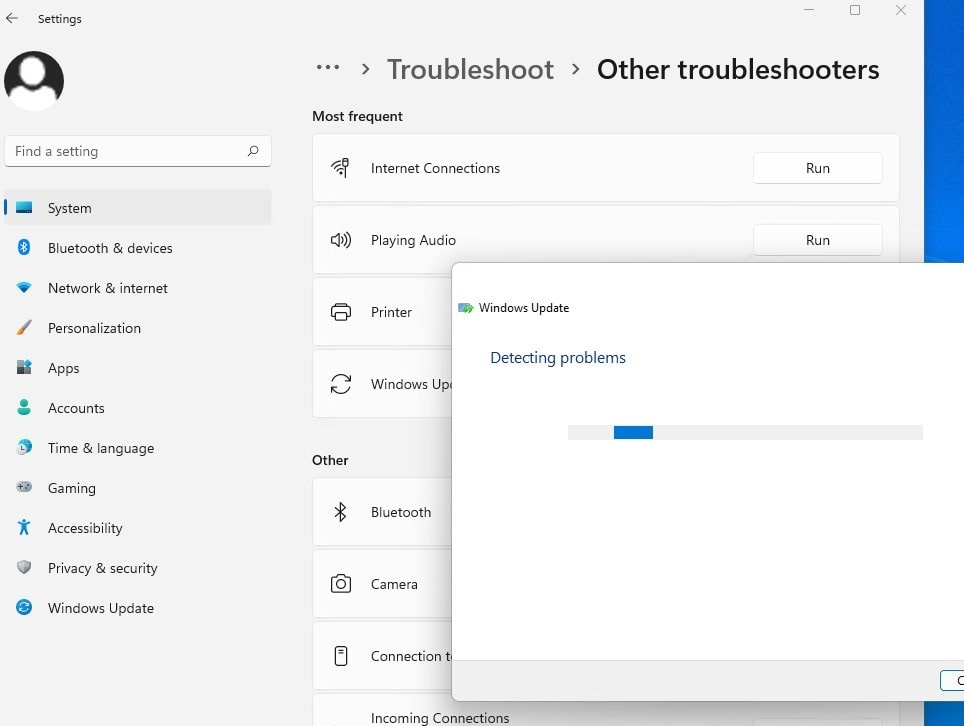
Also, run the Windows Update Troubleshooter that help identify and resolve common issues related to Windows updates. It scans your system for any known issues or configurations that might be causing problems with Windows updates. Based on its scan, the troubleshooter attempts to automatically apply fixes for common problems it encounters. This could include repairing corrupted system files or adjusting settings related to updates.
If the updated Database gets corrupted you may face Windows update stuck downloading Try to Reset Update Components.
Windows 11 version 24H2 failed to install
Also For some users, Windows 11 2024 update fails due to a number of different error codes. Here are the most common reasons behind Windows 11 update failure
- The system drive is almost full, and there might not be enough room to store the update files, causing the installation to fail.
- If the internet connection is slow, unstable, or experiencing disruptions, it can hinder the download of update files.
- Sometimes, the files downloaded for the update can become corrupted during the download process. This leads to installation issues.
- Third-party antivirus or security software can occasionally conflict with the update process, preventing it from completing successfully.
- When device drivers are outdated or incompatible with the update, it can lead to conflicts during the installation process.
- Again Critical files necessary for the update process might be missing or damaged, causing the update to fail.
Error code 0x800F0922
If the upgrade process failed with error code 0x800F0922 pop up on your screen. Then maybe you’re not connected to the Microsoft servers, (Internet connection Gets disconnected) You don’t have sufficient Disk space in your in System Reserved partition.
- Make Sure You Are Connected to the Internet, and it’s working properly.
- Try to disable the VPN connection and Security Software (Antivirus, anti-malware) while Run the upgrade process.
- Also, make sure your antivirus software hasn’t stored data in the System Reserved partition.
- If your partition is full, Try To Resize it using free partition manager tools.
We couldn’t install Windows 11 update 0x8007002C-0x400D
Some Users Report The installation Failed with Error like We couldn’t install Windows 11 24H2 update 0x8007002C-0x400D. This may be due to Third-party Application Conflicts, Security Software, Disk Drive Errors, not enough storage space, incompatible drivers, system file corruption etc.
To Deal with Errors like this, we have to perform Different Actions such as
- Ensure you have enough free space on your system drive for the update to install.
- Check and Ensure you have a stable and fast internet connection during the update process.
- Run the built-in Windows update troubleshooter to identify and fix common update issues.
- Temporarily disable any third-party antivirus or security software, as they may be conflicting with the update process.
- Ensure that all your device drivers are up-to-date, as outdated drivers can sometimes cause update failures.
Boot into Safe Mode and attempt the update installation from there, as this can sometimes bypass certain conflicts. Here we have covered a post how to fix We couldn’t install Windows 11 update 0x8007002C-0x400D.
Windows 11 Update error 0x80070070 – 0x50011
These types of error codes indicate that there isn’t enough available space on the system drive to install the update. The Upgrade and installation process Requires a minimum 16 GB of free disk space to temporary files for installation purposes. If you don’t have enough Free disk space, use the storage sense to delete Unnecessary files.
- Delete unnecessary files or move them to an external drive to free up space on the system drive.
- Use the built-in Disk Cleanup tool to remove temporary files and free up additional space.
- Move installed applications to a secondary drive if possible, or uninstall unused programs to free up space.
- If your system drive is still low on space, consider using an external drive as a temporary storage location for large files.
- If possible, consider upgrading your system drive to one with a larger capacity.
- In addition, Disable hibernation to recover a significant amount of disk space. Open Command Prompt with administrator privileges and run powercfg -h off.
0xC1900200 – 0x20008, 0xC1900202 – 0x20008
These Error codes 0xC1900200 – 0x20008, and 0xC1900202 – 0x20008 indicate your System hardware does not meet the Windows 11 24H2 minimum system requirements. Make Sure your system meets the minimum system requirements below.
| Processor | 1 gigahertz (GHz) or faster with 2 or more cores on a compatible 64-bit processor or System on a Chip (SoC). |
| RAM | 4 Gigabyte (GB). |
| Storage | 64 GB or larger storage device Note: See below under “More information on storage space to keep Windows 11 up-to-date” for more details. |
| System firmware | UEFI, Secure Boot capable. Check here for information on how your PC might be able to meet this requirement. |
| TPM | Trusted Platform Module (TPM) version 2.0. Check here for instructions on how your PC might be enabled to meet this requirement. |
| Graphics card | Compatible with DirectX 12 or later with WDDM 2.0 driver. |
| Display | High definition (720p) display that is greater than 9” diagonally, 8 bits per colour channel. |
| Internet connection and Microsoft account | Windows 11 Pro for personal use and Windows 11 Home require internet connectivity and a Microsoft account during initial device set-up. |
Windows 11 Error Code 0xC1900101
An error code starting with 0xC1900101 indicates a problem with drivers or hardware compatibility. The following errors are some of the most known ones: 0xC1900101 – 0x20004, 0xC1900101 – 0x2000c, 0xC1900101 – 0x20017, 0xC1900101 – 0x30018, 0xC1900101 – 0x3000D, 0xC1900101 – 0x4000D, 0xC1900101 – 0x40017.
Ensure that your current Windows installation is up to date with the latest updates and patches.
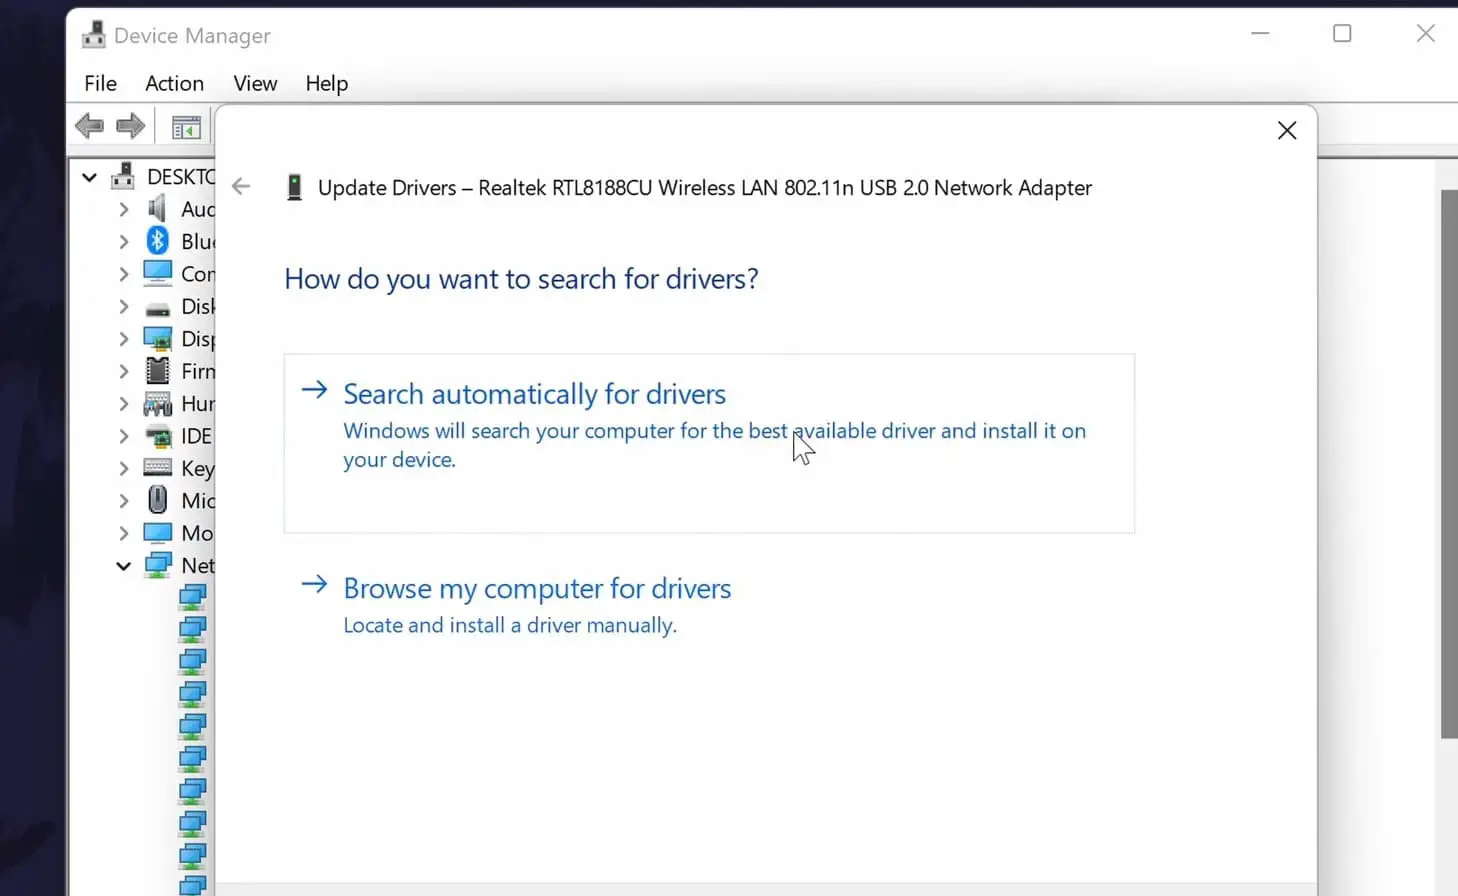
Update all device drivers, especially graphics, network, and chipset drivers, to the latest versions compatible with Windows 11. Open Device Manager and Right-click on the problematic driver, marked with a yellow warning sign select uninstall. Then Try to upgrade / Install Windows 11 24H2 update.
Alternatively, visit the manufacturer’s website, download the latest available driver and update the outdated drivers especially the graphics driver, Network Adapter, and Audio driver).
Verify that your hardware meets the minimum requirements for Windows 11. Pay special attention to CPU and TPM (Trusted Platform Module) requirements.
Disconnect any unnecessary external devices like printers, scanners, and additional monitors before attempting the upgrade.
Accidentally restarted computer during Windows 11 Upgrade
Especially with an unexpected power outage for desktop PCs without a UPS Machine Get Restarted, Shutdown and next start we’ll get the error code: 0x80200056. Allow the computer to start up as usual. It may take a little longer than usual as the system recovers from the interrupted upgrade.
- Go to Settings then Windows Update and Check for updates to see if the upgrade process automatically resumes.
- Use the built-in Windows Update Troubleshooter to identify and fix any issues that may be preventing the upgrade from proceeding.
- If you’re concerned about potential data loss or system instability, consider creating a backup of important files before proceeding with the upgrade.
Black screen during Windows 11 24H2 installation
For Some Users, The upgrade Process is Stuck with a Black Screen for hours, A Bad driver or a faulty update can be responsible for this issue. We recommend to wait a few more hours and let Windows complete the process or Unplug all your peripherals, except for the keyboard, mouse, and monitor and try the upgrade process.
- Look at your computer’s hard drive or SSD indicator lights. If they’re blinking, it indicates that there is disk activity, which means the installation process is still ongoing.
- Ensure that all hardware components are properly connected. Loose cables or connections can cause issues during installation.
- Ensure that your graphics drivers are up-to-date. Outdated or incompatible graphics drivers can sometimes cause display issues.
- Restart the computer and try booting into Safe Mode. This can sometimes bypass certain driver or software conflicts that may be causing the black screen.
- If there’s no sign of progress after a significant amount of time, try restarting the computer. It’s possible that the installation process got stuck.
Windows 11 Activation fails
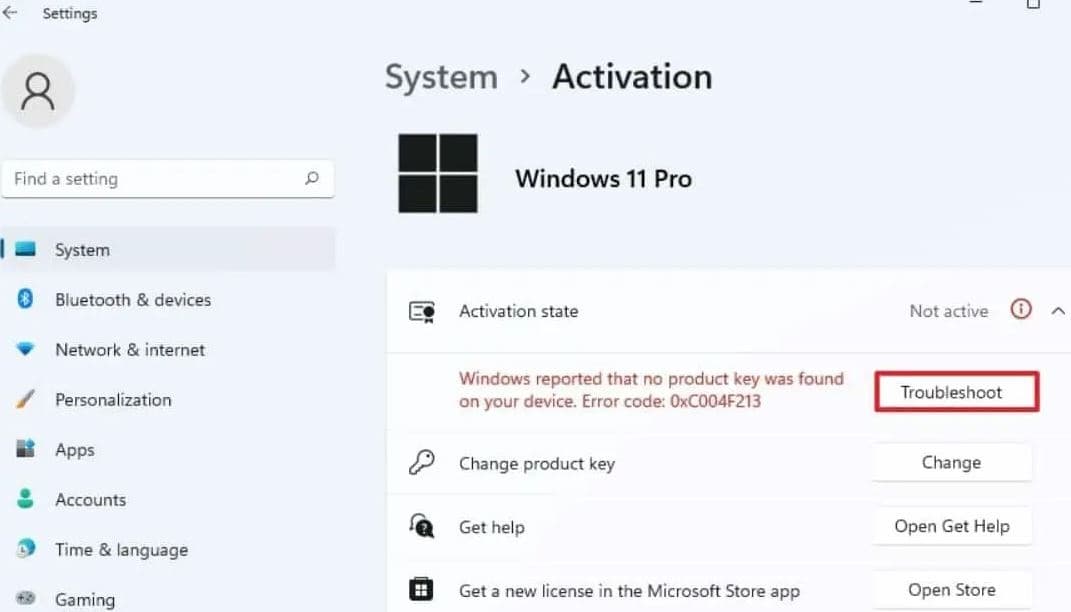
After Successfully upgrading to Windows 11 2024 updates, Some users Report a Windows activation problem. You Can Resolve this issue By running the Activation Troubleshooting tool from Settings -> System -> Activation -> Troubleshoot. This tool can help resolve common activation issues.
If you have a valid product key, try re-entering it in the Activation settings. Ensure that you’re using the correct key for your edition of Windows.
Ensure that your computer is connected to the internet. Sometimes, activation requires an active internet connection. If the above steps don’t work, consider contacting Microsoft Support for further assistance. They can help you with activation issues, especially if there are underlying licensing or account-related problems.
Also, Some users Report Windows 11 Start menu has some problems after the update. Users reported that icons and live tiles are missing, Start menu Not Working event not open when clicking on the start menu icon. Sometimes, a simple restart can resolve temporary glitches. Try restarting your computer and see if the Start menu starts working again.
- Make sure your system is up to date with the latest Windows updates. Sometimes, updates contain fixes for known issues.
- Open Command Prompt as an administrator and run the
sfc /scannowcommand. This will scan for and attempt to repair any corrupted system files. - Press
Ctrl + Shift + Escto open Task Manager. Locate “Windows Explorer” in the list, select it, and click “Restart” in the bottom-right corner. - Sometimes, issues with the user profile can cause problems with the Start menu. Creating a new user profile may resolve the issue.
- If the issue started after a recent update, consider using System Restore to revert your system to a point before the update.
No sound after Windows 11 24H2 update
Outdated, incompatible, or corrupt audio drivers is the most common reason cause No sound problem after Windows 11 24H2 update. Again Loose or faulty connections between your speakers or headphones and the computer can result in no sound.
- Ensure that the volume is not muted and the correct audio output device is selected in the settings.
- Open Device Manager and Update your audio drivers to the latest compatible version. Also, you can visit the device manufacturer’s website to download and install the Audio driver for Windows 11.
- Press the Windows key + R, type services.msc and click ok, here locate and Restart the Windows Audio service.
- Use the built-in audio troubleshooter in Windows to identify and fix common audio issues.
- Try using different speakers or headphones to rule out hardware issues, Ensure your speakers or headphones are correctly connected to the computer.
No internet after Windows 11 24H2 update
No internet connectivity after a Windows 11 24H2 update can occur due to various reasons. Network Driver Compatibility, IP Address Configuration Conflicts or Sometimes, software glitches or temporary errors can occur during the update process, leading to internet connectivity problems.
Power off both your router and modem, wait for a few minutes and then power them back on. This can often resolve temporary connectivity issues.
Make sure your network drivers are up to date. You can do this by going to Device Manager, finding your network adapter, right-clicking, and selecting “Update driver.” Also, you can visit the device manufacturer’s website to download latest network adapter driver for Windows 11
Go to Settings > Network & Internet > Status > Network reset. This will reset all network adapters and settings to their default configurations. Note that this will remove any custom network configurations you’ve made.
Open Command Prompt and type ipconfig /all. Ensure that you have an IP address and other network settings configured properly.
Run this built-in Network adapter and the Internet troubleshooting tool can identify and fix common network problems.
Games running slow on Windows 11
Games may run slowly on Windows 11 due to various reasons, Outdated or Incompatible Graphics Drivers, Insufficient System Resources or Incorrect Graphics Settings are common. Again Unnecessary background processes and applications can consume system resources, impacting game performance. Third-party software, especially security programs or background utilities, can conflict with game processes.
Outdated or incompatible graphics drivers commonly affect gaming performance issues. Visit the website of your graphics card manufacturer to download and install the latest drivers.
Open Graphics settings and Ensure that the correct graphics card is selected for high performance. Within the game itself, adjust graphics settings like resolution, texture quality, shadows, and anti-aliasing to optimize performance.
Go to Settings > System > Power & battery > Additional power settings. Choose the “High performance” power plan to ensure maximum system performance.
Ensure that your computer isn’t overheating. Overheating can lead to performance throttling. Clean out any dust from fans and consider using a laptop cooling pad.
Startup and Shutdown Take Time
If you notice After upgrade to Windows 11 Version 24H2 system startup or shutdown takes a long time. This is mostly caused due to the Fast Startup feature, (The hybrid shutdown Feature). Users Report By disabling the Fast startup Feature they are able to fix a number of Startup problems, BSOD Errors include startup shutdown take a long time issue.
To Disable Fast Startup Feature
- Open Control panel
- Search for and select power options
- Choose what the power buttons do
- Change settings that are currently unavailable
- then uncheck the Fast Startup option.
In addition, Having too many programs set to start with your computer can slow down the boot process. And you need to Disable unnecessary startup programs. You can do this through the Task Manager in Windows.
If your computer’s resources (CPU, RAM) are being heavily used by background processes, it can slow down startup. Close unnecessary programs and consider upgrading your hardware if it’s outdated.
Malware or viruses can run in the background, consuming system resources and slowing down startup. Perform a thorough malware scan using a reputable antivirus program.
Outdated or incompatible drivers can cause system slowdowns, including during startup. Update your drivers, especially graphics and storage drivers.
Failing hardware components can cause delays in the shutdown process. Diagnose and replace any malfunctioning hardware components.
Roll Back Windows to the previous version
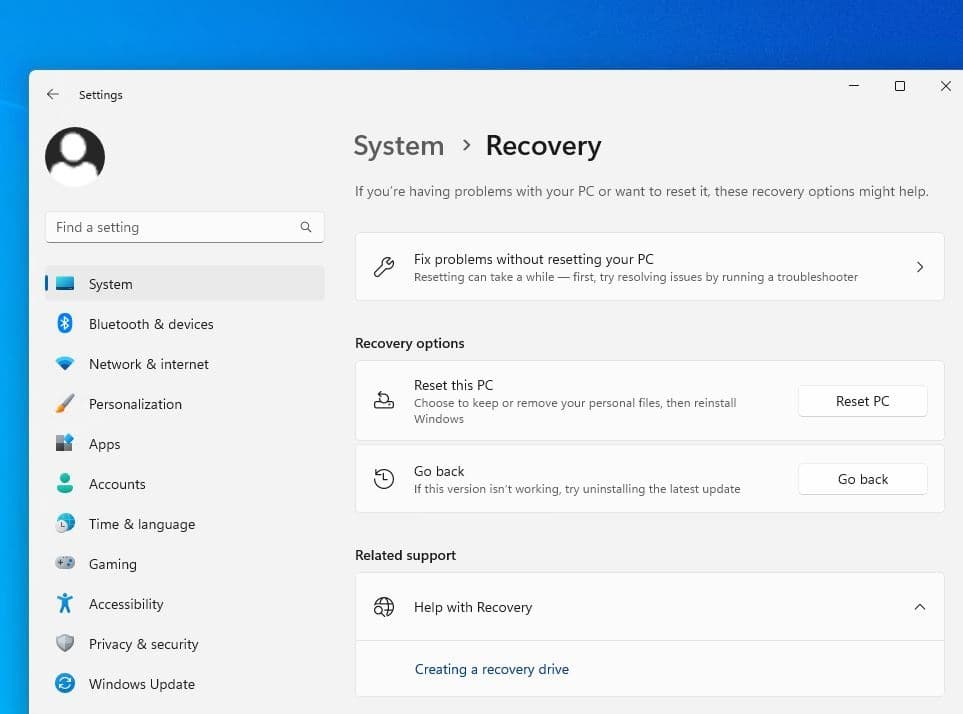
If after upgrade To Windows 11 version 24H2, Having a number of issues and not happy with the current Windows version then you have the option to Roll Back Windows to the previous Windows version 24H2.
Note: If you’re dealing with a problem you can’t fix, you have only 10 days to roll back to your previous Windows installation. Open Settings using the Windows key + I, Nevigate system then Recovery and under Recovery options click Go back.
Windows 11 search not working
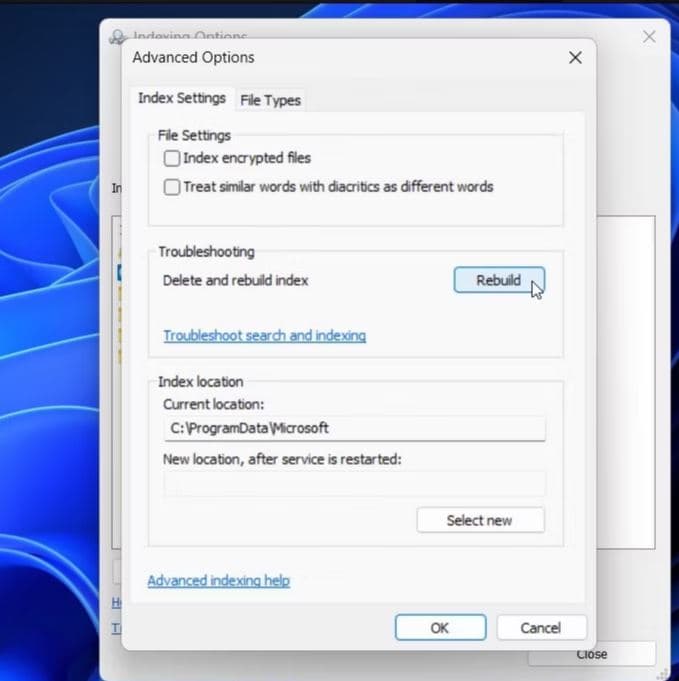
Several factors cause Windows search not working or search can’t find your files ranging from indexing issues to privacy settings are common. If the search index is incomplete or corrupted, it can affect the search results. And to fix the Windows search function you need to Rebuild the search index.
If the location where the files are stored is not included in the search index, they won’t appear in search results. you need to add the specific location to the index. Open the Indexing options and click the Modify option to Add the specific location to the index.
Problems with the Windows Search service can affect search functionality. Press Win + R, and type services.msc, find “Windows Search”, right-click, and select “Restart”.
Sometimes, incorrect search queries may yield no results. Make sure you’re using the correct file names or keywords in your search.
Also Read


Countless problems when updating.
And Microsoft wonders “Gee, why don’t people like installing our constant updates”?