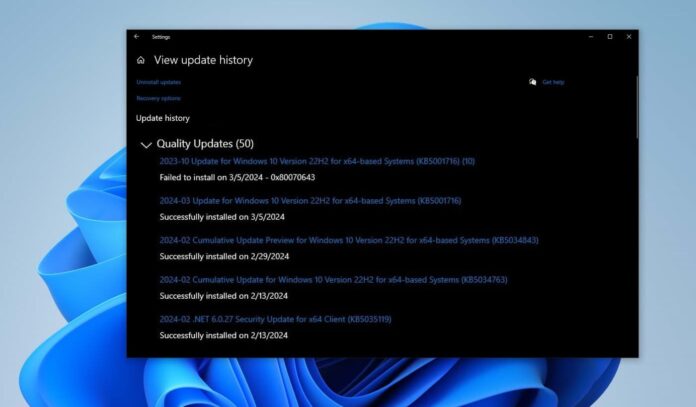
Microsoft recently released KB5001716 for Windows 10, It is a service update improves UI functionality and offers the next feature update in case your current Windows version is approaching the end of support status. However, some users report Windows 10 KB5001716 failed to install with 0x80070643. Well, there are several possible reasons why you are getting Windows 10 Update download errors. But for this particular error 0x80070643 we found its causing because KB5001716 was already installed on October 2023, for some reason Microsoft reissued the same update to those machines causing the Error 0x80070643. As a workaround, uninstall the old KB5001716 and check for updates again help fix the error.
Windows 10 KB5001716 fails with 0x80070643
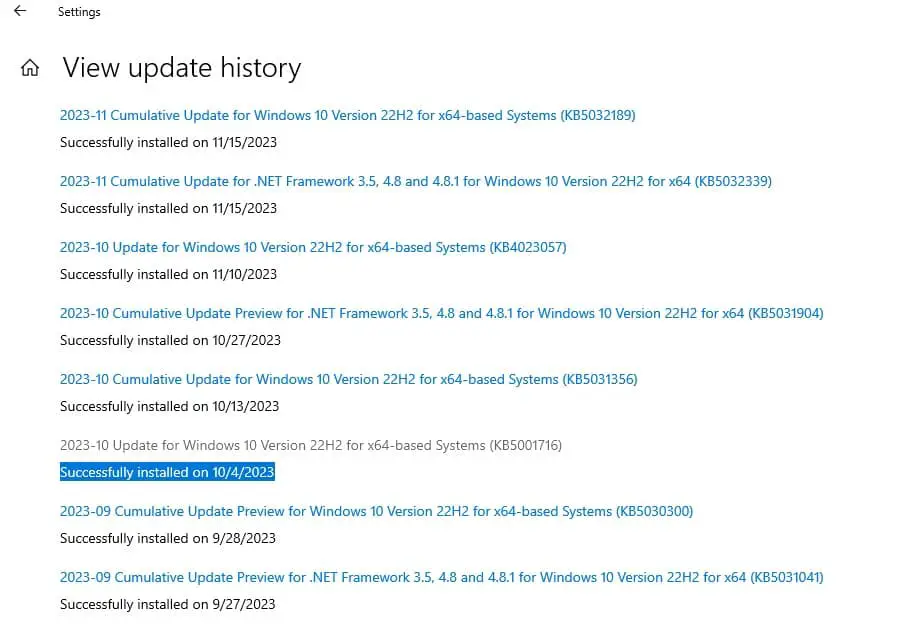
Slow internet to corrupt update cache, low storage or security software blocking are common reasons why you are getting Windows update error. But while investigating for this particular error 0x80070643, we found Microsoft had previously issued Windows 10 KB5001716 in October 2023. For some reason, Microsoft reissued the same update to those machines, (Already Windows 10 KB5001716 installed) causing the error.
To fix the error 0x80070643 you need to uninstall the old KB5001716 update causing conflict, and try check for and install the update again.
Uninstall Windows 10 KB5001716 (Old)
Here is how you can uninstall the KB5001716 update and reinstall it again through this month’s push of the KB5001716 update.
- Press Windows key + I to open the settings app
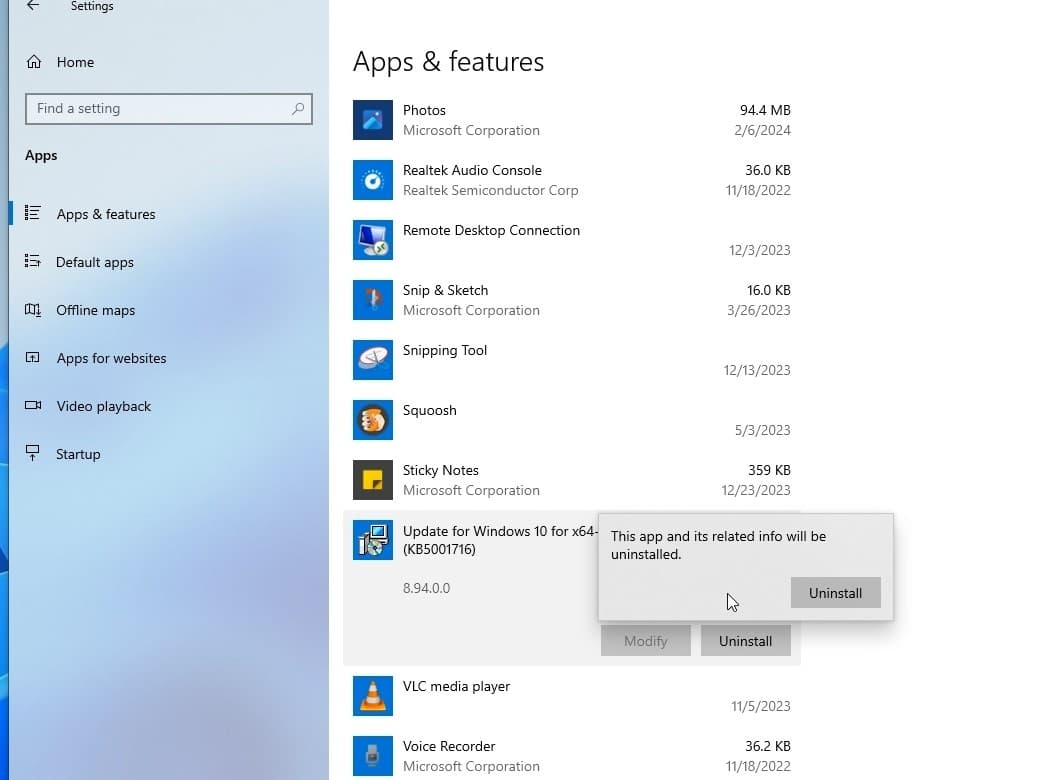
- Go to Apps then Apps and Features, scroll down uninstall you see the update for Windows 10 for x64-based systems (KB5001716) select it,
- You can quickly search it using the search bar, select it then click on Uninstall,
- Follow on screen instructions to uninstall Windows 10 KB5001716 (Old) and reboot your PC.
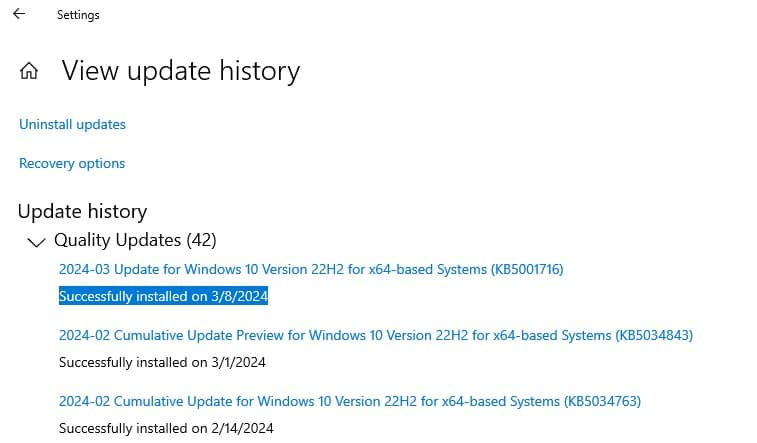
- Once done, again open settings -> update and security and hit check for updates. This time Windows 10 KB5001716 was installed without any errors or problems.
Here is a dedicated video on how to fix Windows 10 update error 0x80070643.
Use the Windows Update Troubleshooter
If you are still experiencing Windows 10 KB5001716 installation error 0x80070643, you should try running the Windows update troubleshooter. This is a builtin tool designed to automatically diagnose and resolve issues related to Windows updates. It can identify and fix problems such as corrupted update files, incorrect settings, or issues with the Windows Update service itself. Running the troubleshooter is a quick and easy way to identify and resolve common update-related issues.
- Press the Windows key on your keyboard or click on the Windows icon in the taskbar to open the Start menu.
- Type “Troubleshoot settings” and press Enter to open the Troubleshoot settings page.
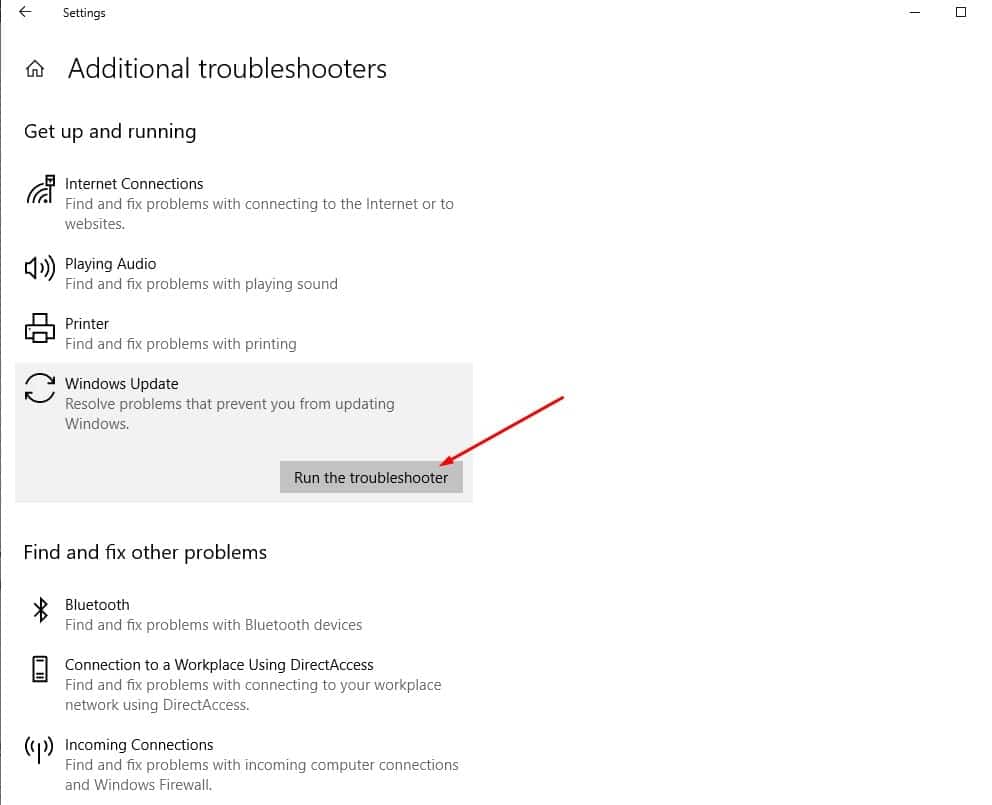
- Scroll down and click on “Additional troubleshooters.”
- Locate and click on “Windows Update” under Get up and running and Click on “Run the troubleshooter”
- This will check the system for errors and problems that prevent install updates which can take a few minutes to complete and fix itself.
- Once the diagnosis process completes, restart your PC and check for updates once again.
Start Windows Installer service
This error can sometimes be solved by manually starting the Windows Installer service. The steps to do that are as follows:
- Press the Windows key and type cmd here Right-click the Command Prompt result, and choose Run as administrator.
- In the Elevated Command Prompt, type net start msiserver and hit Enter on your keyboard to execute the command.
- This Will display Windows installer service was started successfully.
- Now Close the command prompt by clicking the X or by typing Exit and executing the command. Now Restart the system and check for the available updates to download and install.
Reset Windows update components
If you’re still having trouble after running the troubleshooter, performing the same actions manually may help where the troubleshooter didn’t. Deleting Windows update cache files is another solution that may just work for you.
- Press Windows + R on your keyboard to open the Run dialog box.
- Type services.msc and press Enter to open the Services window.
- Scroll down and locate the “Windows Update” service.
- Right-click on “Windows Update” and select “Stop” to stop the service.
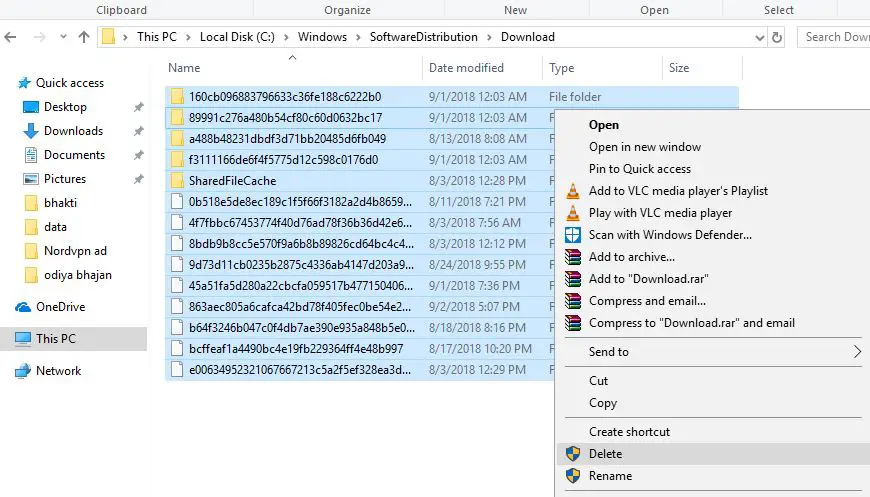
- Now Press Windows + E to open File Explorer. Navigate to the following location: C:\Windows\SoftwareDistribution\Download
- Select all files and folders inside the download folder, then press Delete on your keyboard to remove them.
- It may ask you for administrator permission. Give it. Don’t worry. There’s nothing vital here. Windows Update will recreate what it needs the next time you run it.
- Go back to the Services window, right-click on “Windows Update,” and select “Start” to restart the service.
Repair Corrupted Windows system files
Corrupt system files can cause various issues, including problems with Windows updates. By running the SFC command, you can detect and repair any corrupted system files that may be preventing updates from being installed correctly. This can help ensure the stability and integrity of the Windows operating system.
- First of all, you will have to Open Command Prompt as Admin.
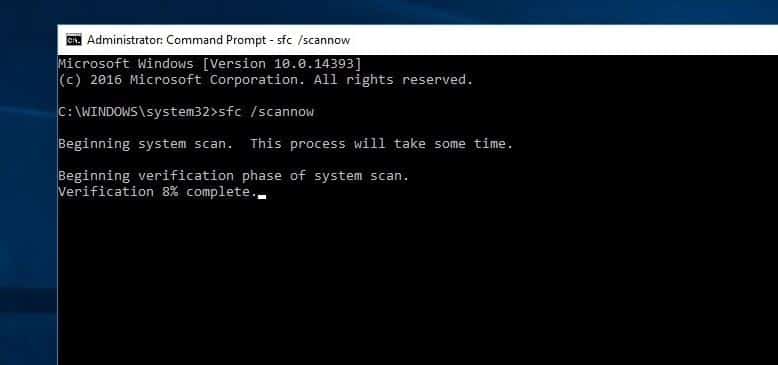
- Then type “sfc /scannow” and hit enter.
This will scan your system for all its important system files, and replace them where necessary. Wait until Windows scans and repairs system files. If this System File Checker finds out the protected files are overwritten by incorrect files, it will extract the correct system file from the system file backup (namely dllcache) and replace the incorrect file. When the System file check and repair is completed, restart your computer and check if your computer works smoothly.
Also, Read
