Does WiFi keep disconnecting after the Windows 10 21H2 update? A number of users report Wi-Fi connection is horrible after update the Windows PC with the latest patch. It keeps dropping the internet connection every 10 minutes or so and the access to the Internet is cut off for 10 – 20 secs and then comes back. For some other WiFi disconnects, then the network name disappears from the list and only appears again after a laptop/adapter reboot.
This problem mostly occurs because of driver incompatibility between the network adapter and the Windows device. Update and, reinstall the latest driver software for the network most probably fix the problem for you.
Contents
WiFi Keeps Disconnecting Windows 10
Before go ahead,
- Restart network devices include PC, routers, switch that fix the problem if a temporary glitch causes the issue.
- Temporarily turn off any antivirus or malware prevention software
- Also, disable the Firewall and VPN if configured.
- Check and make sure the latest Windows updates are installed on your device. Or head over to Settings, Update & security and click the check for updates button.
- Perform Windows clean boot, which helps to determine if any startup service conflict is causing the problem.
- Open Windows services, using services.msc and restart the WLAN AutoConfig service.
Run the Internet Connections Troubleshooter
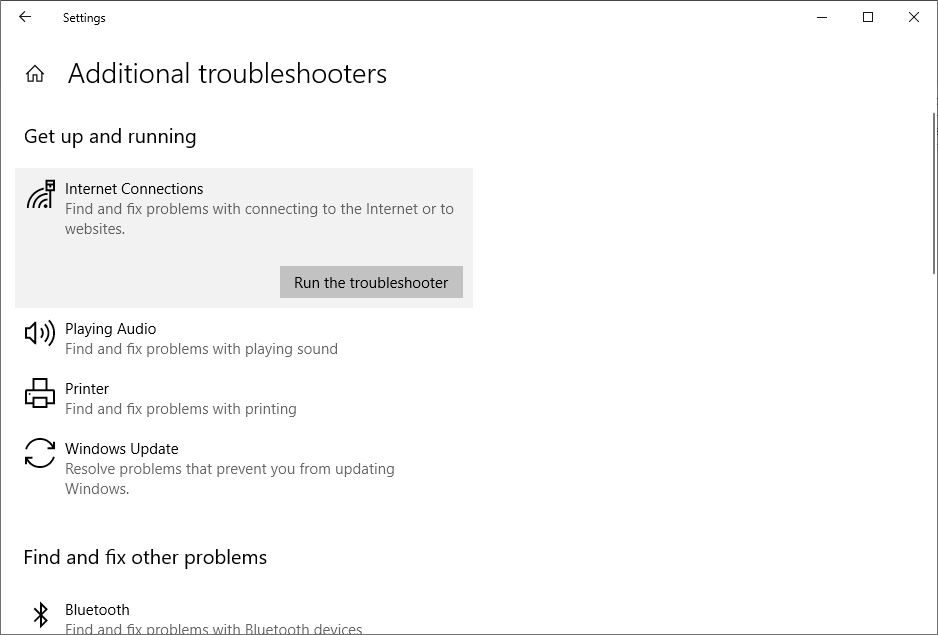
This troubleshooter is an automated Windows 10 inbuilt tool that finds and fixes the common issues with the Internet Connections on the computer. Perform these steps to run this tool and check if that helps.
- Press Windows + X to select settings,
- Click on Update & security, then Troubleshoot,
- Now on the right-hand side look for and select “Internet Connections”.
- Click run the troubleshooter and follow the on-screen instructions,
- This will check and fix problems, and prevent the internet connection from working properly.
Run the Network Adapter Troubleshooter
This is another automated Windows10 inbuilt tool, that detects and fixes the common issues with the Network Adapter Settings on the computer. It also checks if the network adapter drivers are up to date or not. It may also provide you some clues about the hardware failures happening to the Network Adapter.
- Press Windows + X to select settings,
- Click on Update & security, then Troubleshoot,
- Now on the right-hand side look for and select the Network adapter
- Click run the troubleshooter and follow on-screen instructions,
- Restart windows after completing the troubleshooting process,
- Now check if you have a stable network and internet connection.
Reset your network adapter
If the troubleshooter didn’t fix the problem, you can reset all your network adapters using the steps below.
- Press Windows + X select Settings,
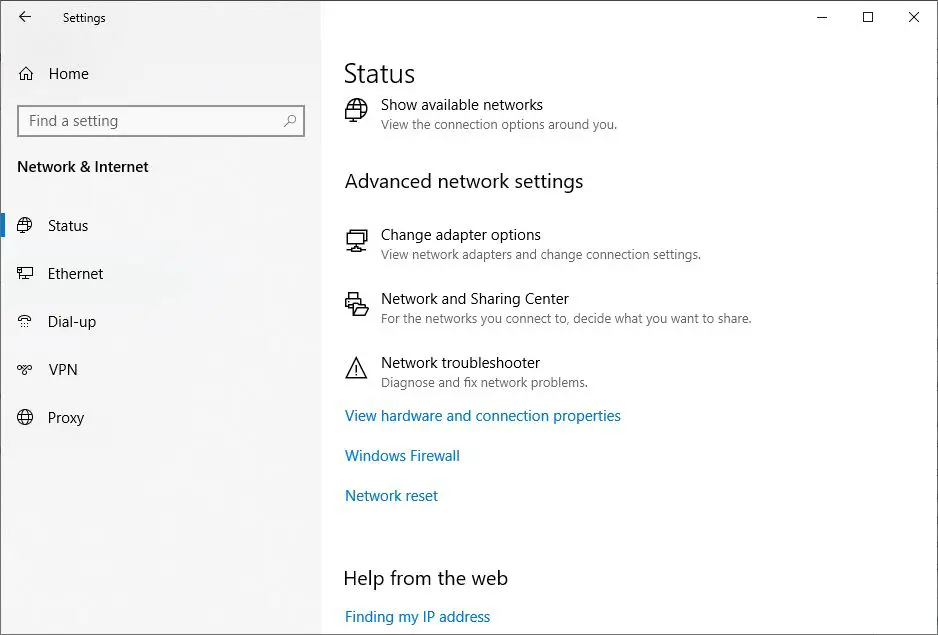
- Click on Network & Internet, then Status,
- Finally, Click on the Network reset link,
- Click the Reset now button,
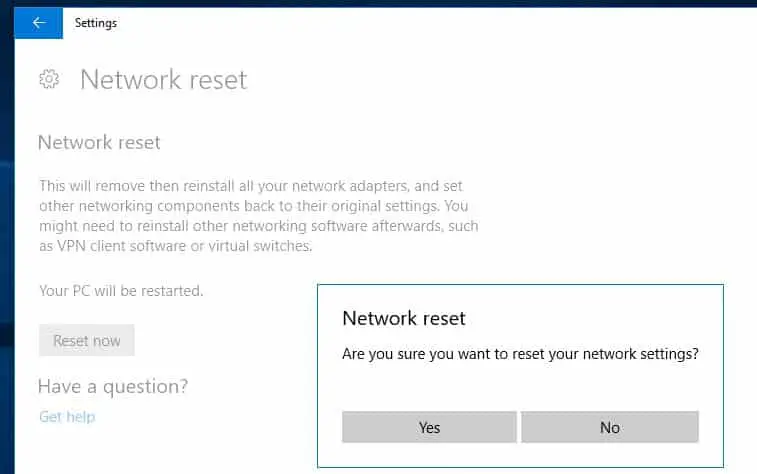
Using this process, Windows 10 will automatically reinstall every network adapter that has been configured on your device, and it’ll reset your network settings to their default options. Restart windows and check There is no more problem with the WiFi connection.
Reinstall WiFi driver
If the above solutions didn’t fix the problem for you, Still WiFi disconnecting frequently. Then reinstall the Driver software for WiFi Adapter, most probably solve the problem.
To Uninstall and Reinstall the Network Card Drivers.
- Press Windows + X select Device Manager,
- This will display all installed drivers list,
- Expand network adapter,
- Right-click on installed WiFi adapter, select uninstall device,
- Click yes, if ask for confirmation,
- Restart Windows to completely remove the driver software,
- On the next start windows automatically installs the network adapter.
Also, you can Go to the Computer or Network Card manufacturer’s website and search for the latest Windows 10 drivers available for the Network Card model and then install it by following the instructions given on the website.
Check Power Management Issues
It is quite possible that your computer is automatically turning OFF its WiFi Adapter in order to conserve power. Since this power-saving feature appears to be interfering with your WiFi Network, you are quite justified in Turning Off this feature.
- Again open Device Manager using Windows + X,
- Expand network adapters,
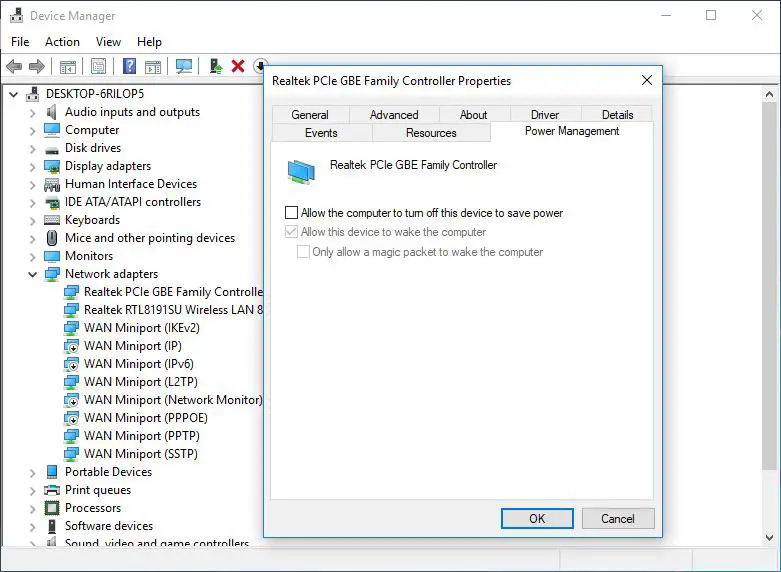
- Right-click the installed Network adapter, select properties,
- Navigate to Power Management Tab
- Here uncheck “Allow the computer to turn off this device to save power.“
- Click OK and close the Device Manager.
Reset TCP/IP to Default
The ultimate solution is resetting the TCP/IP configuration to Default settings.
Open the command prompt as administrator, then perform the commands below one by one.
- netsh winsock reset
- netsh int ipv4 reset
- ipconfig /release
- ipconfig /renew
- ipconfig /flushdns
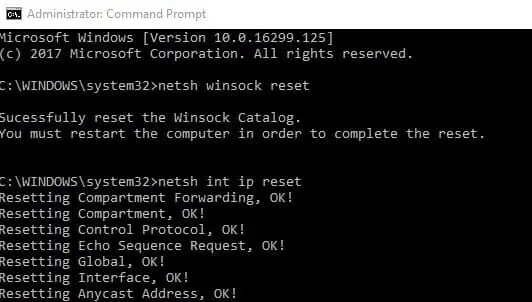
Restart Windows after performing all these commands and check this must fix the problem for you.
Did these solutions help to fix the WiFi keeps disconnecting issue on Windows 10? Do let us know in the comments below, also read:
- Printer only print one page then hangs until reboot Windows 10
- How to disable the Windows SmartScreen filter in Windows 10
- Solved: ERR_NETWORK_CHANGED Google Chrome Error
- Fix This App Has Been Blocked For Your Protection in Windows 10
- Windows 10 Stuck on Welcome Screen? Here 5 working solutions to get rid this







Thanks!!!! the Reset TCP/IP to Default method ended up fixing it for me. Greatly appreciated
Still not solved, my problem is the pc is only read the Ethernet network and not read the wireless network
Also if i open the device manager, it doesnt show the driver of wireless connection
Only show me the Ethernet driver
I have tried Everything and nothing works, what gets me is that WiFi works in my Linux partition but not in windows. I want WiFi in windows too!
I have come to figure out a different solution to this, which may help some people, or it may not.
Make sure you are NOT hardwired with an Ethernet/LAN cable.
Go into Settings>Network And Internet>Ethernet
Here you may see Ethernet 0, Ethernet 1, or Ethernet 2
If any of them says anything other than “Not Connected”, that is your culprit.
Make note of which one it is, then open “Change adapter settings” from the right hand side.
In this new window that opens, Right click on the Ethernet # that we’ve identified as the culprit, and select “Disable”.
As long as you have your Wifi setting to startup automatically, and your wifi network is in range, your computer should automatically connect to the internet now.
This is what I did, and this was the solution for me.