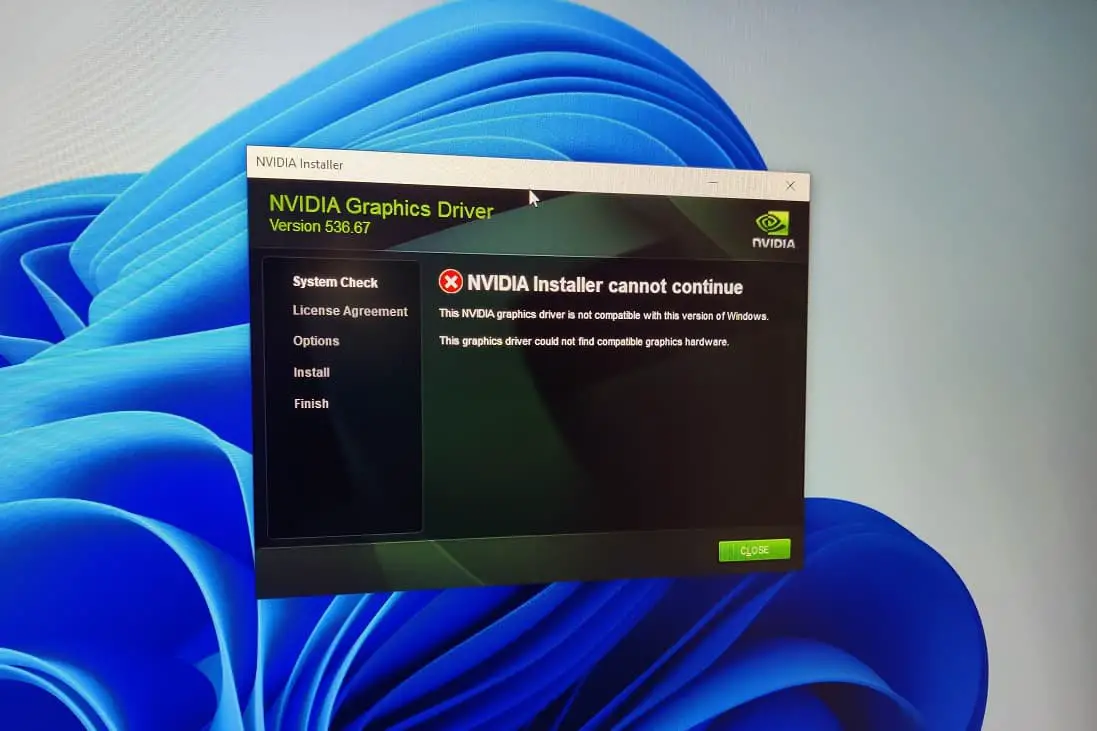
Nvidia GeForce Game Ready Drivers are specifically optimized to provide the best gaming experience for users by offering performance improvements, bug fixes, and support for the latest gaming titles. However at times while updating or installing the latest GeForce Game Ready driver, you may encounter an error message stating, “GeForce Game Ready Driver Installation Can’t Continue.” This article explores the common reason why NVIDIA driver installation can’t continue on your system and solutions to fix the problem install GeForce Game Ready Drivers on Windows 11.
Contents
Why GeForce Game Ready Drivers not installing?
There are different reasons why GeForce Game Ready driver installation can’t continue on Windows 11. The installer file is corrupted, Conflicts with existing drivers or software or Antivirus or security software block or interfere with the driver installation are common.
Again it may be due to insufficient administrative privileges or lack of storage space on the system driver Geforce Game Ready driver installation can’t continue on Windows 11.
What to do when NVIDIA driver installation can’t continue
Downloading and installing the particular driver from the official website, help most users fix the issue. Also, you could try to install the NVIDIA driver with administrative permission. Sometimes you need to install the driver in compatibility mode to bypass the error.
Also ensure the latest Windows updates are installed, and Temporarily Disable Antivirus Software before try install the Nvidia GeForce Game Ready Drivers on Windows 11.
Restart windows 11
Sometimes this error is caused due to temporary glitch, and you need to reboot Windows 11 to get it resolved. When you restart your computer, it clears temporary files, resets certain system configurations, and closes any conflicting processes that might be interfering with the driver installation.
Also, check and ensure the system driver (usually its C drive) is not full.
Temporarily Disable or uninstall Antivirus software and try run the installer as administrator.
Download latest NVIDIA driver
You may be getting “GeForce Game Ready Driver Installation Can’t Continue” error due to a corrupted driver installer. Or you might try to install older driver that is not compatible with the latest Windows 11. Let’s download the latest driver version, and ensure you have a fresh, uncorrupted file, reducing the chances of encountering installation issues.
- Visit the official Nvidia website (www.nvidia.com) and navigate to the “Drivers” section.
- Enter your graphics card model and operating system information, and ensure the download type is selected Game Ready Driver.
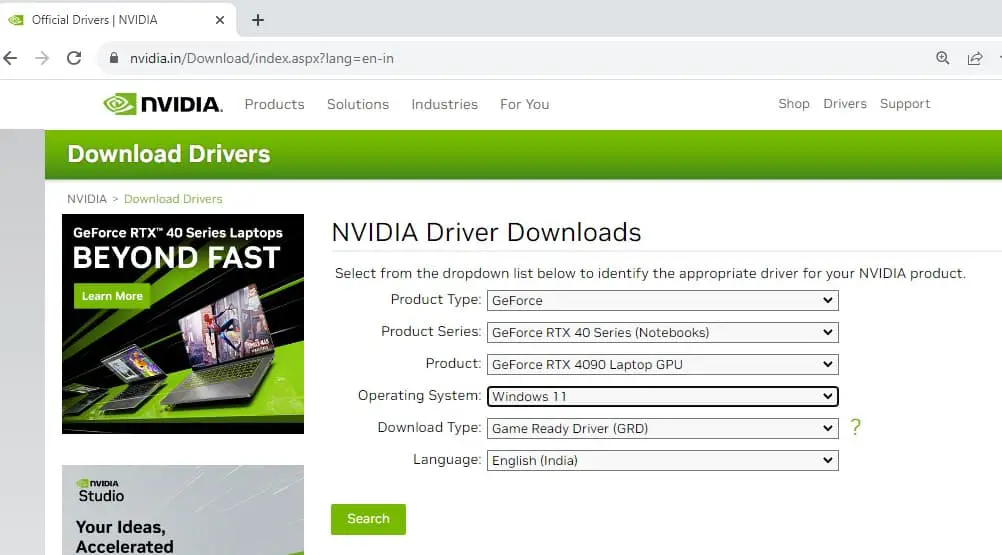
- Click search to find the latest GeForce Game Ready Driver.
- Download the driver and save it to a location you can easily access.
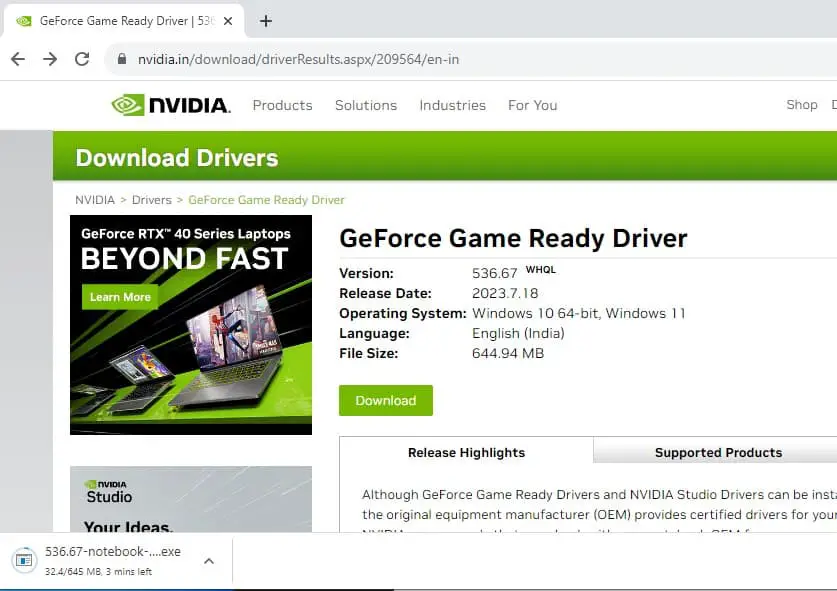
Run the Installation with Administrative privileges
Insufficient administrative permissions can prevent the driver installer from accessing and modifying essential system files, causing the error. Running the installer as an administrator grants the necessary privileges for a successful installation.
Remove existing NVIDIA driver (if installed previously)
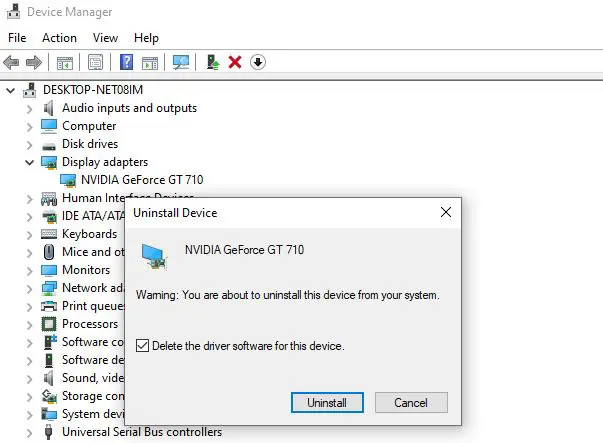
Open Device Manager, and expand display driver. Right-click on the installed NVIDIA driver select uninstall And reboot your PC.
- Locate the downloaded GeForce Game Ready Driver installer file (usually ending with “.exe”).
- Right-click on the installer file and select “Run as administrator” from the context menu.
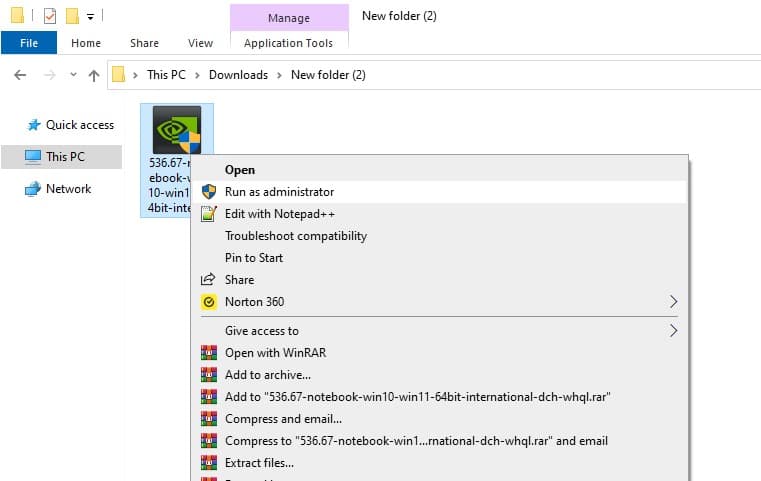
- If prompted for permission, click “Yes.”
- The installer will now have the necessary administrative privileges to proceed with the installation.
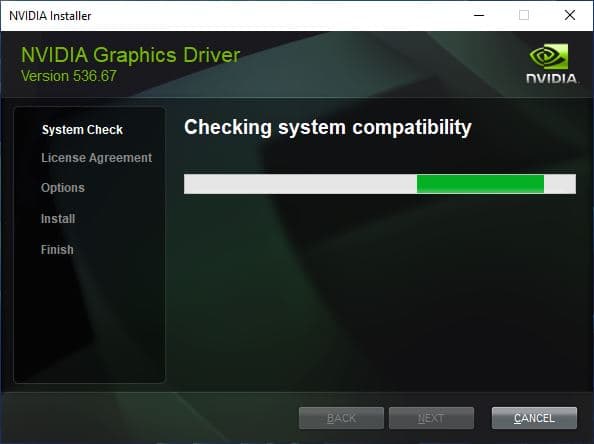
Perform a Clean Installation
Incomplete or conflicting driver installations from previous attempts can cause the error. Performing a clean installation ensures that all remnants of the old driver are removed, allowing for a fresh installation without conflicts.
First Download the “Display Driver Uninstaller (DDU)” tool from its official website here.
Nex Restart your computer in Safe Mode. To do this, press the “Windows + R” keys, type “msconfig,” hit Enter, go to the “Boot” tab, check “Safe boot,” and select “Minimal.” Restart your computer when prompted.
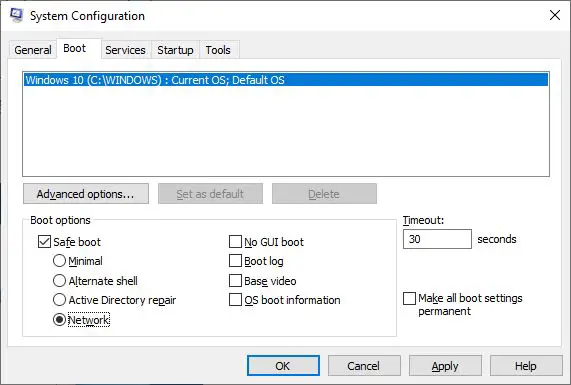
- After booting into Safe Mode, run the DDU tool you downloaded earlier.
- In DDU, select your GPU manufacturer (Nvidia) and click “Clean and Restart.”
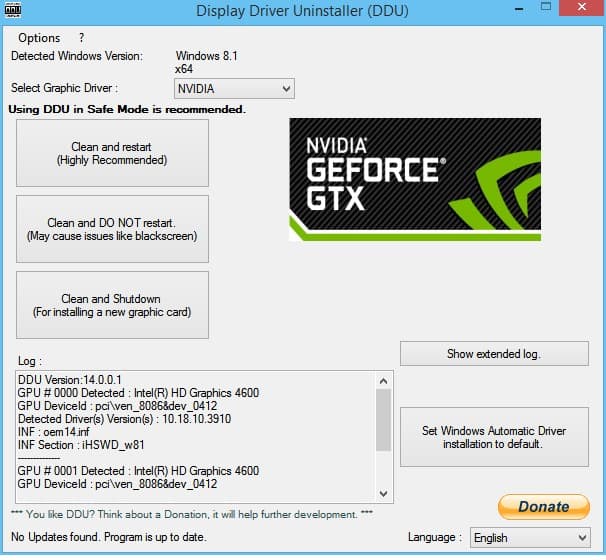
- Once the cleaning process is complete, your computer will automatically restart in normal mode.
- Proceed to install the downloaded GeForce Game Ready Driver.
Run the Installer in Compatibility Mode
Running the driver installer in compatibility mode allows it to mimic an earlier version of Windows, which can help bypass compatibility issues and enable successful installation on Windows 11.
- Locate the downloaded GeForce Game Ready Driver installer file (usually ending with “.exe”).
- Right-click on the installer file and select “Properties” from the context menu.
- In the Properties window, navigate to the “Compatibility” tab.
- Check the box next to “Run this program in compatibility mode for:” and select an earlier version of Windows from the drop-down menu (e.g., Windows 10).
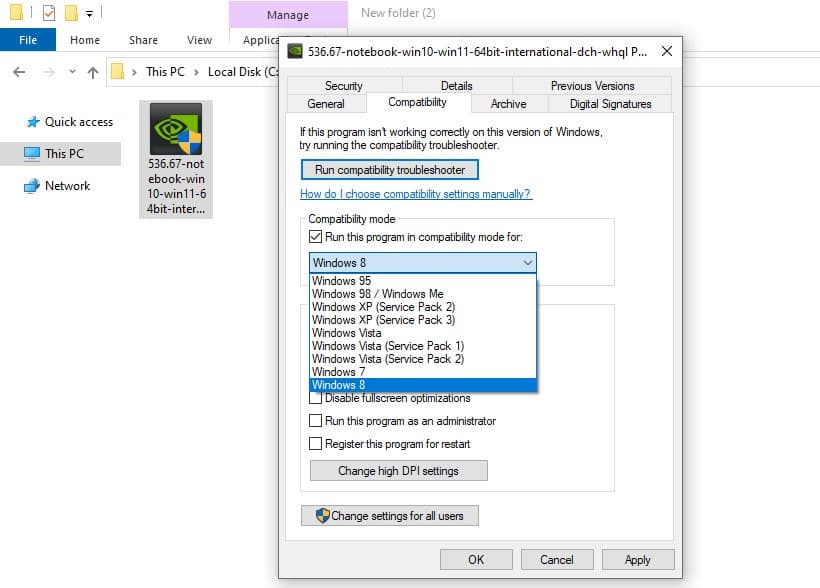
- Click “Apply” and then “OK” to save the changes.
- Double-click the modified installer file to run it.
Rename the NVIDIA Graphics Folder
Renaming the NVIDIA Graphics folder effectively disables the current driver and its associated settings. This step is particularly useful when there are remnants of an old or corrupted driver that are interfering with the new driver installation. Renaming the folder allows the installer to create a new, clean directory during the installation process, potentially resolving the error.
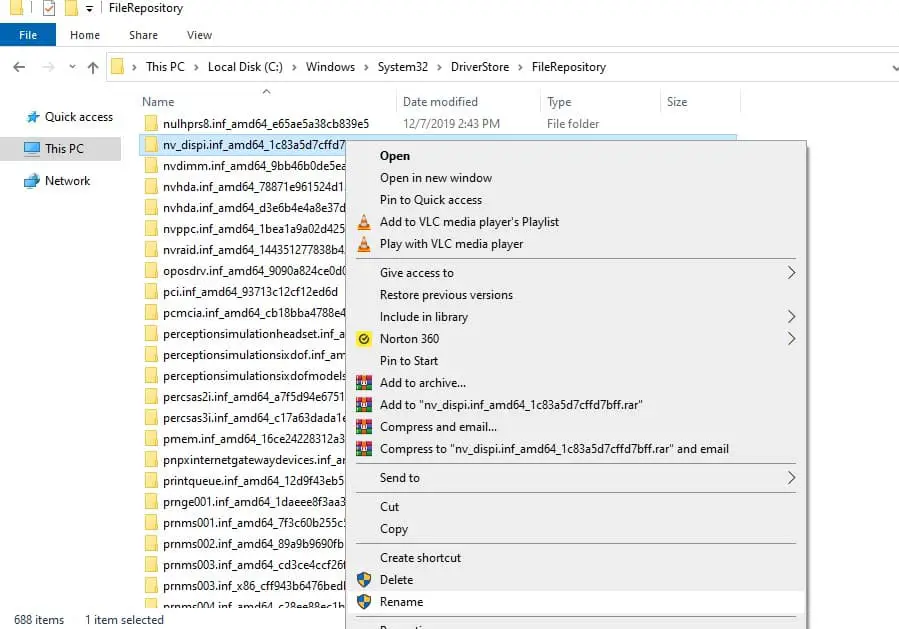
- Press “Windows + E” to open File Explorer and Navigate to the following location: “C:\Windows\System32\DriverStore\FileRepository”.
- Within the “FileRepository” folder, locate the folder with “nv_disp” or “nv_dispi” in its name. This is the NVIDIA Graphics folder.
- Right-click on the NVIDIA Graphics folder and choose “Rename.”
- Change the folder name to something like “NVIDIA Graphics_old” or any other name of your preference.
- Restart your computer to apply the changes.
After restarting, try installing the GeForce Game Ready Driver again.
Temporarily Disable Antivirus Software
Antivirus or security software may sometimes mistake Nvidia’s driver installer as a potential threat, blocking its installation. Temporarily disabling the antivirus software can prevent any interference during the installation process.
- Access the system tray (located on the taskbar) and right-click on your antivirus software icon.
- Look for an option to “Pause” or “Disable” the antivirus protection.
- Select the appropriate duration (e.g., 15 minutes, 1 hour, or until the next restart) to disable the antivirus temporarily.
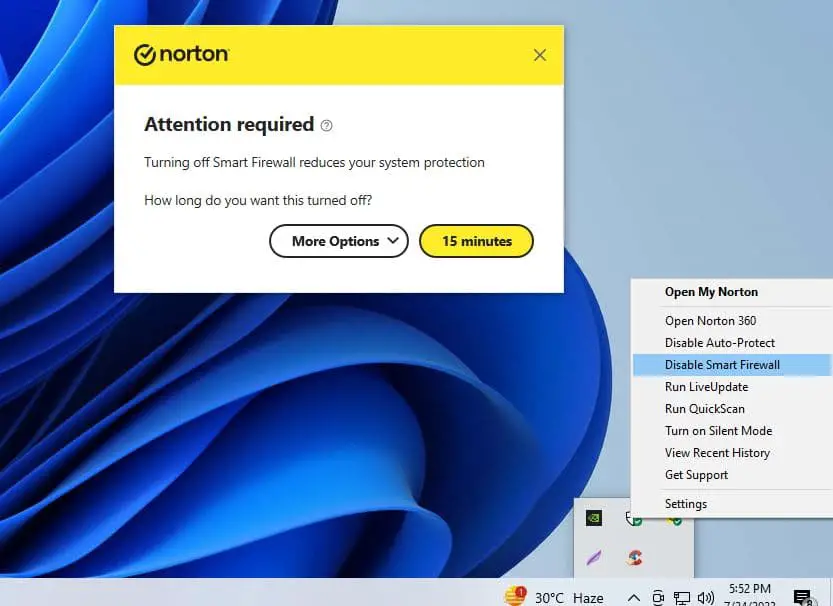
- Begin the GeForce Game Ready Driver installation while the antivirus is disabled.
Install Windows 11 Update
Issues with Windows Update services or pending updates can hinder the driver installation. Ensuring that your Windows operating system is up to date can resolve compatibility problems.
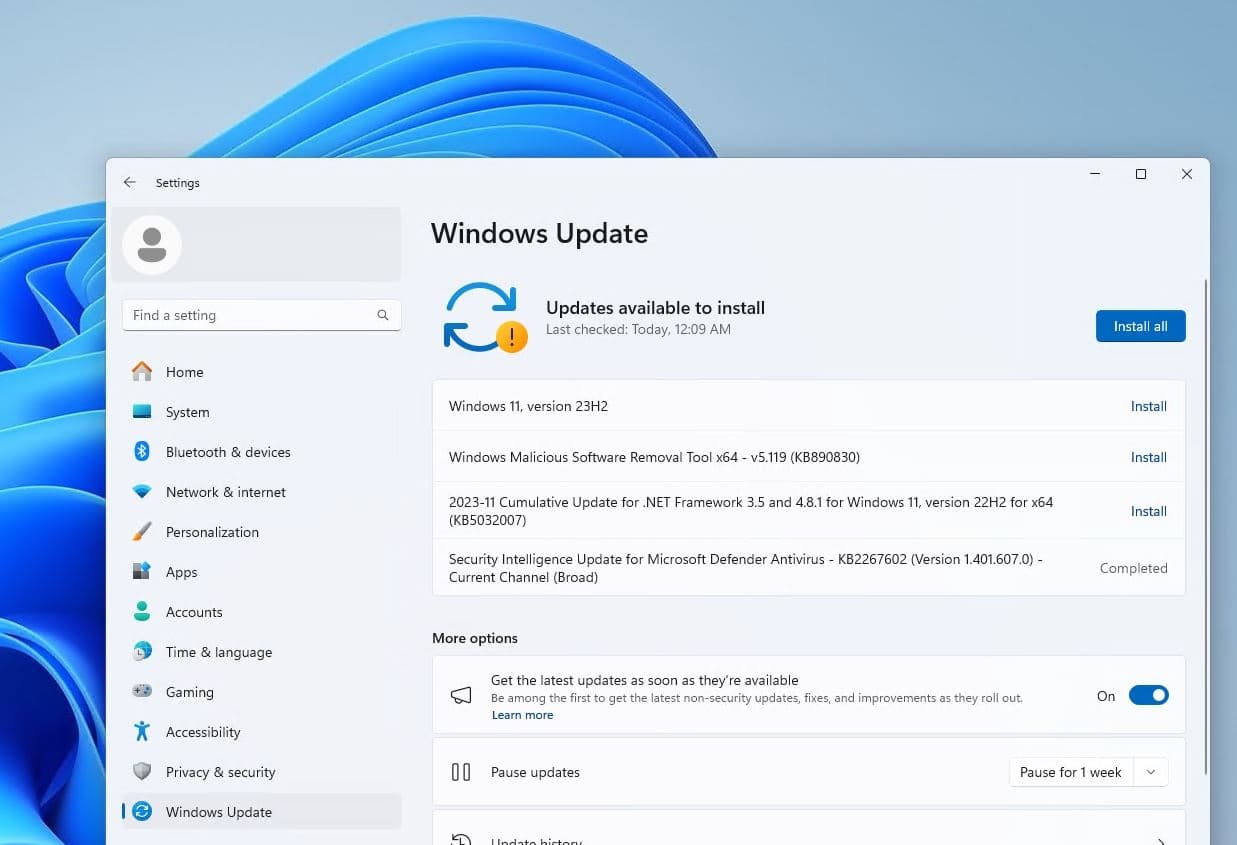
- Press the “Windows + I” keys to open Windows Settings.
- Go to “Windows Update” in the left pane and Click “Check for updates“
- If updates are available, allow download and install them.
- Once done reboot your PC to apply changes.
Now run the NVIDIA GeForce Game Ready Driver installation with administrative permission.
Also read:
- Solved: Nvidia GeForce Experience Error Code 0x0003 on Windows 11
- Solved: NVIDIA Control Panel not Opening after Windows 10 update
- Laptop Stuck Getting Windows ready Don’t turn off your computer? Try these solutions
- How to update your NVIDIA Graphics driver on Windows 10
- Solved: The network adapter is not working after Windows 10 update
- Are VPNs Legal In My Country? Let’s Break That Down

