Microsoft regularly releases updates for Windows 11 to address various aspects of the operating system. And install the latest Windows updates address known issues, improving system stability and performance. But still bugs or glitches present there, sometimes you may experience Laptop sound not working after Windows 11 update. Affected users report that sound has stopped working on Windows 11.
There may be several reasons, why Windows 11 sound not working, wrong configuration of audio settings, audio service not running or outdated audio driver are common. This article explores the reason why Windows 11 Audio not working and how to Troubleshoot Audio Problems in Windows 11.
How To Fix Windows 11 Sound Not Working
There are multiple reasons cause Dell laptop Sound not working on Windows 11. If the problem started after the Windows 11 update, it may be audio drivers become outdated or incompatible with the new operating system and causing the problem.
Sometimes you may experience No sound problem due to hardware-related issues, Incorrect Audio Settings or Certain required audio services might be disabled.
To fix such problems you need to check volume isn’t muted, and also make sure the correct output device is chosen. Again Restarting certain audio services can feasibly resolve Windows 11’s sound issues.
Restart windows 11
Whenever you experience a problem with Windows 11, reboot your PC help resolve various issues including sound-related problems in Windows 11. Restart Windows 11 wipe up system memory, reset system processes and clear temporary configurations that might be causing conflicts or errors.
- Click on the “Start” button in the taskbar or press the Windows key on your keyboard.
- In the Start menu, click on the power icon located at the bottom left.
- From the power options, select “Restart.”
In addition, If you are connected external sound device Make sure its cable connection isn’t loose. Check that your speakers are connected to the correct audio output and speakers are turned on.
Run Audio troubleshooter
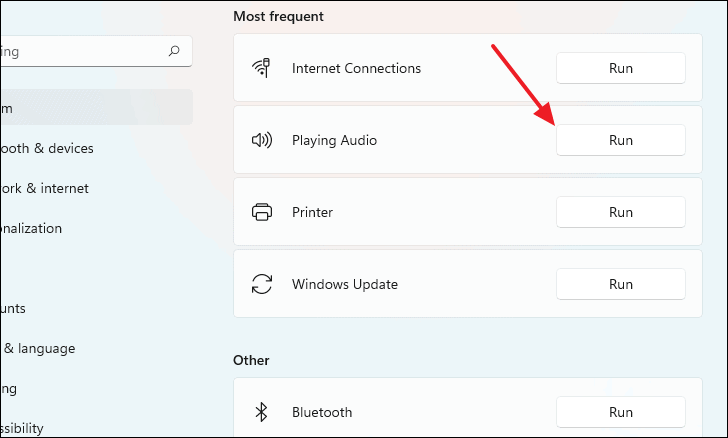
This is one of most effective methods to diagnose and potentially resolve sound-related issues on Windows 11. The built-in Playing Audio troubleshooter is designed to automatically detect and fix common audio problems on your device. Let’s run the troubleshooter and let Windows detect and fix the problem automatically.
- Press Windows key + I to open the settings app
- Go to the system then troubleshoot and click on Othertroubleshooters,
- And click Run next to playing Audio to start the Audio troubleshooter.
The troubleshooter scans your system for audio issues, check the driver and related services running, attempts to automatically resolve detected problems or provides you with instructions on how to fix them manually.
Update windows 11
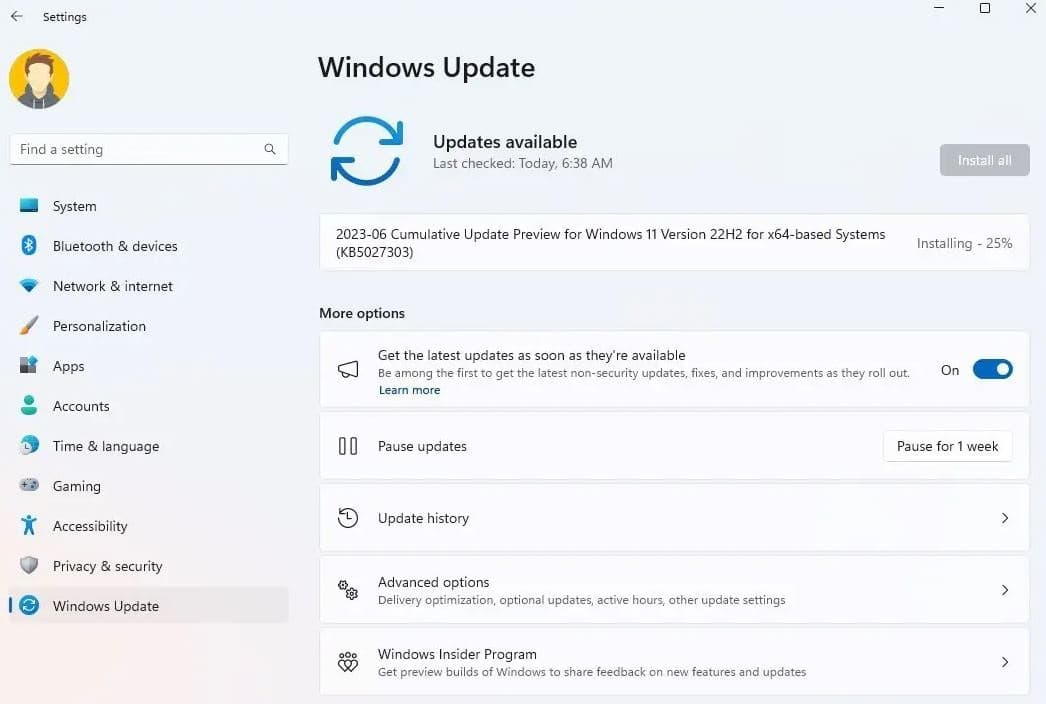
Again Outdated versions of Windows 11 can potentially contribute to various issues, including sound problems. Updating Windows 11 to the latest version can help resolve such issues, including sound problems on your computer.
- Press the Windows key + I to open the settings app,
- Go to windows update then hit the check for Updates button,
- If updates are found, click on the “Download and install” button to begin the update process. Make sure you have a stable internet connection as the update files can be large.
- Once done reboot your PC to apply changes, now check if the audio sound is restored on your laptop.
Check Windows 11 audio settings
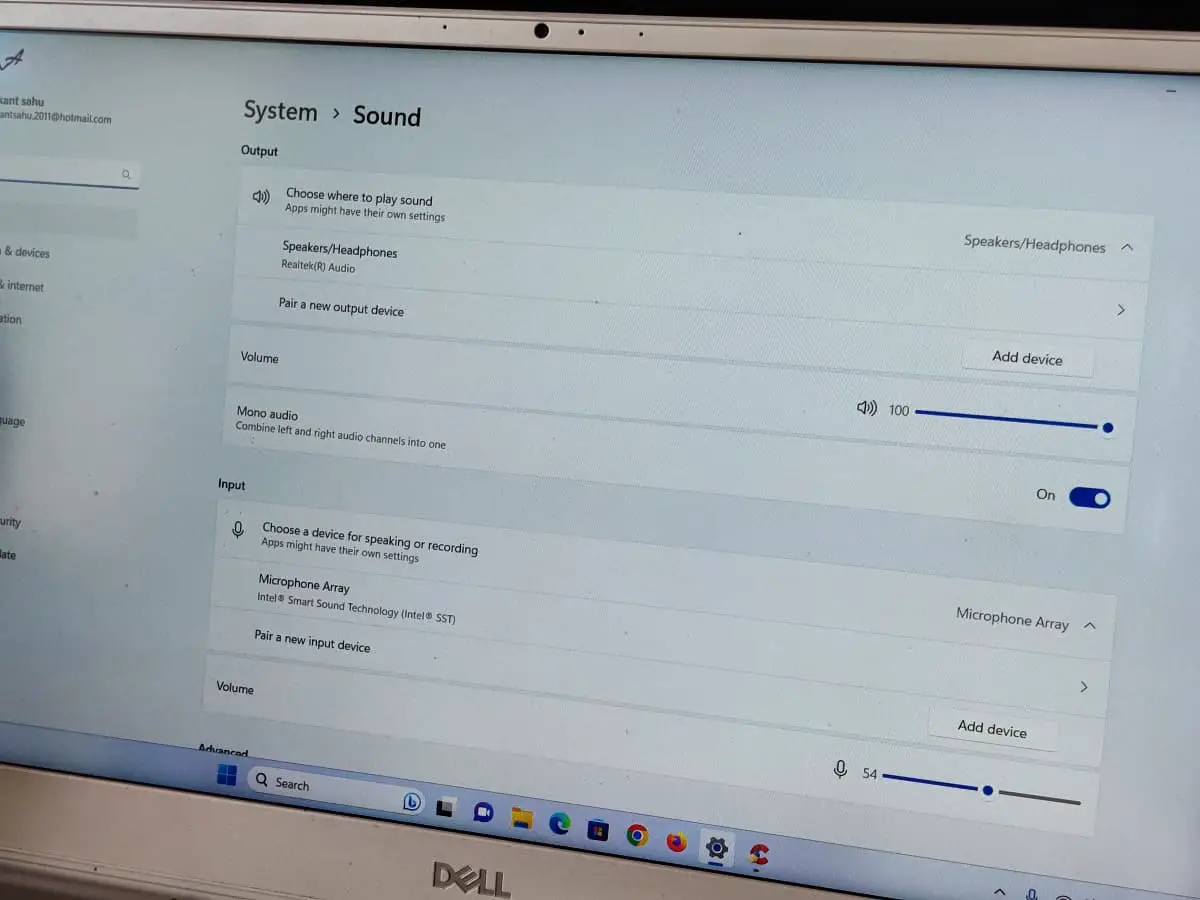
Sometimes due to incorrect audio configuration or any other reason may sound stopped working on your laptop. And Checking the audio settings in Windows 11 can help identify any configuration issues that might be causing No sound problems on Windows 11.
- Locate the sound icon on Taskbar, right-click on it select Open Sound settings.
- Alternatively, press the Windows key + I to open settings and navigate System then sound in the right panel.
Here under the output section Ensure that the correct output device is selected. If you’re using speakers or headphones, make sure they are properly connected to your computer and selected as the default output device in the Sound settings. If your audio device isn’t listed there, click Add Device to add it.
Next to Volume ensure that the volume is not muted and is set to an appropriate level. You can use the volume slider in the Sound settings to adjust the volume accordingly.
Also, Toggle on the Mono audio option.
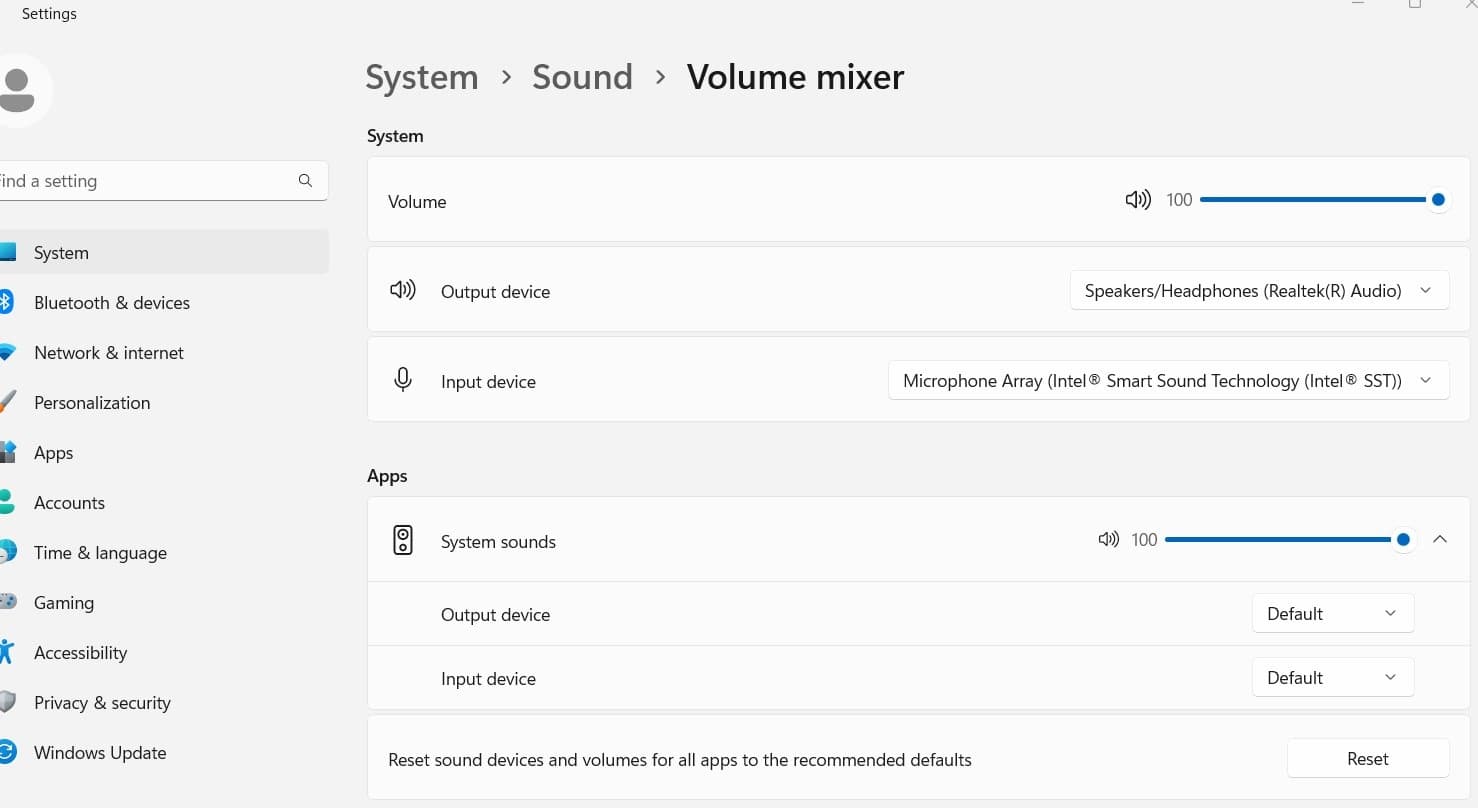
- Next Select Volume Mixer in the advanced settings and ensure the Volume and System sound bars are dragged firmly to the right for full audio.
- Expand System sounds and Select Default on the Output device drop-down menu if that setting isn’t selected.
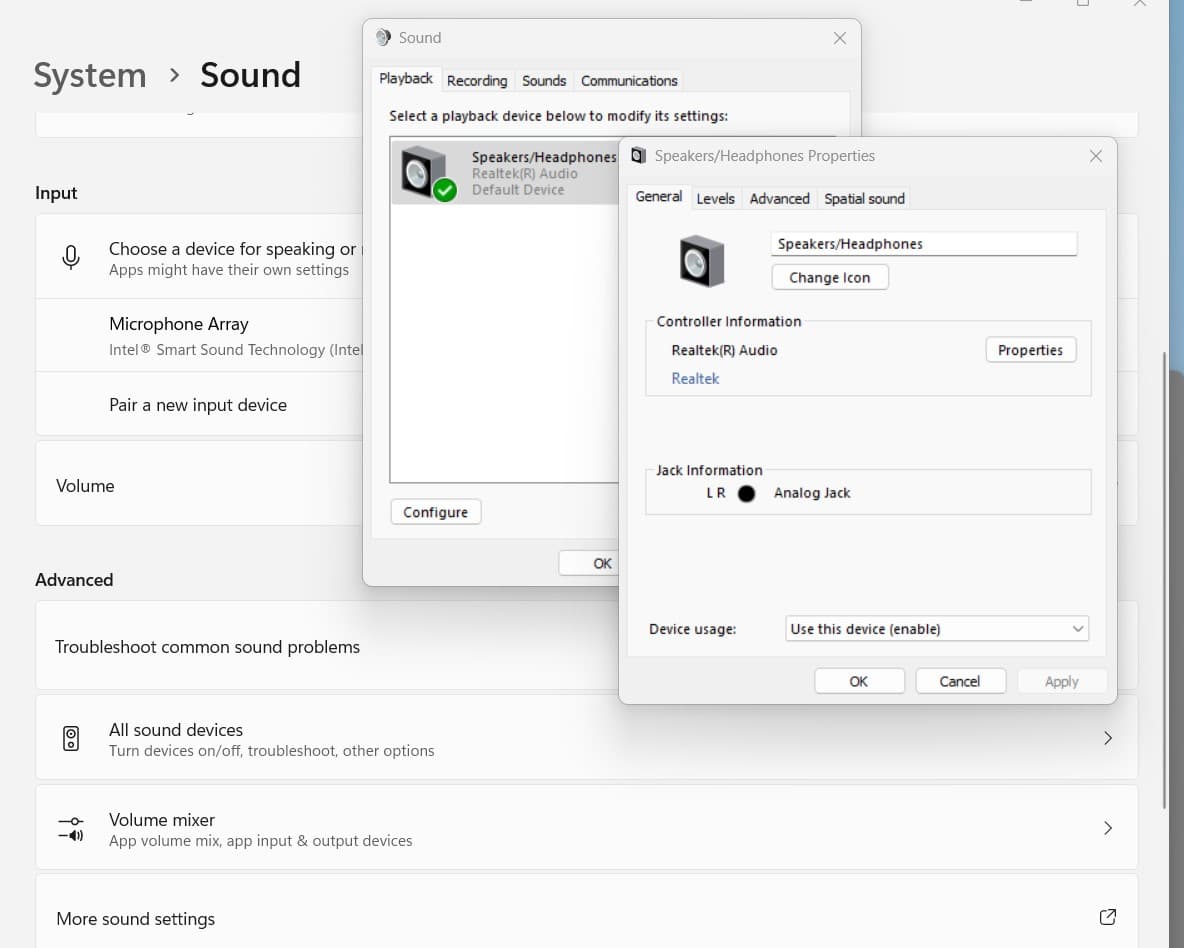
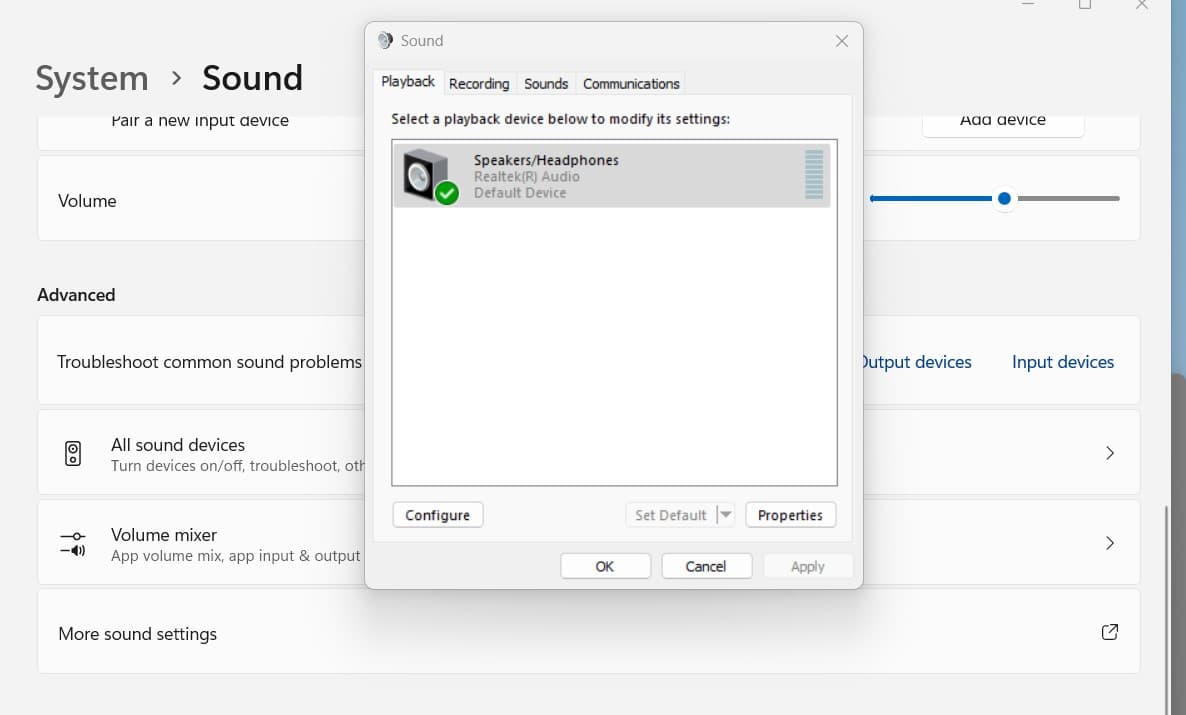
Next on the Advanced section click on More sound settings, Select the ” Playback ” tab and click ” Properties “.
Restart the Audio Service
The Audio Service is responsible for managing audio playback and related functionalities on your device. If due to some reason audio service not running or stop responding it may cause Windows 11 sound not working. And Restarting this service can help refresh its functionality and resolve any temporary glitches or conflicts.
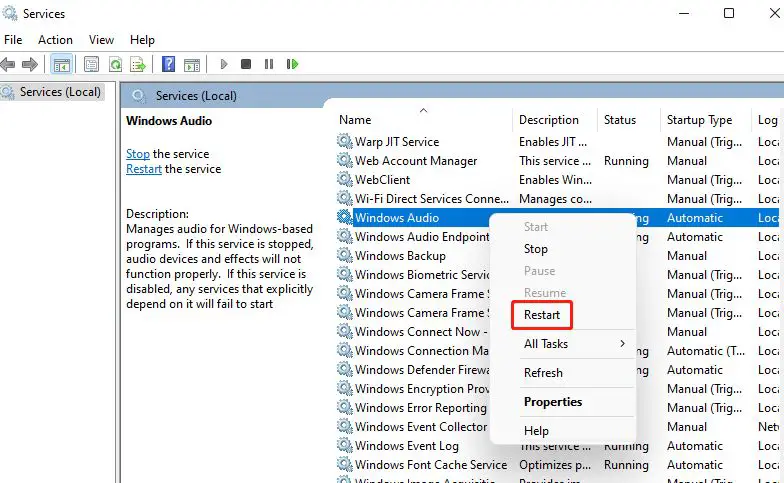
- Press Windows key + R, type services.msc and click ok
- This will open the Services window, scroll down and locate “Windows Audio” right click on it select restart.
- Next, locate “Windows Audio Endpoint Builder” service right click on it select restart.
- Now check if you can hear audio from your Laptop.
Update Audio Drivers
In most of cases, Outdated or incompatible audio drivers can lead to sound problems after a Windows 11 update. Let’s check and update the audio drivers, and ensure that your audio hardware is properly recognized and functioning with the latest software enhancements.
- Press the Windows key + X on your keyboard and select “Device Manager” from the menu that appears.
- This will display a list of installed devices and peripherals connected to your PC
- Locate and expand the “Sound, video, and game controllers” category to reveal the audio devices installed on your computer.
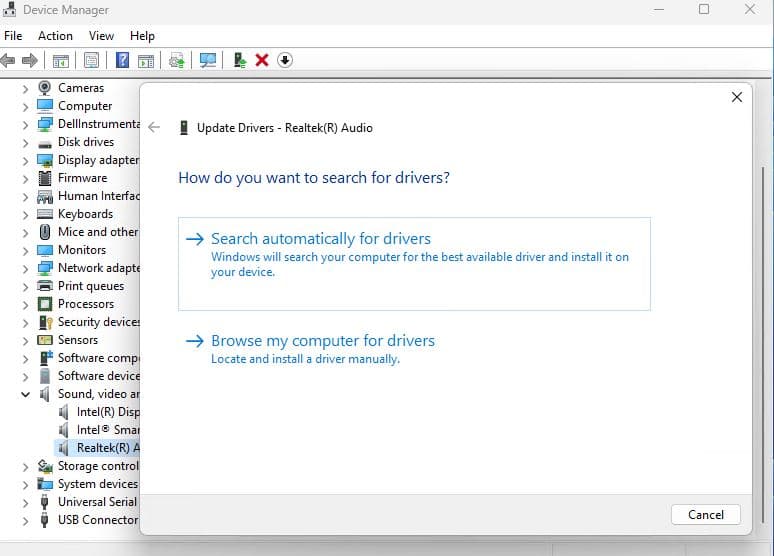
- Right-click on your audio device (e.g., Realtek, Intel, etc.) and select “Update driver” from the context menu. This will initiate the driver update process.
- Next, select the option to search automatically for updated driver software and follow on screen instructions.
Alternatively, you can select ” Browse my computer for drivers ” if you want to install the audio driver manually.
- Windows will then connect to the internet and search for the latest driver updates for your audio device and install them.
- Once done reboot your PC and check if the Windows 11 sound not working resolved.
Disable Audio Enhancements
Some audio enhancements or effects provided by the sound card or driver might conflict with Windows 11, causing sound problems. Lets Disable Audio Enhancements and check if this helps.
To disable audio enhancements:
- Right-click on the sound icon in the taskbar and select “Open Sound settings.”
- Click on “Device properties” under the “Output” section, then navigate to the “Additional device properties” link.
- In the new window, go to the “Enhancements” tab and check the “Disable all sound effects” box.
Reinstall Audio Drivers
If the above solutions didn’t fix the problem, Reinstall the audio driver help resolve the sound issue in Windows 11. This will ensure that the audio driver files are properly installed and configured, which can potentially fix any corrupted or misconfigured driver settings.
- Press the windows key + X and select “Device Manager.”
- Expand the “Sound, video, and game controllers” category, right-click on your audio device, and choose “Uninstall device.”
- n the confirmation prompt, check the box that says “Delete the driver software for this device” if it’s available, and then click on “Uninstall.”
- Once done restart your computer. This will allow Windows to detect the audio hardware and reinstall the driver automatically.
Also you can navigate to the manufacturer’s website for your sound card or motherboard and download the latest drivers compatible with Windows 11. Install the drivers and restart your computer to apply the changes.
If Dell laptop sound not working after a recent Windows update, performing a system restore to a previous point in time may help. Open the Start menu, search for “System Restore,” and launch the corresponding utility. Follow the on-screen instructions to select a restore point from before the update, and let Windows restore your system to that state. Note that this will undo any changes made after the selected restore point.
Also read:
- 5 ways to Reset Audio Settings on Windows 11 (Fix No Audio Problem)
- How to Reset and reinstall Microsoft Store on Windows 11/10
- Solved: MsMpEng.exe High CPU usage on Windows 11
- Laptop Battery Draining Faster Than Usual? Battery saving tips for Windows 11
- Solved: Your DNS Server Might Be Unavailable In Windows 10
