
The laptop wifi says No Internet Connection after Windows 10 update. Windows 10 is losing WiFi signal strength and says “No Internet Connection” while other devices are connected just fine. Other times you may see “WiFi Connected but no Internet Access” on your Laptop, prevents you from accessing websites, using online services, and checking emails. This article explores the reasons why wifi says no internet connection, and how to fix the WiFi problem on Windows 10 Laptops.
WiFi Connected but no Internet Access
There are various factors may cause No Internet problems on Windows 10 Laptop, low signal strength, problems with WiFi routers or incorrect network configuration is common.
Again Outdated, corrupted, or incompatible network drivers can lead to connectivity issues, preventing the laptop from accessing the internet.
If WiFi is Connected but it says no internet connection run the built-in troubleshooter automatically detects and restores internet access on Windows 10.
Also update the wireless driver and Resetting your network settings is a great way to fix all WiFi problems on your Laptop.
Restart Your Laptop and Router
Sometimes, a simple restart can fix various connectivity issues.
- Let’s first Turn off your laptop completely, Then unplug the power adapter from your WiFi router.
- Wait for about 30 seconds and then plug the power adapter back into the router.
- Turn on your laptop and see if the “No Internet” issue is resolved.
In addition, Ensure the WiFi is enabled on your laptop. Look for a physical WiFi switch or press the function key (usually Fn) + the corresponding WiFi key (usually an F-key with an antenna icon) to toggle the Wi-Fi on or off.
Check the WiFi signal on your Laptop, if it’s weak take it closer to the WiFi router for better results and improve internet speed.
Run Internet Troubleshooter
Windows 10 comes with built-in troubleshooters that can automatically diagnose and fix common network-related problems. Let’s first run the troubleshooter related to the internet and allow Windows 10 to fix the problem for you.
- Press Windows key + X and select settings
- Go to Update & Security then Troubleshoot and click on additional troubleshooters.
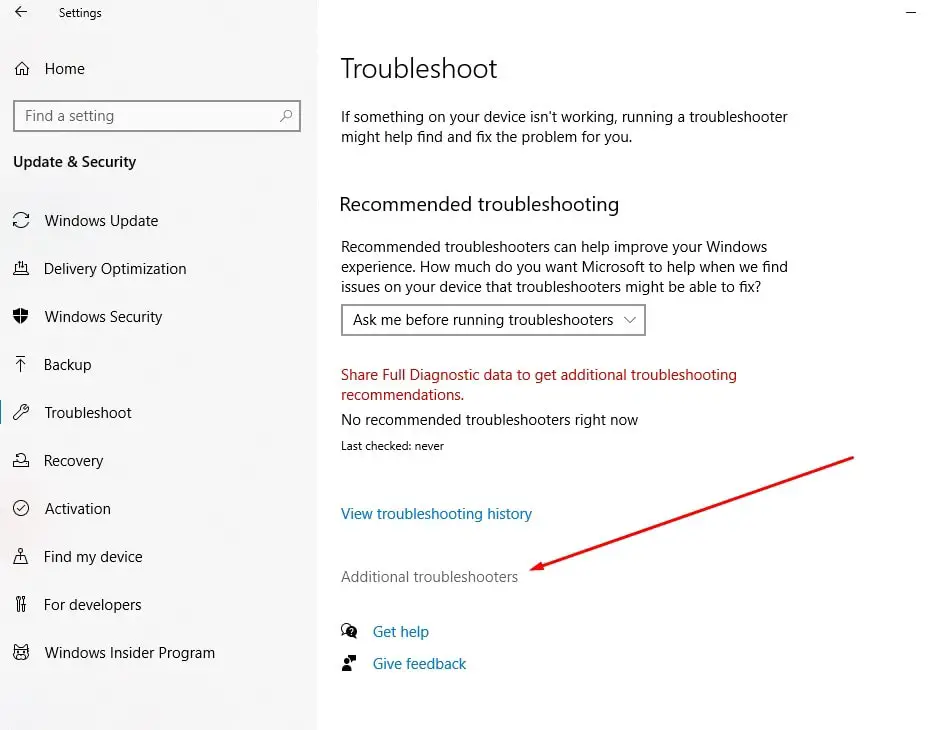
- This will display a list of available troubleshooters, select internet then click Run the troubleshooter.
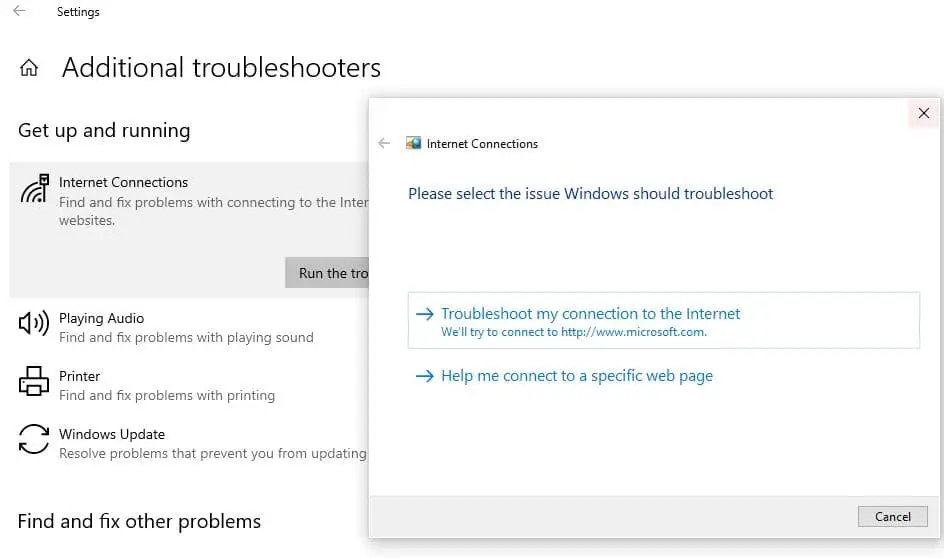
- Windows will run the troubleshooter and attempt to identify and fix the issue. Follow the on-screen instructions.
- In addition, locate the network and click Run the troubleshooter to fix problems related to the wifi adapter and its related drivers.

Once done, reboot Windows 10 and check if this help fix WiFi Connected but no Internet Access on Windows 10.
Flush DNS and Reset TCP/IP configuration
Corrupted DNS and incorrect TCP/IP settings can lead to connectivity problems. To resolve this, flush DNS and reset TCP/IP configuration probably fix the issue of wifi says no internet connection on Windows 10.
Press Windows key + S, type “Command Prompt” in the Windows search bar, right-click on “Command Prompt,” and select “Run as administrator.”
Now run the following commands one by one, pressing Enter after each:
ipconfig /flushdns
netsh int ip reset
netsh winsock reset
ipconfig/ release
ipconfig/ renew
The above command reset the network settings and fix things prevent internet access on Windows 10. Let’s reboot your Laptop and check if the internet connection is restored or not.
Change DNS address
Changing DNS server address with Google’s public DNS helps a number of users to fix the problem of WiFi Connected but no Internet Access on Windows 10.
DNS servers are responsible for translating human-readable domain names (like www.example.com) into IP addresses that computers use to identify and access websites.
- Press Windows key + R, type ncpa.cpl and click ok
- Right-click on your active WiFi connection and select “Properties.”
- Scroll down and select “Internet Protocol Version 4 (TCP/IPv4).” Then, click the “Properties” button.
- In the TCP/IPv4 Properties window, select “Use the following DNS server addresses ” and set Preferred DNS server: 8.8.8.8 Alternate DNS server: 8.8.4.4

- Click “OK” to save the changes and close the windows.
Restart your Windows 10 laptop to apply the new DNS settings.
Update WiFi Adapter Driver
Outdated, corrupted, or incompatible WiFi drivers can cause connectivity problems, leading to the inability to access the internet despite being connected to a WiFi network. And update the Wi-Fi adapter driver on your Windows 10 laptop help fix things for you.
- Right-click on the Start button and select “Device Manager.”
- In the Device Manager window, expand the “Network adapters” section.
- Right-click on your WiFi adapter and select “Update driver.”
- Choose “Search automatically for updated driver software” and follow the on-screen instructions.

Windows will then start searching for updates for your Wi-Fi adapter. If a newer driver version is found, it will be downloaded and installed automatically. After the update is complete, restart your laptop to apply the changes.
Also, you can visit the device manufacturer’s site (e.g., Intel, Realtek, Qualcomm Atheros, Broadcom) to download and install the latest wifi adapter driver on your laptop.
Try Network Reset option
If the above solutions fail to fix the problem, and still wifi says no internet connection on your Windows 10 Laptop, you should try reset your network settings. This is an excellent way to clear out any potential configuration errors, IP conflicts, or corrupted settings that might be causing the connectivity problem.
- Press Windows key + I to open the settings app
- Go to Network & Internet then Make sure to stay on the Status tab.
- Scroll down and click on the Network reset link.

A new window will appear, informing you that network reset will remove all network adapters and return all network settings to their default values.
Note- This action will also reinstall all network adapters and set other networking components back to their original settings.
Click on the “Reset now” button, and Yes when it prompts for confirmation.

Windows will then proceed with resetting the network adapter and other network settings. This process may take a few minutes. After the reset is complete, your Windows 10 laptop will automatically restart.
In addition, Disabling and then re-enabling your Wi-Fi adapter can sometimes reset its settings and fix the “No Internet” problem.
Sometimes, Malware can interfere with your internet connection. Run a full system scan using a reliable antivirus program to ensure your laptop is free from malicious software. Sometimes Disable any third-party antivirus apps you may have installed and see if your connection comes back.
If you are using VPNs (Virtual Private Networks) to encrypt and route internet traffic through a different server, which can sometimes lead to conflicts and disrupt normal internet connectivity. By turning off the VPN, you can often restore the regular internet connection and address the “No Internet” problem.
Also read:
