Windows 10 is chock full of temporary files that help the operating system do its job quickly. Occasionally these files’ cache can become corrupted or get so large that they interface with the performance of Windows 10. If you are running low on storage space or notice some unusual behavior such as Windows 10 freezes, takes a long time to shut down or start or web browsers not responding one of the first things you can do is clear the cache.
It’s important to clear the cache on your Windows 10 computer to free up disk space and improve performance.
This small effort not only improve system performance but also Free up lots of disk space for you. Here in this post, we discuss How To clean up Windows 10 Hidden caches Safely.
Contents
What is Cache?
A cache is a non-permanent file (or files) that may be needed again in the future, and is, therefore, kept hidden away until that time comes. Or we can say caching is the mechanism used to make the performance and working of applications better and faster.
How to clear cache windows 10
But some time Cache gets corrupt or damaged cause various problems (Such As apps fail to open, windows updates fails to download and install, Windows store start misbehaving, etc) and most importantly they take up valuable space — and that can be a problem if you have an SSD with limited capacity.
Clear windows update Cache
- Press keyboard shortcut Windows + R, type services.msc and ok to open windows services console,
- Scroll down and locate the windows update service,
- Right-click on the Windows Update service and select stop. Do the same with BITS service.
- Then open File Explorer and from the view menu check the box of “Show hidden folders”.
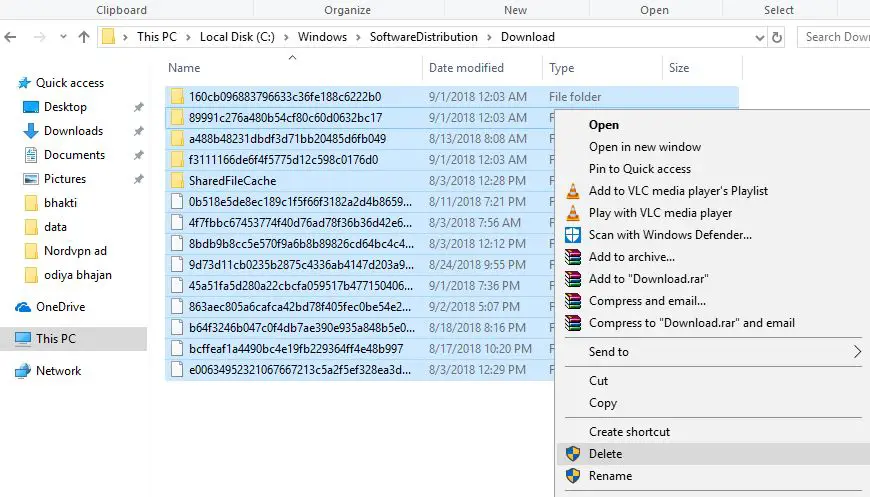
- Now go to this path C:\Windows\SoftwareDistribution\Download
- After reaching to “Download” folder, delete all of its content.
Start the services (windows update, BITS ) which you previously stopped. That’s all this is an easy and simple way to delete your Windows update cache. This will not only free up the system disk but Also fix most of the windows update-related problems on Windows 10 PC.
Clear Microsoft store cache
To Remove the Microsoft store cache the company provides a utility called WSReset.exe that clears the cache for you.
- Press the keyboard shortcut Windows + R, type WSReset.exe and click ok.
- A black window will open and it might seem like nothing is happening, but wait it out.
- It may take a few minutes to delete the cache in the background.
- When all cache will delete the command box will automatically close.
Clear Microsoft store cache is very useful to fix different Microsoft store problems, especially if the Microsoft store is stuck while downloading or updating apps.
Clear temporary files cache
Temporary files are usually created as an intermediary while another file is being created or modified, but they can also hold temporary data that are only needed by a program for a little while. Clear temp cache files are very easy
- Press Windows + R keyboard shortcut type %temp% and ok.
- This will display all temp files available on your PC,
- Use keyboard shortcut Ctrl + A to select all and press Shift + Del on the keyboard to delete them permanently
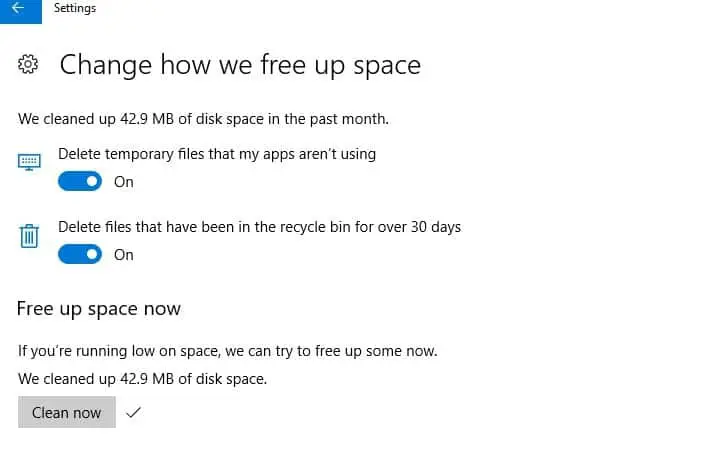
Also, you can delete temp cache files from windows 10 storage sense as well.
- Press Windows + I to open the settings
- Click on System then Storage -> Change how we free up space.
- Here Click on clean now as shown image below.
Clear Windows Thumbnail Cache
Thumbnails are great from a usability standpoint, but where do you think those thumbnails come from? Windows has to generate them on demand. When you use File Explorer to browse folders, every time you encounter a file for the first time, Windows has to create a thumbnail for it.
- Go to the start menu and go “File Explorer” and check the “show hidden folders” checkbox to make them visible. Now go to the following path.
- “C:\Users\Username\AppData\Local\Microsoft\Windows\Explorer”
- And select all files that start with icon cache and delete them permanently by pressing “Shift+delete”.
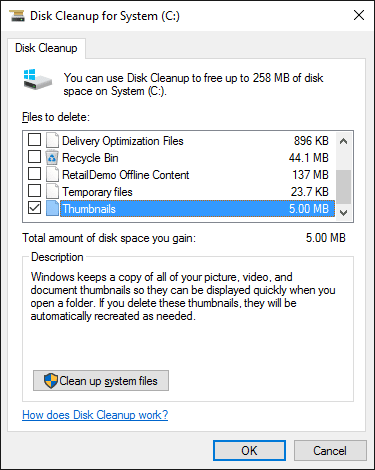
Also, from Start Menu, search for the Disk Cleanup app and open it. When prompted, select your system drive (typically the C: drive) and wait as it analyzes the file system.
Under the Disk Cleanup tab, uncheck all boxes except for the one labeled Thumbnails, then click OK.
Clear Windows Browser Cache (Edge, Chrome, Firefox)
Whenever you visit a webpage, your browser adds that page — including the HTML, CSS, JavaScript, and image files — to the browser’s cache. The next time you visit that same page, your browser uses the cached files to load the page faster. But sometimes this cache cause different problem for your web browser.
To delete the cache of your browser, go to the start menu and type “Internet Options” and open it. There you’ll see the option for deleting the browsing history of your browsers. Select it and press “OK”
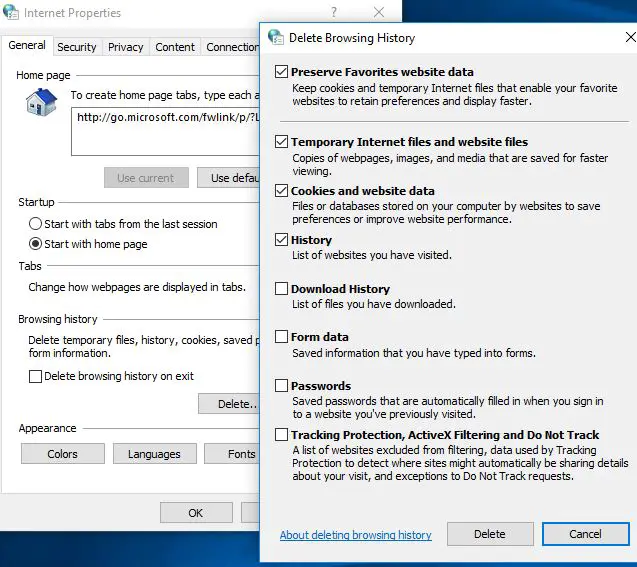
Or you can clear Cache for an individual Browser:
Chrome Browser:
- Open Chrome Browser,
- Type chrome://settings/clearBrowserData in address bar and press enter key
- Select the Cached Images and Files option, and make sure to clear from “the beginning of time”.
In Firefox, open the Options menu, go to the Advanced section, select the Network tab, and click the Clear Now button where it says Cached Web Content.
In Opera, open the Settings menu, go to the Privacy & Security section, Privacy click on Clear Browsing Data, select the Cached Images and Files option, and make sure to clear from “the beginning of time”.
Clean DNS Cache
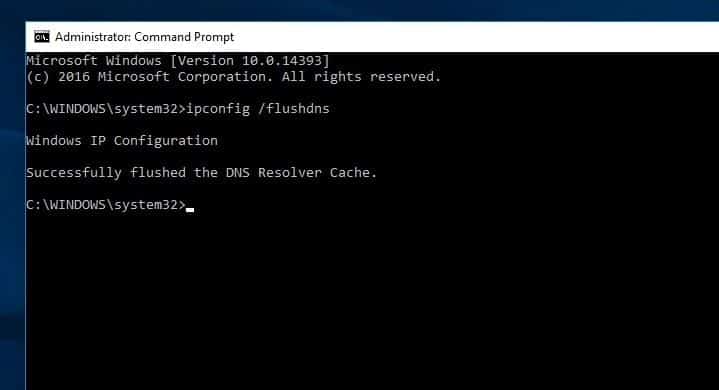
When you visit web pages your computer keeps all records of recent visits and attempted visits to websites and other internet domains. on DNS cache database. When the cache database is corrupted you may encounter internet problems such as no internet access. And clearing the DNS cache is the first thing you do while troubleshooting network and internet problems.
To clear the DNS cache on Windows 10
- Type cmd on start menu search Right click on command prompt and select run as administrator.
- Then type ipconfig /flushdns and hit the enter key.
- This will clear the DNS cache and fix most of the internet-related problems on Windows 10 PC.
Windows System Restores Cache
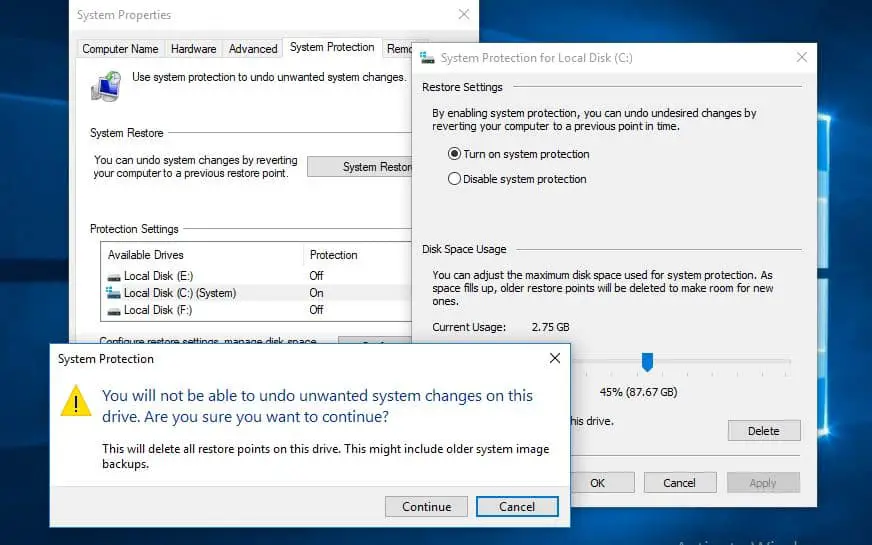
And at last, The System restores Cache. This will delete all restore points except the recent one.
- Go to the start menu and type “System” and press enter.
- Now go to “System Protection” and select “system drive
- Here click on “configure” then press on “delete”.
If you do, be sure to create another restore point right away!
These are some hidden windows caches you must clear to free up lots of disk space and fix most of the windows problems. And the most common windows update not downloading, update stuck downloading, windows app store not working, windows store not opening, etc. Have any query suggestions about this post feel free to discuss on the comments below.
Also, Read
- How to install Kali Linux on Windows 10 subsystem (Step by step guide)
- Solved: WiFi Connected But No Internet Access Windows 10 !!!
- Windows 10 local account vs Microsoft account, which one is best for you?
- How To Fix Temporary Profile Login error on Windows 10
- Microsoft Edge not Responding, Slow Performance after windows 10 update


