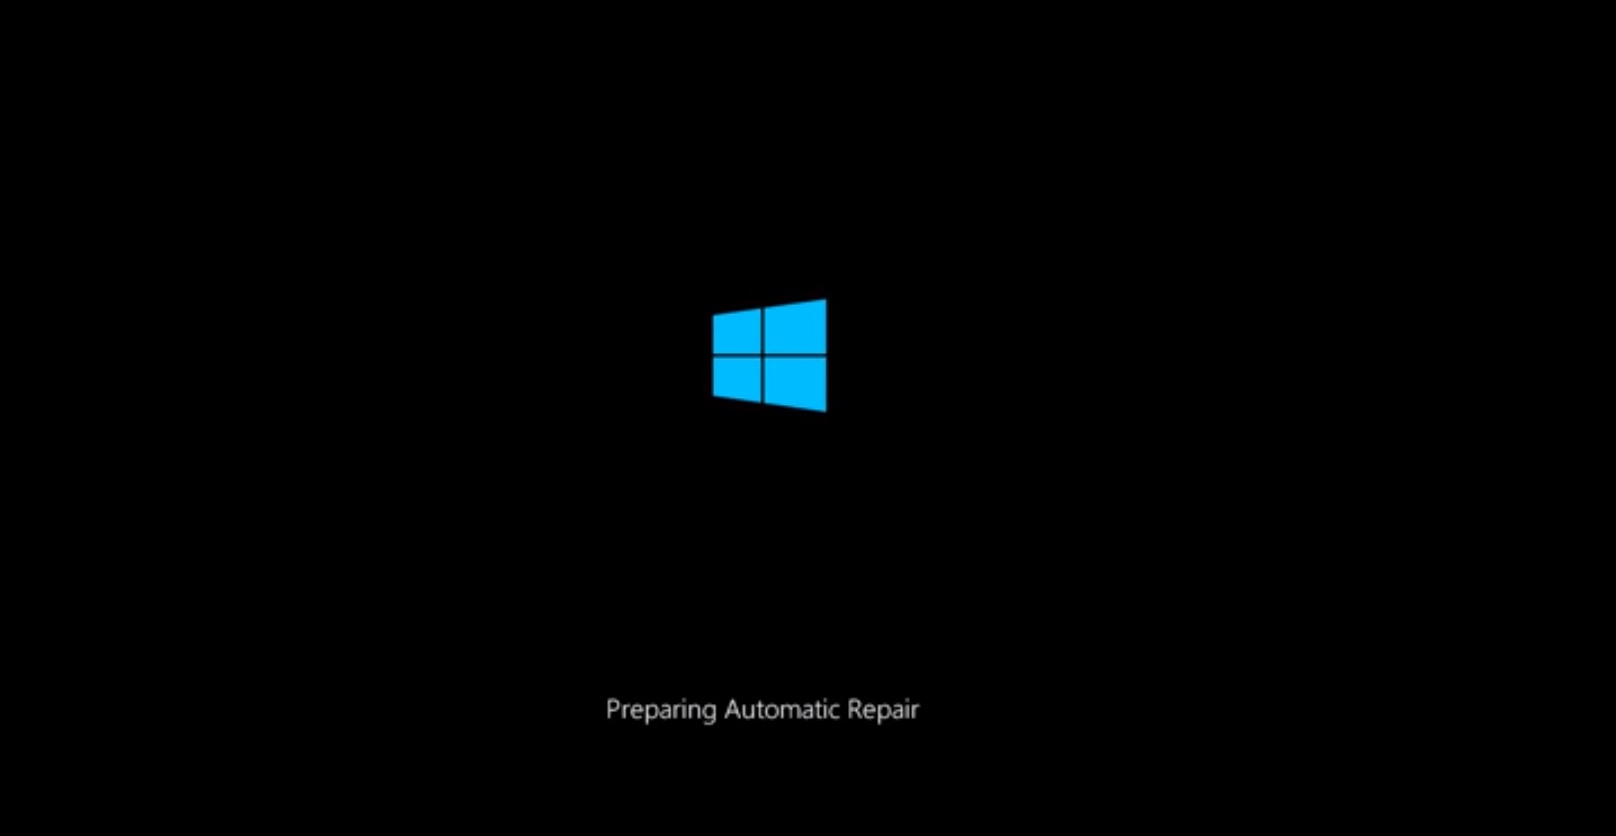
Have you ever encountered an issue where Windows 10 won’t boot properly, and stuck “Preparing automatic repair” screen for hours? Usually, you may experience this problem due to power interruption or after an improper shutdown. Windows automatic repair is a built-in feature that kicks in when the operating system detects an issue, preventing it from starting correctly. This tool attempts to diagnose and repair the problem automatically. However, sometimes, you may notice Windows 10 is stuck on preparing automatic repairs for hours. Corrupted System Files, Missing or Damaged Boot Configuration Data, and driver incompatibility are the most common reasons behind this. Well If your PC has entered this state “Windows 10 stuck on preparing automatic repair” or Windows 10 stuck on loading screen Here are some solutions to get rid of this.
Contents
- 1 Stuck preparing automatic repair Windows 10
- 1.1 Disconnect External Devices and Reboot PC
- 1.2 Boot Into safe mode
- 1.3 Repair MBR and Rebuild the BCD
- 1.4 Update or uninstall problematic drivers
- 1.5 Run a system file check
- 1.6 Disable Automatic Repair on Startup
- 1.7 Restore Windows registry
- 1.8 Check the device partition and OS device partition
- 1.9 Refresh or Reset Windows 10
Stuck preparing automatic repair Windows 10
This message usually indicates that Windows was unable to start normally and is initiating the Automatic Repair process to troubleshoot and resolve the underlying problem. There are several possible reasons why Windows is stuck preparing automatic repair.
- Corrupted System Files: If critical system files required for booting Windows become corrupted or damaged, the operating system may fail to start properly, leading to the “Preparing automatic repair” message.
- Boot Configuration Issues: Problems with the boot configuration data (BCD) store, which contains information about how Windows should start, can prevent the operating system from booting correctly and trigger the automatic repair process.
- Software Conflicts: Conflicts between software programs or incompatible drivers can lead to system instability and trigger automatic repair.
- Virus or Malware Infections: In some cases, malware infections can cause significant damage to system files or modify critical system settings, leading to boot failures and the need for automatic repair.
- Failed Windows Updates: If a Windows update fails to install correctly or causes system instability, it can result in boot problems and trigger automatic repair to attempt to fix the issue.
Depending on the cause of the problem, you can try different solutions to fix the problem and start your computer normally.
However, the automatic repair process may take some time, especially if it’s dealing with significant system issues or if your computer’s hardware is slow. Waiting allows the process to complete without interruption and may resolve the issue without further intervention.
Disconnect External Devices and Reboot PC
Sometimes, external devices such as USB drives, external hard drives, or peripherals connected to your computer can cause conflicts during startup, leading to issues like being stuck on “Preparing automatic repair.” Disconnecting these devices and then rebooting your PC can help eliminate potential sources of interference and allow your system to boot normally.
- Disconnect all the devices connected to the computer except the keyboard and mouse.
- Press and hold the power button until your PC turns off. Then, turn it back on and see if the issue persists.
Restarting your computer can help refresh the system and potentially resolve the problem.
Boot Into safe mode
Booting into Safe Mode allows your computer to start with only essential system files and drivers, bypassing any problematic third-party software or drivers. This can help troubleshoot and isolate the cause of the automatic repair issue, allowing you to take further action to resolve it.
Well if every time you seeing preparing automatic repair, you need to Start (or boot) your computer from the installation media. Insert the DVD or USB flash drive and restart your computer and again access advanced options.
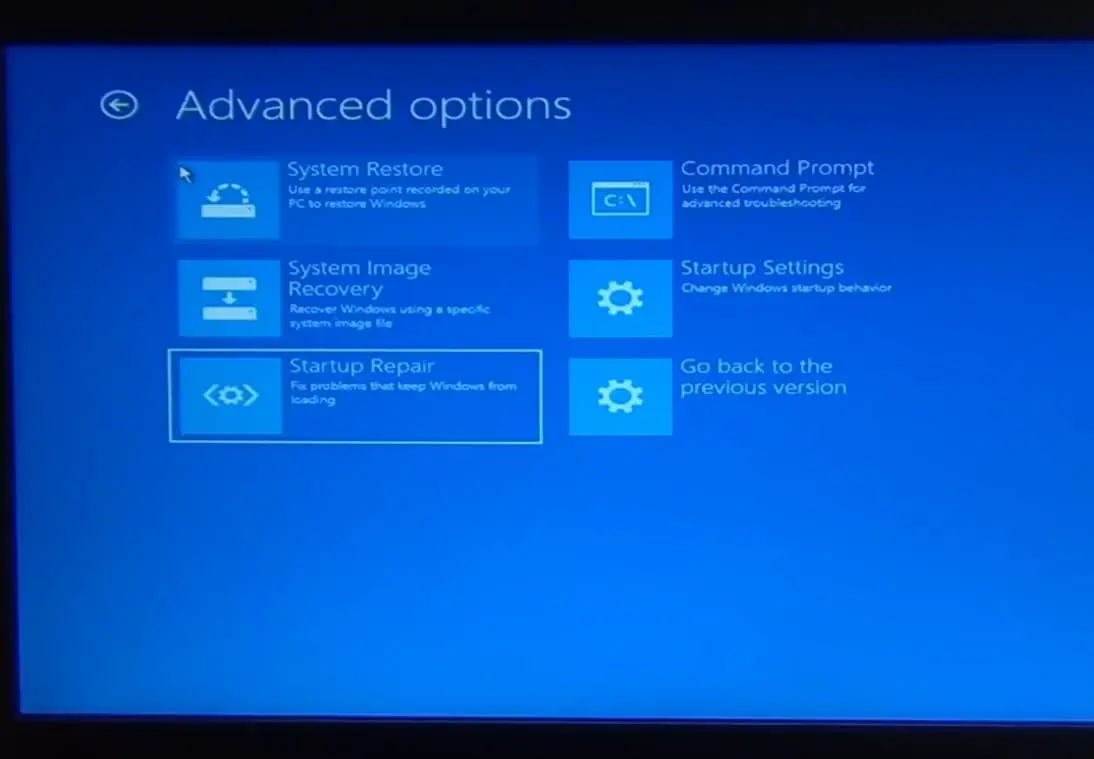
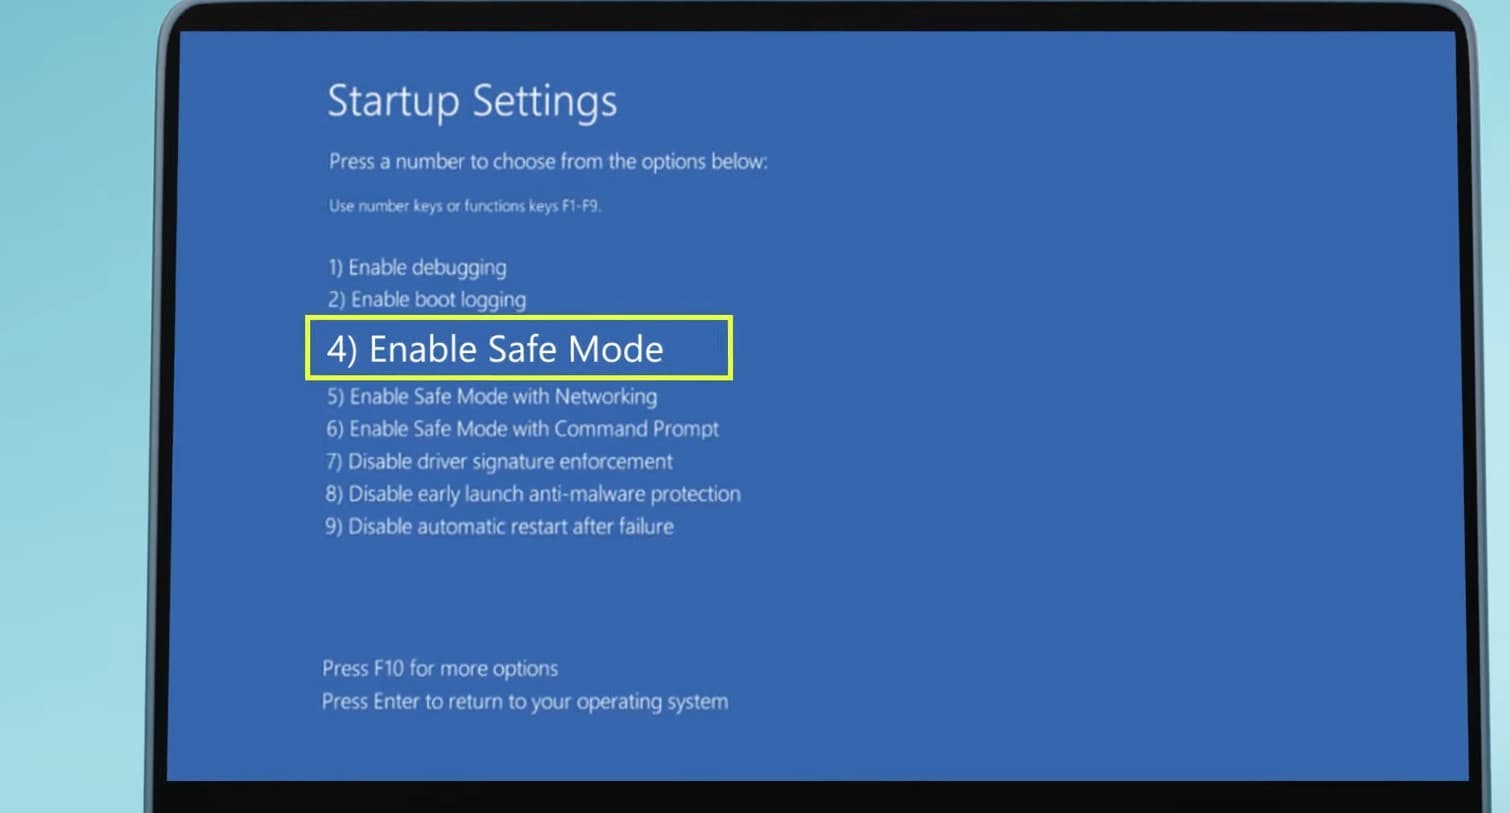
Click on Startup Settings, Click on Restart, and choose Safe mode with Networking or Low resolution.
Repair MBR and Rebuild the BCD
The Master Boot Record (MBR) is a crucial part of the boot process that contains information about how your computer’s hard drive is partitioned and where to find the operating system. If the MBR becomes corrupted or damaged, it can prevent your system from booting properly and lead to the “Preparing automatic repair” issue. If your computer fails to start in safe mode, Repairing the MBR and Boot Configuration Data (BCD) help restore its functionality and resolve the boot problem.
- Insert bootable media into your PC or computer and Restart your computer.
- Enter your computer’s BIOS (or UEFI) adjustments the moment it starts up.
- Under boot options change the first boot CD/DVD (Removable Disk)
- Press F10 to save changes and restart Windows.
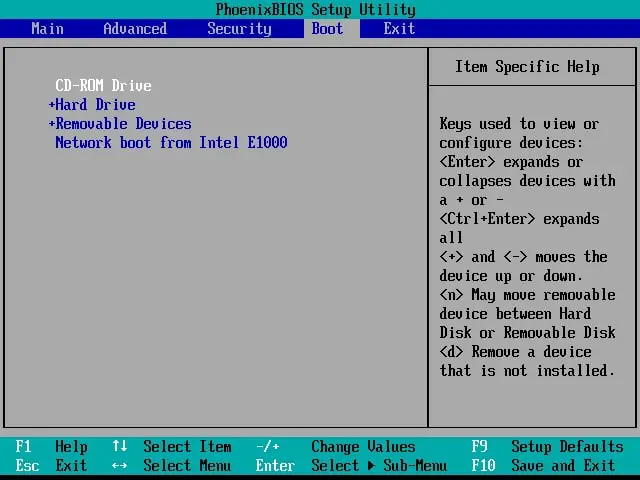
- While reboot presses any key to boot from CD/DVD.
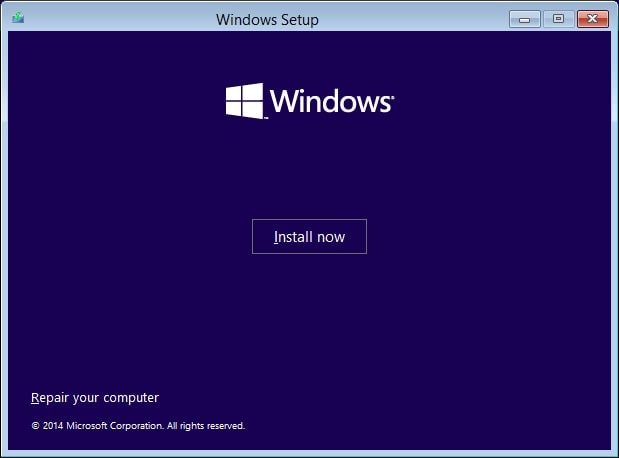
- When you see the Install Windows screen, click the link “Repair Your Computer” at the bottom left:
- In the screen titled Choose an option, pick the Troubleshoot item.
- On the next screen, select “Advanced Options”.
- In the Advanced Options screen, pick the item named “Command Prompt”.

Here on the advanced command prompt enter the following commands and press Enter after each line in order to run it:
- bootrec.exe /rebuildbcd
- bootrec.exe /fixmbr
- bootrec.exe /fixboot
Also after performing these commands, you need to run additional chkdsk commands as well. To perform these commands, you need to know drive letters for all your hard drive partitions.
- chkdsk /r c:
- chkdsk /r d:
This is just our example, so keep in mind that you have to perform chkdsk command for every hard drive partition that you have. After completing 100% scanning Restart your computer and check if the issue is resolved.
Update or uninstall problematic drivers
Sometimes, faulty or outdated drivers can cause Windows to enter the “Preparing automatic repair” loop. To fix this, you need to update or uninstall the drivers that are causing the problem. Boot into Safe Mode with networking uisng F5 key as previously explained.
- Right-click on the Start menu and select Device Manager.
- look for any devices that have a yellow exclamation mark next to them. These are the devices that have driver issues.
- Right-click on each device and select Update driver. Choose Search automatically for updated driver software and follow the instructions.
If updating the driver does not work, right-click on the device again and select Uninstall device. Confirm your choice and restart your PC.
Now check if you can now able to boot normally and avoid the “Preparing automatic repair” loop.
Run a system file check
Running the System File Checker (SFC) and Deployment Image Servicing and Management (DISM) tools can help identify and repair corrupted system files that may be causing the automatic repair process to fail. These tools scan for and fix issues with system files, restoring them to a healthy state and resolving the underlying problem.
- Open Command Prompt as an administrator by typing “cmd” in the search box and right-clicking on Command Prompt > Run as administrator.
- In Command Prompt, type “sfc /scannow” and press Enter. Wait for the scan to complete and fix any errors it finds.
- Then perform DISM (Deployment Image Servicing and Management )command below.
DISM /Online /Cleanup-Image /RestoreHealth
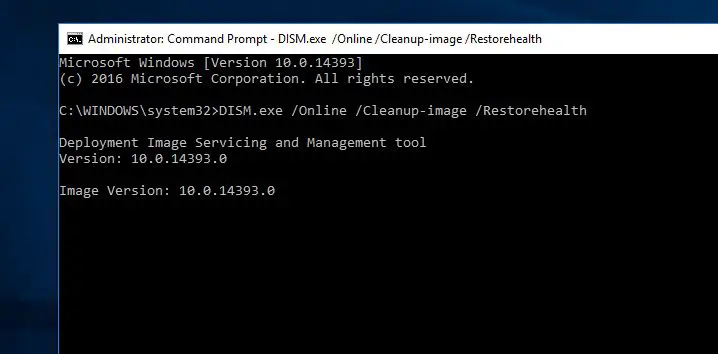
- It might take about 15 or more minutes for this process to complete, so be patient. Do not interrupt it.
- Wait until 100% complete the scanning process.
- Restart windows and check this time system starts normally.
Disable Automatic Repair on Startup
After performing the above method still getting the same problem then disabling the Automatic Repair will help. Disabling Automatic Repair prevents your computer from automatically entering the repair process during startup. While this solution may not directly fix the underlying issue causing the automatic repair problem, it can prevent your system from getting stuck in a loop and allow you to access other troubleshooting options or perform repairs manually.
To do this access the Advanced command prompt and type the below command.
bcdedit /set {GUID} recoveryenabled No
After typing this hit enter to execute the command and restart Windows to check problem is fixed. Still getting the Same problem follow the next troubleshooting step.
Restore Windows registry
Also, Sometimes Due to different application installation or uninstallation windows registry may get corrupted and this will cause different problems while Windows start, windows stuck at the repair screen or“Windows 10 Automatic Repair couldn’t repair your PC”. You can fix this by restoring your registry from RegBack directory To this follow below steps.
First Access Command Prompt using advanced boot options, Here In Command Prompt, enter the following and press Enter to execute this.
copy c:\windows\system32\config\RegBack\* c:\windows\system32\config
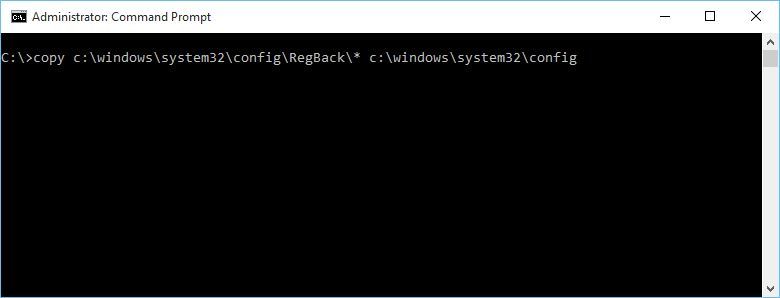
If you get asked to overwrite files, type All and press Enter, Now type exit and press Enter to exit Command Prompt. Simply Restart your computer and check if the issue has been resolved.
Check the device partition and OS device partition
Also if the device partition and OS device partition values aren’t correct this will cause this problem. Start Command Prompt from Advanced boot options and Enter the following command and press Enter:
bcdedit
Find the device partition and osdevice partition values and make sure that they are set to the correct partition.
On our device, the default and correct value is C: but this can change for some reason to D: (or some other letter) and create problems.
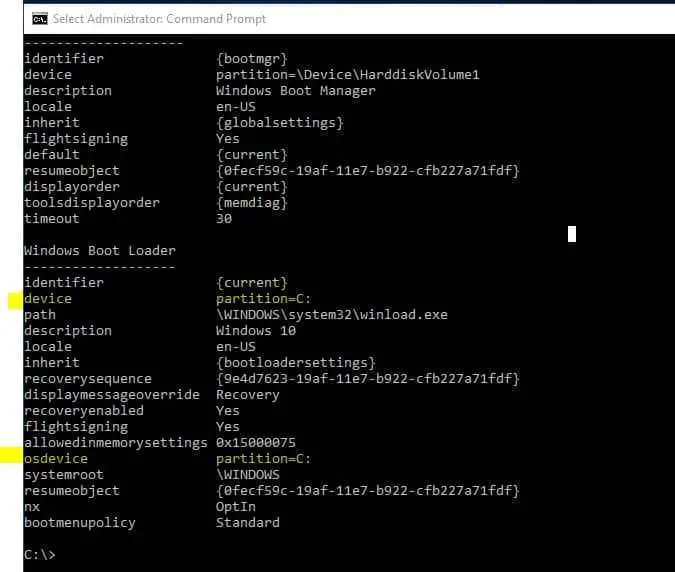 If the value isn’t set to C: enter the following commands and press Enter after each one:
- bcdedit /set {default} device partition=c:
- bcdedit /set {default} osdevice partition=c:
By default it should be C: but if your Windows 10 is installed on a different partition, make sure that you use that partition’s letter instead of C. Restart your computer and check if the issue has been resolved.
Refresh or Reset Windows 10
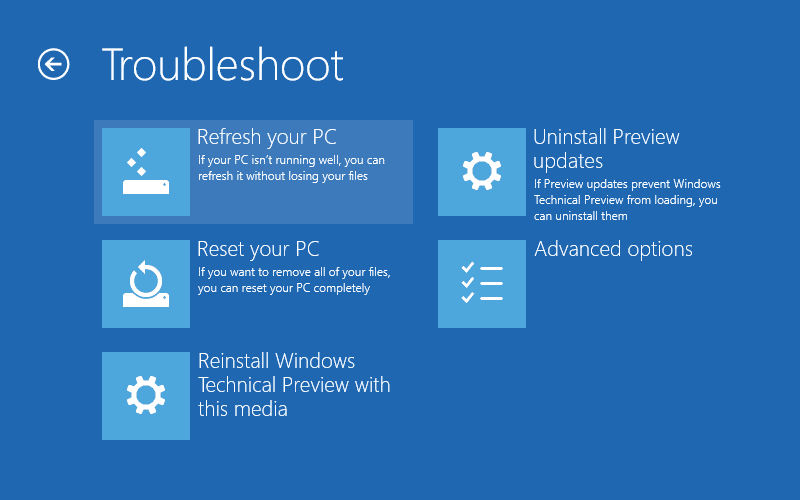
If after performing all the above steps still, the problem persists, then the last way to refresh or reset windows which helps windows to get a fresh start. Note By doing this, your installed applications will be removed but your installed Universal apps and settings will be saved if you choose the Refresh option. On the other hand, the Reset option will delete all installed files, settings and apps. If you decide to take this step, it’s advised that you back up your important files.
Did these solutions help to fix Windows 10 preparing automatic repair black screen? Let us know on the comments below.
Also read:
- Windows 10 Stuck Getting Windows ready Don’t turn off your computer
- USB Keyboard/Mouse not working after Windows update
- Fix Automatic repair couldn’t repair your PC on Windows 10
- Windows 10 start menu search not working after update
- How to Open HEIC file (iPhone images) in Windows 10 Or convert HEIC to jpg

