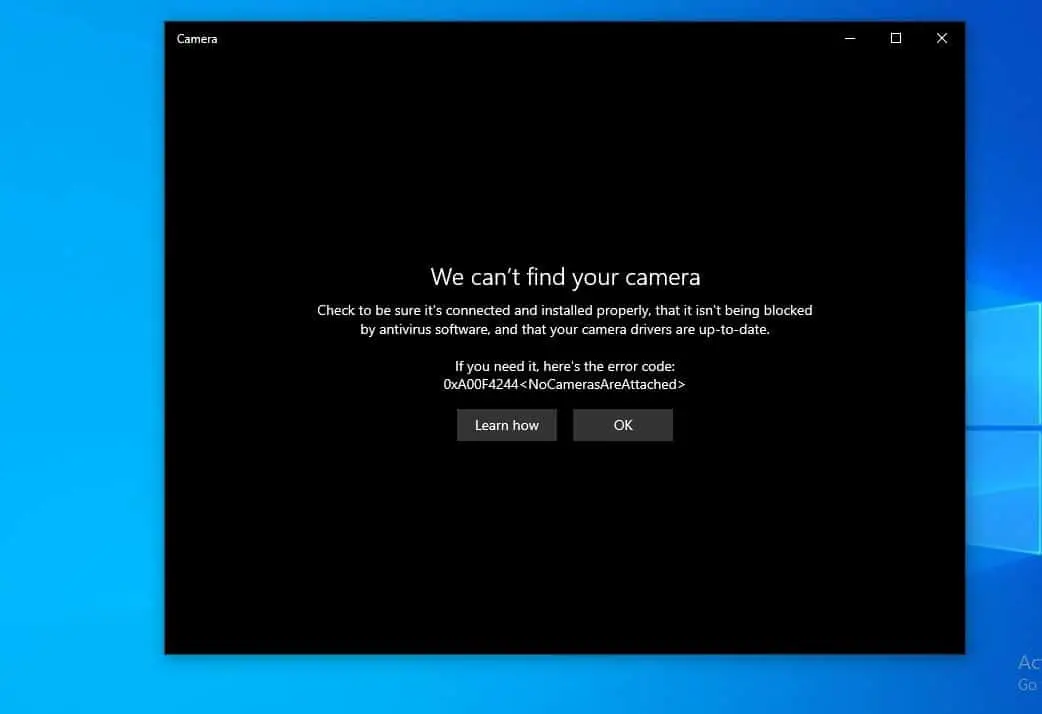
The camera on Windows 10 usually works by default, But Sometimes while attempting to use the built-in camera on Laptop you might experience the Camera not working. Windows 10 says “We can’t find your camera error 0xA00F4244”. A number of users report after recent Windows 10 version 21H2 update Camera app fails to launch with an error “something went wrong, Make sure your camera is connected and not being used by another app”
The reason may vary prevent laptop Camera from working properly on Windows 10, It might be that the drivers are missing after a recent update. It’s possible that your anti-virus program is blocking the camera or your privacy settings don’t allow camera access for some apps and more. Whatever the reason if you’re having problems with the built-in webcam on your laptop or USB camera connected to your desktop computer, here are quick solutions apply to fix the problem.
Contents
Windows 10 camera not working
Before working through the possible solutions listed here, consider a system restart that fixes the problem if a temporary glitch prevents the Camera app from working properly.
Also In your antivirus software settings, look for settings that block access to your camera or permission to use your webcam. (We recommend temporarily disable or uninstall the security software until resolve the issue)
If you have USB camera connected to the desktop computer, check its connected properly and try to connect the same to a different USB port
Change Privacy Settings for Camera App
Since Windows 10 version 21H2 part of privacy improvement, the company has revoked certain apps access to your microphone and camera automatically. And checking the privacy settings (Check apps have permission to access and use the webcam on your computer or laptop) is one of the first steps to get a camera working on your device.
- Press Windows + I keyboard shortcut to open the settings app,
- Click Privacy then Camera,
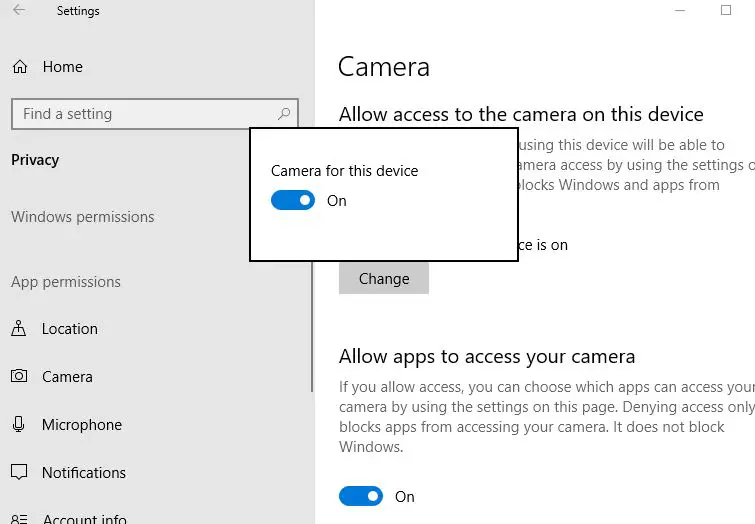
- Under the “Camera access for this device” section, click the Change button and make sure the Camera for this device is turn on,
- Also, make sure the toggle below Allow apps to access your camera is turned ON.
Reset Camera App to the Default setup
Let’s Reset the Webcam app to its default setup, which fixes the problem if Started due to any wrong configuration on the camera app.
- Open the Settings app using the keyboard shortcut Windows + I,
- Navigate to Apps then Apps & features,
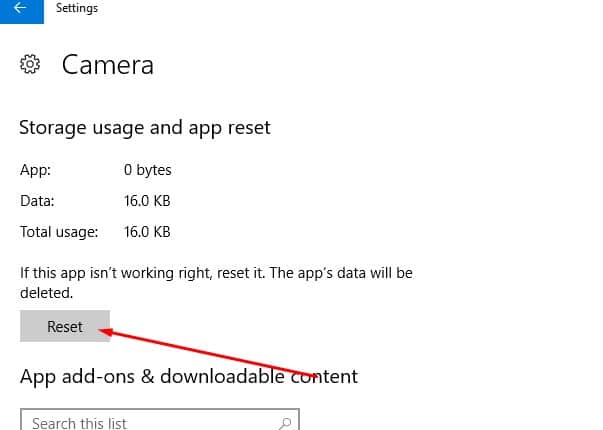
- Locate and select Camera app entry and click on the advanced options link,
- Click the Reset button.
- When you see the confirmation flyout, click the Reset button to reset the Camera app to its default setup.
Check the camera driver causing the problem
If the problem started after the recent Windows 10 21H2 update, there’s a chance that you’re using an outdated version of the camera driver that is causing the problem. In such cases, you can try to update, rollback or reinstall the camera driver by following the steps below.
Update camera driver
- Right-click on Windows 10 start menu select device manager,
- This will display all installed device driver list,
- Expand the Imaging devices, Cameras, or Sound, video and game controllers branch.
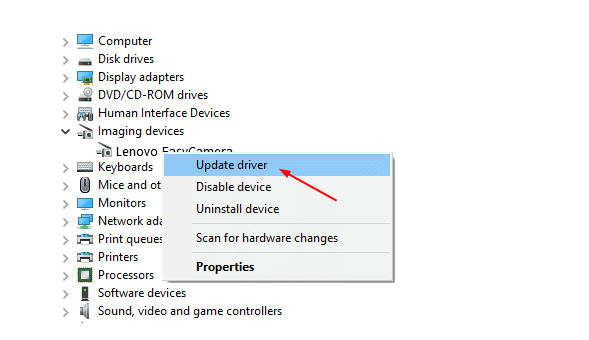
- Right-click the webcam and select the Update driver option.
- Click the Search automatically for updated driver software button and follow on-screen instructions. If a newer update is available windows update download and installs them automatically.
Rollback camera driver
Its always recommend to use the latest device drivers to access new improvements and features, but sometimes new drivers come with bug compatibility issues that may prevent the device function properly. In such cases, If the camera was working before a recent driver update, rolling back to the previous version can fix the problem.
- Press Windows + R, type devmgmt.msc and click ok
- This will open Device Manager and display all installed device driver list,
- Now Expand the Imaging devices, Cameras, or Sound, video and game controllers branch.
- Here Expand Imaging devices or Sound, video, and game controllers or Cameras and find your webcam listed under it. Right-click on your webcam and select Properties.
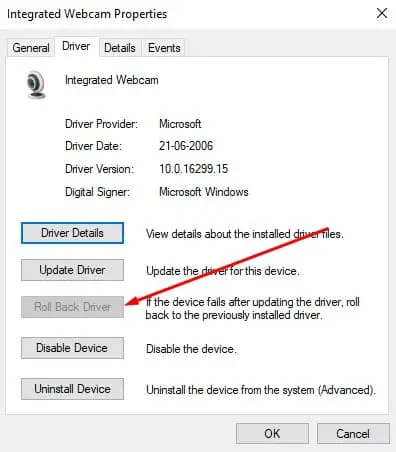
- Select the Driver tab and click the Rollback Driver button, then choose Yes. (Note that some drivers don’t provide a rollback option.)
- Select Yes to continue with the rollback and reboot your PC once the process is complete.
- After that check and open the Camera app hope this time starts without any error.
Re-install Webcam Driver
If rolling back didn’t work or isn’t available, uninstall your webcam driver and scan for hardware changes.
- Again open Device manager,
- Expand Imaging devices or Sound, video, and game controllers.
- Right-click on installed Webcam Driver and select Uninstall Delete the driver software for this device and then select OK.
- Now Restart windows And check on the next login windows will automatically install the Webcam Driver.
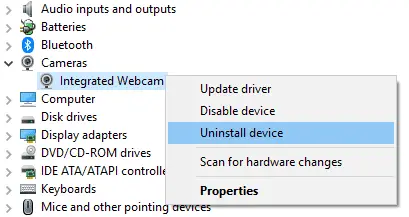
If not open Device manager click the Action menu, and select Scan for hardware changes. Wait for it to scan and reinstall updated drivers, restart your PC, and then try opening the Camera app again.
Still need help try looking for help on the webcam manufacturer’s website. Download The latest available driver version for your Webcam from the manufacturer website and install it. check Windows camera app started working.
Reinstall Camera App
Again Reinstalling the Camera app can restore anything to its initial state, and this may be the most effective way to fix the issue of the Camera not working.
- To uninstall the Camera app,
- Right-click on the Start button and choose Windows PowerShell (Admin).
- Enter the following command and hit enter key to remove the camera app
- Get-AppxPackage *Microsoft.WindowsCamera* | Remove-AppxPackage
- Once you’ve done this restart your PC,
- Now open the Microsoft store search for the Windows Camera app and install it.
Tweak Windows Registry Editor
Still need help let’s tweak the windows registry to fix the Camera app problem on windows 10.
- Press Windows + R, type regedit and click ok to open the registry editor,
- First backup the registry database then navigate the following key
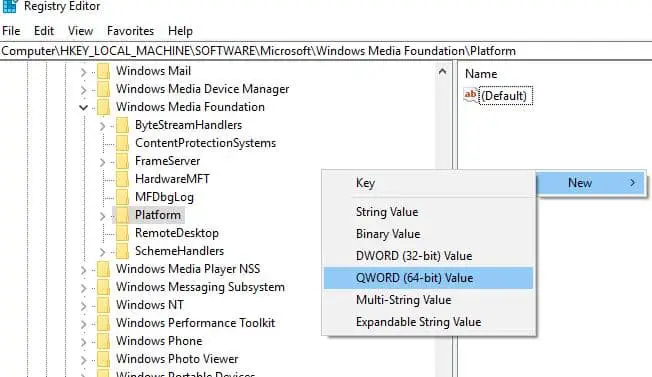
- HKEY_LOCAL_MACHINE\SOFTWARE\Microsoft\Windows Media Foundatio\Platform
- Right-click on Platform then select New > DWORD (32-bit) value.
- And name this new DWORD as EnableFrameServerMode.
- Double click on EnableFrameServerMode and change its value to 0.
- Click OK and close the registry editor, Restart windows to take effect the changes.
- Now On the next start open the camera app and check hope this time it starts normally without any errors.
These are some most effective solutions to fix windows 10 camera app problems ( windows 10 camera app not working, not opening, Stopped working, something went wrong 0xa00f4271, we can’t find your camera 0xA00F4244 or 0x200F4244 etc ). And i am sure applying the above solutions windows webcam will back to the normal stage. Still have any queries, or suggestions about this post feel free to discuss in the comments below.
Also, Read
- Fix Computer Sound Volume Too Low in Windows 10, 8.1 and 7
- The default gateway is not available After Windows 10 Update
- Fix windows license will expire soon windows 10
- Skype Audio or Microphone not working after Windows 10 update
- Solved: “No Audio Output Device Is Installed” Windows 10
- Solved: Can’t download Apps or Games from Microsoft store windows 10






Tried on all kind of tips include working on Drivers , Registry Tweak and Camera App setting, unfortunately NONE of them works for me. Thinking that it could be really a broken Hardware and decided to give up and stop looking for Webcam issues solutions on Software/App or BIOS setting. But then recently a colleague face a similar webcam issues that start to trigger my interest back to look for webcam not working solution again. Somehow I get to direct to this site today and finally got my built-in Webcam issues RESOLVED with “Reinstall Camera App” solution.
THUMB UP with Many THANKS to Windows101tricks.com !